Linux Mint 13 (Maya) with Cinnamon. In general, I've been very pleased with
Mint as compared to Ubuntu Precise, even with Cinnamon on the latter.
My present policy is not to move ahead with subsequent releases of any
Linux distro, but stay behind on LTS releases until the next LTS appears. This
is because I got sorely burned by installing Maverick (10.10), whose support
ran out a year before Lucid's. As it was an important development host with
software very hard to duplicate at the time, I couldn't risk upgrading it and
so it became a virtual cul de sac . As I make this note (December, 2013),
I'm still a few weeks being able to junk that installation.
Linux Mint (Cinnamon) window focus settings
Quirks
There is no resolv.conf . Instead, there's a more complicated, probably
newer-thinking, configuration involving a subdirectory tree, /etc/resolvconf .
See here for a solution.
Linux Mint support username
If you forget your Mint forum username, you won't find it using your password.
So, don't forget it. Mine's russellbateman .
Installation quirk
Installing behind a firewall (behind a proxy) created a problem for Mint. Here's
the installation process as it worked for me.
Boot from CD.
If behind a proxy, do this...
When desktop appears, open a console (Ctrl+Alt+T or click an
icon that does it).
Express your proxy, i.e.:
mint@mint ~ $ export http_proxy="http://web-proxy.austin.acme.com:8080" export http_proxy="http://web-proxy.austin.acme.com:8080"
Right-click the Install Linux Mint icon and choose "Properties".
Scrape what's in Command : and paste into open console window; for me this was:
$ ubiquity --desktop %k gtk_ui
Press Enter and wait a while for the Mint installer to launch.
What does this do? It sets up your Internet proxy before running the Mint installer
so that it can reach files it needs on the Internet.
If not behind a proxy, simply double-click the Install Linux Mint icon.
Welcome : Choose your language, click Continue .
Preparing to install Linux Mint : If Mint can see its files on the Internet, there should
be a grey checkmark near is connecte to the Internet (instead of a red circle with an X).
Click Continue .
Installation type : Choose desired installation, click Continue .
Click Install Name .
Do install (timezone, keyboard, owner/user, hostname, password, etc.)...
Reboot when prompted.
Dead launchers in Cinnamon panel...
Once, I had the situation where clicking on launchers in the panel didn't
launch anything. See
Panel launchers don't launch when clicked .
A family member put me on to this link:
Applications won't launch from panel applets . Neither the response
to my question nor this bug report were particularly cogent, however, the
latter did put me directly on to the solution:
From the command line, launch dconf-editor . If not installed,
install it.
In the left-hand column, expand org .
Click on (no need to expand) cinnamon .
Scroll down to panel-edit-mode and uncheck it.
Click the close box to dismiss dconf-edit .
This resolved the problem in a way that, per the bug report, could not be
solved except by mindless combinations of changing the setting in the GUI
manager for Cinnamon Settings .
How to make /etc/resolv.conf work the way it used to...
By default, /etc/resolv.conf is no longer a file, but a subdirectory
on Mint distributions. This can get in the way of some incidental consumers
of this file such as my own employer's VPN script, my inability to consume
which a) put Mint at a disadvantage as a viable developer platform and b) forced
me to keep another host running Maverick (or Precise, etc.) in order to perform
deployments and other work.
I stumbled upon a solution to this. Answer affirmatively to all interaction
this installation proposes:
$ sudo dpkg-reconfigure resolvconf
I have observed no ill side-effects after doing this on two hosts at this
point.
How to fix advanced packaging tool proxy issues
Create a new file, /etc/apt/apt.conf.d/95proxy with these contents:
Acquire::http::proxy  "http://web-proxy.austin.acme.com:8080";
Acquire::https::proxy "https://web-proxy.austin.acme.com:8080";
Acquire::ftp::proxy   "ftp://web-proxy.austin.acme.com:8080";
How to fix Firefox proxy issues
Edit -> Preferences -> Advanced -> Network -> Connection -> Settings...
    Manual proxy configuration:
    HTTP Proxy: web-proxy.austin.acme.com  Port: 8080
               x Use this proxy server for all protocols
Final proxy solution
Once everything is set up, these settings are available from the panel icon (that
looks like a little computer with monitor), click it, then Network Settings ,
then Network proxy -> Manual , etc.
How to relocate bottom panel to top
Menu -> Preferences -> Cinnamon Settings -> Panel -> Panel Layout -> Flipped
How to install a new launcher in the top panel
How to install a newly obtained application in the menus?
(Note made in October 2016:)
Now using Cinnamon on Fedora, CentOS and Mint, and details having changed, I found
this link useful on CentOS 7:
How to add shortcut to Cinnamon taskbar . Also, alacarte is
installable on Red Hat systems:sudo yum install alacarte
Open a console.
Install alacarte if absent.
mint@mint ~ $ sudo apt-get install alacarte
Right-click Mint menu , choose Preferences -> Main menu.
Select one out of Applications Group for the new application.
Click New Item .
Fill in Name , Command (path to the executable), and
Comment (if desired), just as you would when setting up a panel
launcher for Gnome.
(Usually, the icon will auto-fill, but if not, go download a suitable one
from any page with something nice for the application you're insalling; it
can be GIF, PNG, anything.)
Click OK .
Go to the Mint menu, find the application you just installed, right-click
it and choose Add to panel .
Reorder the icon that shows up on the panel.
Then, in the menus, if you right-click the new application, you'll have the
option to put it on the top panel, desktop, etc.
Can't edit launcher in the top panel
This happens to me every time I need to change my IntelliJ IDEA launcher in the
top panel (I put my panel at the top) to reach the new version I just
downloaded.
Because the edit dialog will not dismiss, check out
~/.cinnamon/panel-launchers , fgrep to find the ones containing
references to the old version of what you're trying to change and delete those
you identify.
That doesn't actually fix the problem, but it cleans up things.
Right-click on the desktop (not the panel) and choose Create a new launcher
here... . Set up the launcher just as you would. You'll find it in the
Start Menu under Other . Right-click that and choose Add
to panel . Then, delete the new launcher from the desktop (unless you want
it there).
The compose key (accents)...
...whatever has been chosen (Menu -> Preference -> Keyboard Layout
> Layouts -> (keyboard language) -> Options... -> Compose key
position -> (whatever you've chosen) doesn't work quite like Ubuntu.
Instead, you must maintain the compose key while pressing both the diacritic
selector AND the character to receive the diacritic.
Screenshot on Mint Cinnamon...
...is in Menu -> Accessories . You can pin it to the top panel.
How to make console window title bars show active/inactive
To make the active console window appear different than inactive windows, do
Menu -> Preferences -> Cinnamon Settings -> Themes ->
Other Settings -> Window theme
and choose Adwaita . It's
subtle, but it does produce a slightly different title bar in the active
console window.
Window tiling...
Using Window Tiling preference, turn off Enable Window Tiling and Snapping or...
Maximize, instead of tile, when dragging a window to the top edge OFF
Show snap on-screen-display OFF
Show tile heads-up-display OFF
Legacy window snapping OFF
How to restore the Gnome workspace switcher to the panel
I disengage the hot corner because I keep hitting it all the time.
Go to Menu .
Look for the icon with the gears in it (Cinnamon Settings ).
Choose Applets .
Scroll way down to Workspace switcher .
Check the box.
Dismiss by clicking Close .
The old, old-style switcher will reappear (though it will not have any
graphical representation of activity in it, but this is better than
The Hot corner .
Pressing Ctrl+Alt+Up Arrow .
Pressing Crrl+Alt+Right/Left Arrow .
How to add a workspace in Cinnamon
This can't be done if, as I do, you've disabled the workspace hot spot.
Re-enable it, then put the mouse into it (usually the upper, left-hand corner)
and then you'll see, to the right of the rightmost workspace thumbnail, a plus
(+) sign. Click it and it will add another.
How to get wireless working on Mint 13
This promised to be a big mess, but really, it was all a matter of receding
back into the days before plug and play and being okay with that. I've gotten
altogether too lazy about expecting distros to do this sort of thing for me.
It is a perennial problem with Ubuntu (and, to be fair, all Linuces). I
Googled using the string "mint 13 won't enable wireless". The symptom had been
that I couldn't enable my wireless.
De fil en aiguille , I got this link:
No Wireless linux mint . It was suggested to a poster that he try
this command (and you see what I got afterward—really import what's
in bold ):
    $ sudo mintwifi

    -------------------------
    * I. scanning WIFI PCI devices...
      -- Intel Corporation Centrino Ultimate-N 6300 (rev 35)
          ==> PCI ID = 8086:4238 (rev 35)
    -------------------------
    * II. querying ndiswrapper...
    -------------------------
    * III. querying iwconfig...
    lo        no wireless extensions.

    wlan0     IEEE 802.11abgn  ESSID:off/any
              Mode:Managed  Access Point: Not-Associated   Tx-Power=off
              Retry  long limit:7   RTS thr:off   Fragment thr:off
              Encryption key:off
              Power Management:off

    eth0      no wireless extensions.

    tun0      no wireless extensions.

    -------------------------
    * IV. querying ifconfig...
    eth0      Link encap:Ethernet  HWaddr 88:ae:1d:ae:37:b1
              inet addr:16.86.193.103  Bcast:16.86.195.255  Mask:255.255.252.0
              inet6 addr: fe80::8aae:1dff:feae:37b1/64 Scope:Link
              UP BROADCAST RUNNING MULTICAST  MTU:1500  Metric:1
              RX packets:439098 errors:0 dropped:0 overruns:0 frame:0
              TX packets:46544 errors:0 dropped:0 overruns:0 carrier:0
              collisions:0 txqueuelen:1000
              RX bytes:57210957 (57.2 MB)  TX bytes:9162863 (9.1 MB)
              Interrupt:20 Memory:d7500000-d7520000

    lo        Link encap:Local Loopback
              inet addr:127.0.0.1  Mask:255.0.0.0
              inet6 addr: ::1/128 Scope:Host
              UP LOOPBACK RUNNING  MTU:16436  Metric:1
              RX packets:596 errors:0 dropped:0 overruns:0 frame:0
              TX packets:596 errors:0 dropped:0 overruns:0 carrier:0
              collisions:0 txqueuelen:0
              RX bytes:48254 (48.2 KB)  TX bytes:48254 (48.2 KB)

    tun0      Link encap:UNSPEC  HWaddr 00-00-00-00-00-00-00-00-00-00-00-00-00-00-00-00
              inet addr:10.19.252.209  P-t-P:10.19.252.209  Mask:255.255.255.255
              UP POINTOPOINT RUNNING NOARP MULTICAST  MTU:1406  Metric:1
              RX packets:4644 errors:0 dropped:0 overruns:0 frame:0
              TX packets:5478 errors:0 dropped:0 overruns:0 carrier:0
              collisions:0 txqueuelen:500
              RX bytes:816830 (816.8 KB)  TX bytes:384646 (384.6 KB)
    .
    .
    .
Then, I Googled for "intel corporation centrino ultimate-n 6300 linux driver" and got
this link:
http://wireless.kernel.org/en/users/Drivers/iwlwifi , clicked on the "Download"
link, downloaded and exploded the tarball. I also noticed their advice of how to install
the driver:
$ sudo cp iwlfifi-*.ucode /lib/firmware
I ensured myself that /lib/firmware existed and contained drivers (it did)
and followed these instructions. After copying the adapter, I clicked the network
icon in my top panel and enabled wifi producing the following including some nearby
wireless access points:
Previously, I had not been able to move the switch control for Wireless from
OFF to ON .
Then, I reissued the mintwifi command and got the following; the important
differences are in bold , though I didn't tried to connect to these unknown
points to get an address for wlan0 :
    -------------------------
    * I. scanning WIFI PCI devices...
      -- Intel Corporation Centrino Ultimate-N 6300 (rev 35)
          ==> PCI ID = 8086:4238 (rev 35)
    -------------------------
    * II. querying ndiswrapper...
    -------------------------
    * III. querying iwconfig...
    lo        no wireless extensions.

    wlan0     IEEE 802.11abgn  ESSID:off/any
              Mode:Managed  Access Point: Not-Associated   Tx-Power=15 dBm
              Retry  long limit:7   RTS thr:off   Fragment thr:off
              Encryption key:off
              Power Management:off

    eth0      no wireless extensions.

    tun0      no wireless extensions.

    -------------------------
    * IV. querying ifconfig...
    eth0      Link encap:Ethernet  HWaddr 88:ae:1d:ae:37:b1
              inet addr:16.86.193.103  Bcast:16.86.195.255  Mask:255.255.252.0
              inet6 addr: fe80::8aae:1dff:feae:37b1/64 Scope:Link
              UP BROADCAST RUNNING MULTICAST  MTU:1500  Metric:1
              RX packets:466445 errors:0 dropped:0 overruns:0 frame:0
              TX packets:57224 errors:0 dropped:0 overruns:0 carrier:0
              collisions:0 txqueuelen:1000
              RX bytes:88141997 (88.1 MB)  TX bytes:9966593 (9.9 MB)
              Interrupt:20 Memory:d7500000-d7520000

    lo        Link encap:Local Loopback
              inet addr:127.0.0.1  Mask:255.0.0.0
              inet6 addr: ::1/128 Scope:Host
              UP LOOPBACK RUNNING  MTU:16436  Metric:1
              RX packets:596 errors:0 dropped:0 overruns:0 frame:0
              TX packets:596 errors:0 dropped:0 overruns:0 carrier:0
              collisions:0 txqueuelen:0
              RX bytes:48254 (48.2 KB)  TX bytes:48254 (48.2 KB)

    tun0      Link encap:UNSPEC  HWaddr 00-00-00-00-00-00-00-00-00-00-00-00-00-00-00-00
              inet addr:10.19.252.209  P-t-P:10.19.252.209  Mask:255.255.255.255
              UP POINTOPOINT RUNNING NOARP MULTICAST  MTU:1406  Metric:1
              RX packets:4687 errors:0 dropped:0 overruns:0 frame:0
              TX packets:5521 errors:0 dropped:0 overruns:0 carrier:0
              collisions:0 txqueuelen:500
              RX bytes:825292 (825.2 KB)  TX bytes:387309 (387.3 KB)

    wlan0     Link encap:Ethernet  HWaddr 00:24:d7:43:68:1c
              UP BROADCAST MULTICAST  MTU:1500  Metric:1
              RX packets:0 errors:0 dropped:0 overruns:0 frame:0
              TX packets:0 errors:0 dropped:0 overruns:0 carrier:0
              collisions:0 txqueuelen:1000
              RX bytes:0 (0.0 B)  TX bytes:0 (0.0 B)
    .
    .
    .
How to set up a printer on Mint 13
First, do not use the totally useless printer set-up dialog at Menu .
Launch the real one, installing it if need be, and use it instead. It's
pretty self-explanatory once you launch it.
    $ sudo apt-get install system-config-printer
    $ system-config-printer
How to set up rdesktop
rdesktop works on Ubuntu post Unity fisco. And on Mint. So I'm no
longer bemoaning the fact that Remmina can't be configured; I'm just ignoring
it. Here's how to set up rdesktop .
sudo apt-get install rdesktop
Create a launcher.
Configure by modifying the Command property in the launcher to
the appropriate arguments geometry , connection , username ,
domain , something like
rdesktop -g1200x1080 op2-winrds1.hpd5.aus1.snapfish.com -u russellbateman -d AD
Launch rdesktop and fix whatever you didn't get right.
Screensaver on Mint
There isn't one, except GNOME's, but the solution is the same for Unity. This
is done by root:
$ apt-get remove gnome-screensaver
$ apt-get install xscreensaver xscreensaver-gl-extra xscreensaver-data-extra

$ ln -s /usr/bin/xscreensaver-command /usr/bin/gnome-screensaver-command
To reverse (restore default functionality):
$ apt-get remove xscreensaver xscreensaver-gl-extra xscreensaver-data-extra
$ rm /usr/bin/gnome-screensaver-command
$ apt-get install gnome-screensaver
Upgrading Mint
How to upgrade to a newer release .
Burning an ISO (Brasero, K3b)...
Ready the ISO...
Go to and download (e.g.:) the Linux Mint ISO (not the torrent).
For some years, I have been using K3B.
Launch K3b.
Choose Tools → Burn image .
Navigate to select the ISO downloaded above.
Load a blank DVD into your DVD or Blu-ray drive. You should now see
something like thisImage to Burn and Burn Medium :
Click OK (or rather probably Start ).
Eject (usually automatic) and label the new DVD (or CD).
I used to use Brasero. If absent, install as root :
# apt-get install brasero
Find in Menu → All Applications . Use option, Burn an image .
Frequently, Brasero gives the message at the end, "Please eject the disc from
(device) manually."
Note: Once I installed Brasero (under Mint Sonya) and it wouldn't accept some
blank DVD+R discs I had. I installed K3B and it did accept them. Go figure.
Burning files to disk using K3B...
Install K3B.
Insert blank disk into optical drive.
Click New Project at upper left, a pane opens below.
Navigate in upper, filesystem browser pane, to find what you wish to
reproduce on the new disk—click and drag it to the pane below.
In the pane below, click Burn .
When the filesystems chosen have been copied to the blank disk, the drive
will open offering the disk to you. It's ready to use at this point.
Without taking special steps, the disk is burned closed and cannot be
added to.
Booting directly to console prompt, no X Windows GUI
The major problem I have with these instructions, which I got
here , is that
if they fail, and I'm struggling with my display support (why I'm doing this
in the first place), the only choice I've found so far is to reinstall.
Save off a copy of /boot/grub/grub.cfg .
Make this file writable.
Edit the file and search for the section named,
### BEGIN /etc/grub.d/10_linux ### .
Search again for "quiet splash" under this section and add " text"
(minus the quotes) just after those words.
Important note starting with Mint 17 LTS
At least by Mint 17, you must...
Look for GRUB_CMD_LINE_DEFAULT="quiet splash" .
Add "text" to the end of that command.
Exit the editor (with update).
Run update-grub to integrate these changes.
Cross your fingers.
Reboot the system.
Setting static IP address on Mint
This sort of worked the same for Mint 13.
Find and launch the Network setting manager.
Choose Wired and click Options .
Click the IPv4 Settings tab and enter the desired values.
Make the General tab look like this and click Save... .
Time and date settings
This worked a little differently in Mint 13 where there was a Calendar
setting in Settings .
How to change date format properly in Mint 17:
Menu → All Applications → Applets → Calendar
(or Settings → Applets )
(Select Calendar .)
Click Configure button.
Use custom date format .
Change Date format: to %a %e %b %Hh%M to get Mon 11 May 15h12"
%A %e %B %H:%M to get "Wednesday 2 February 16:59"
...or:
Right-click at upper right, the date and time displayed,
Choose Configure ,
Do as above.
Thawing Cinnamon...
Sometimes Cinnamon freezes, though in fairness, it's only happened when I've screwed around with
the computer case or something.
Switch tty. I usually try Ctrl+Alt+F6 .
Log in, get root.
Type w and press Enter to see the number of the display in use, for example
:0 .
Type export DISPLAY=:0 ; cinnamon &
Go back to the graphic displays, to find the one you were on, just start doing
Alt+Fn , where Fn is successive function keys, until you "get
back" to the screen that froze.
A link to peruse is
How do I restart Cinnamon from the tty? .
Mounting a network drive in Cinnamon...
I found this
here , but these are the steps:
Launch whatever passes for the GUI filesystem explorer (Nautilus, etc.).
Under the File menu, find Connect to Server... .
Type in the server address or name if you've got that in /etc/hosts .
Select Type: SSH and (likely) Port: 22 .
Add your username and password.
Click Connect .
This should do it.
Microphone on Cinnamon
Plugged my microphone into the backplane of my computer and headed for the
adjustment:
Once I found that I had to install pavucontrol ...
~ $ sudo apt-get install pavucontrol
Reading package lists... Done
Building dependency tree
Reading state information... Done
The following NEW packages will be installed:
  pavucontrol
0 upgraded, 1 newly installed, 0 to remove and 35 not upgraded.
Need to get 116 kB of archives.
After this operation, 1,041 kB of additional disk space will be used.
Get:1 http://archive.ubuntu.com/ubuntu/ trusty/universe pavucontrol amd64 2.0-2 [116 kB]
Fetched 116 kB in 0s (136 kB/s)
Selecting previously unselected package pavucontrol.
(Reading database ... 167955 files and directories currently installed.)
Preparing to unpack .../pavucontrol_2.0-2_amd64.deb ...
Unpacking pavucontrol (2.0-2) ...
Processing triggers for man-db (2.6.7.1-1ubuntu1) ...
Processing triggers for mime-support (3.54ubuntu1.1) ...
Processing triggers for gnome-menus (3.10.1-0ubuntu2) ...
Processing triggers for desktop-file-utils (0.22-1ubuntu1) ...
Setting up pavucontrol (2.0-2) ...
~ $ pavucontrol
(This launches pavucontrol :)
Skype
Reputedly, one must never leave in a checked state the box
Allow Skype to automatically adjust my mixer levels at
Skype → Options → Sound Devices .
Chrome/Shockwave Flash freezes
This began happening to me in August 2015 on Mint 17 and on Fedora as soon as
I upgraded from 20 to 22. It drove me back reluctantly to Firefox. Here's what
I did at work where I'm on Fedora 22.
I Googled "linux hang chrome flash" and saw this:
http://www.pcadvisor.co.uk/how-to/internet/how-stop-shockwave-flash-crashing-in-google-chrome-3332967/
I went here from a link in that article:
http://www.adobe.com/products/eula/tools/flashplayer_usage.html
I clicked on Downloads near bottom.
I clicked on Adobe Flash Player under Downloads at the right.
I selected .rpm for other Linux (there is an option for Debian
apt * ).
I clicked Download now and saved the file in ~/Downloads .
I went to ~/Downloads and did this:
$ sudo rpm -Uvh flash-plugin-11.2.202.540-release.x86_64.rpm
* However, at some point, this had already made it onto my Mint 17 box.
After that, I bounced Firefox completely. Back up, it was then able to run France2 news,
YouTube and Classical 89 streaming. I don't think it can do those without this plug-in.
I bounced Chrome and looked at its plug-ins. It has only the PepperFlash plug-in, which
I'm pretty sure is at the root of my system freezing.
I ensured Shockwave Flash disabled in Chrome:
Launch Chrome.
Type "about:chrome".
Scroll down to and click chrome://plugins .
Scroll down to
    Adobe Flash Player - Version: 18.0.0.233
    Shockwave Flash 18.0 r0
    /opt/google/chrome/PepperFlash/libpepflashplayer.so
and click Disable .
My theory is now to use Firefox to play content while still being able to use Chrome
for normal work (not including playing content).
Programming menu missing in Cinnamon start
When you install Linux Mint fresh, you'll usually find some menus you're used to
seeing have gone missing, like Programming . This is because, fresh, there
are no items for that menu. Once you add some, the menu will show up. The easier
one (or ones) to add are Python (e.g.: v2.7 and v3.5) because they're installed,
just not items in the menu yet.
Here's what to do:
Ensure alacate is installed because, usually, Main menu
won't be found in the Preferences menu unless this program is
installed and it doesn't come by default:
mint@mint ~ $ sudo apt-get install alacarte
Go to and select Menu → Preferences → Main menu .
Click on Programming in the left pane.
Check at least one program from the center pane.
Likely, you'll find Programming now shows up.
Ensuring ssh and scp working on new installation
Likely, openssh hasn't been installed. Do this (on the new system you're
trying to get into):
$ sudo apt-get install openssh-server
Change hostname (permanently)
$ sudo hostnamectl set-hostname new-hostname
How to get workspaces and the panel representation
If the workspaces don't exit (4 of them generally do), enable Hot Corners
via the System Settings dialog under the panel menu, then go see them or
create them.
To get the squares representation on the panel, for convenience in reaching them,
go to the panel menu and look for Applets , then launch it. Scroll down
to the bottom to Workspace switcher , right-click and choose Add to
panel .
If these land in the wrong place, right-click the panel, and enable Panel
edit mode , then move whatever icons fell to the left past to the right of
the workspace switcher. I found this doesn't work yet—still trying to fix
the problem.
Upgrade from Mint 18 Sarah to 18.2 Sonya
Here's how to upgrade from 18 Sarah to 18.2 Sonya. This is simple because both
are based on the same codebase, Ubuntu 16.04 .
Diable screensaver.
Launch Update Manager and apply all updates.
Relaunch Update Manager . In menu Edit , choose Update
to "Linux Mint 18.2 Sonya" .
You get a wizard that conducts your preparation for the installation. Here
are some notes I found to be potentially useful. They are available at
https://www.linuxmint.com/rel_sonya_cinnamon.php . You will be
asked to overwrite some configuration files with newer copies. I always
chose to overwrite them. There are issues introduced by the upgrade to
18.2 Sonya. In particular, ...
Known issues
Cinnamon freezes when changing resolution (Intel GPU)
If your Intel GPU is recent enough (2007 or newer) it is recommended to
remove the legacy Intel driver "xserver-xorg-video-intel" and to use the
built-in modesetting driver instead:
apt remove xserver-xorg-video-intel
sudo reboot
Not only will the modesetting fix the freeze issue when changing
resolutions, it should also work better with Cinnamon and produce better
performance.
The legacy driver is no longer maintained and only useful for the old
i800x and i900x family of chipsets.
If you are using one of these old chipsets or if you do not want to use
the modesetting driver, an alternative is to continue to use the
"xserver-xorg-video-intel" driver, but to disable VSync:
echo CLUTTER_VBLANK=none >> ~/.profile
Log out for this change to take effect, and please be aware that
disabling Vsync might result in video screen tearing.
Sound and microphone issues
If you're facing issues with your microphone or your sound output, please
install pavucontrol .
This will add "PulseAudio Volume Control" to your menu. This application
has more configuration options than the default volume control.
After the last step, the installation starts; be patient, it won't always
give warm fuzzies that it's doing something.
After installation, a reboot is required.
From
Linux Mint: how to upgrade quickly and safely to Mint 18.2 Sonya ,
I also did:
Install the new display manager LightDM of 18.2.
Correct the Grub bootloader menu items.
Installing Sun VirtualBox...
When Mint/Ubuntu come with VirtualBox and you attempt to install it (directly)
a second time, a big mess results. When you power up your VM, you see:
virtualbox RTR3init failed with rc=-1912
The best advice is to uninstall VirtualBox (every one):
# apt-get purge virtualbox-5.2
# dpkg --purge virtualbox virtualbox-dkms virtualbox-guest-dkms virtualbox-guest-utils virtualbox-guest-x11
Then install properly (which, at the time, was using apt-get ):
# apt-get install virtualbox-5.2
Incidentally, bounding my installation left configuration such that I
never lost the VM definitions I had set up. After re-launching VirtualBox,
I was able to continue on installing the OS.
Failing Ethernet and USB of Dell docking station
Installing Linux Mint 19 Tara on a Dell Precision 5520 with docking station,
once up I had no wired network connection and the USB ports did not work for
keyboard, mouse, external drives, etc.
I found a post in the Linux Mint Forums that described an identical failure
for another notebook computer and dock. I added to it:
There's no NIC (only wireless) in this machine; typically, one buys the
docking station and uses the NIC in that for wired Ethernet. Like the
original poster here, I could not get wired Ethernet after smoking my Windows
10 installation and installing Linux Mint 19 Tara.
I did these things in the BIOS:
Reboot and press F2 repeatedly--about 2-3 times per second until gaining
entrance to the BIOS.
Open System Configuration.
Click on Thunderbolt Adapter Configuration; I did the following:
✗ Enable Thunderbolt Technology Support
(checkbox was already checked)
✗ Enable Thunderbolt Technology Adapter Boot
Support (I had to check this)
✗ Enable Thunderbolt Technology Adapter Pre-Boot
Modules (I had to check this)
• Security level - User Authorization
(radio button was already marked)
Exit the BIOS with update.
Relaunch the notebook.
Linux Mint came up and I had a wired Ethernet connection.
With installation of Linux Mint 19, Google Chrome doesn't open
On my first, completely new installation of Linux Mint 19 Tara, I could not get
Google Chrome to come up. It launched, was represented by a title on the panel,
but no window on the desktop. When I clicked on the Google Chrome title on the
panel, a window would briefly flash, then disappear. Note that I have multiple
monitors.
I tried all the wiggles recounted here (and elsewhere, such as in Ubuntu
forums) of uninstalling using the Software Manager, using apt-get, doing
updates, and also I tried:
$ rm -rf ~/.config/google-chrome
Nothing worked until I did this:
$ rm -rf ~/.local/share/applications/chrome*.desktop
(There were many of these.) Then I launched Google Chrome again from the
Menu → Internet .
Same symptoms, but I right-clicked the panel title again and chose to move it
to a different monitor whereupon the window did open on another monitor. I
found I could drap the window off that monitor on to my primary display and,
after that, the window remained open. I signed in (to Google Chrome), then
closed the whole window. Then I relaunched and Google Chrome started up, window
open on my desktop just as it should.
How to set up network-time synchronization
Menu → Software Manager
Type "ntp" into the search box.
Click on ntp in the list.
Click on the Install button.
$ sudo apt-get install ntpstat
$ ntpstat .
It's probably working as long as
you do not see unsynchronized
stratum is loger than 16
time correct is a "lower" number (like 35 ms )
How to force Ubuntu (and Mint) updates that are being held back
See
How to force Ubuntu (and Mint) updates that are being held back
How to pair a mouse and the nib it's divorced from
Install Solaar:
# add-apt-repository ppa:daniel.pavel/solaar
# apt-get update
# apt-get install solaar ( or solaar-gnome3)
This will install solaar at /usr/bin/solar . You must run it as
root
$ gksudo solaar
This will put Solaar in your panel whence you can launch Unifying Receiver
and pair your mouse and the nib you propose to run it from. This process worked for
me using a Logitech Performance MX (MX 510) mouse and Logitec USB nib under Linux
Mint.
See
Solaar Makes Managing Logitech's Unifying Receiver Easy .
How to instruct Nemo and others what to run...
When choosing what to run with the context menu, like right-clicking on a .pdf
and choosing Send by Email wanting Thunderbird to come up instead of
Google, set the desired applications in Mint's Menu → Preferences →
Preferred Application configuration.
How to set up alien in order to build RPMs
I can't produce an RPM. I was surprised to discover that I did not have Debian
alien installed. I must have done this in an earlier existence of my present
development host. I install that:
russ@gondolin ~ $ sudo dpkg --list | grep alien
russ@gondolin ~ $ sudo apt-get install alien dpkg-dev debhelper build-essential
Reading package lists... Done
Building dependency tree
Reading state information... Done
build-essential is already the newest version (12.1ubuntu2).
dpkg-dev is already the newest version (1.18.4ubuntu1.6).
The following additional packages will be installed:
  autoconf automake autopoint autotools-dev debugedit dh-autoreconf dh-strip-nondeterminism
  libfile-stripnondeterminism-perl librpm3 librpmbuild3 librpmio3 librpmsign3 libtool po-debconf rpm rpm-common
  rpm2cpio
Suggested packages:
  autoconf-archive gnu-standards autoconf-doc dh-make rpm-i18n libtool-doc gfortran | fortran95-compiler gcj-jdk
  libmail-box-perl elfutils rpmlint rpm2html
Recommended packages:
  libltdl-dev libmail-sendmail-perl
The following NEW packages will be installed:
  alien autoconf automake autopoint autotools-dev debhelper debugedit dh-autoreconf dh-strip-nondeterminism
  libfile-stripnondeterminism-perl librpm3 librpmbuild3 librpmio3 librpmsign3 libtool po-debconf rpm rpm-common
  rpm2cpio
0 upgraded, 19 newly installed, 0 to remove and 31 not upgraded.
Need to get 2,986 kB of archives.
After this operation, 8,826 kB of additional disk space will be used.
Do you want to continue? [Y/n] y
Get:1 http://archive.ubuntu.com/ubuntu xenial/main amd64 autotools-dev all 20150820.1 [39.8 kB]
Get:2 http://archive.ubuntu.com/ubuntu xenial/main amd64 autoconf all 2.69-9 [321 kB]
Get:3 http://archive.ubuntu.com/ubuntu xenial/main amd64 automake all 1:1.15-4ubuntu1 [510 kB]
Get:4 http://archive.ubuntu.com/ubuntu xenial-updates/main amd64 autopoint all 0.19.7-2ubuntu3.1 [406 kB]
Get:5 http://archive.ubuntu.com/ubuntu xenial/main amd64 libtool all 2.4.6-0.1 [193 kB]
.
.
.
Get:16 http://archive.ubuntu.com/ubuntu xenial/universe amd64 rpm2cpio amd64 4.12.0.1+dfsg1-3build3 [7,756 B]
Get:17 http://archive.ubuntu.com/ubuntu xenial/universe amd64 debugedit amd64 4.12.0.1+dfsg1-3build3 [15.5 kB]
Get:18 http://archive.ubuntu.com/ubuntu xenial/universe amd64 rpm amd64 4.12.0.1+dfsg1-3build3 [114 kB]
Get:19 http://archive.ubuntu.com/ubuntu xenial/universe amd64 alien all 8.95 [54.5 kB]
Fetched 2,986 kB in 1s (1,725 kB/s)
Selecting previously unselected package autotools-dev.
(Reading database ... 421045 files and directories currently installed.)
Preparing to unpack .../autotools-dev_20150820.1_all.deb ...
Unpacking autotools-dev (20150820.1) ...
.
.
.
update-alternatives: using /usr/bin/automake-1.15 to provide /usr/bin/automake (automake) in auto mode
Setting up autopoint (0.19.7-2ubuntu3.1) ...
Setting up libtool (2.4.6-0.1) ...
Setting up libfile-stripnondeterminism-perl (0.015-1) ...
.
.
.
Setting up rpm (4.12.0.1+dfsg1-3build3) ...
Setting up dh-strip-nondeterminism (0.015-1) ...
Setting up debhelper (10.2.2ubuntu1~ubuntu16.04.1) ...
Setting up alien (8.95) ...
Setting up dh-autoreconf (12~ubuntu16.04.1) ...
Processing triggers for libc-bin (2.23-0ubuntu10) ...
...and, behold, I am able to build the RPM.
How to create a bootable USB drive for Linux Mint
https://linuxmint-installation-guide.readthedocs.io/en/latest/burn.html
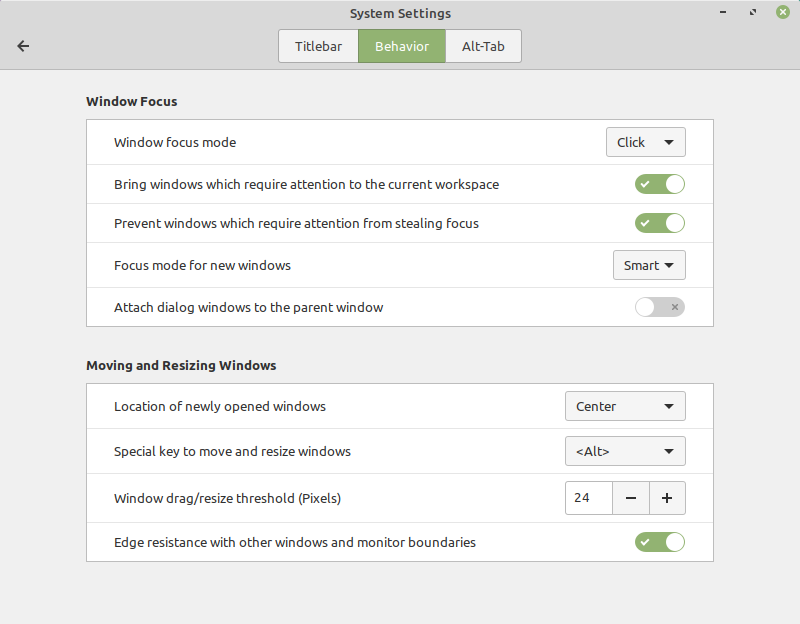
Prevent focus stealing—stop browser from switch workspace when
opening a link
Annoyed when you...
...click a hyperlink, Chrome is your default browser and, because the last time
you in Chrome was in a different workspace than the one you're on, Chrome
switches to itself in that workspace instead merely of using one of its
instances in the workspace you have up front and center?
In Cinnamon, go to main Menu → System Settings → Preferences
→ Windows → Behavior → Prevent focus stealing → On .
/etc/fstab
# 4Tb Western Digital Blue
UUID="8fc4c3eb-b49c-4923-bc1a-dc604a4db339" /home2    ext4    defaults       1 2
How to install youtube_dl on Linux Mint 20.1
Recent versions of Linux distributions no longer come with Python 2 and, as has
always been the case, they still have ancient software, so you can't easily get
a hold of the latest version of youtube_dl , which is written in
Python.
Moreover, youtube_dl --upgrade no longer works.
So, do this:
$ youtube-dl --version               # latest version from Mint
2020.03.24
$ where youtube-dl                   # where it lives
/usr/bin/youtube_dl
# apt-get purge youtube-dl           # remove current version
# pip3 install youtube_dl            # install using Python 3
Command 'pip3' not found, but can be installed with:
apt-get install python3-pip
# apt-get install python3-pip        # (try harder)
# pip3 install youtube-dl
$ youtube-dl                         # or fix PATH? no I won't
bash: /usr/bin/youtube-dl: No such file or directory
# pushd /usr/bin
# ln -s /usr/local/bin/youtube-dl    # fix-up link
# popd
$ youtube-dl --version
2021.03.03
How to relocate Chrome tabs and windows to another workspace
It can't be done without going into Chrome settings and choosing
Launch Chrome.
From the triple-dot/hamburger/general menu, choose Settings .
This brings up the Settings page.
Click Appearance .
Click to turn on Use system title bar and borders .
(Mint/Cinnamon) GUI static IP address
DON'T DO IT THIS WAY! (see the next note after this one)
Go to start menu and type "Network."
Choose to launch Network .
Select Wired , then click on the gear icon (settings/options).
Click IPv4 .
Change Automatic (DHCP) to Manual .
Type in the static IP Address you want. (192.168.0.105 )
Type in the Netmask . (255.255.255.0 )
Type in the Gateway . (192.168.0.1 )
Add the following DNS Server addresses:
8.8.8.8 (Google's DNS server)
8.8.4.4 (ibid)
Click on Apply .
You should see a summary that looks like this:
    IPv4 Address 192.168.0.105
    IPv6 Address (some long hexadecimal number)
Hardware Address (another hexadecimal number)
   Default Route 192.168.0.1
             DNS 8.8.8.8 8.8.4.4
In a console, type:
$ sudo bash # (get root)
# ipconfig # (discover your Ethernet device name)
# (let's say it turned out to be eno1 )
# ipconfig eno1 down # (bring down your Ethernet device)
# ipconfig eno1 up # (bring back up your Ethernet device)
# ^D # (unget root)
$ ping google.com # (ping Google)
—if you get no ping returns here, you screwed something up in your configuration
You will likely have to bounce any open browser before being able to do
much with it (like search for stuff).
Static IP address—the right way!
There's potential monkey business in your operating system which wants you not
to hold a static IP address. So, the right way always to get the same address
is to go to the assigning authority which, in my case, is my TP-LINK router.
If you're at the mercy of a power utility that loves to leave you literally in
the dark from time to time, you're often getting a new and different address to
any device when the power comes back on.
Every router will be a bit different, but most offer a way to impose or prefer
a node (host) getting the same address. In my case, I have a TP-LINK Wireless
Dual Band Gigabit Router, model number Archer C7. To reserve an IP address, I
do this:
Avoid configuring my Wired IPv4 address by Manual .
Instead, I bring up my Network configuration GUI to observe
my host's details as given to it by DHCP. Among these details is the
Hardware Address.
In TP-LINK, as seen below, I click Add New , then type in that
hardware address that is my MAC address , the Reserved IP
Address and enable it.
I Save this and then reboot my router, which takes a few minutes.
Once that's done, I bounce my assigned network configuration as show
above at the end of the previous note (using ifconfig up/down ).