Objectives:
(Skip directly to Chris’ or Scott’s command-line instruction write-up. See collected original links and assignments from syllabus at bottom of this document.)
Download the MySQL4.1 Binary (make sure you get the full install).
Download the MySQL Administrator 1.1 Binary.
Download the MySQL Query Browser 1.1 Binary.
(Note: you don’t have to do any of the "sign-ups.")
1. Unzip the downloaded file and run the executable.
2. You can skip the MySQL.com sign-up.
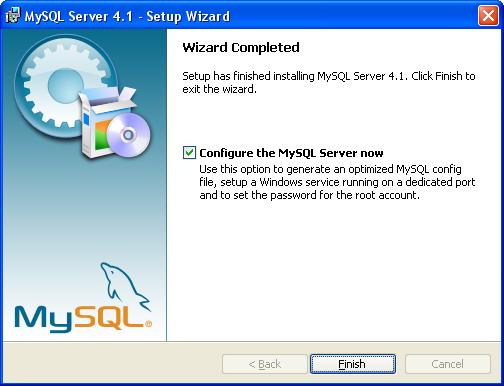
3. Verify that Configure the MySQL server now check box is marked and click Finish.
4. Choose a detailed configuration.
5. Choose Developer Machine.
6. Choose Non-Transactional Database Only.
7. Choose Decision Support (DSS)/OLAP.
8. Set your Port Number.
9. Choose whether to install as a service or not. (I like the service, but you may not, if you choose the other option you will have to start and stop your server manually.)
10. Set your root password (and remember it for step #2 of User Creation below, and do not check Enable root access from remote machines, and do not check Create An Anonymous Account.
11. Execute.
For any step not dealt with explicitly here, choose what is probably the default.
These installations are straightforward, no options other than (Complete) to select.
You can read the following documentation on server administration and database creation or if you don’t care and just want it to work, skip to the next section.
MySQL Administrator Documentation
MySQL Query Browser Documentation
1. Launch MySQL Administrator; you will have a screen like this...
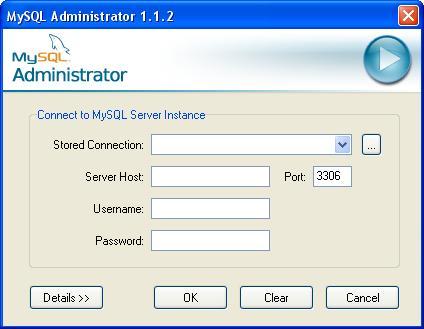
2. Fill in the appropriate information, assuming you are on the machine that the database is installed on, use localhost for Server Host, and assuming you left the default port when you set up the MySQL server, leave that as is. Use root for the username and whatever password you set when you set up the MySQL server.
3. In the next screen, lets first set up a new database schema. Click on the Catalogs entry shown, and right click in the field where the red x is drawn in my illustration. Choose Create New Schema.
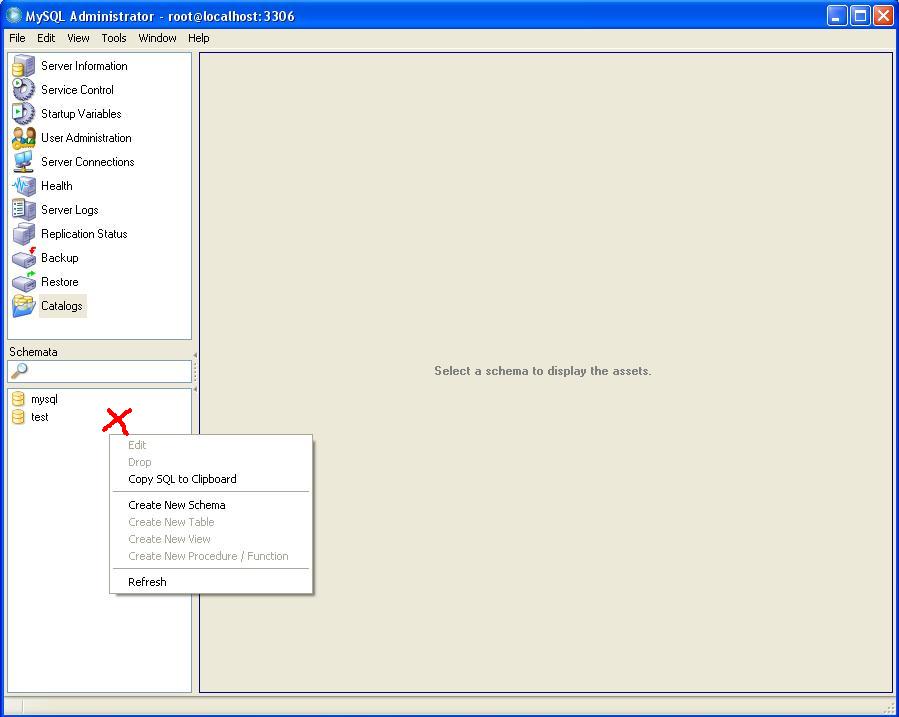
3. Create the schema using the name dvdcat for continuity purposes.
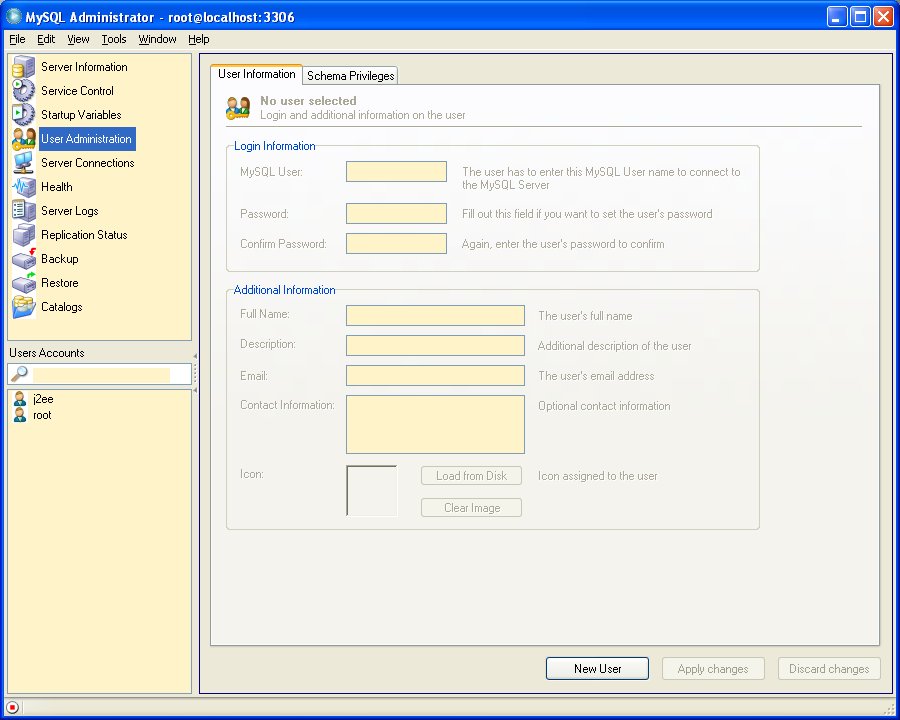
4. Now let’s create a user. Click on User Administration in the list (up higher from Catalogs), then click on New User.
Again for continuity purposes, create a user named j2ee. Set the password, and fill in whatever optional data you wish on this screen. Then click on the Schema Privileges tab, select the dvdcat schemata, and click on the double arrow button to give this user all privileges on this database. Click on apply changes. (If you get an error to the effect that the user may be missing and to refresh the user list, merely click again.)
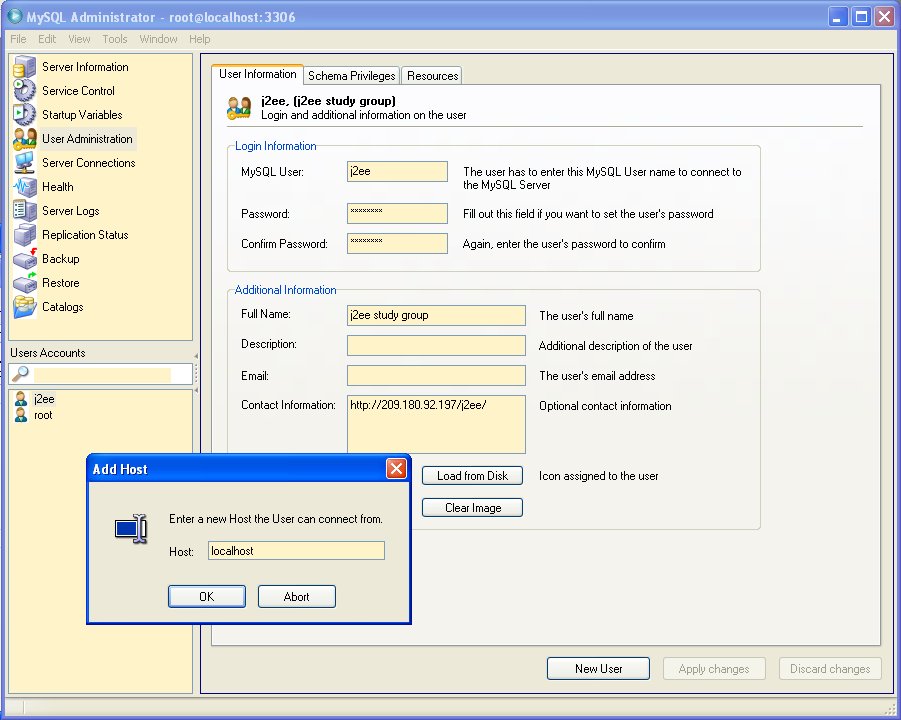
5. Now let’s assign what host this use can connect to—the local one. Clicking on User Administration as shown here...
...and right-clicking on j2ee, choose Add Host from Which the User Can Connect and fill in “localhost” in the Add Host dialog as shown here:
6. Lets move on to create a table, select Catalogs, then on dvdcat, then the button Create Table. Name the table, dvdtitle (though it doesn’t matter), then double-click in the upper, left-hand cell, just below "Column Name" and enter, "itemID." Next, click the tab key to see all of the remaining information fill in automatically.
Don’t worry about the index stuff down at the bottom, that is beyond the scope of our project.
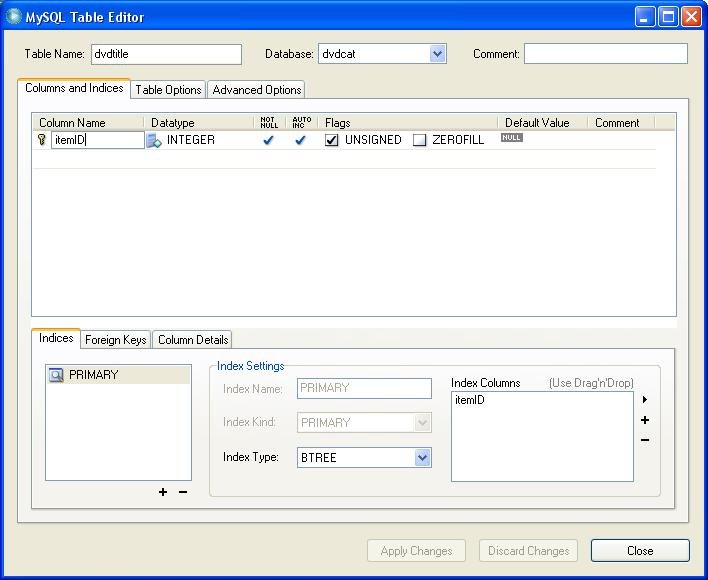
7. Now, click on the Table Options tab and select MyISAM Storage Engine. Leave everything else as default. This first item will be our primary key: a primary key has to be unique and the easiest way to archive uniqueness is to just use an incrementing number.
8. Add the remaining items setting the table up just as in the following graphic. You may add additional items if you desire, but these will be the required ones. Close the window.
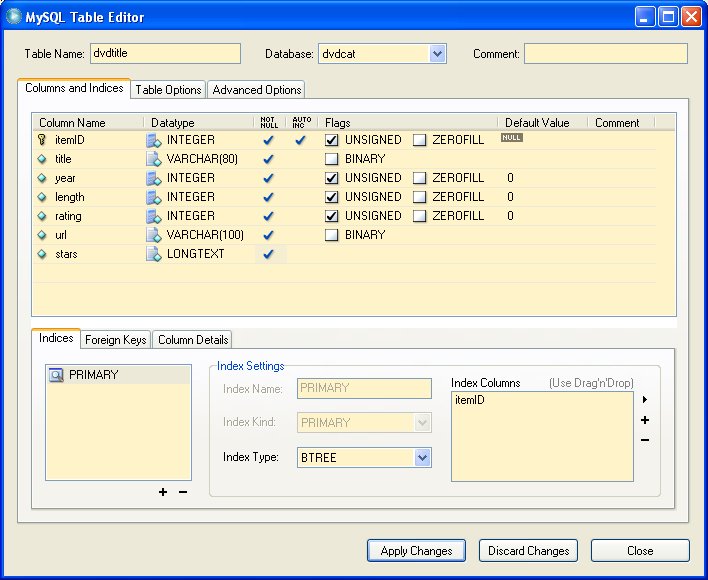

Congratulations, you have completed the database setup and now we are ready to start inputting information. You could use the Query Browser to enter table information now, however we will be writing a quick and dirty Java app using a JDBC driver to connect to our database and enter information.
If you are a command-line junkie and would prefer to do all the above user and table creation from a command line interface, please see the command-line instructions for doing so.
Alternatively, Scott has also written a command-line example. In addition to walking you through database creation as the link already featured here, it shows how to make entries into the database by hand (not using the application we’re developing) and perform queries to retrieve that information. This is useful to unmask any mystery of using MySQL prior to concentrating on the application. As everything done on the command line, these actions appear both as more cryptic, but also far more simple than using the MySQL Administrator or other application—an interface suitable for programmers like us when not for end users.
First, this section assumes that you have already downloaded and installed the Java SDK from SUN. If you have not done so please get it here, http://java.sun.com/j2se/1.5.0/download.jsp, and install it. Look for JDK. Don’t download the J2EE SDK as that has Sun’s equivalent of the Tomcat server and we’re going to use Tomcat later instead. In general, take the defaults. You will have to register yourself with Sun in order to get this SDK. The reason we need this software is precisely because we’re going to be writing and compiling Java code.
When this syllabus was written, the most current JDK from Sun was 5.0 (JDK 1.5). As you read this, there is perhaps a later one available.
Make sure you have things set up correctly, go to the command line and type java and javac. If they are undefined, you need to add the location of the Java compiler and other binaries to the PATH environment variable. This would probably be something like c:\Program Files\java\jdk1.5.0_05\bin, depending on the version you get when you do this exercise (and if you are on Windows.)
Next you need to download and install the JDBC driver. What you will get, after exploding the archive that you’ll download here, is a collection of files and subdirectories. The only file you probably need to care about is mysql-connector-java-3.1.10-bin.jar. This is the file we’re talking about in the next step, which is described here in a Java 5 context.
The best way to make sure the JDBC driver library is in the right place is to put it in your jdk/jre/lib/ext directory, on my (Windows) machine it was located at c:\Program Files\java\jdk1.5.0_05\jre\lib\ext.
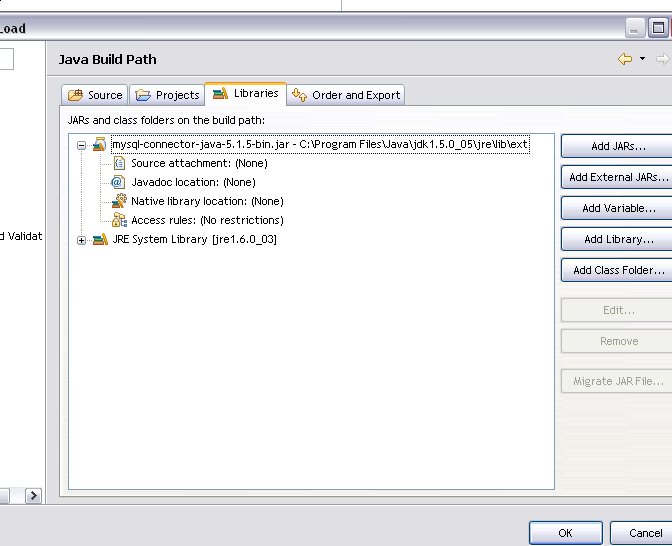
Nevertheless, after it’s there, you will need to add it into any eclipse
project you create for the application:
Project->Properties->Java Build Path->Libraries->Add External JARs...
navigate to and double-click
mysql-connector-java-3.1.10-bin.jar on the path
C:\Program Files\Java\jdk1.5.0_05\jre\lib\ext.
We need to create a simple application to input data into our database, I would have preferred to do a web application, but at this point you don’t have tomcat installed and configured, so it will have to be a Java application. I’m going to make it really simple. It just takes five arguments from the command line and adds them to our table in order.
Here is the code I have for a simple application to do this. First, create a work area. You may have already created an area for your J2EE work. Then, create a new directory named dvdjdbc with subdirectories src, src/main and src/main/java. Put this Java source code into a file on the path src/main/java. Name it dvdjdbc.java. (Note: it doesn’t make much difference on Windows, but on other platforms, the spelling and case of your class is crucial and must match the file it is in. For this reason, I have left it lower case because I don’t want it to be upper or mixed case.)
import java.sql.Connection;
import java.sql.DriverManager;
import java.sql.SQLException;

class dvdjdbc
{
   public static void main(String args[])
   {
      try
      {
         Class.forName("com.mysql.jdbc.Driver").newInstance();
         Connection conn = DriverManager.getConnection(
               "jdbc:mysql://localhost/dvdcat?user=j2ee&password=tinkywinky");
         java.sql.Statement stmt = conn.createStatement();

         try
         {
            String query = "INSERT INTO ";
            query += "dvdtitle (title, year, length, rating, url, stars)";
            query += " VALUES ('";

            for (int i = 0; i < args.length; i++)
            {
               System.out.println(i + ": " + args[i]);
               query += args[i];

               if (i+1 < args.length)
                  query += "', '";
            }

            query += "')";
            System.out.println(query);
            stmt.executeUpdate(query);
         }

         catch (SQLException ex)
         {
            // handle any errors
            System.out.println("SQLException: " + ex.getMessage());
            System.out.println("SQLState: " + ex.getSQLState());
            System.out.println("VendorError: " + ex.getErrorCode());
         }
      }

      catch (Exception ex)
      {
         System.out.println("Oh, crap!");
         //System.out.println(ex.getMessage());
         ex.printStackTrace();
         System.out.println("Remember: mandatory fields include:");
         System.out.println("title, year, length, rating, url, stars");
      }
   }
}
To compile and run this application, type
javac -cp . dvdjdbc.java
If everything went well, you should see a file named dvdjdbc.class in the directory. To run this program to populate your database, type
java -cp . dvdjdbc arg0 arg1 arg2 arg3 arg4 arg5
where the arguments must match your database schema, e.g.: arg0 is the title(char), arg1(int) is the year, arg2(int) is the length, arg3(char) is the rating, and arg4(char) is the URL, if any (just pass nil for nothing), and arg5(char) is the star list. If you have any errors make sure the MySQL JDBC driver is in the right location. To complete this module’s assignment you will need to add up to five movies to our database.
To verify that the application actually did anything, open up the MySQL Query Browser (right-click on the MySQL icon in the System Tray if you’re on Windows); it looks like this:
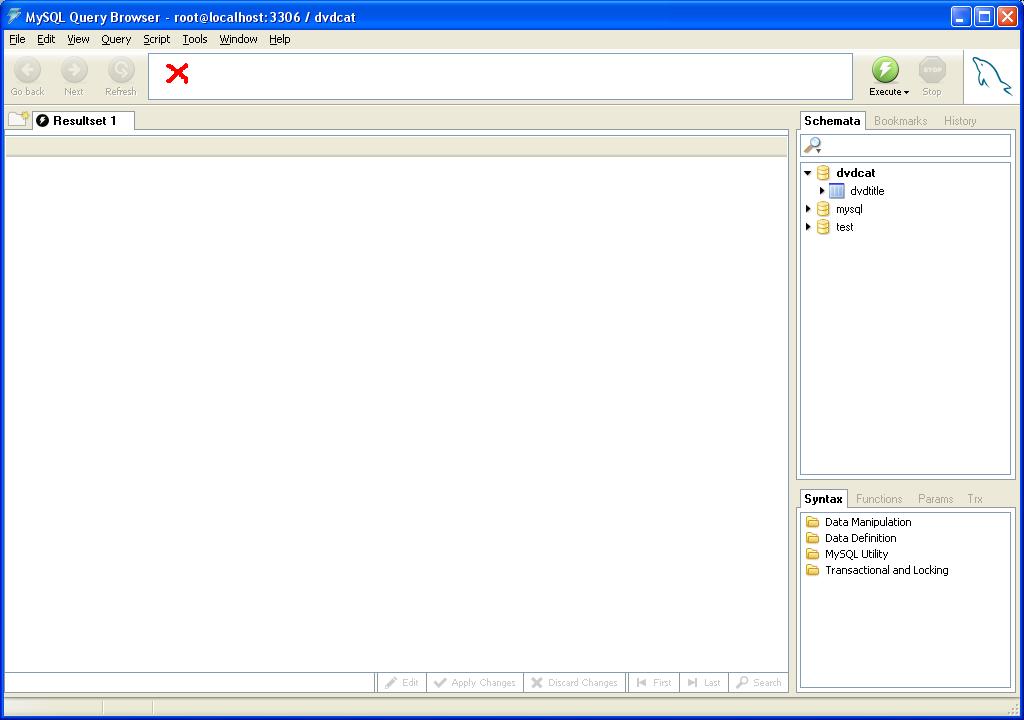
In the area marked with a red X (in the illustration just above), type the following SQL statement:
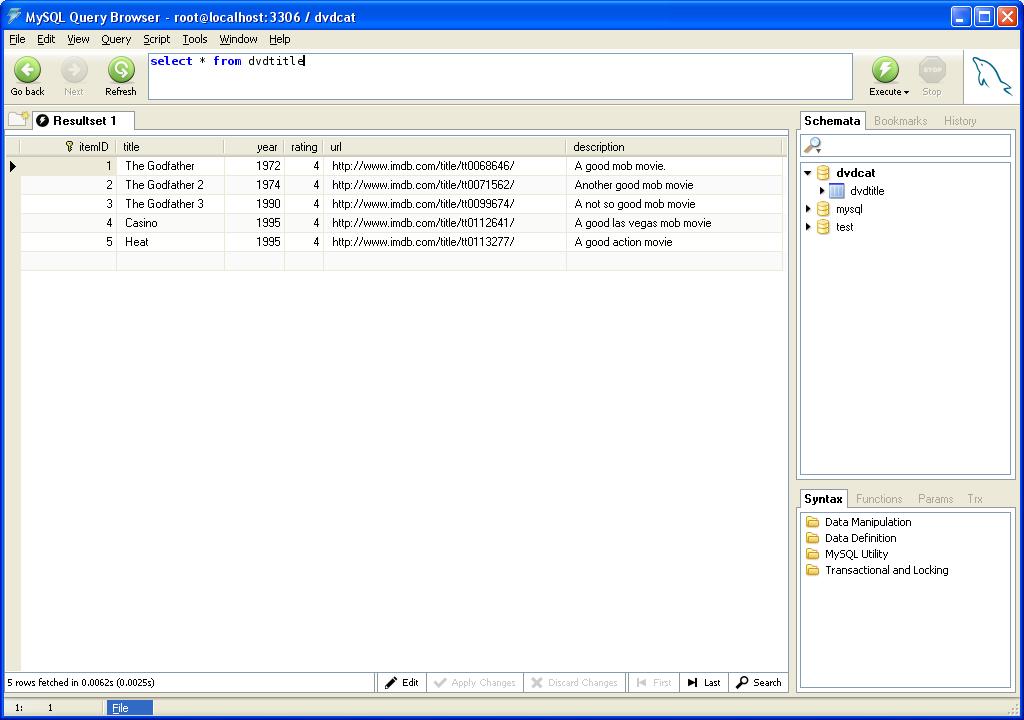
SELECT * FROM dvdtitle;
and click Execute. This will display your table with all data. Assuming all the data was entered correctly, it will look like this.
Here is a very simple application that sends an SQL query to the database and displays the result to the console.
import java.sql.Connection;
import java.sql.DriverManager;
import java.sql.SQLException;

class SimpleDisplayApp
{
   public static void main(String args[])
   {
       try
       {
          Class.forName("com.mysql.jdbc.Driver").newInstance();
          Connection conn = DriverManager.getConnection(
                "jdbc:mysql://localhost/dvdcat?user=j2ee&password=tinkywinky");
          java.sql.Statement stmt = conn.createStatement();
          java.sql.ResultSet rs = null;

          try
          {
             String query = "SELECT * from dvdtitle";
             System.out.println(query+ "\n");
             rs = stmt.executeQuery(query);
          }

          catch (SQLException ex)
          {
             // handle any errors
             System.out.println("SQLException: " + ex.getMessage());
             System.out.println("SQLState: " + ex.getSQLState());
             System.out.println("VendorError: " + ex.getErrorCode());
          }

          try
          {
             int index = 1;
             while (rs.next())
             {
                System.out.println("Here's the result of row " + index++ +":");
                System.out.println(rs.getString(1)+ ", " + rs.getString(2)+ ", " + rs.getString(3)+ ",
                      " + rs.getString(4)+ ", " + rs.getString(5) + ", " + rs.getString(6) + "\n");
             }
          }
          catch (SQLException se)
          {
             System.out.println("We got an exception while getting a result. "
                      + "This shouldn't happen: we've done something really bad.");
          }
       }

       catch (Exception ex)
       {
          System.out.println("Oh, crap!");
          System.out.println(ex.getMessage());
       }
   }
}
That is all there is to it, if you have any problems, feel free to contact me on messenger, my username is [email protected] or you can contact Scott whose username is [email protected].
- It is unlikely that one would use some of the advanced features of JDBC ResultSets, particularly scrollable and updatable ResultSets. Steve Franson indicates he has found little use for these features since it would be rare to hold open a ResultSet, scroll within it, and modify it in the context of a web application. Though it is possible to hold a ResultSet open over the lifetime of a session, it is considered not a good idea since it keeps the connection to the database open. With the number of hits a web application will make to a database that is not a good thing. It is best practice to use transactions even on the simplest of updates, mainly because different drivers and databases do things differently. A single executeUpdate may not be atomic.
1. Create a database for the course project; 'dvdcat' for example.
2. Create a user who’s rights are limited to the database.
3. Create a table with (at least) the following columns (fields):
4. Populate the database with at least five (5) DVD titles.