
Setting up the Sun Java Developer's Kit
Russell Bateman
Spring 2010
last update:
|
|
Setting up the Sun Java Developer's KitRussell Bateman |
This is a very short treatise on quickly setting up the Sun Java Developer's Kit (JDK) for use with Eclipse.
If you originally installed a (whole) JDK (and not just a JRE) on your Windows box, you can just use that. I do not do this, but install the JDK separately (not under Program Files), though I have a JRE installed under Program Files for the benefit of the whole computer.
You must, however, download a JDK if you're doing real Java development as you'll need it for that. If you're doing C/C++, PHP, or something else, you might never need it and can just use a Java Runtime Environment (JRE). Eclipse already comes ready to use that and probably already works without you doing anything. If you're here in my pages, though, you're likely a Java developer since that's my only target audience.
First, note that it is possible to get a 64-bit JRE(JDK) these days. I'm not going to discuss this in any detail except to point out that if you install a 64-bit Eclipse, you had better install a 64-bit JDK also. You cannot run Eclipse on a mismatched JDK. This is a common start-up problem among questions to the Eclipse newcomers' forum.
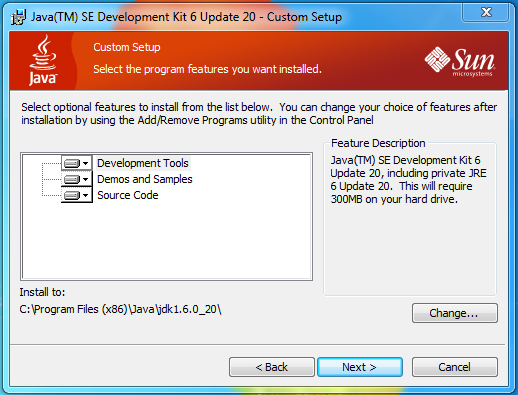
Download the JDK from http://java.sun.com/javase/downloads/widget/jdk6.jsp. These instructions were written when the current version was 1.6.0 20.
If you wish to install the JDK for the whole computer you're on, just download the JDK, install and then skip this document. (If you want things this way on Linux, prefer the .rpm download or its equivalent for Debian platforms.)
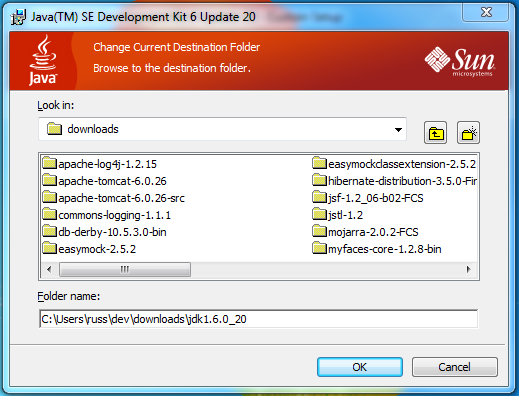
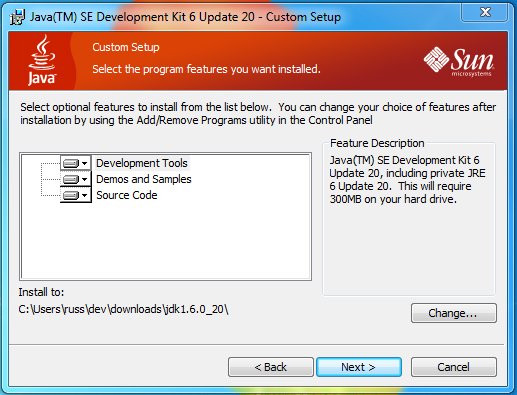
I advise installing a separate JDK for Eclipse's use because you're not at risk of it changing out from under you because of updates and you know exactly what version was used to develop your applications.
There are several methods of telling Eclipse where the JDK lives.
This method is probably the least used, but it's very useful, it's the best solution unless you do not wish to violate the Eclipse distribution subdirectories. It involves simply downloading a JDK, unzipping (or untarring it) and placing it on the path eclipse/jre. You will have to create the jre subdirectory.
For the download, please read the instructions below, but don't put the JDK on a path like /home/russ/dev/downloads/jdk1.6.0_20. Instead, put it in the jre subdirectory you created under your Eclipse folder.
If you place the JDK local to Eclipse, you still need to edit eclipse.ini as discussed here because Eclipse will just find it there without help.
This method has the advantage of not copying the JDK. If you're installing Eclipse several times (for different purposes) and chose method 1, you'd be duplicating the JDK all over your host. This way, you just link to one copy.
Assuming the JDK on the path /home/russ/dev/jdk1.6.0_20, you can make the link easily enough:
russ@tuonela:~/dev/eclipse/jre> ln -s ../../jdk1.6.0_20
This can also be done under Windows (since Vista only), but I haven't tried it for this purpose. "Symbolic links" under Windows seem to work well enough, but they're not very documented and I haven't used them very much. See Symbolic Links. Still assuming the JDK on C:\Users\russ\dev\jsdk1.6.0_20, ...
C:\Users\russ\dev\eclipse\jre> mklink /d .\jdk1.6.0_20 ..\..\jdk1.6.0_20
You still need to specify the location of the JDK in eclipse.ini.
If you do not want to "violate" the Eclipse distribution by creating the jre subdirectory inside it, or you want the JDK somewhere in a more overt location, consider the method discussed here. You will have to edit eclipse.ini, in this case, to tell Eclipse where you have installed the JDK. Just download the JDK according the instructions below.
Return to Setting up Eclipse for the discussion on how to modify eclipse.ini.
When you go looking for a JDK, do not choose the download with "rpm" in the name. The other one (ending in .bin*) will unpack to a subdirectory, which is what you want. Place this directory on a path similar to /home/russ/dev/downloads/jdk1.6.0_20. Skip to after the (lengthy) Windows instructions below.
(* To unpack a .bin file on Linux, make it executable, then execute it.)
I resist this too since I want to administer my computer's Java runtime environment separately from development issues (though this certainly doesn't hurt anything as you won't need to use the JRE installed under your JDK).
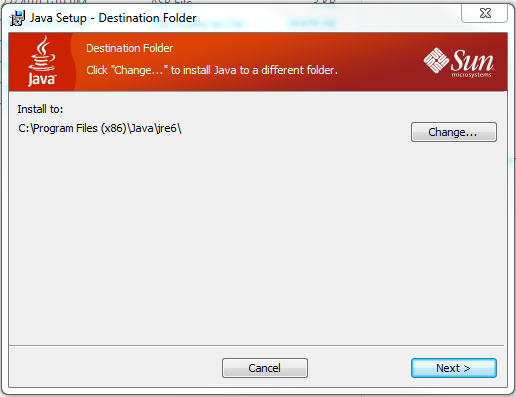
Note: Installation launches your browser on a page that wants registration. This is not necessary and you can just close the page.
If you've accomplished this installation correctly, you're now ready to install Tomcat, if you want this as your web container server, or you can go on to install Eclipse at this point.
If you install Tomcat, do the same thing as was shown here instead of installing it for your whole computer (or, in addition to doing that). See Setting up Apache Tomcat.