Timeline
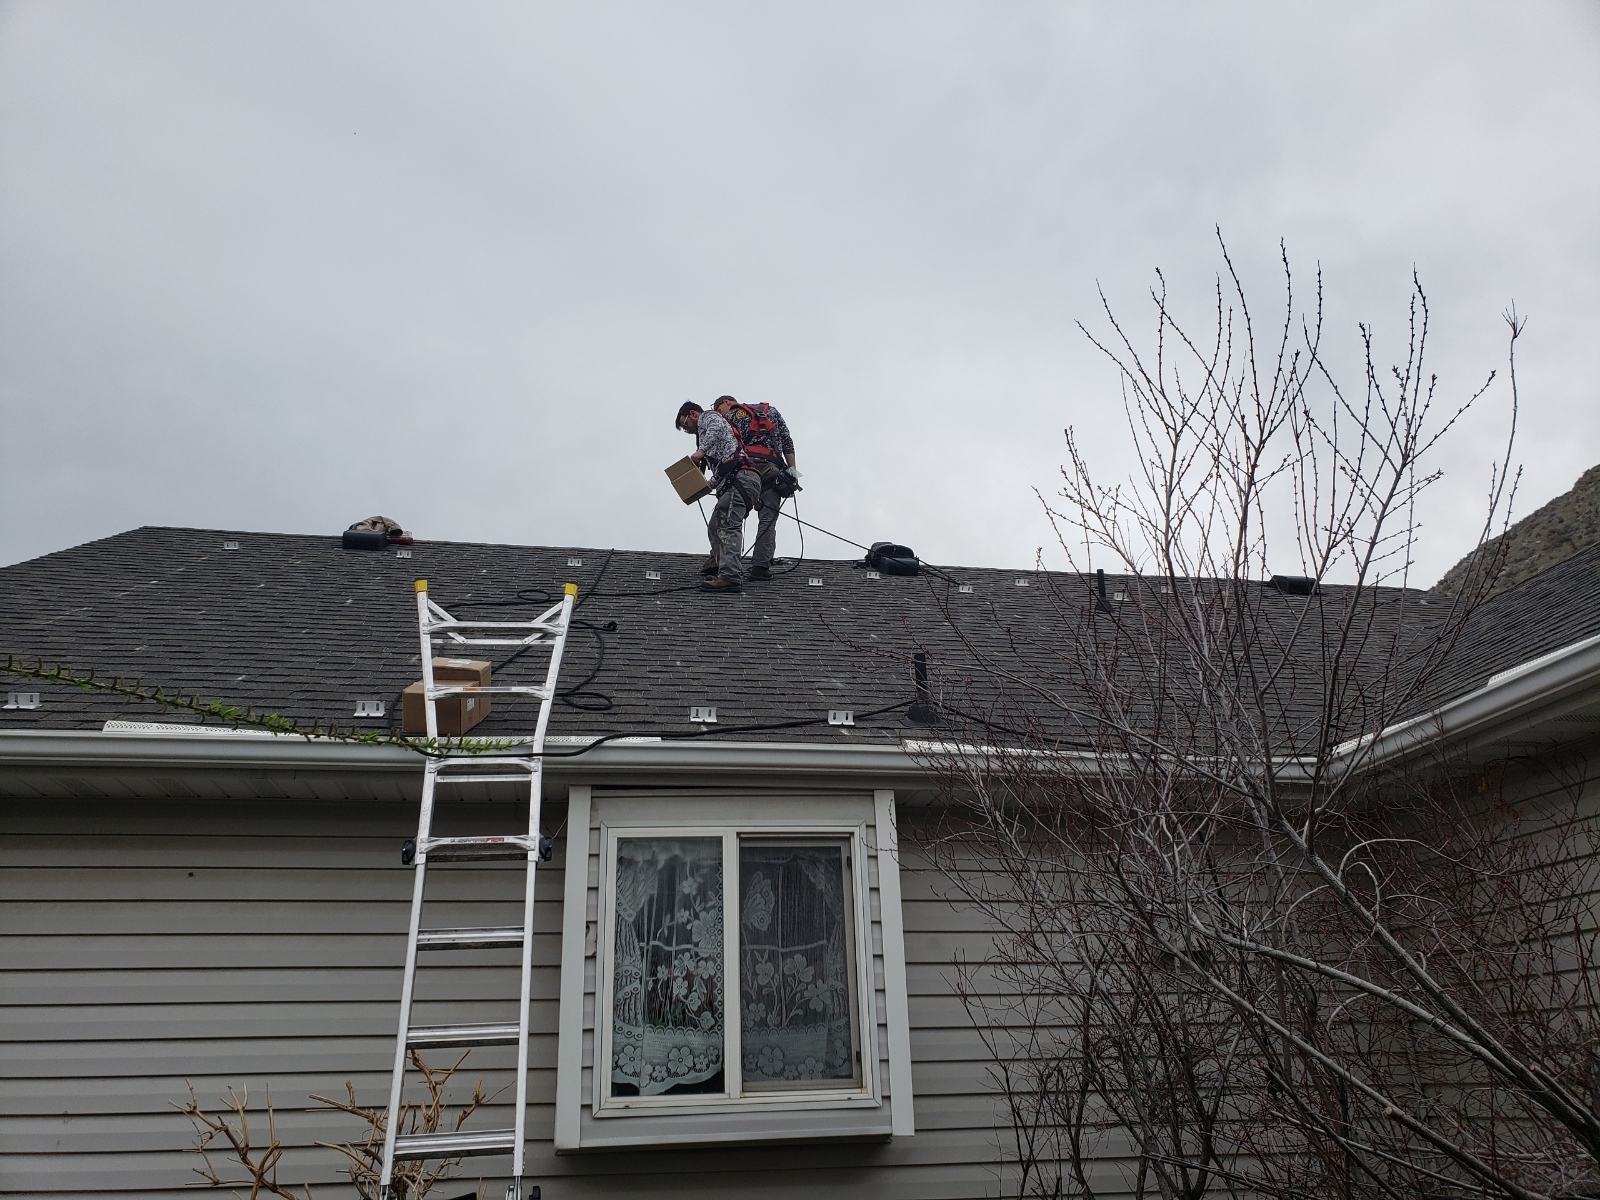
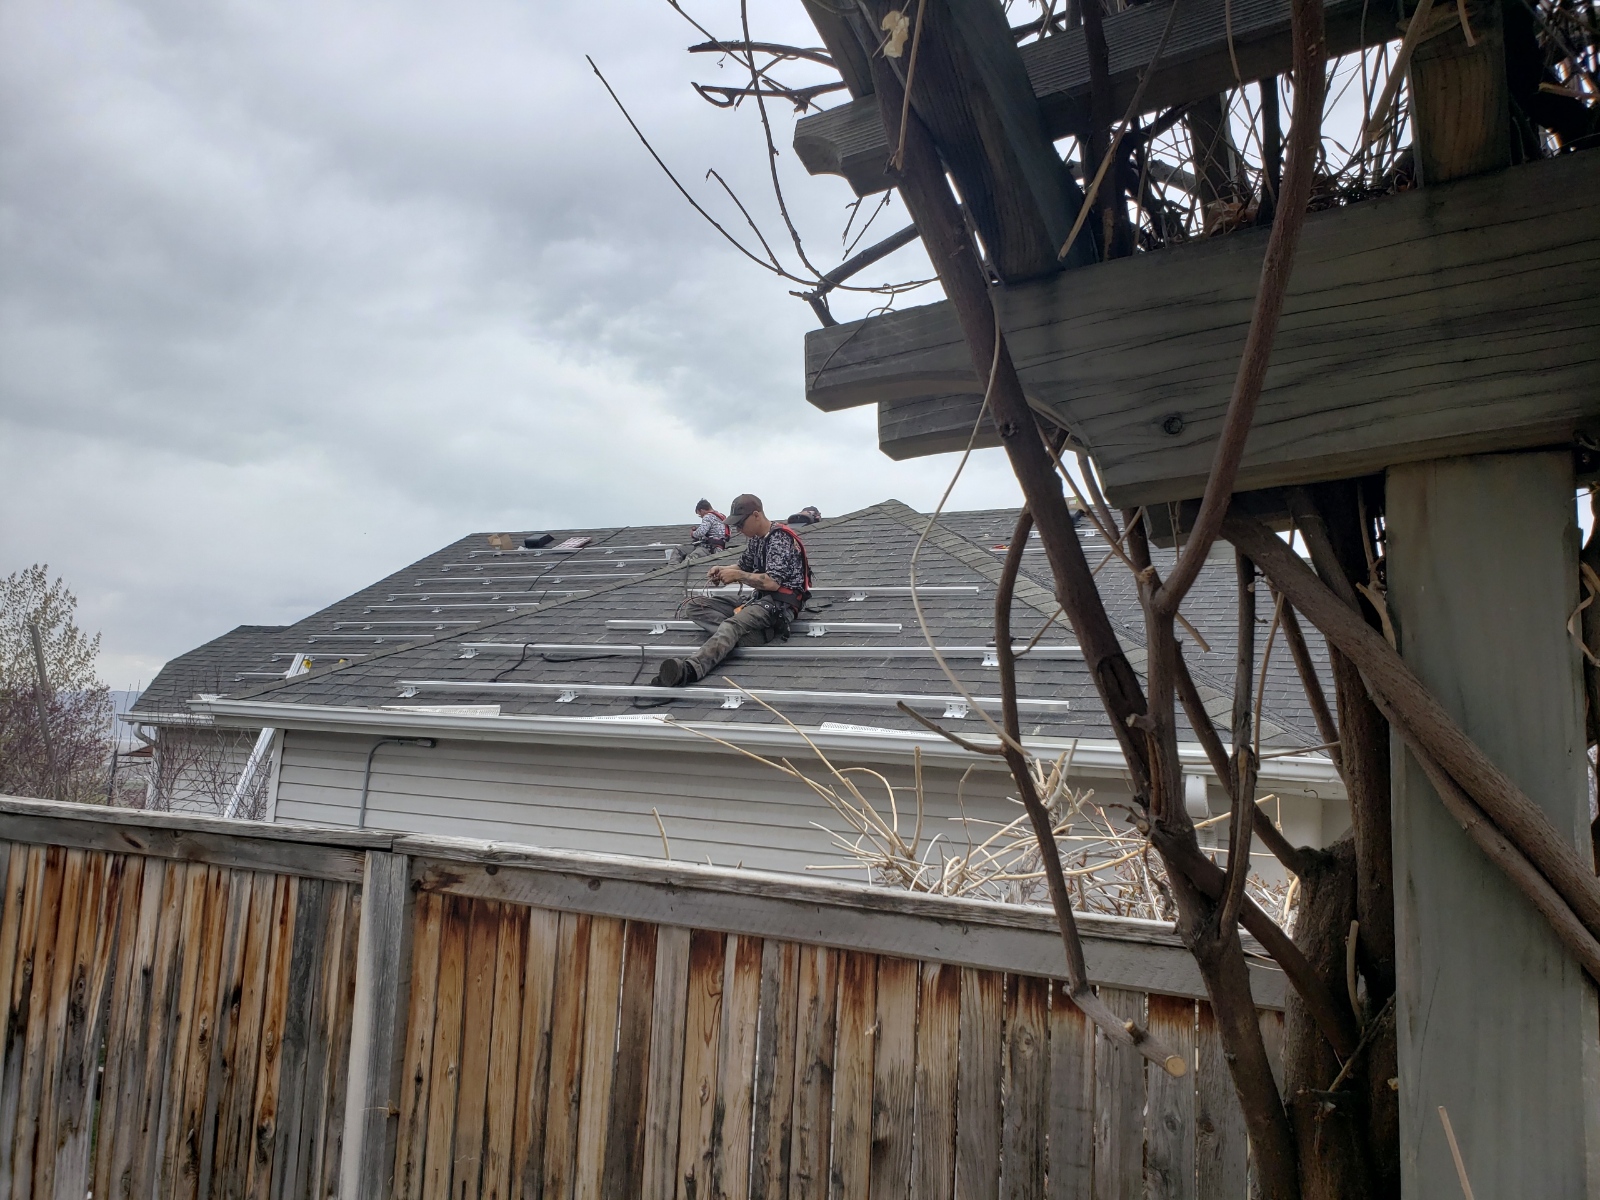
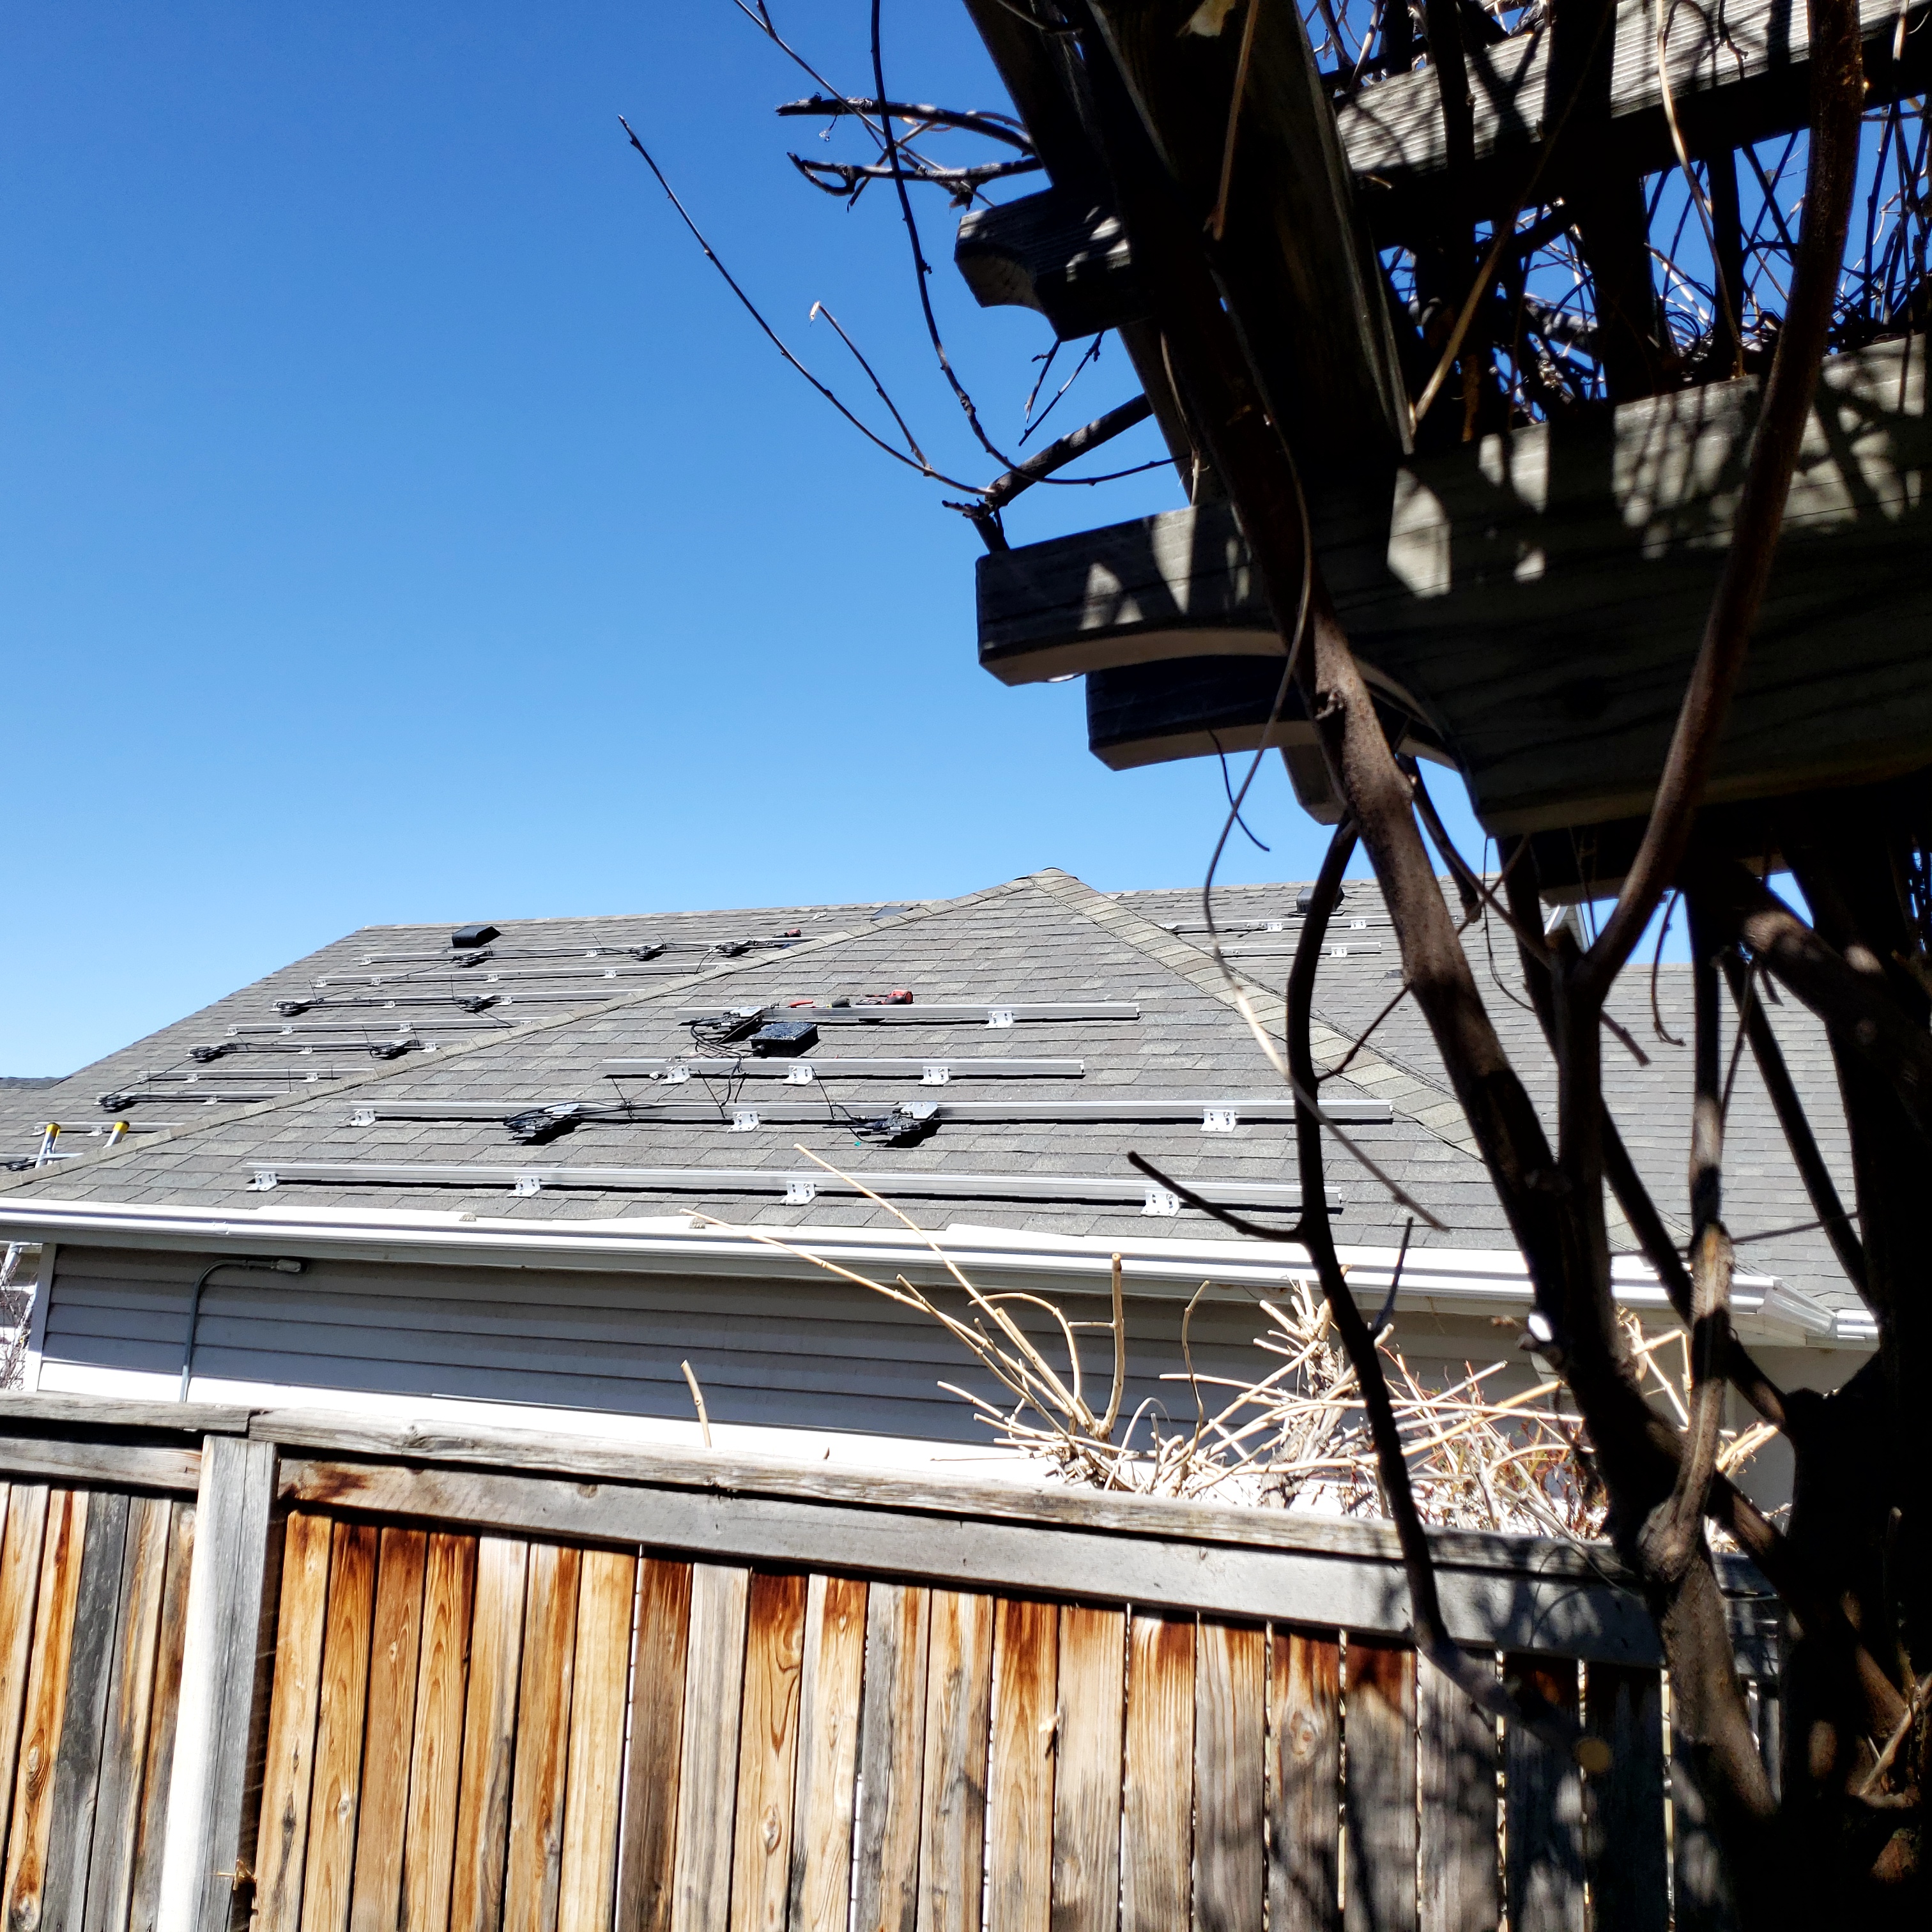
| 28 March 2022 | Installation of rails, SolaDeck™ junction boxes, inverters and rough electrical. | ✓ |
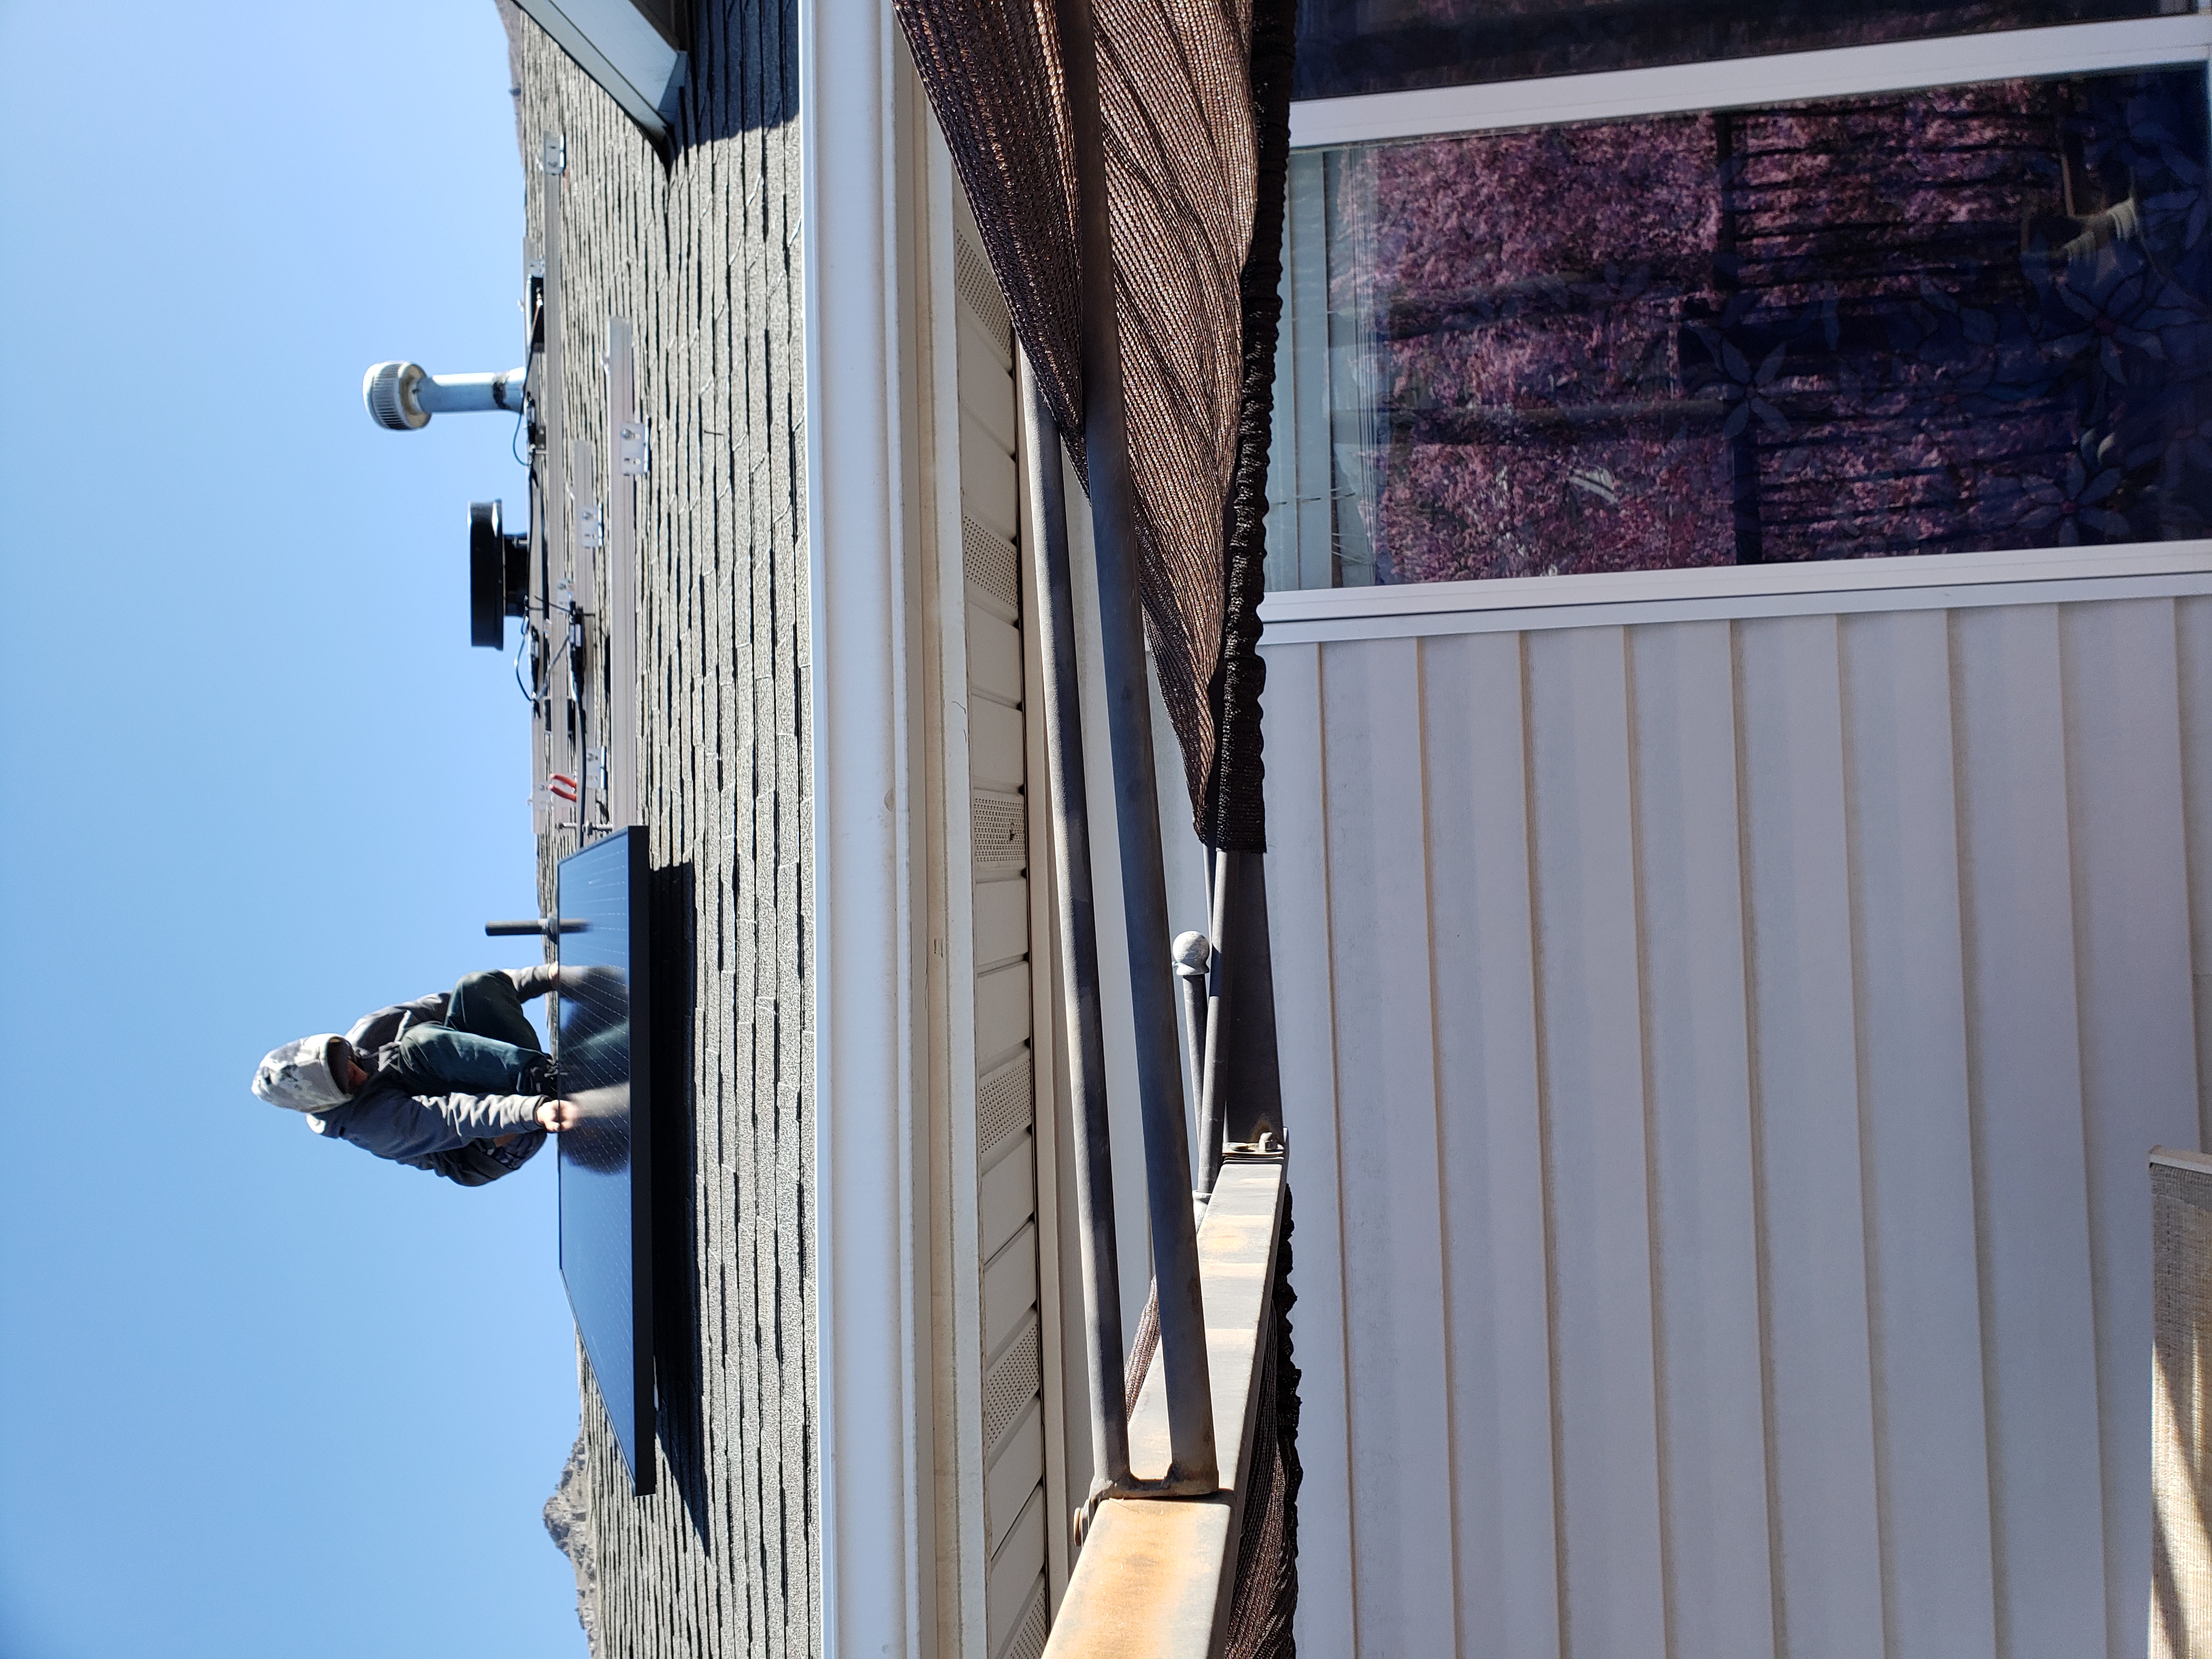
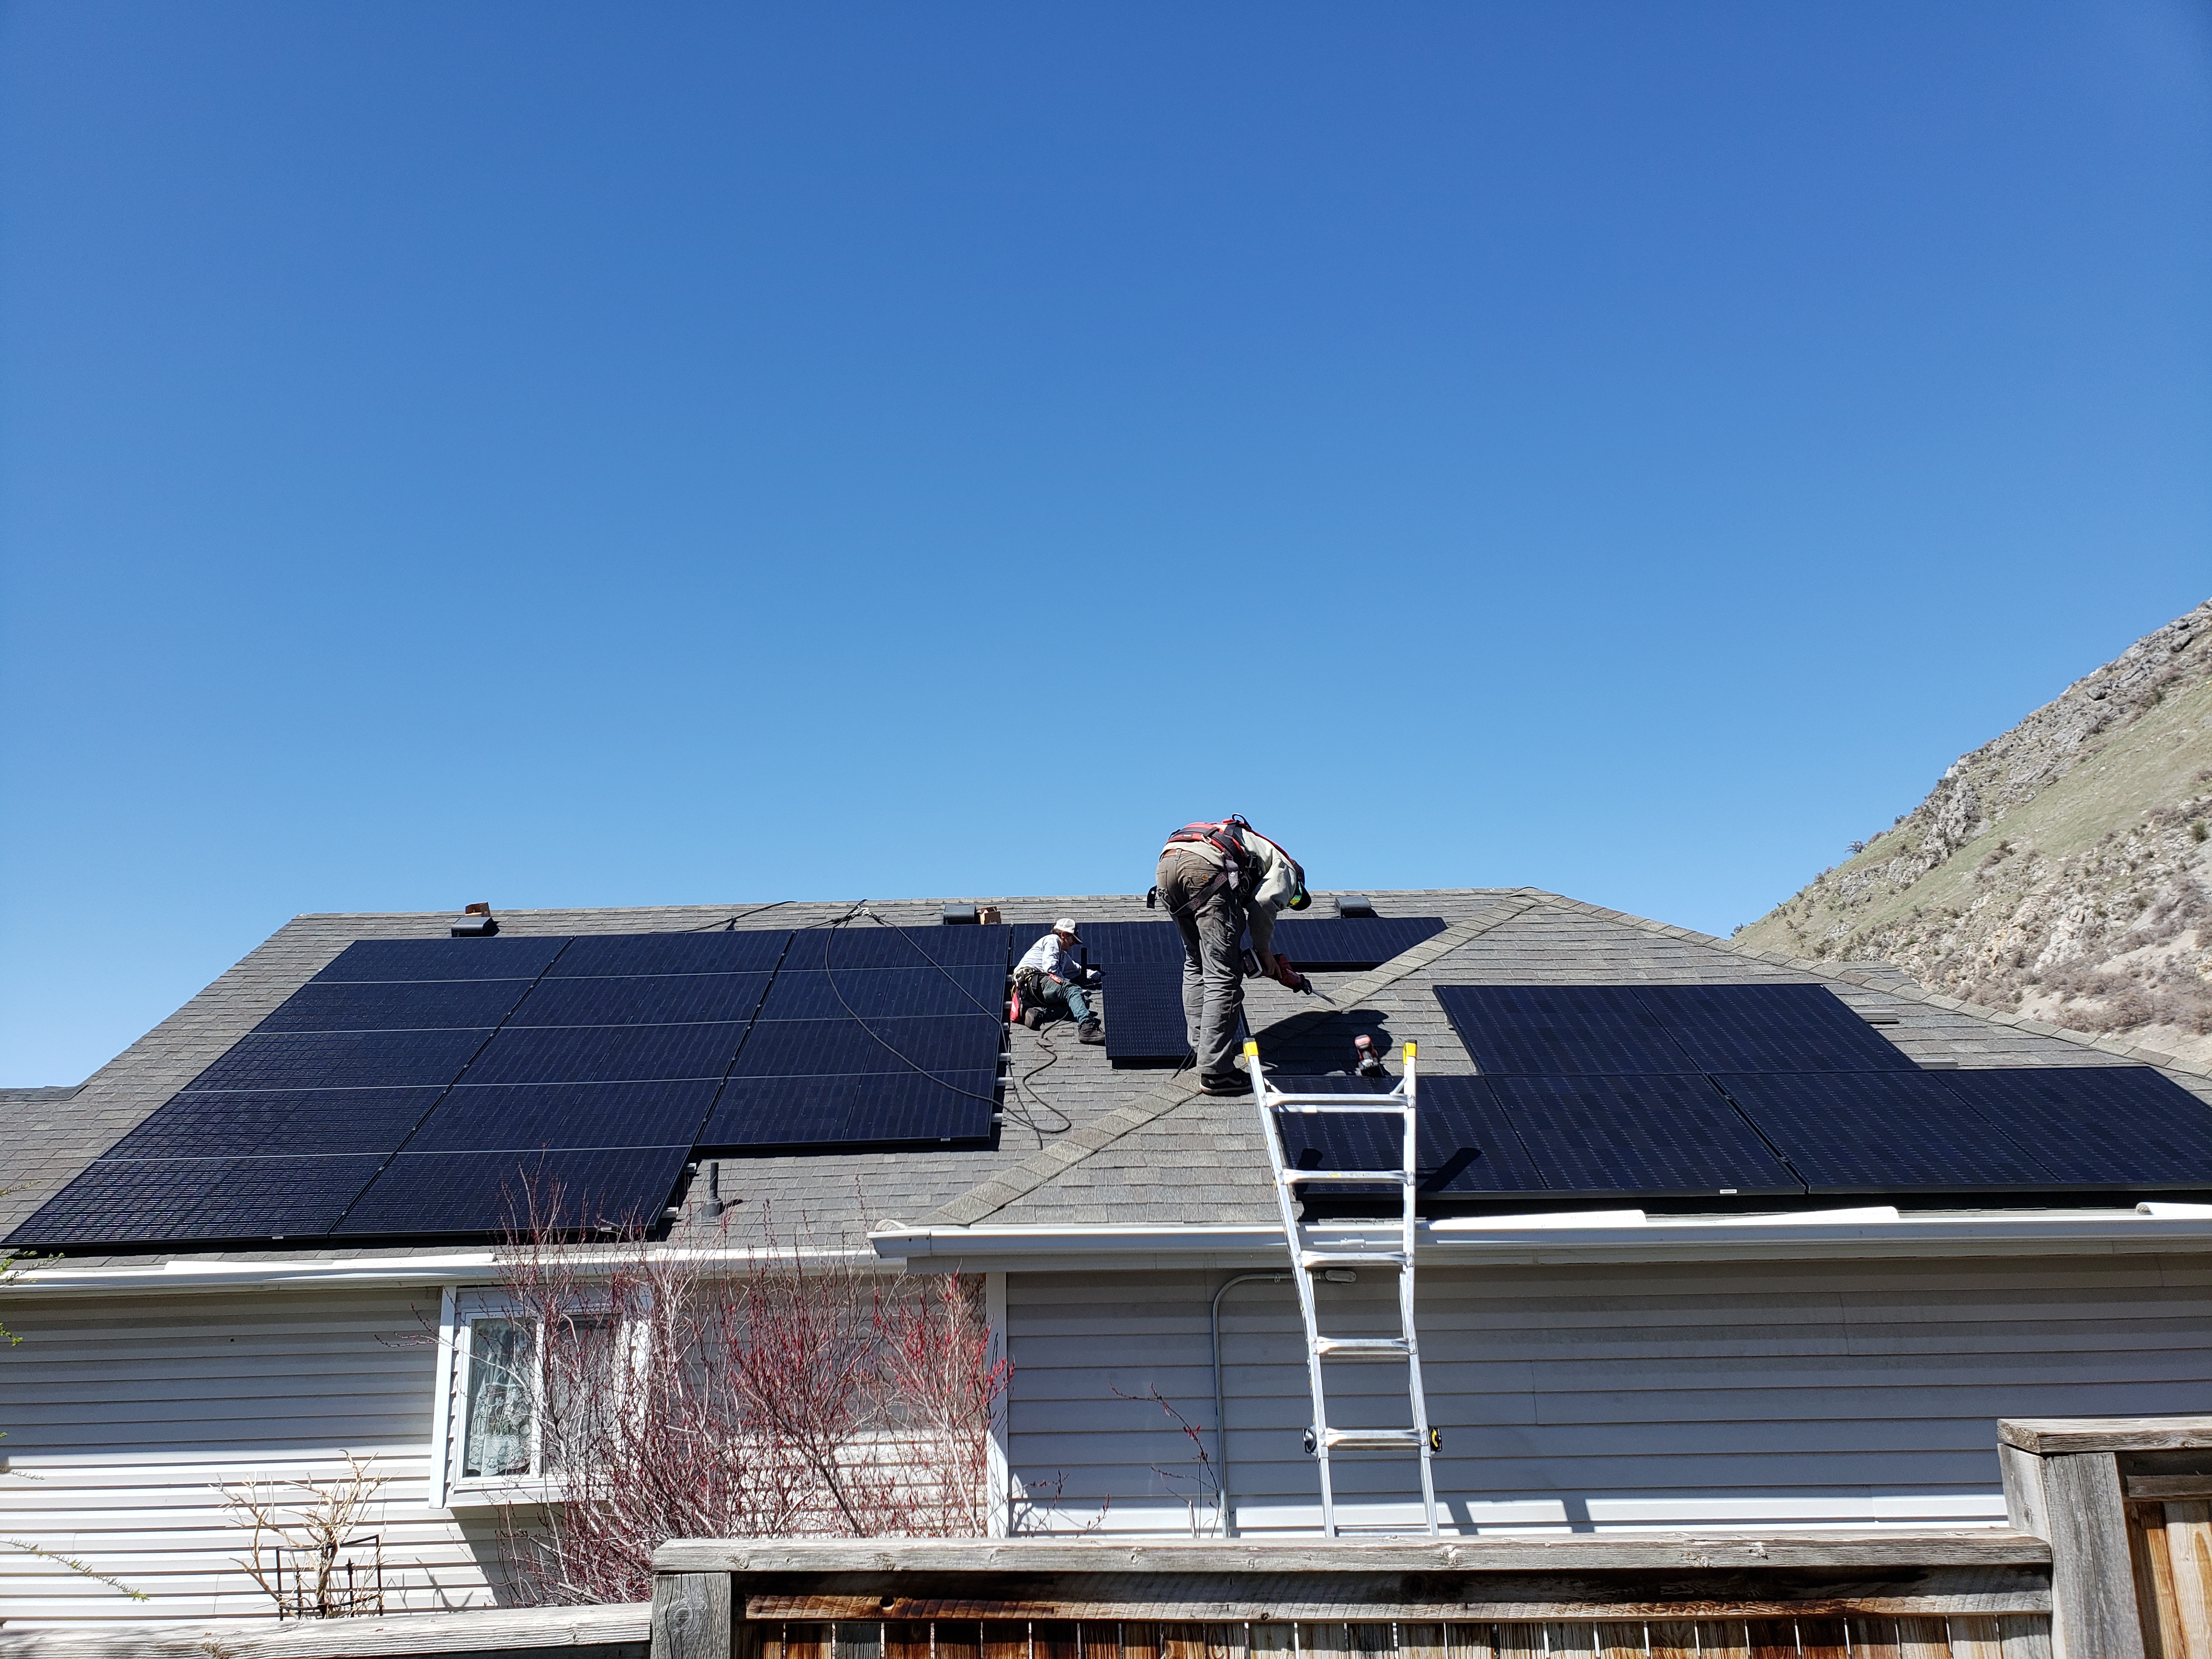
| 6 April 2022 | Installation of panels and finish electrical. | ✓ |
| April 2022 | Provo City Power inspection. | ✓ |
| 9 May 2022 | Received e-mail authorizing system turn-on. | ✓ |
| 9-17 May 2022 | Worked through missing PV meter problem. | ✓ |
| 17 May 2022 | System turn-on. | ✓ |
| May 2022 | System generating up to 60kWh on sunny days. | ✓ |
| February 2023 | Installation of Enphase battery. | ✓ |
| May 2023 | Commissioning of Enphase battery. | ✓ |
Observed during installation...
- SolaDeck™ junction boxes, black junction boxes up on the roof, tie all cabling in it to two strings each to a 20 amp breaker down at the combiner panel. These SolaDeck™ boxes end up under panel groups and are installed on the roof like vents in the sense that they penetrate, but do not lead to leaking.
- The DC/AC inverters are installed mounted to the rails, one per panel. This means that each panel is inverted and one panel shaded from the sun won't "take out" the effectiveness of any other panel in full sun. In fact, the granularity of this is at the "sub panel" level and even shaded cells don't ruin the rest of the panel. This is what you get when you spend real money for real panels (unlike the ones I have experienced previously).
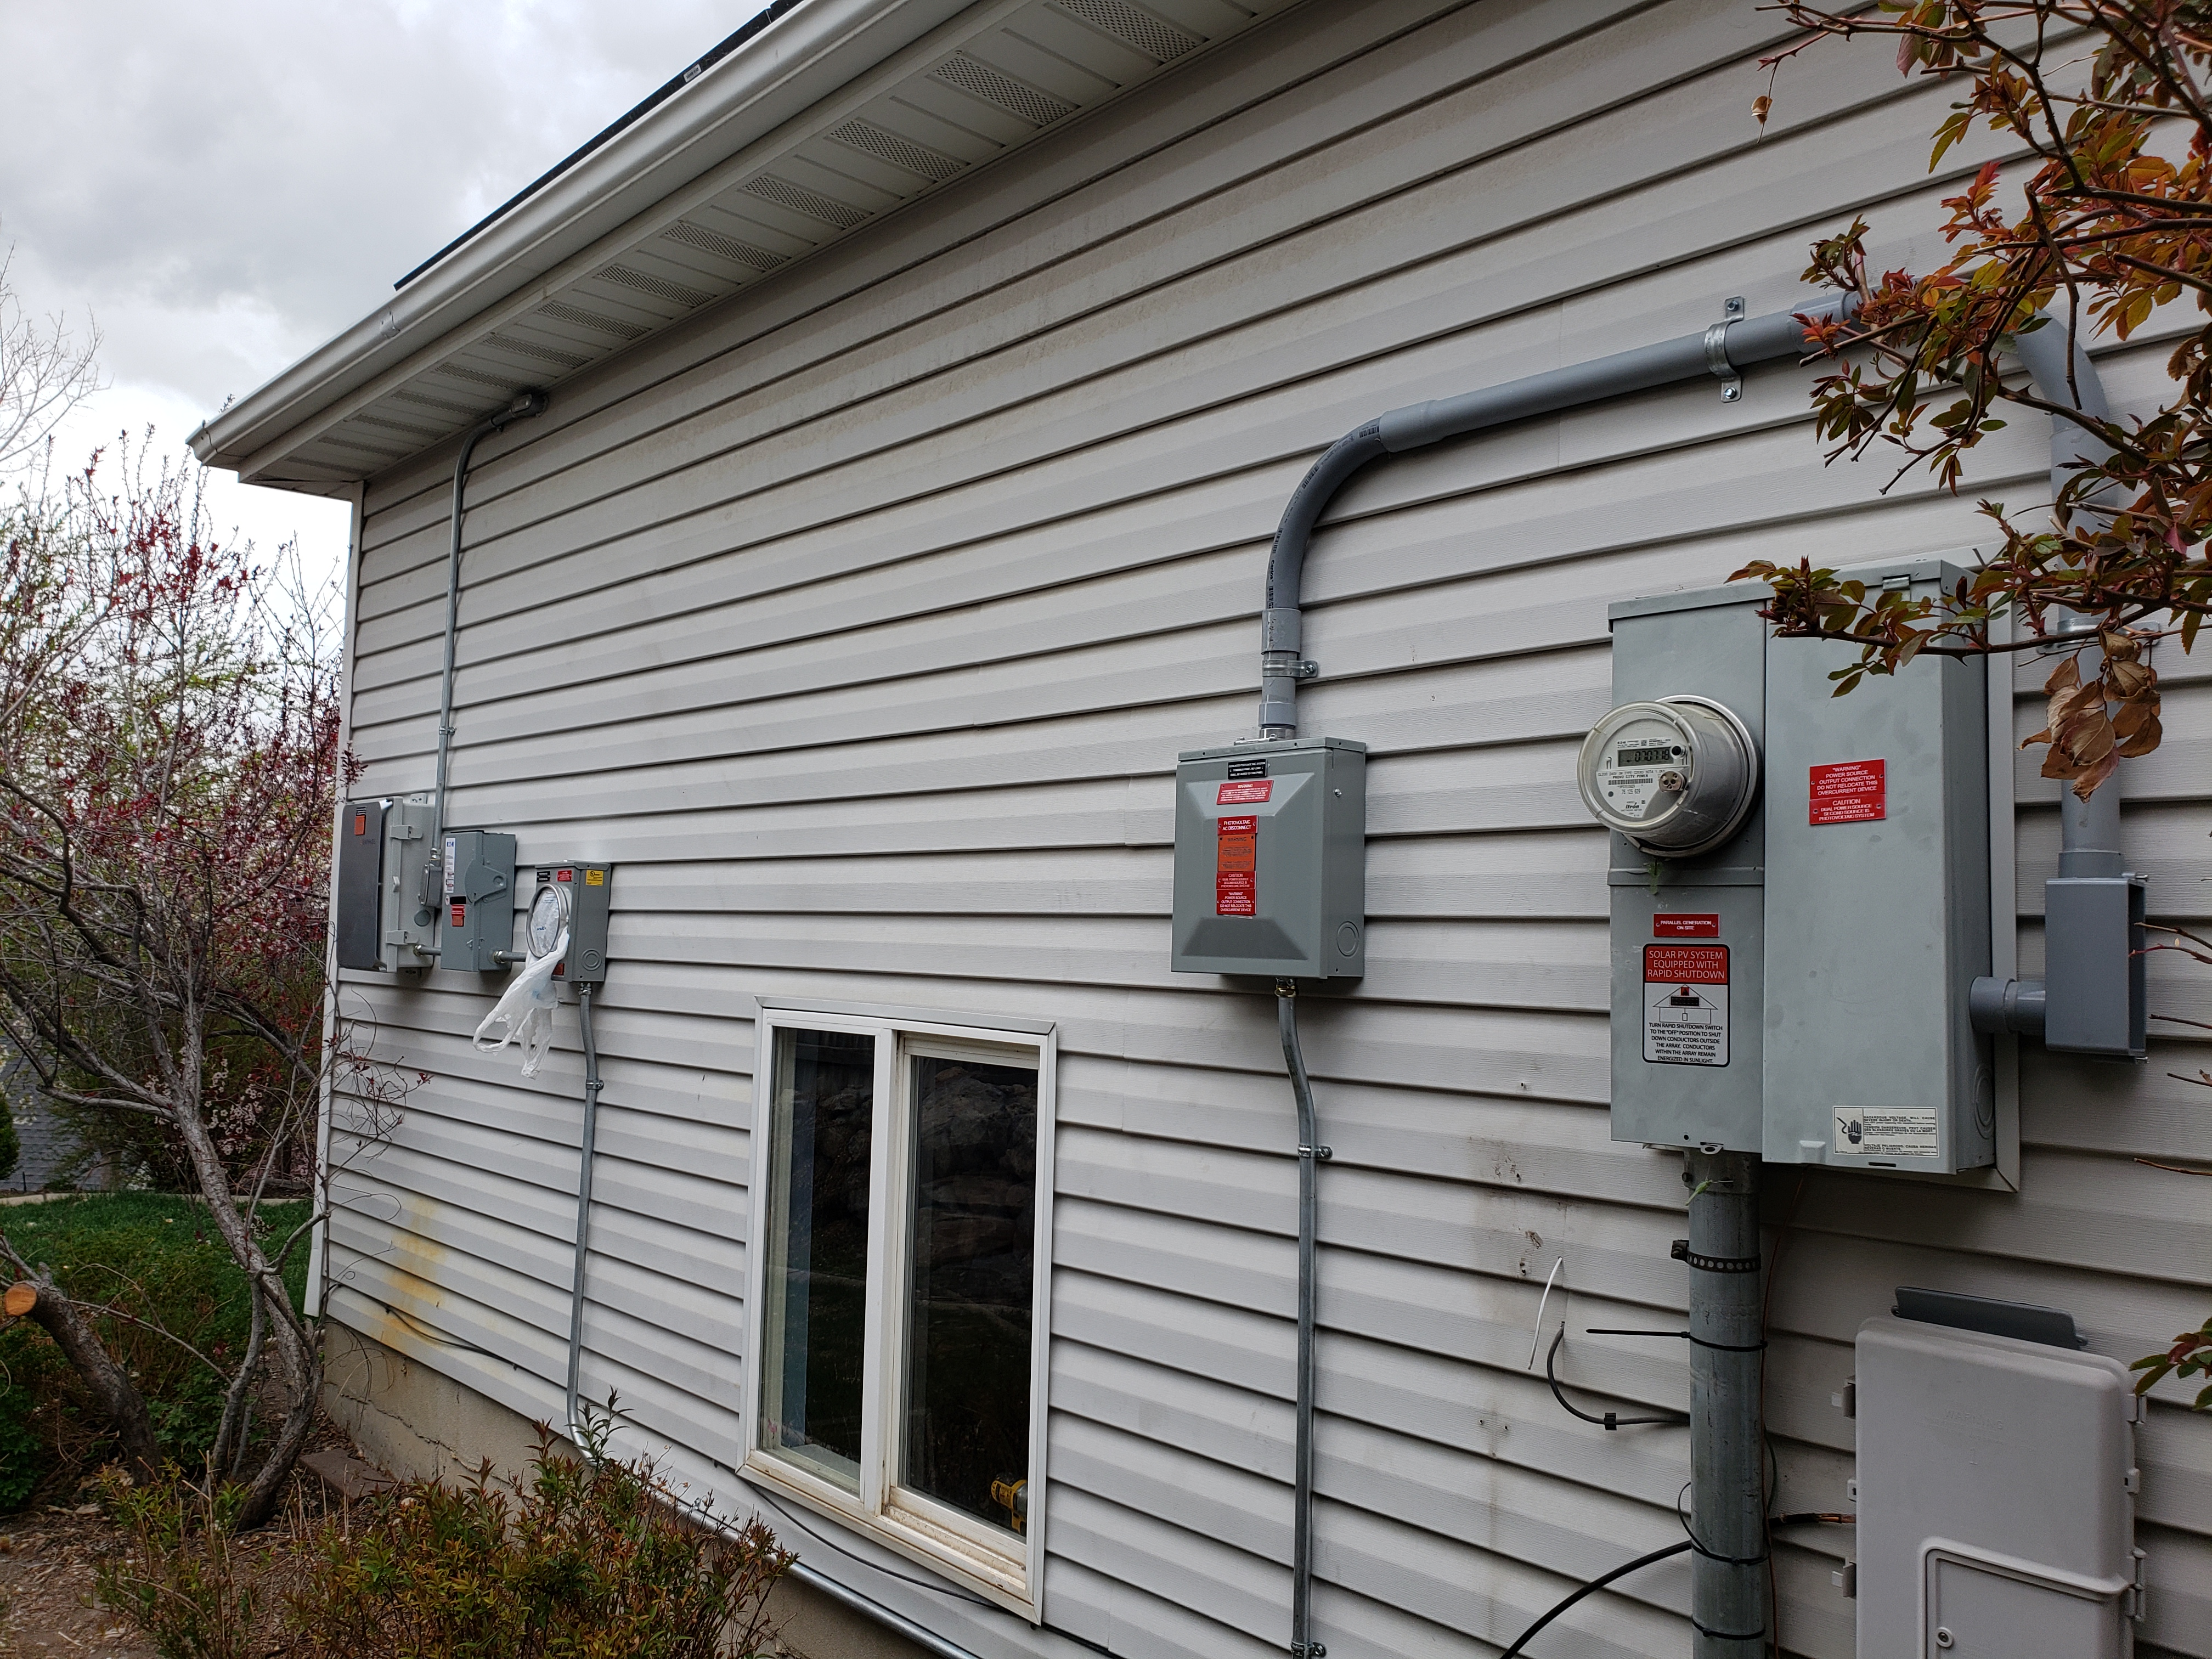
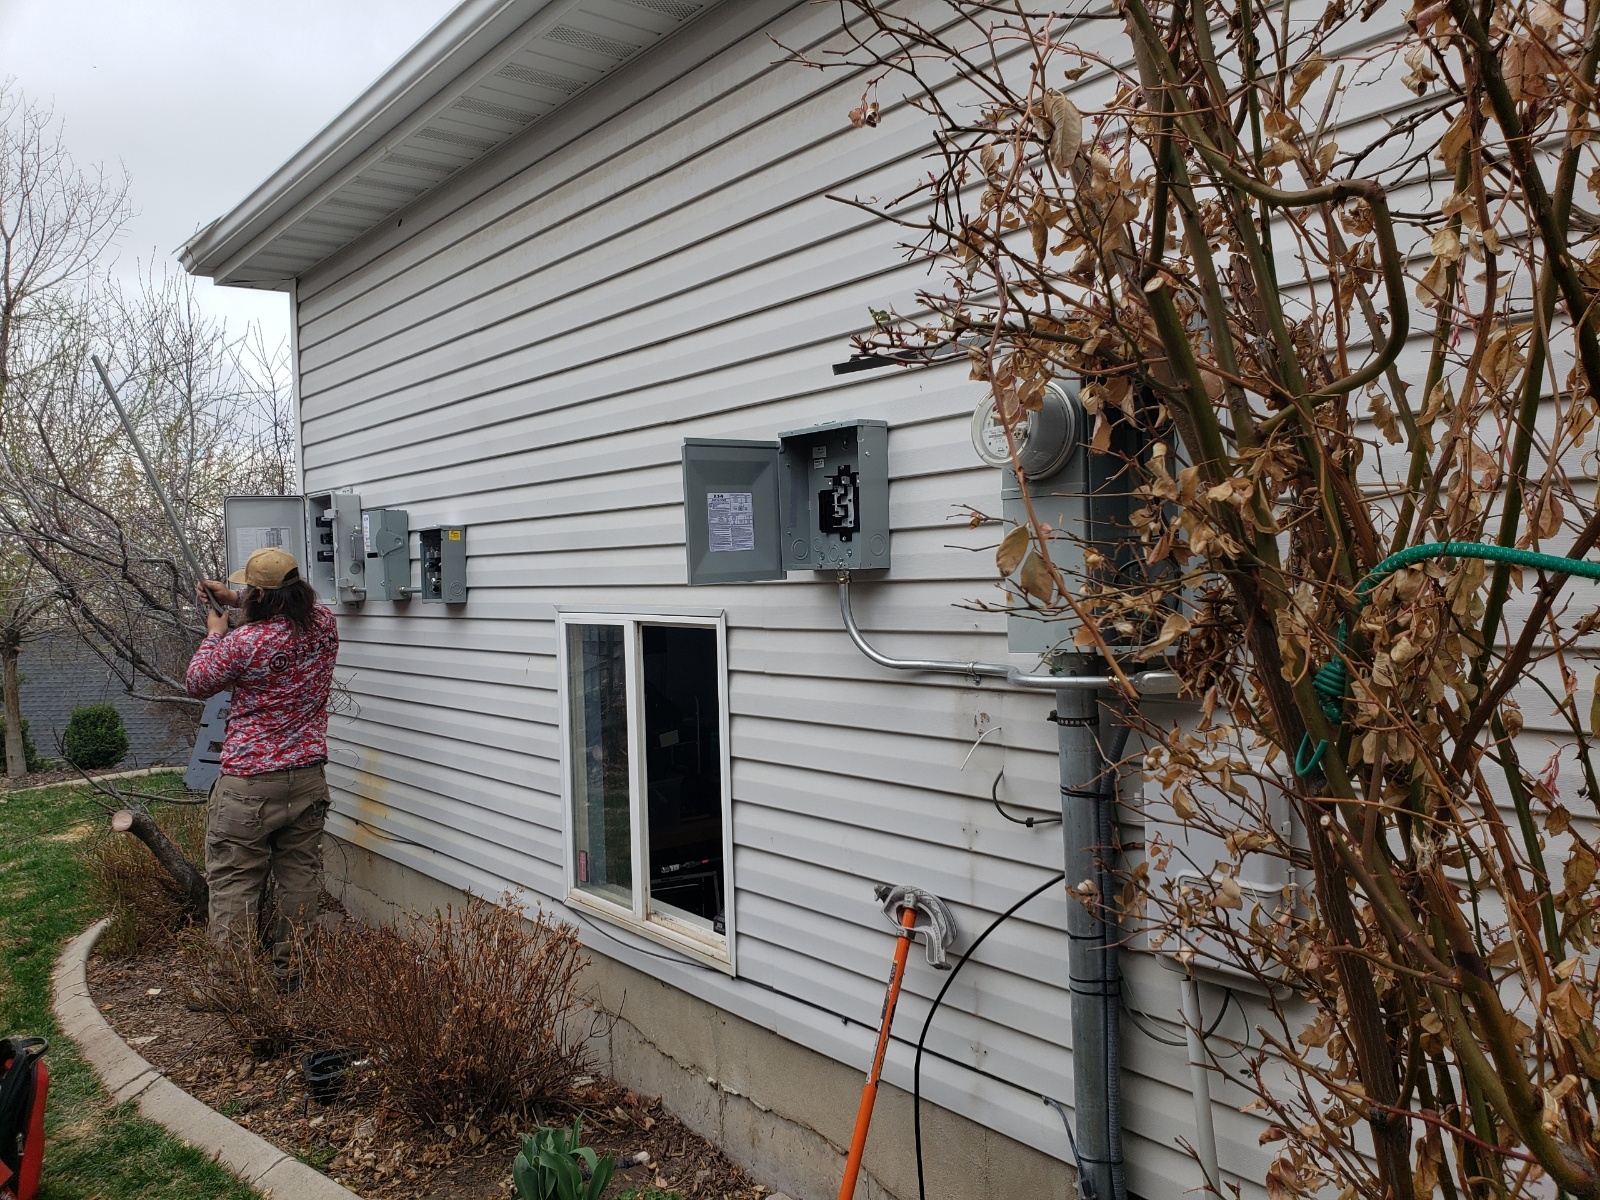
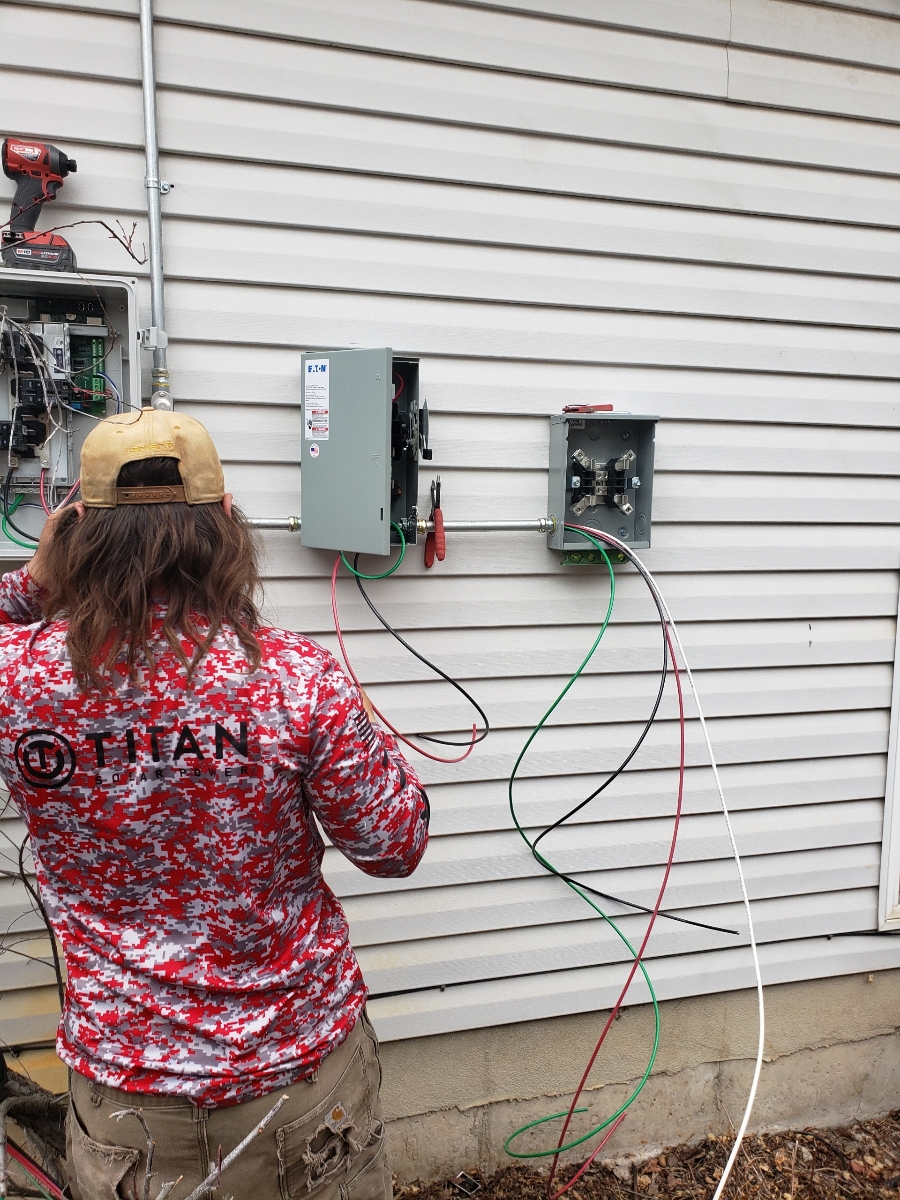
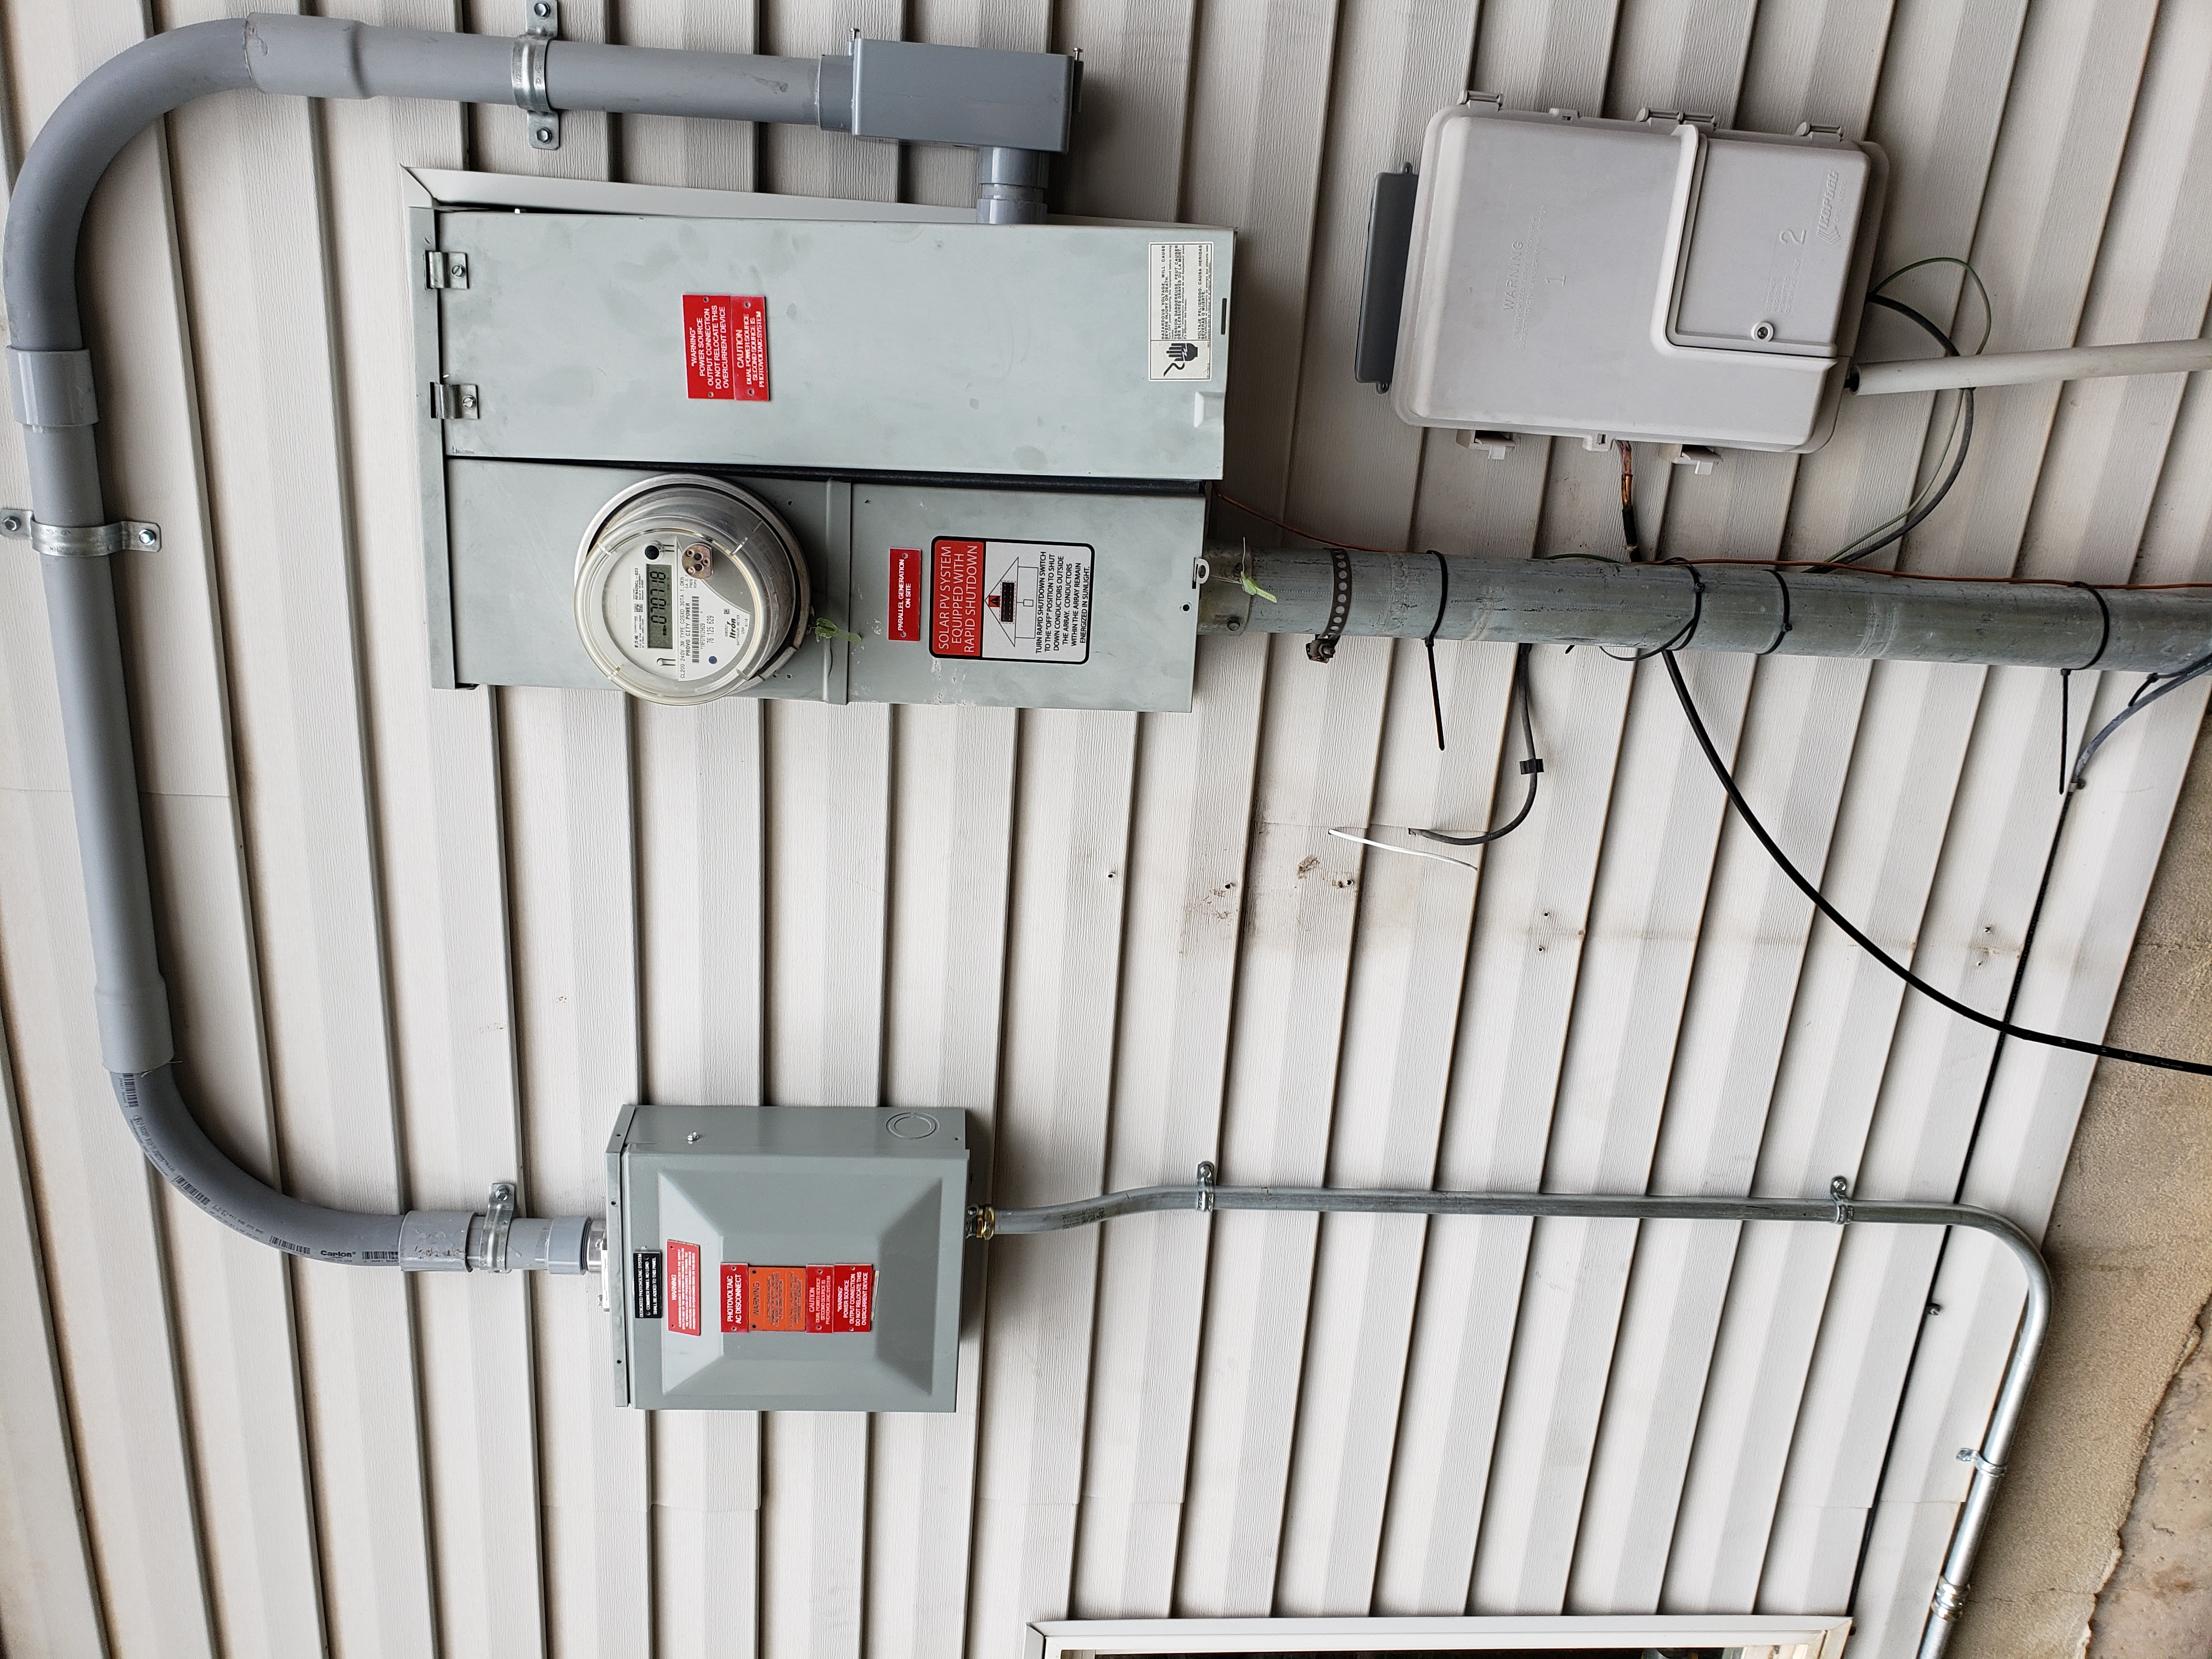
- From left to right on the outside of the south wall of the garage, here is
the electrical installation:
- Enphase Combiner panel—combines the SolaDeck™ boxes from the various panel groups
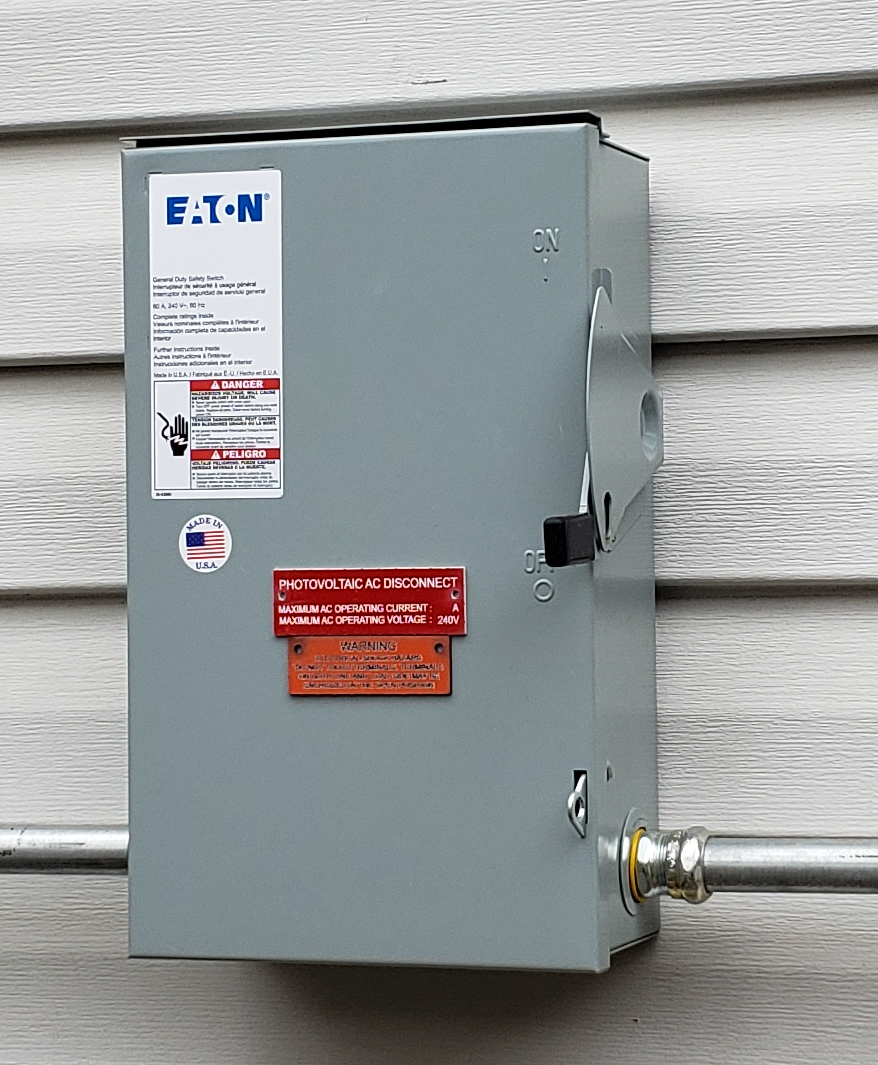
- PV disconnect—rapid shutdown for the solar installation)
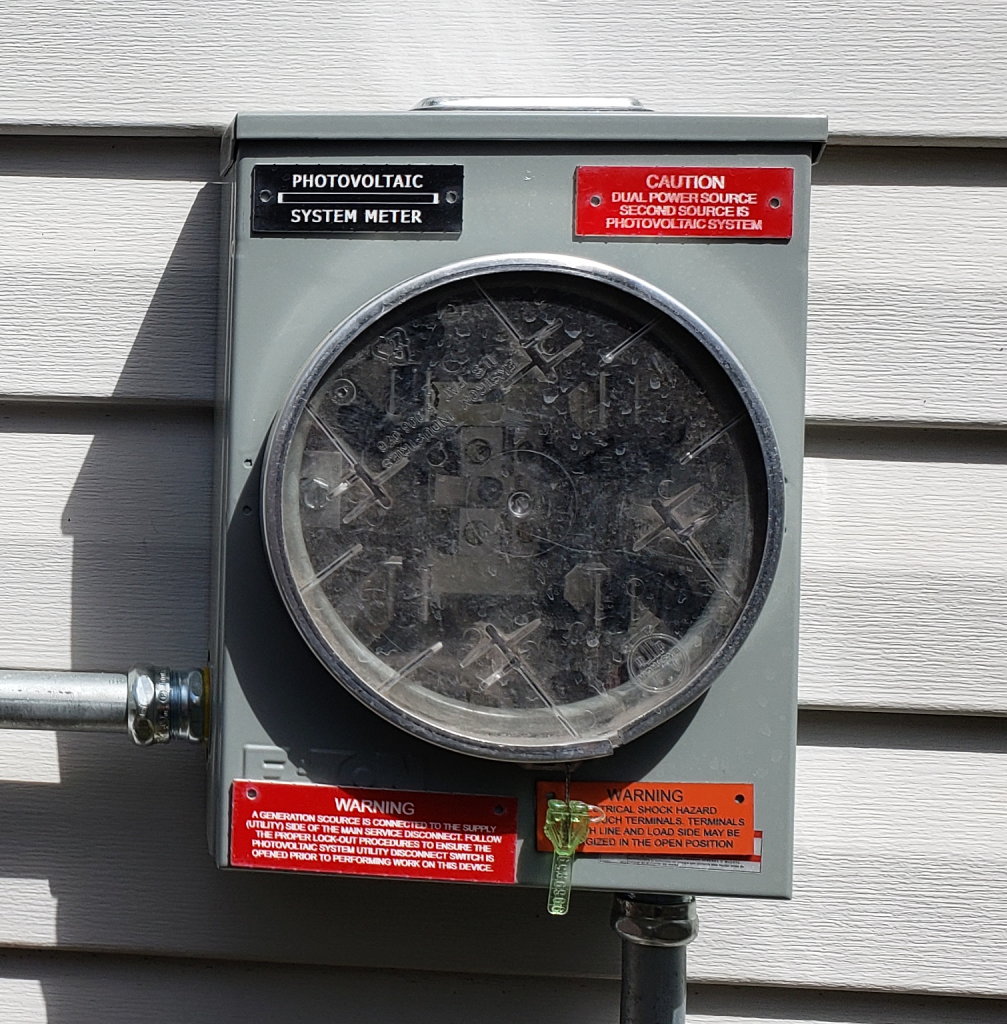
- PV meter base—for the solar installation
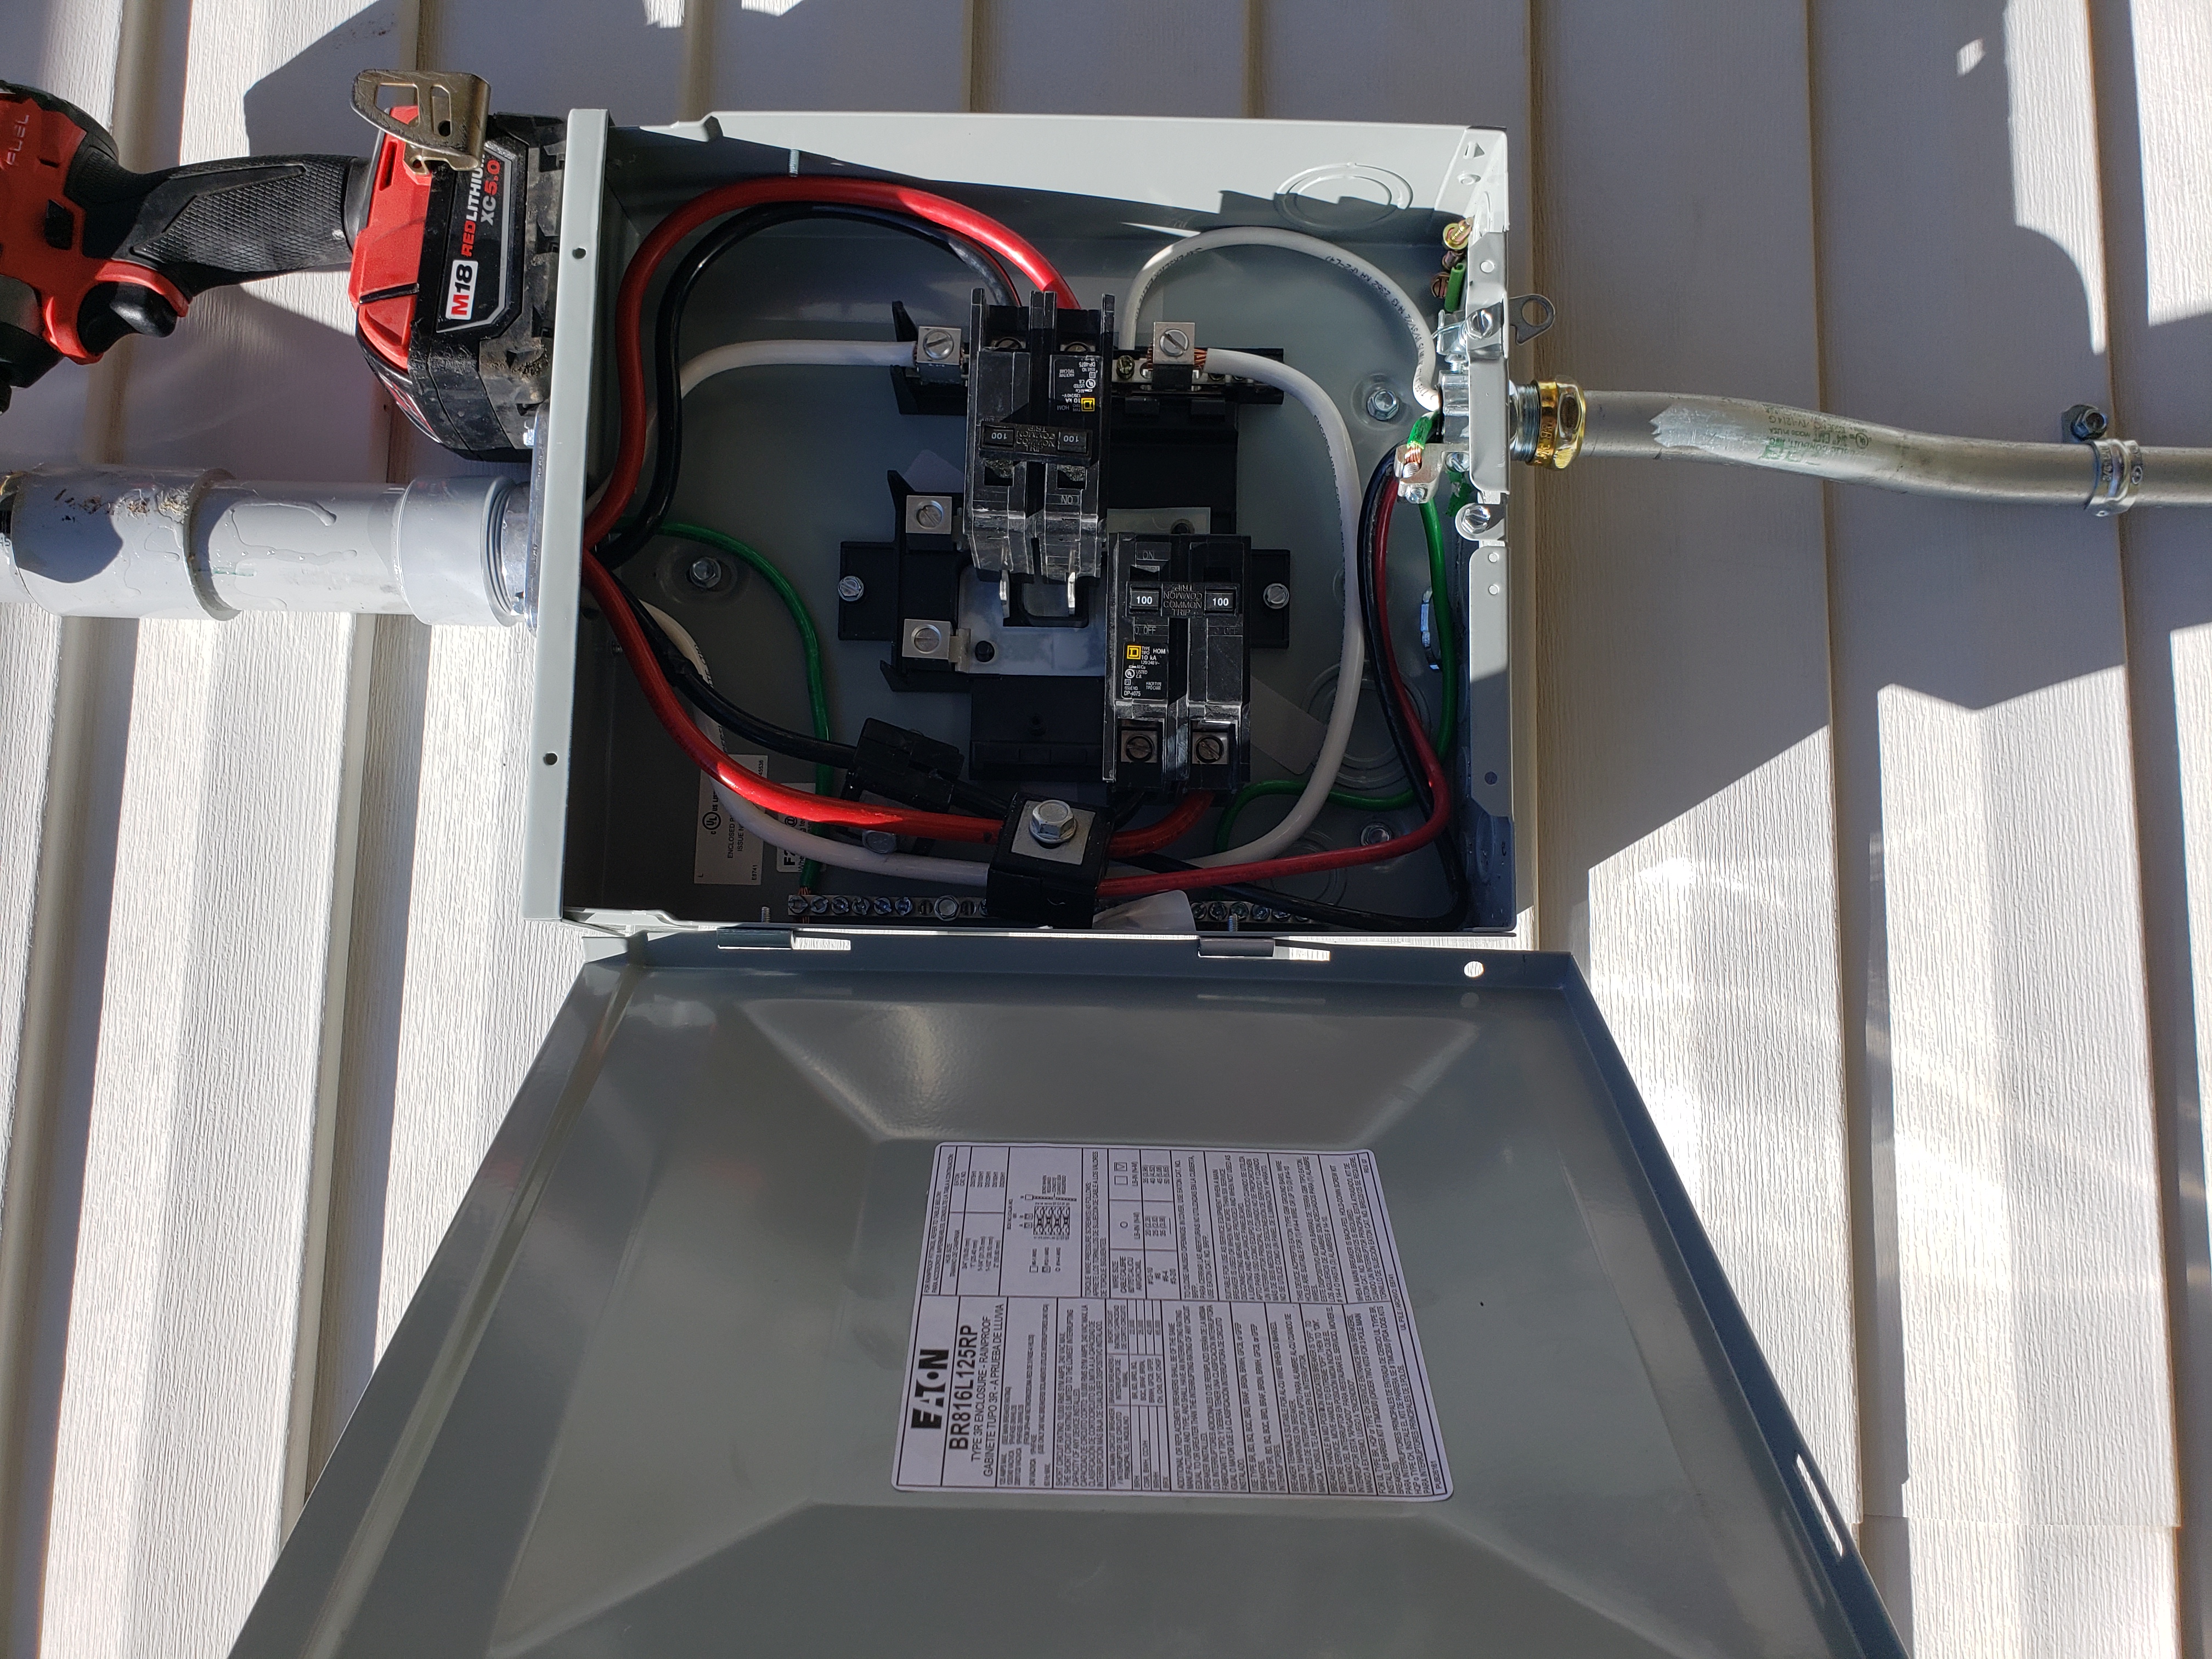
- Service-entrance loop-back subpanel (makes my system unusual)
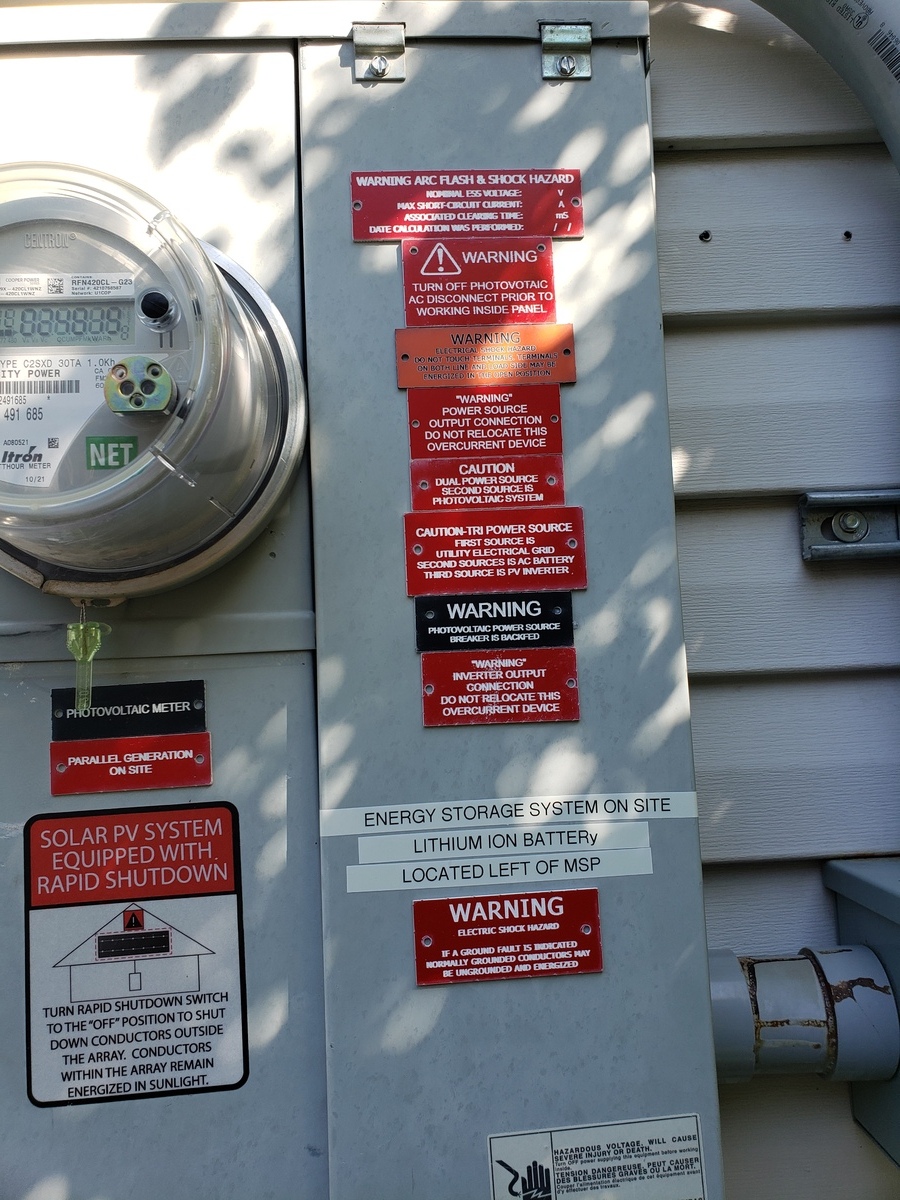
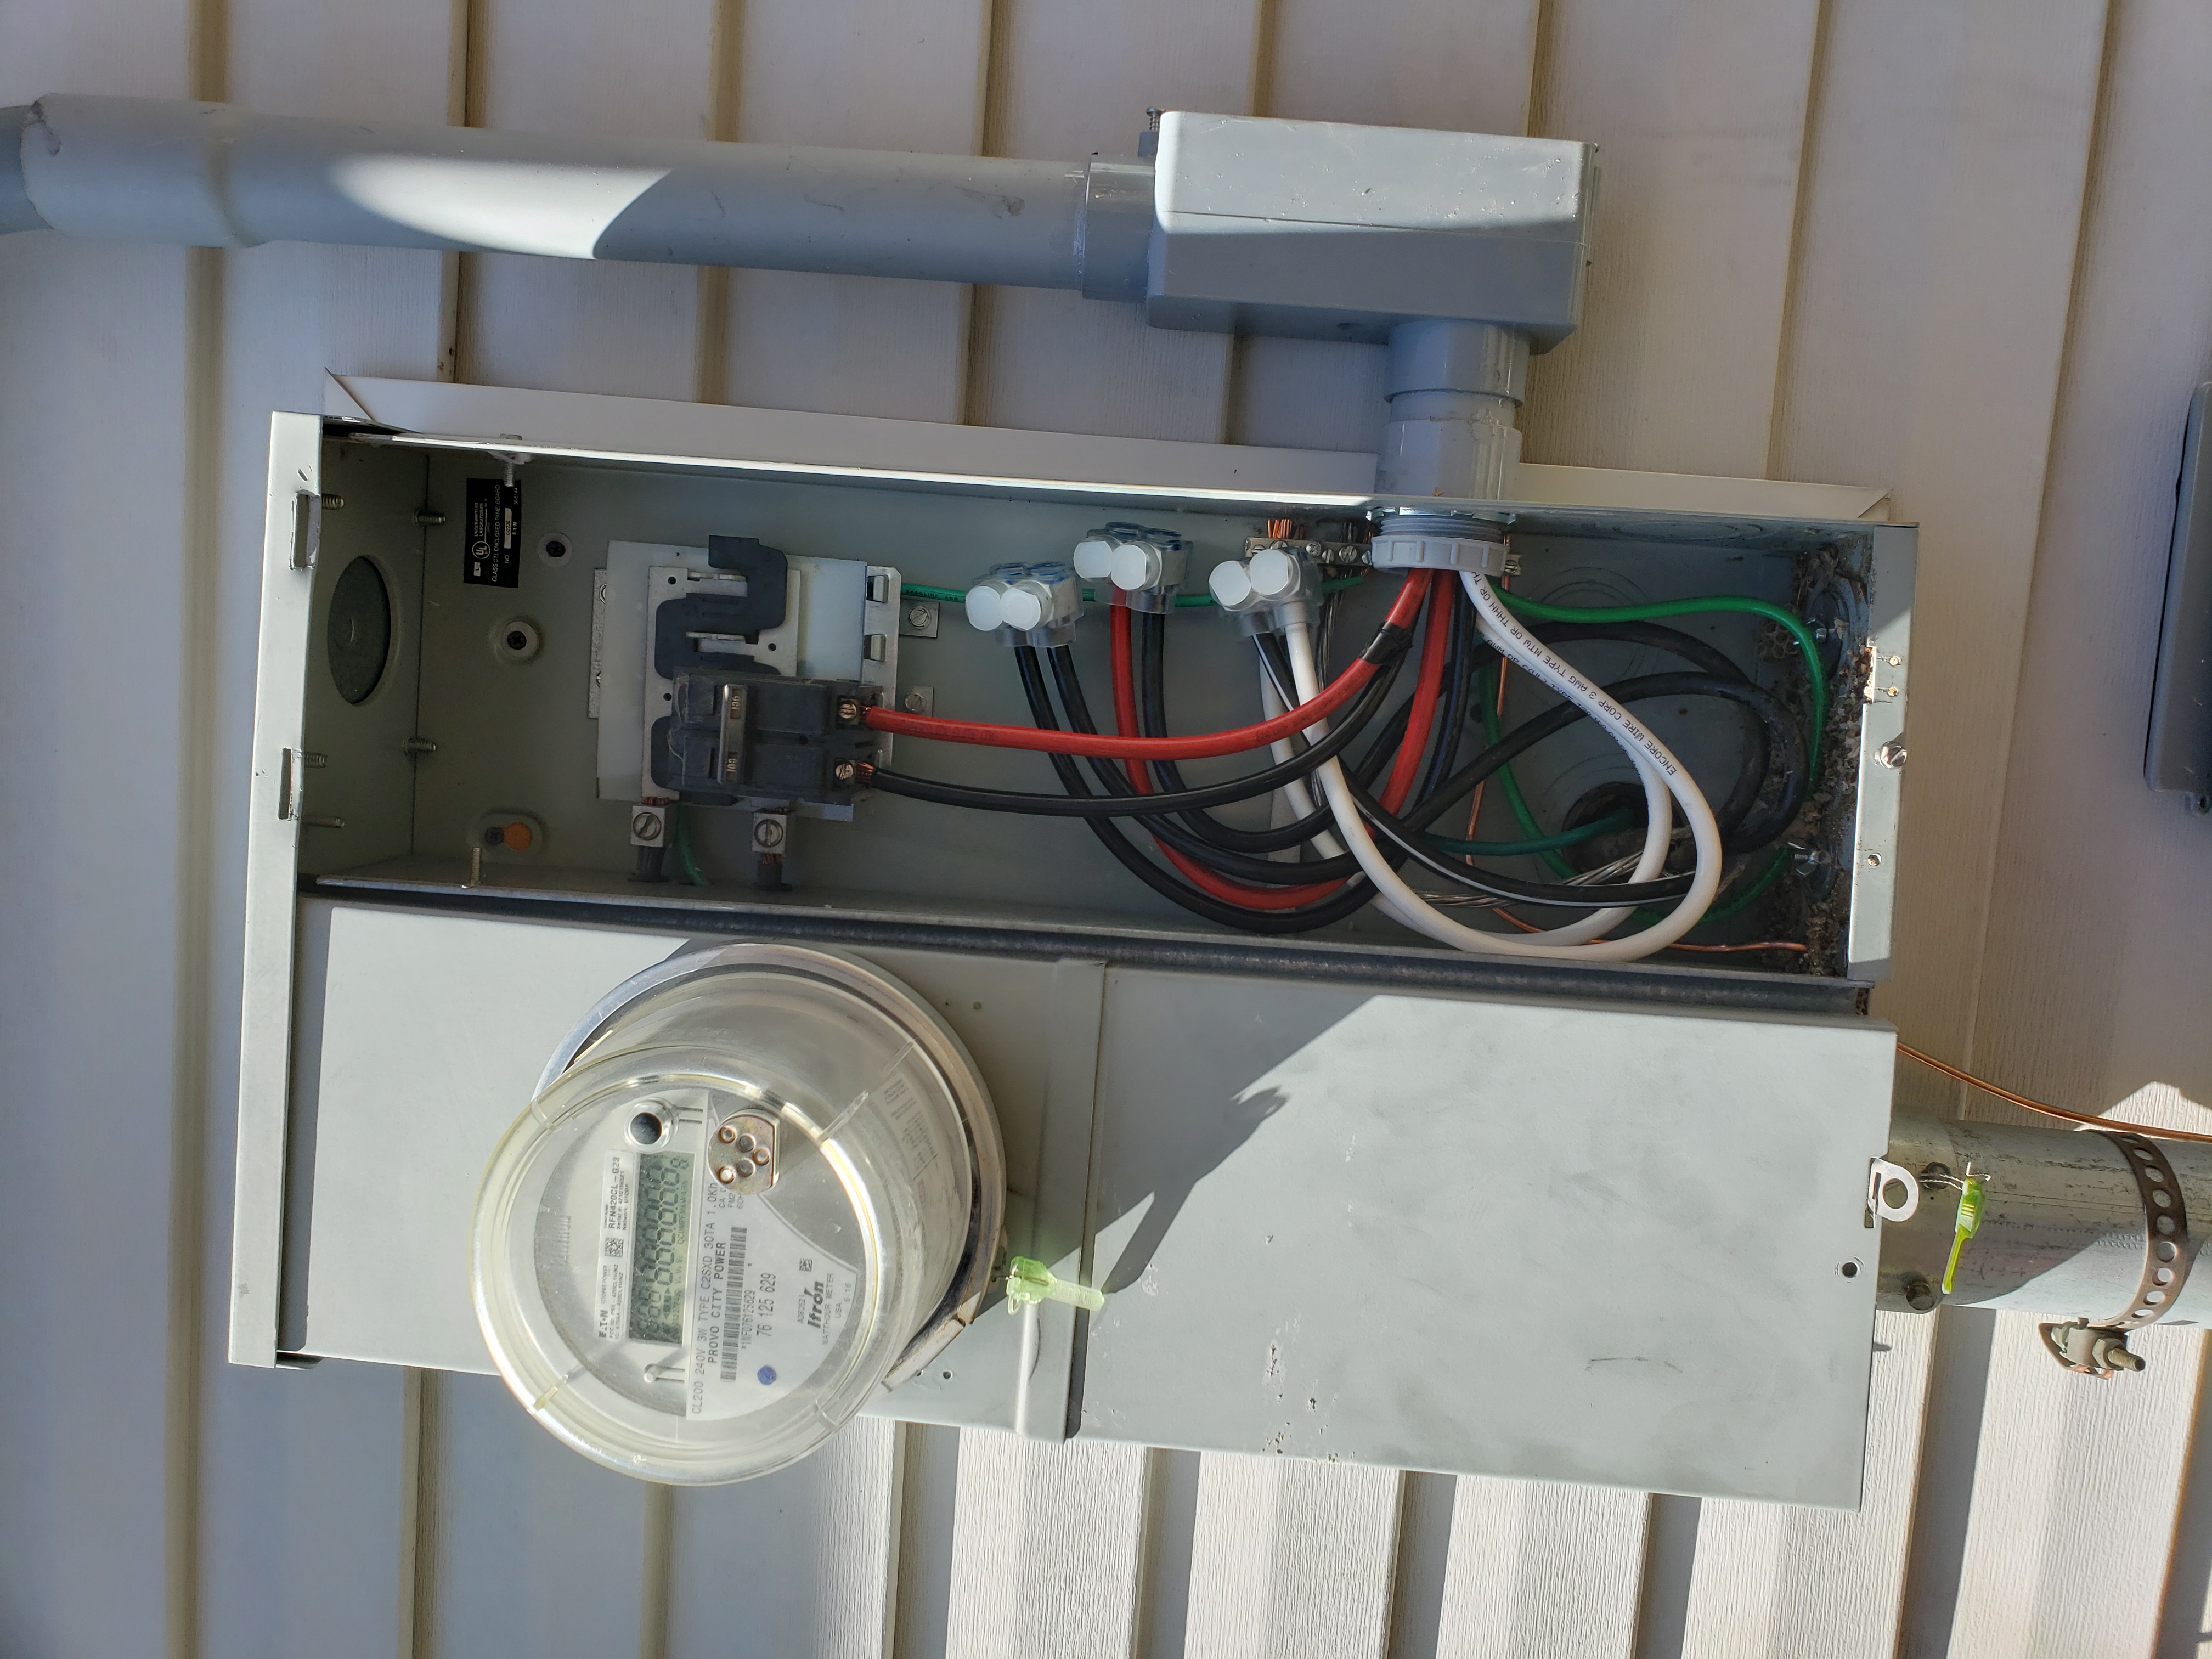
- Original service entrance, but new "Net metering" meter
- Back-up interface (BUI)—not yet featured; will connect including
disconnect when grid down the components belows. In an Enphase system
this is, I think, the Enphase Enpower Smart Switch.
- photovoltaic panels and inverters,
- Enphase battery(ies) and
- Provo City Power grid.
- It turned out that the missing PV meter was not an obstacle, but only Provo City Power was able to impart this understanding.
- The battery(ies), missing so far, will be mounted inside the garage/shop on the south wall (on the inside of where these electrical panels are all mounted as shown near here).
Installation photos...
South wall electrical (May 2025) | ||

Enphase combiner. |

Service entrance. |
Service entrance, detail. |
Various details | ||

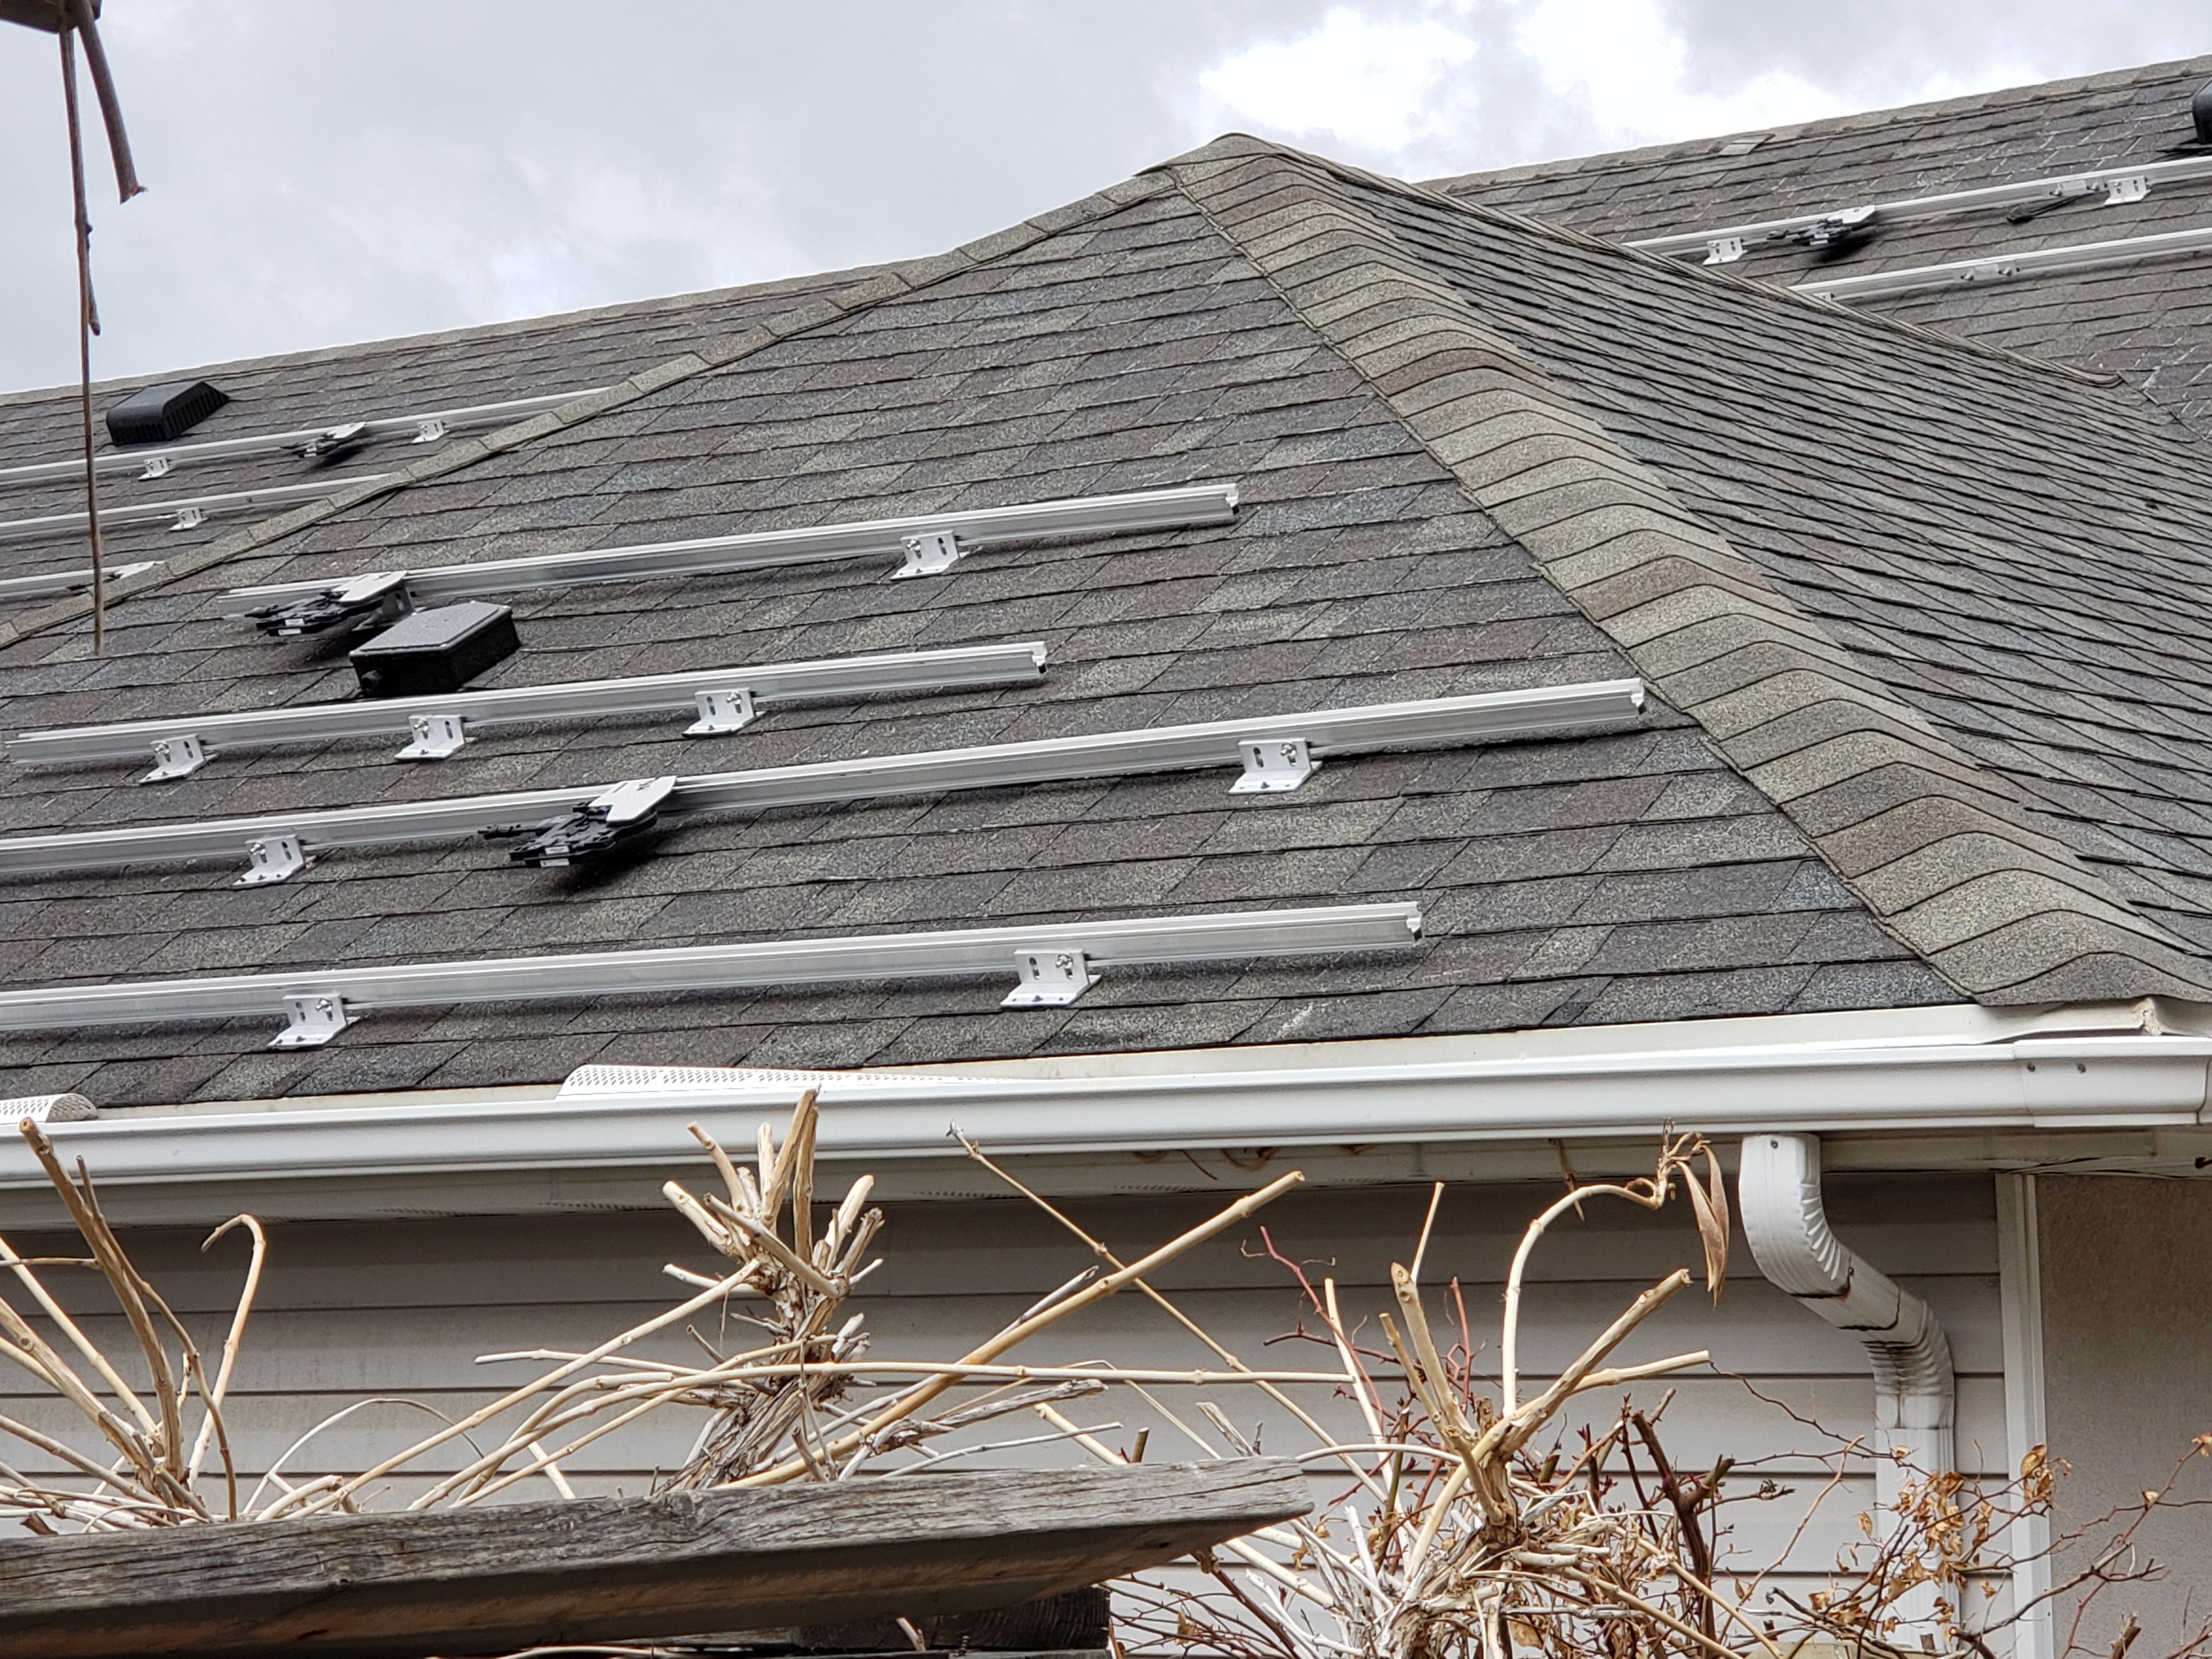
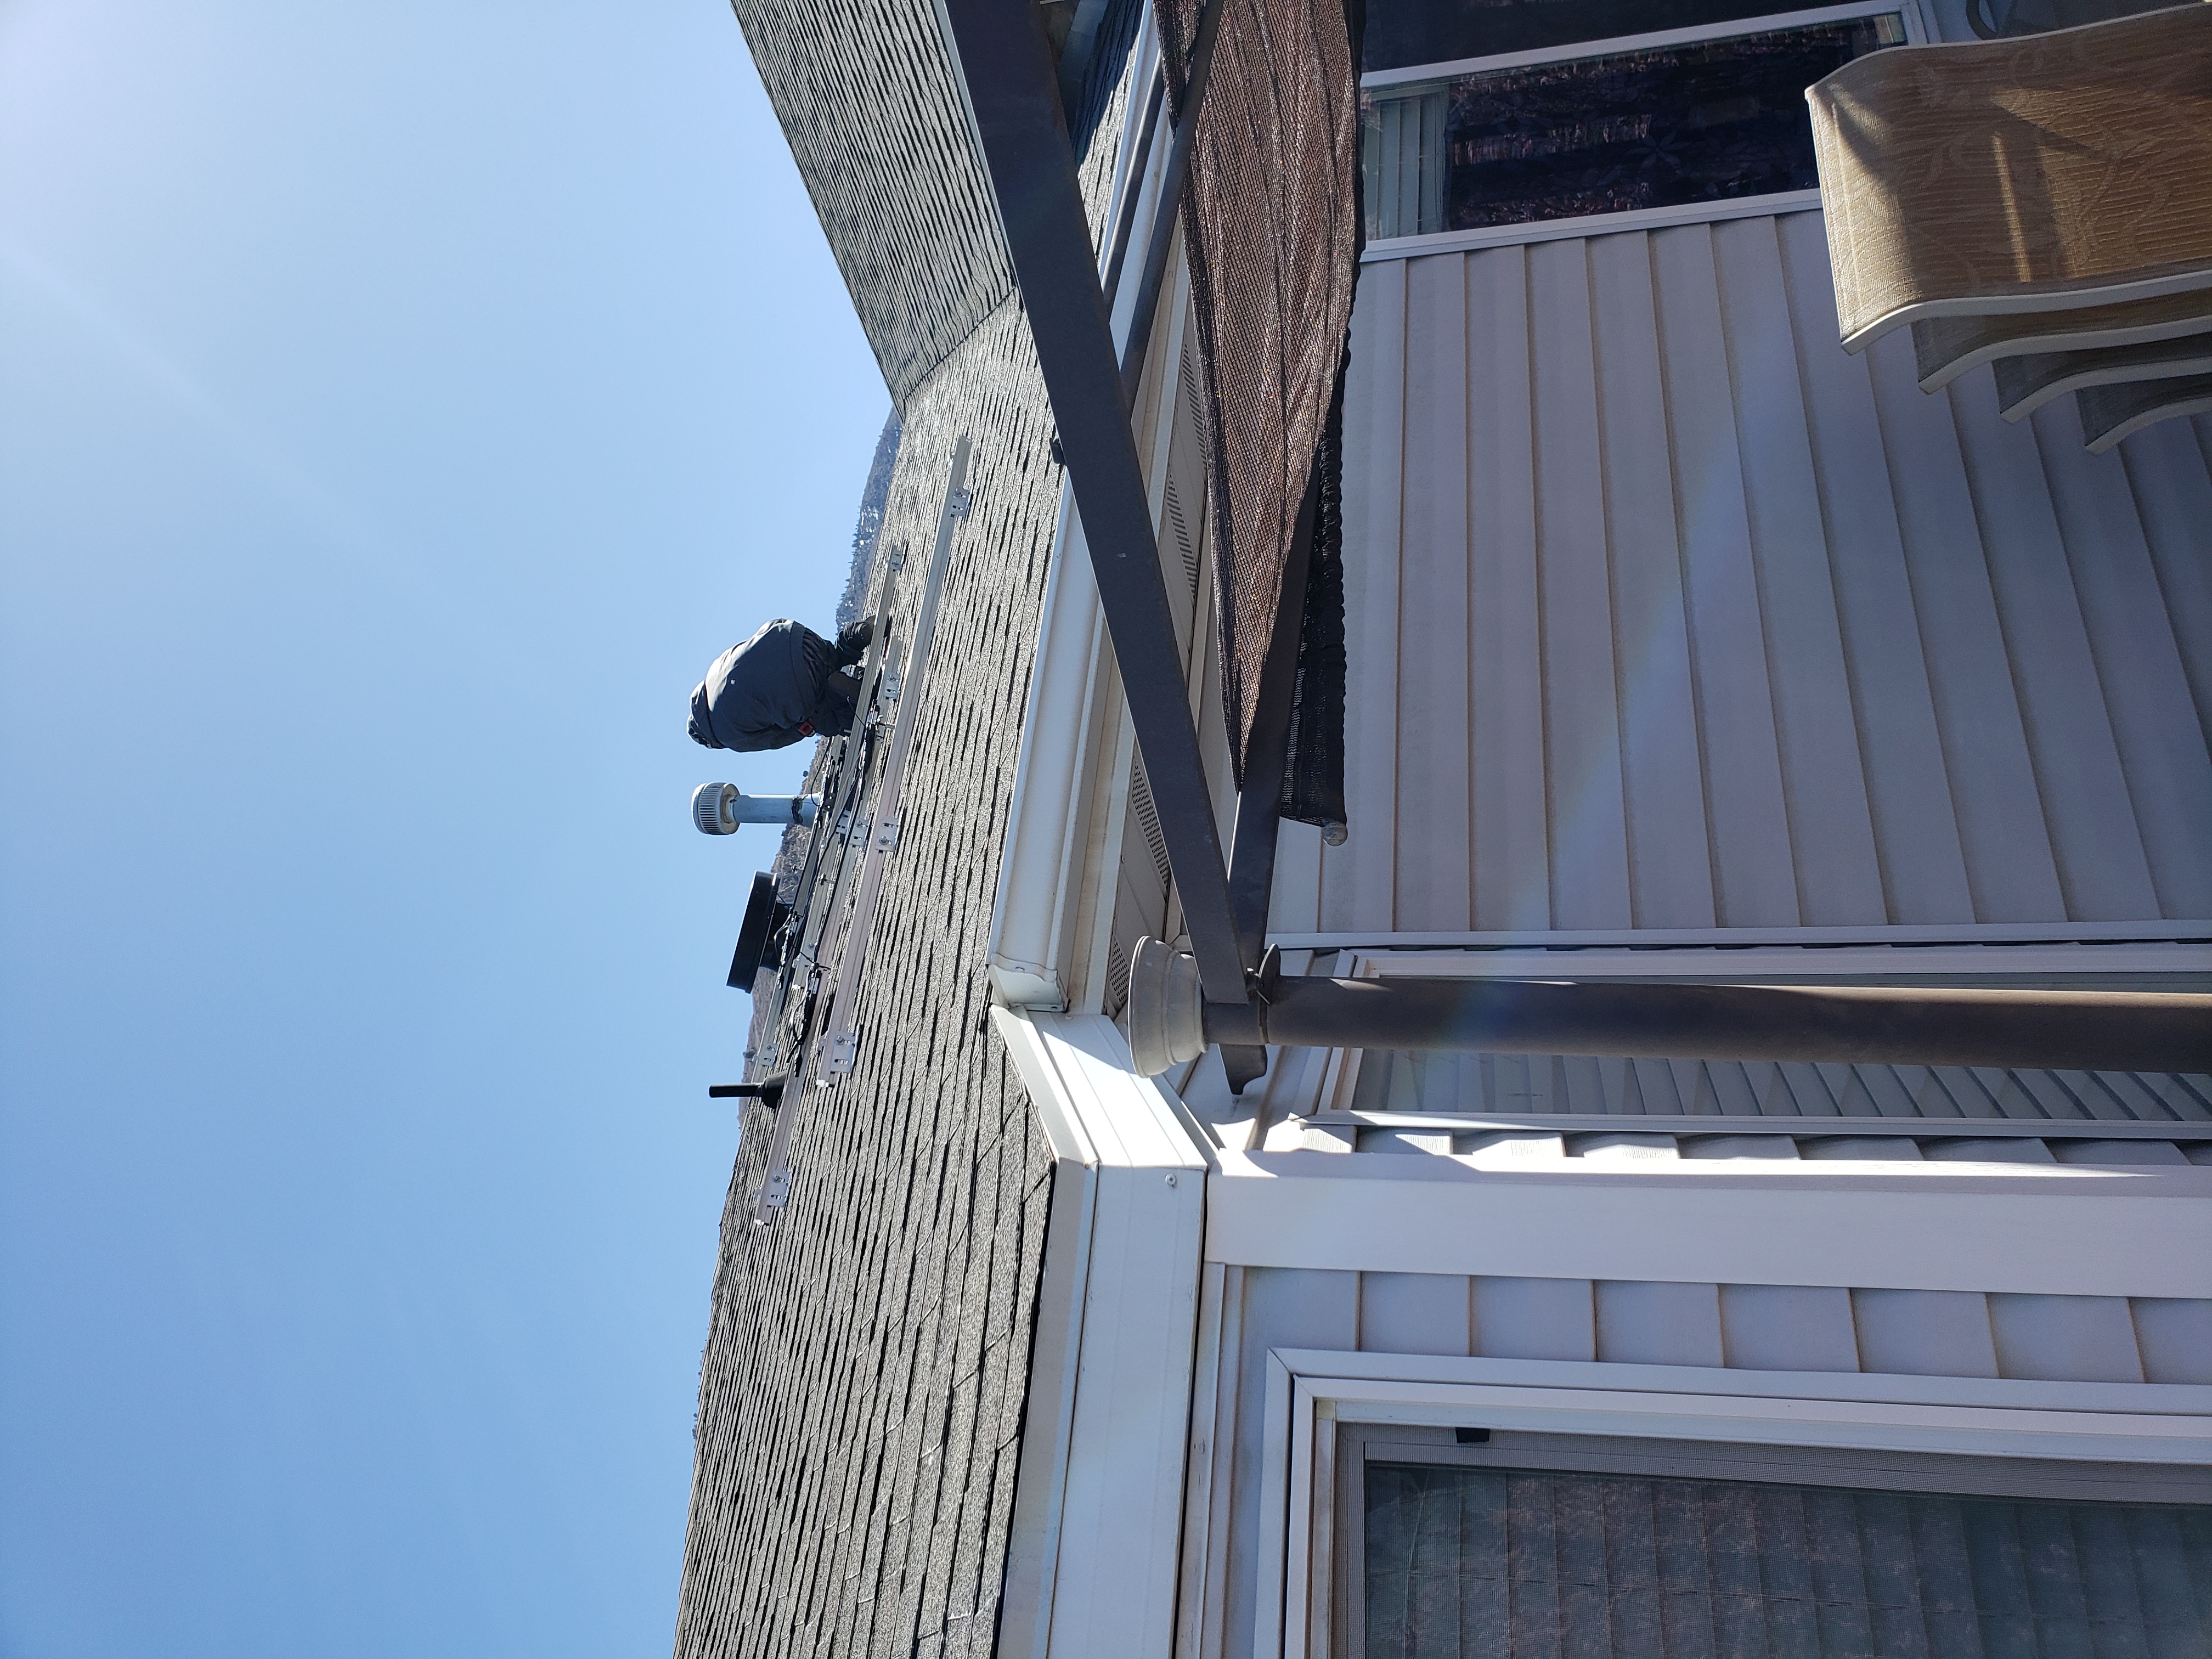
Rooftop rail mount. |
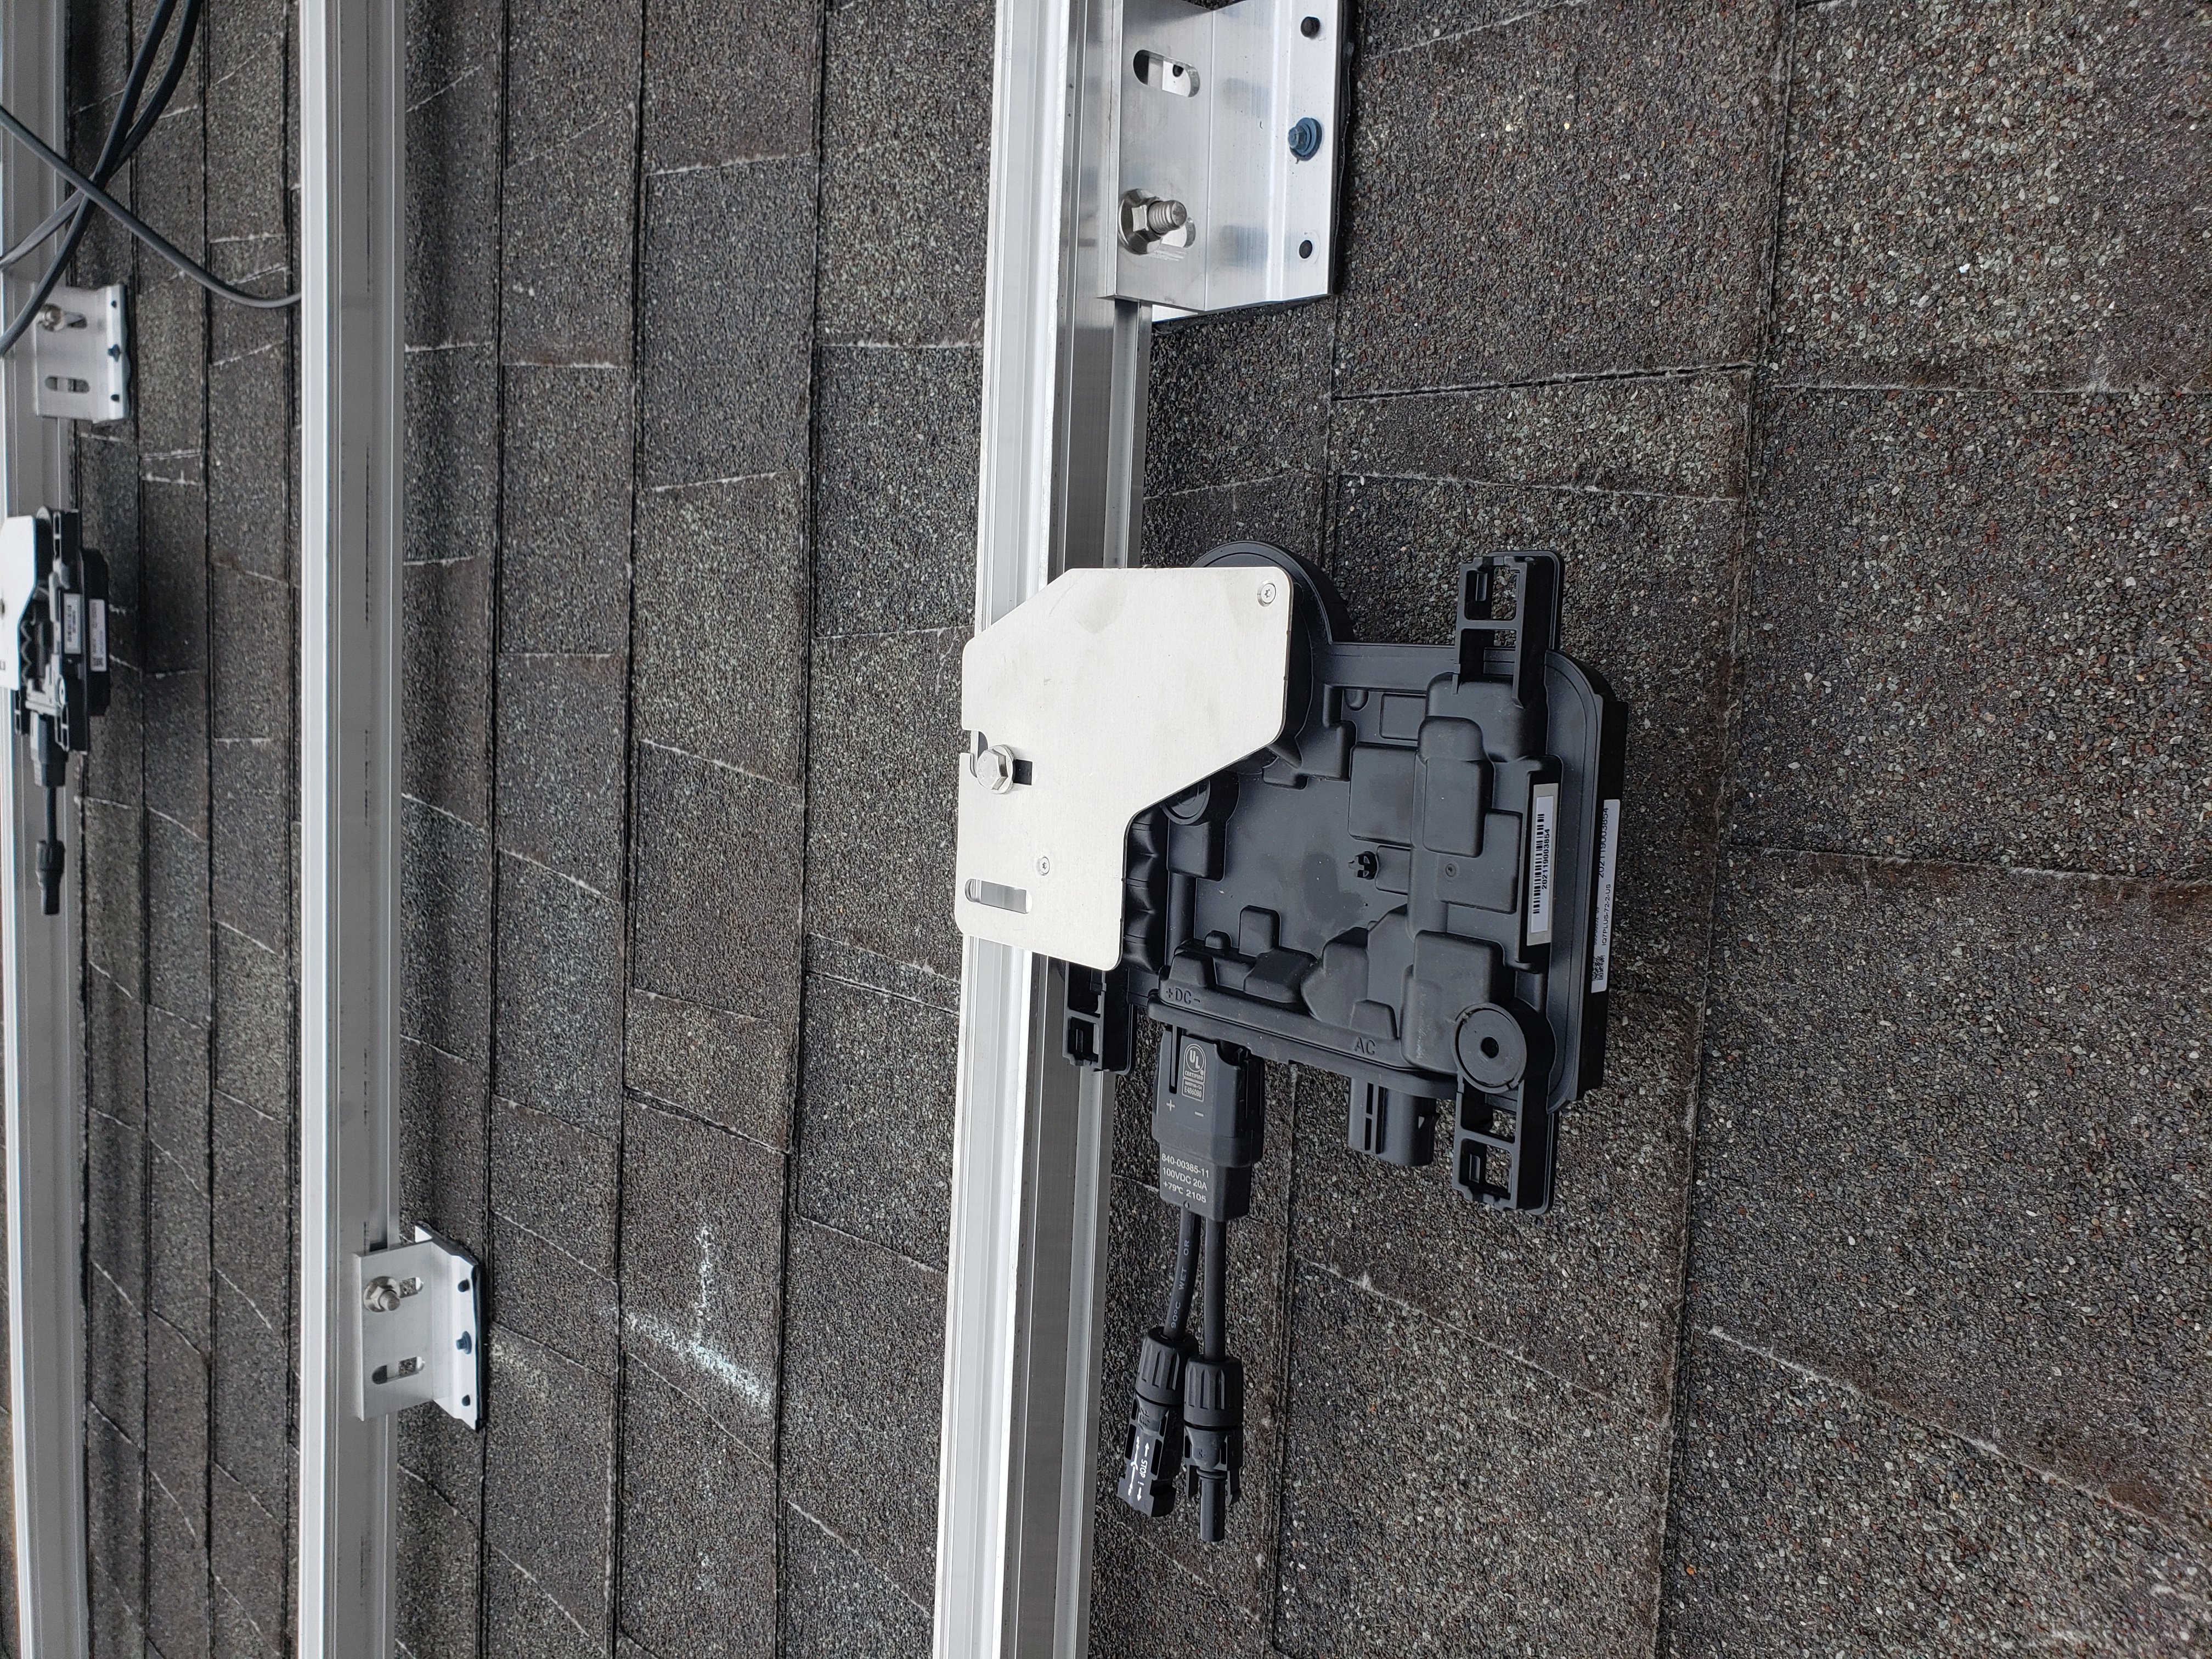
Installed inverter. |
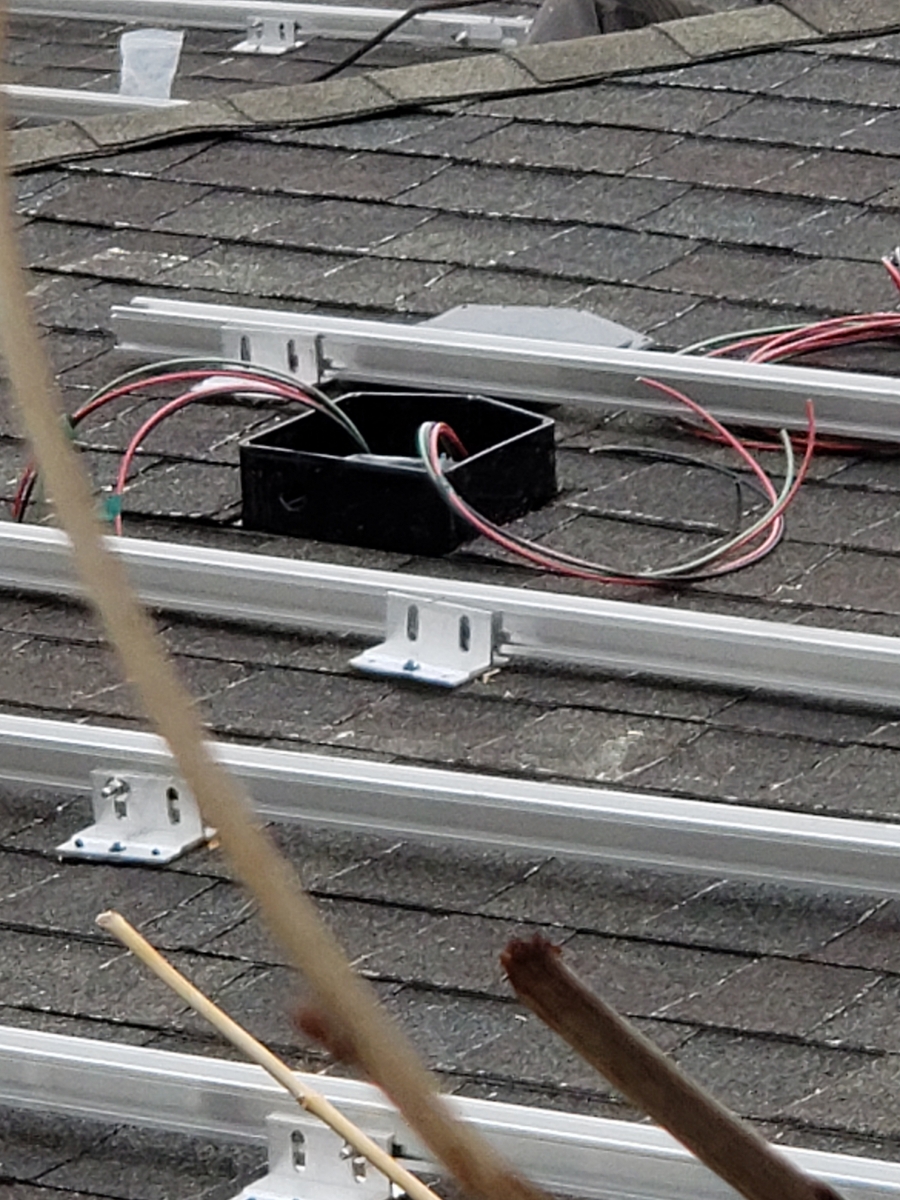
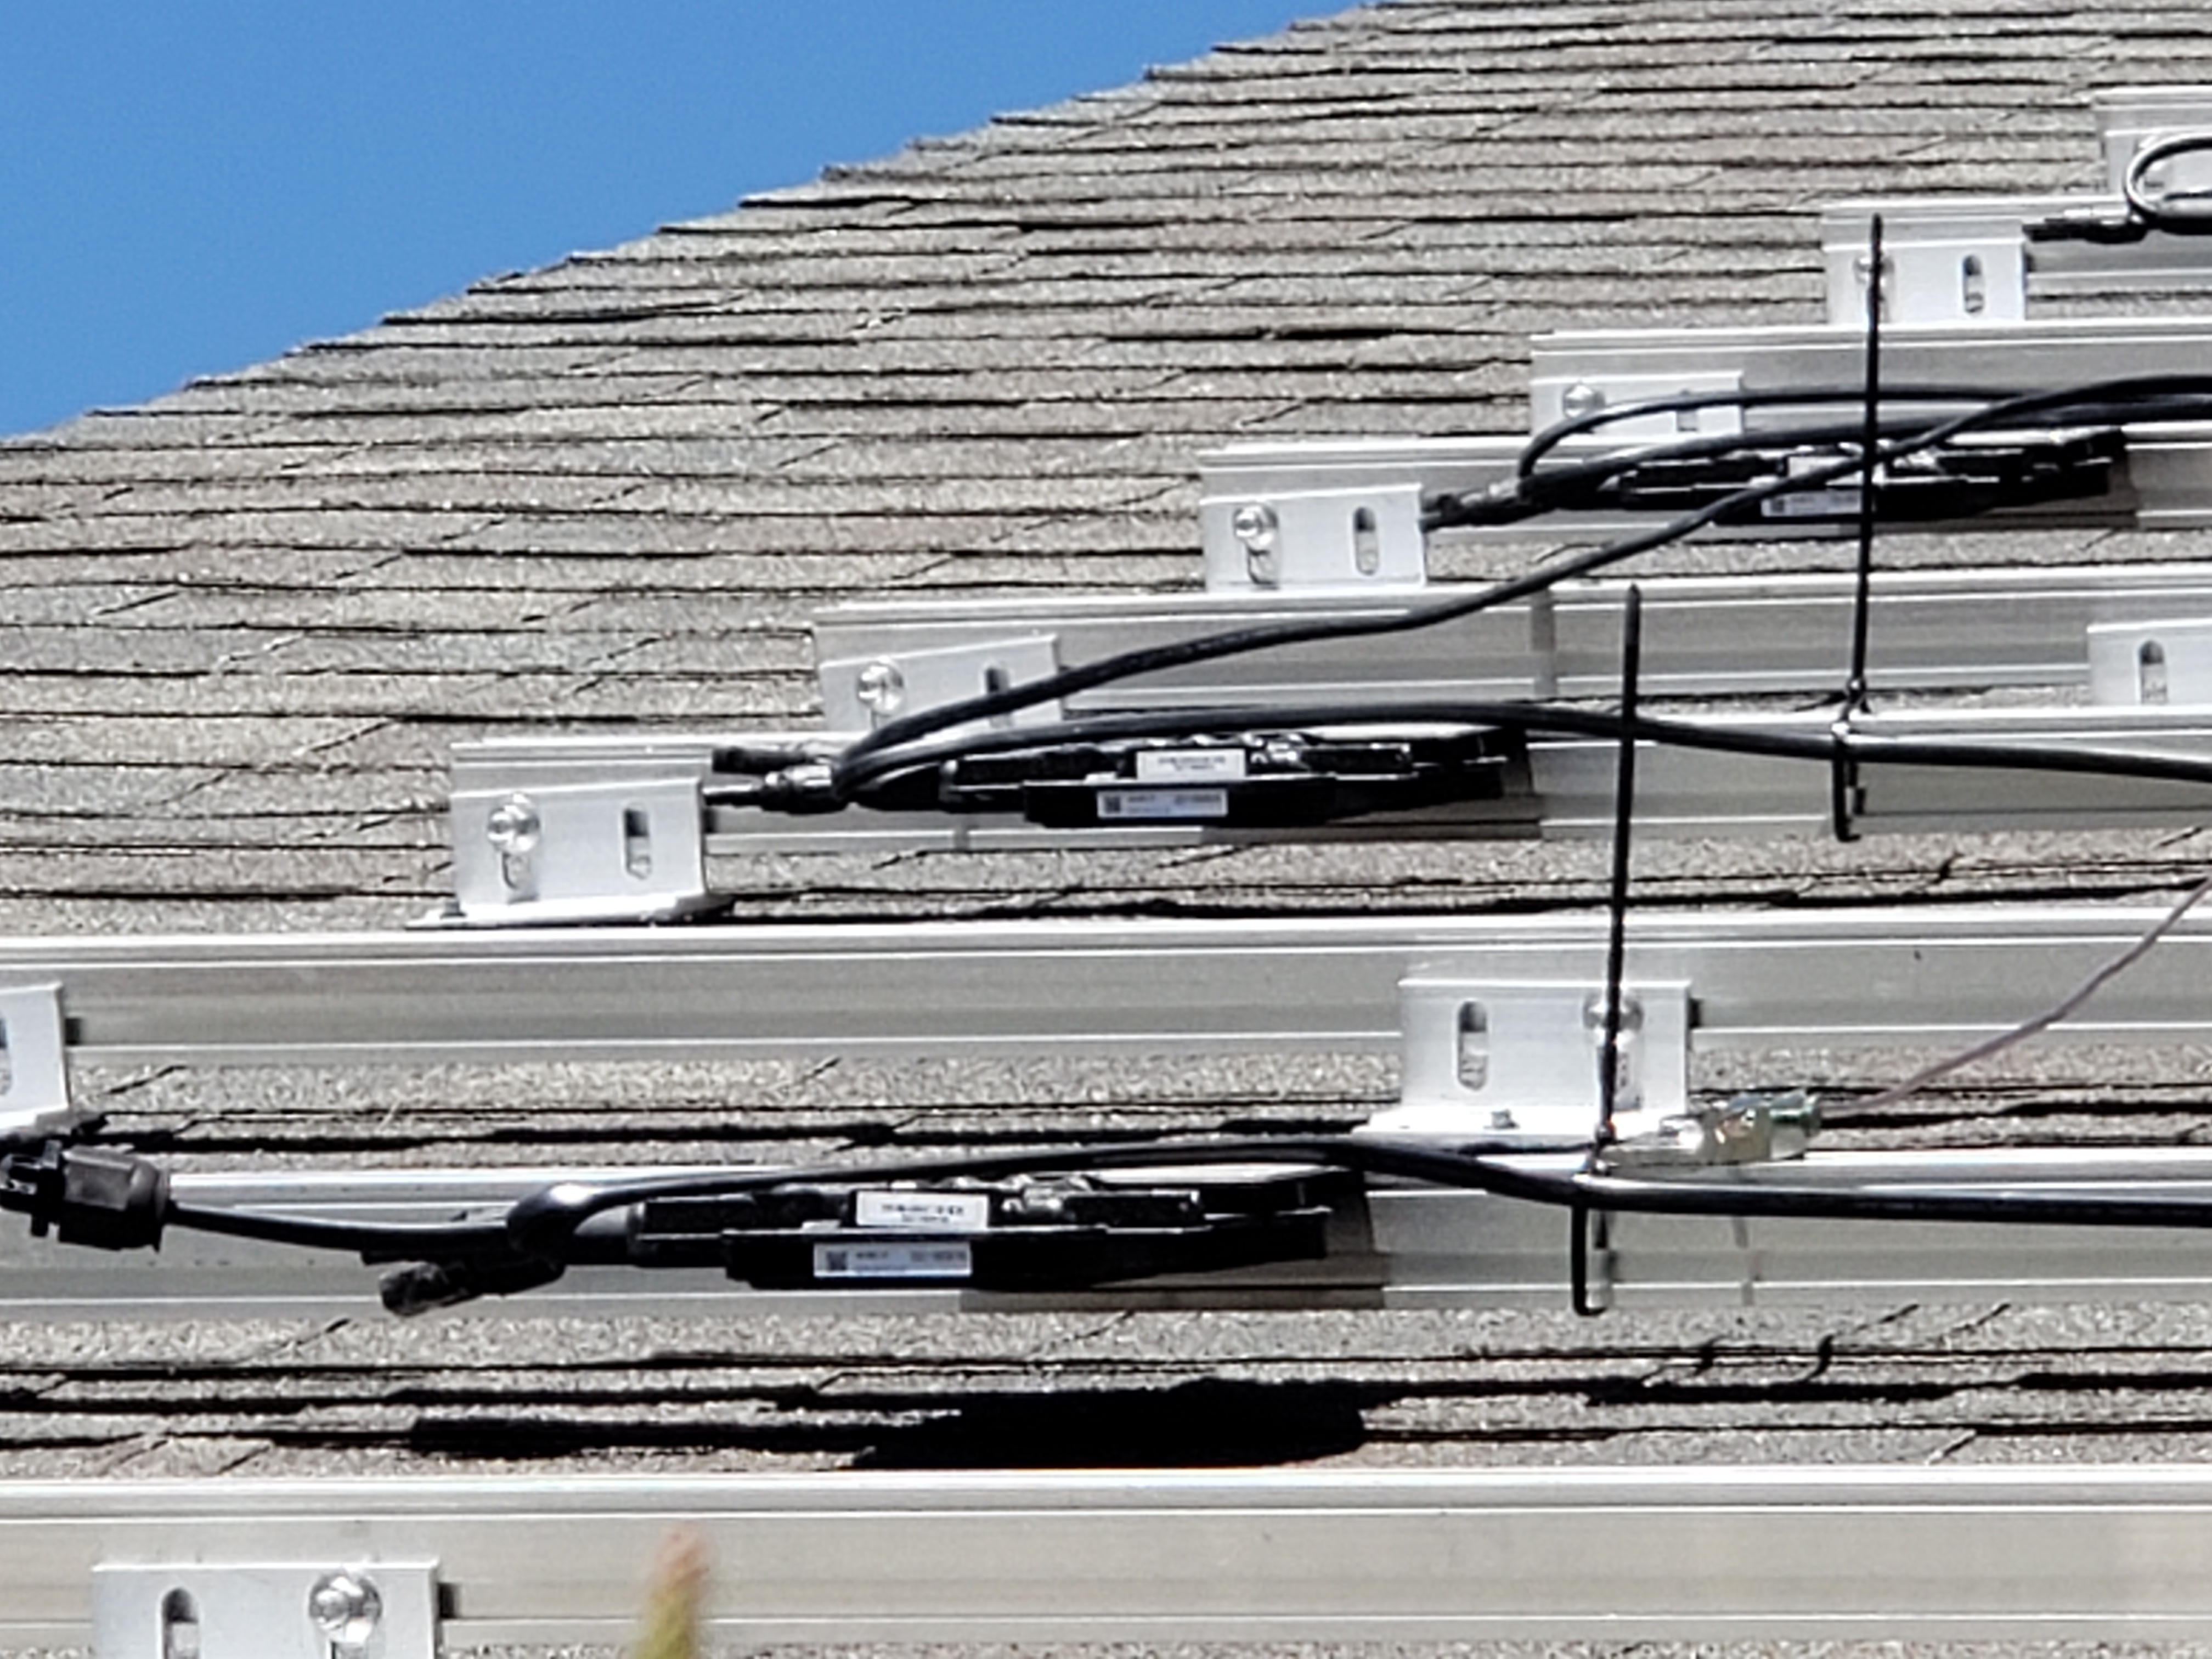
SolaDeck™ junction box. |
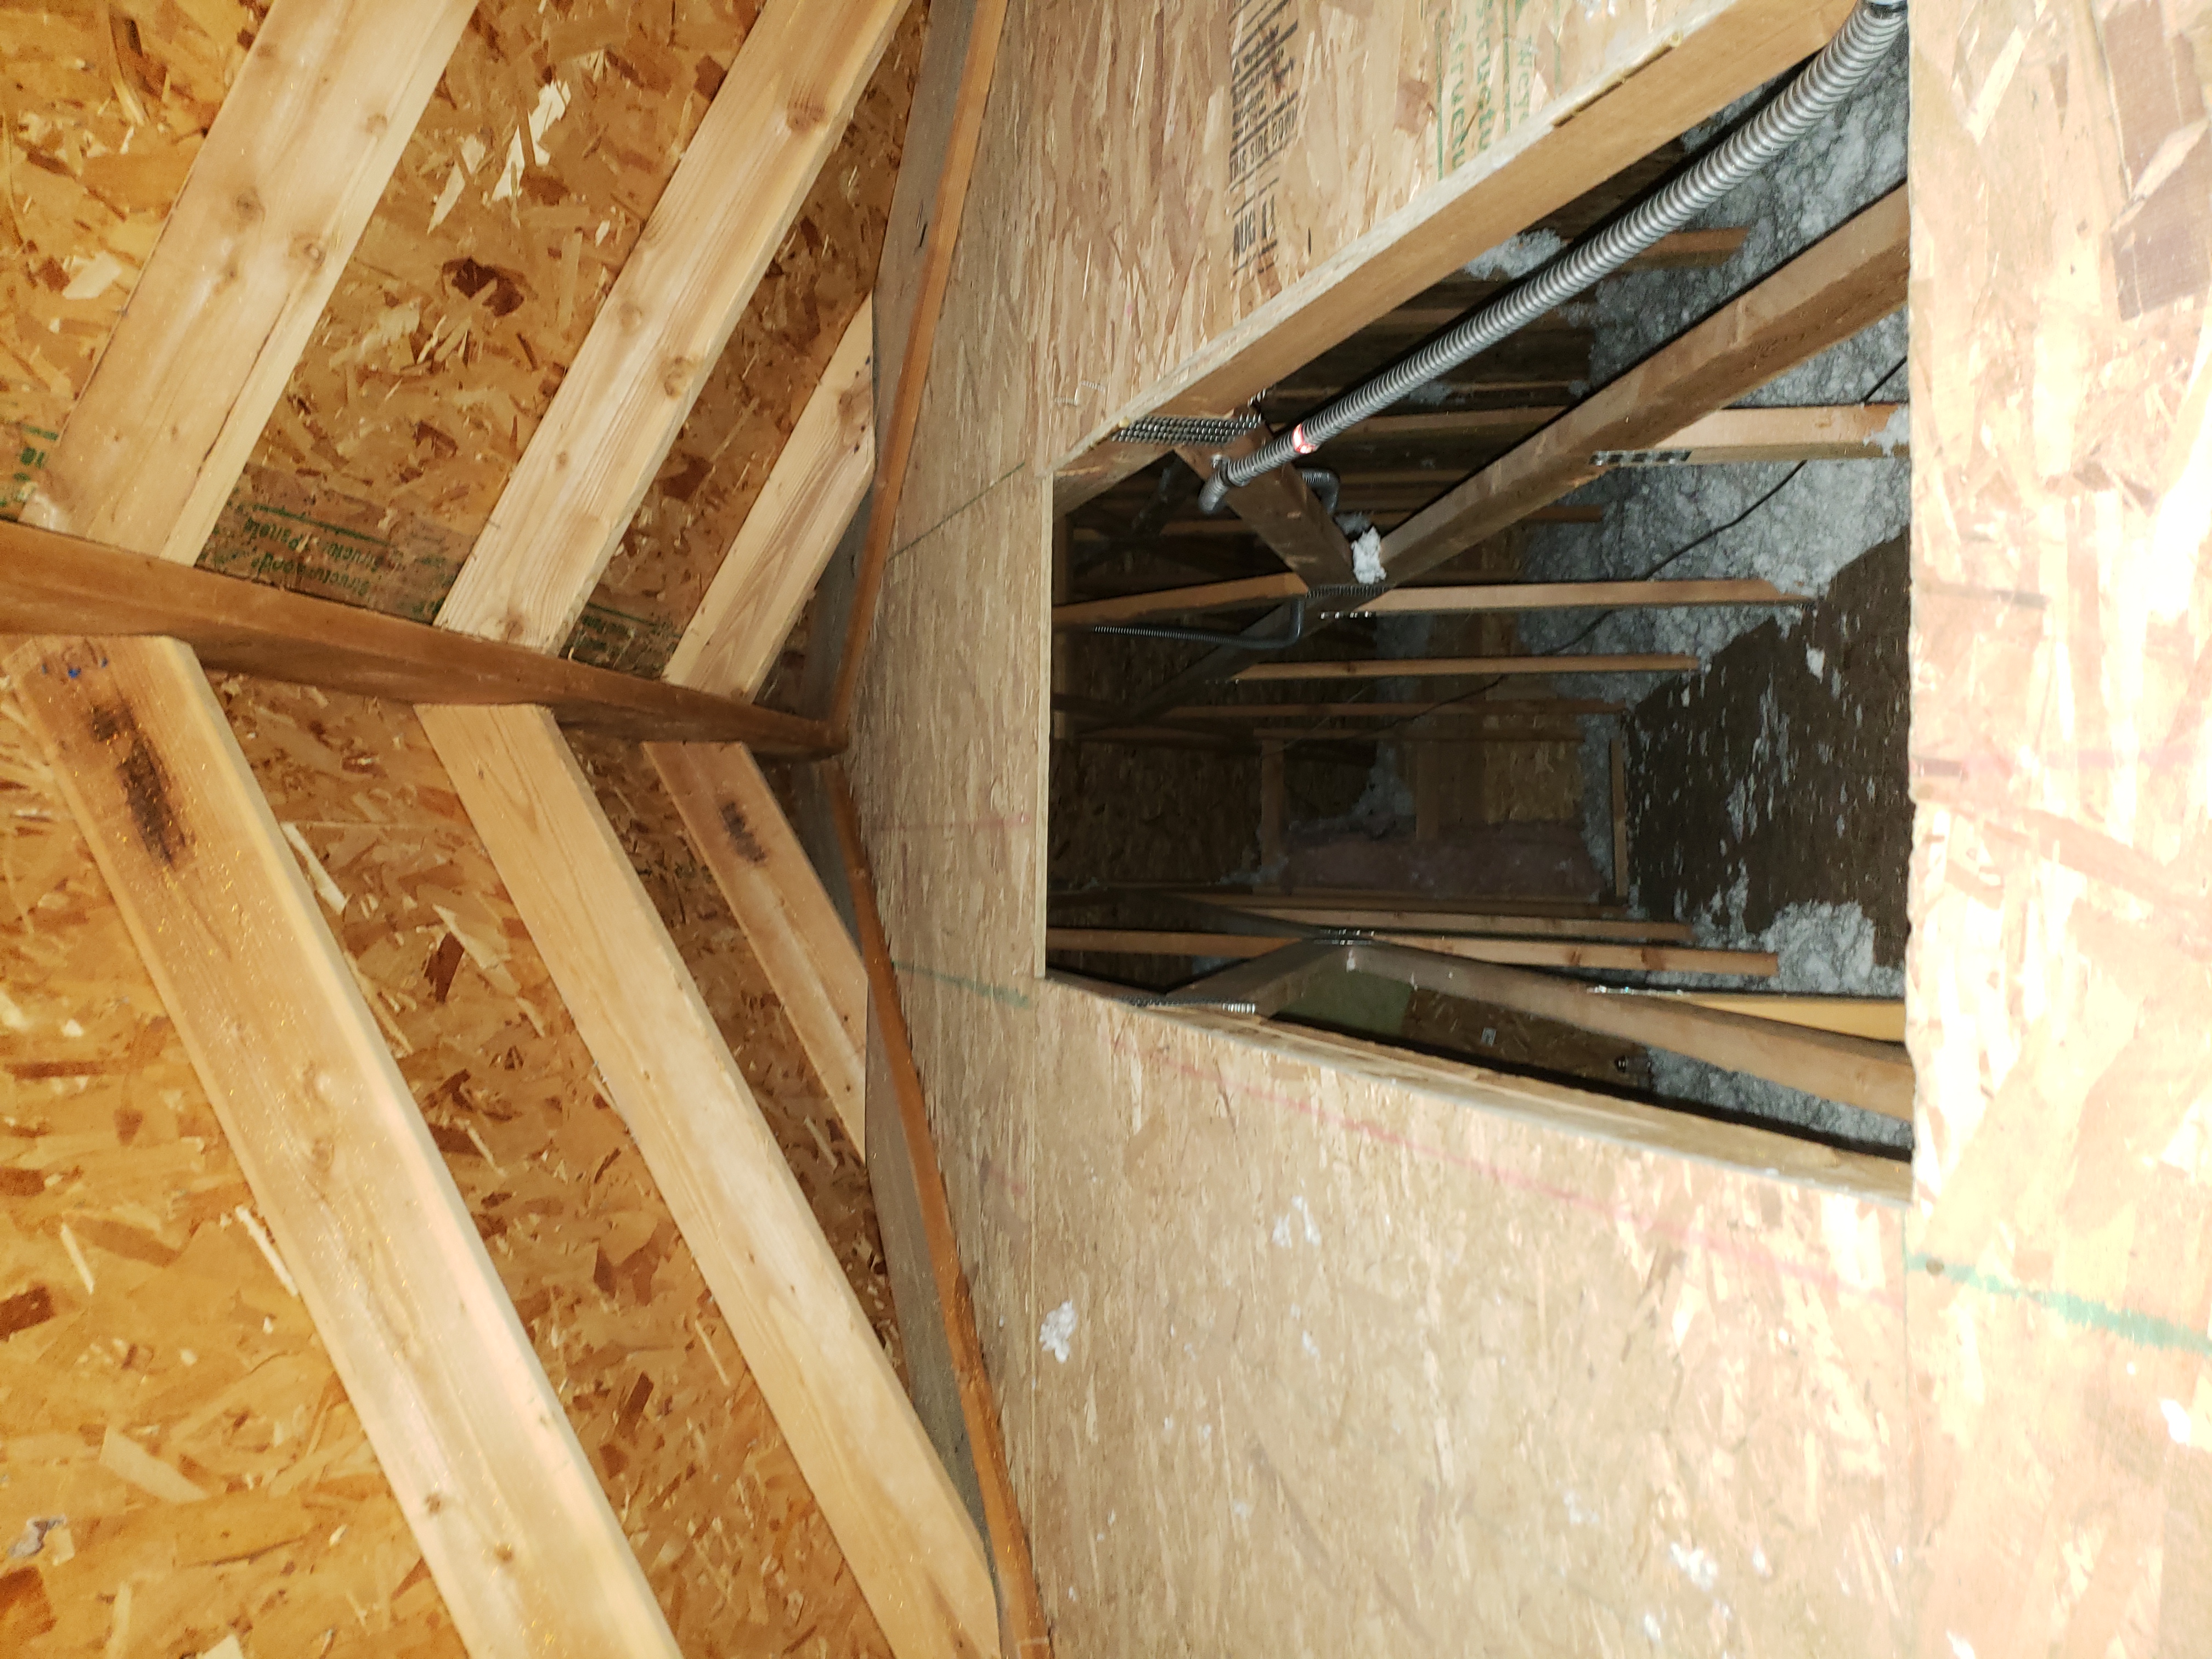
Fire-stop door in attic
|
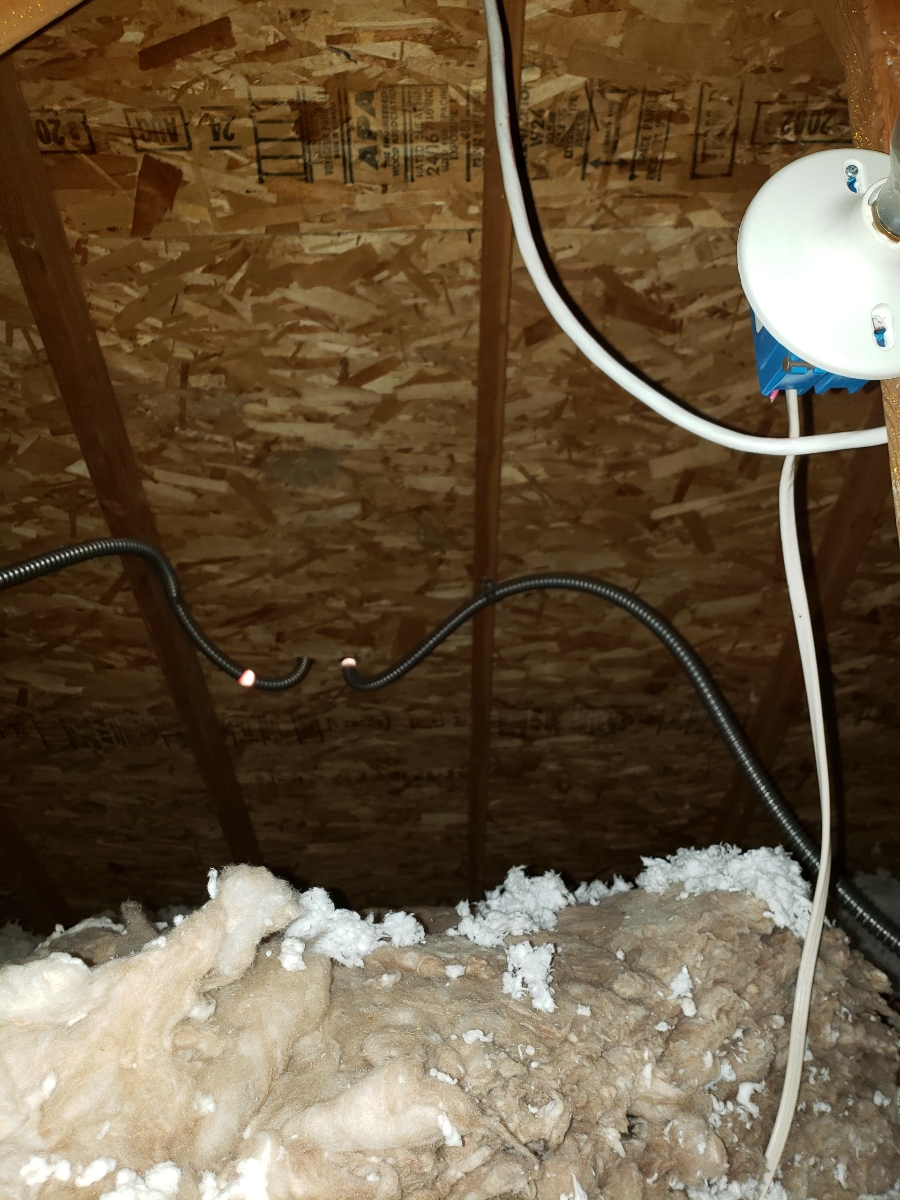
Cabling down from SolaDeck™
|
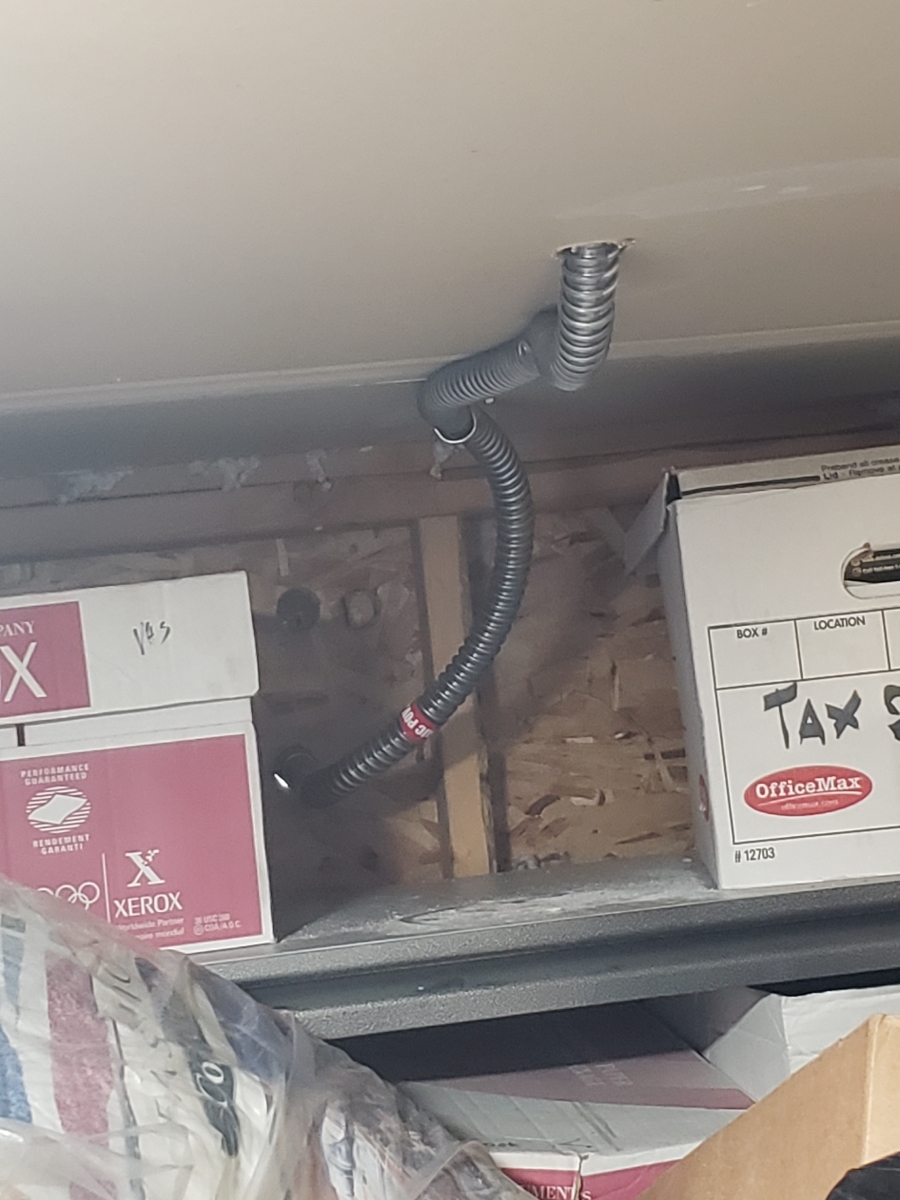
SolaDeck™ cabling down from attic
|
Electrical panels | ||
|
|
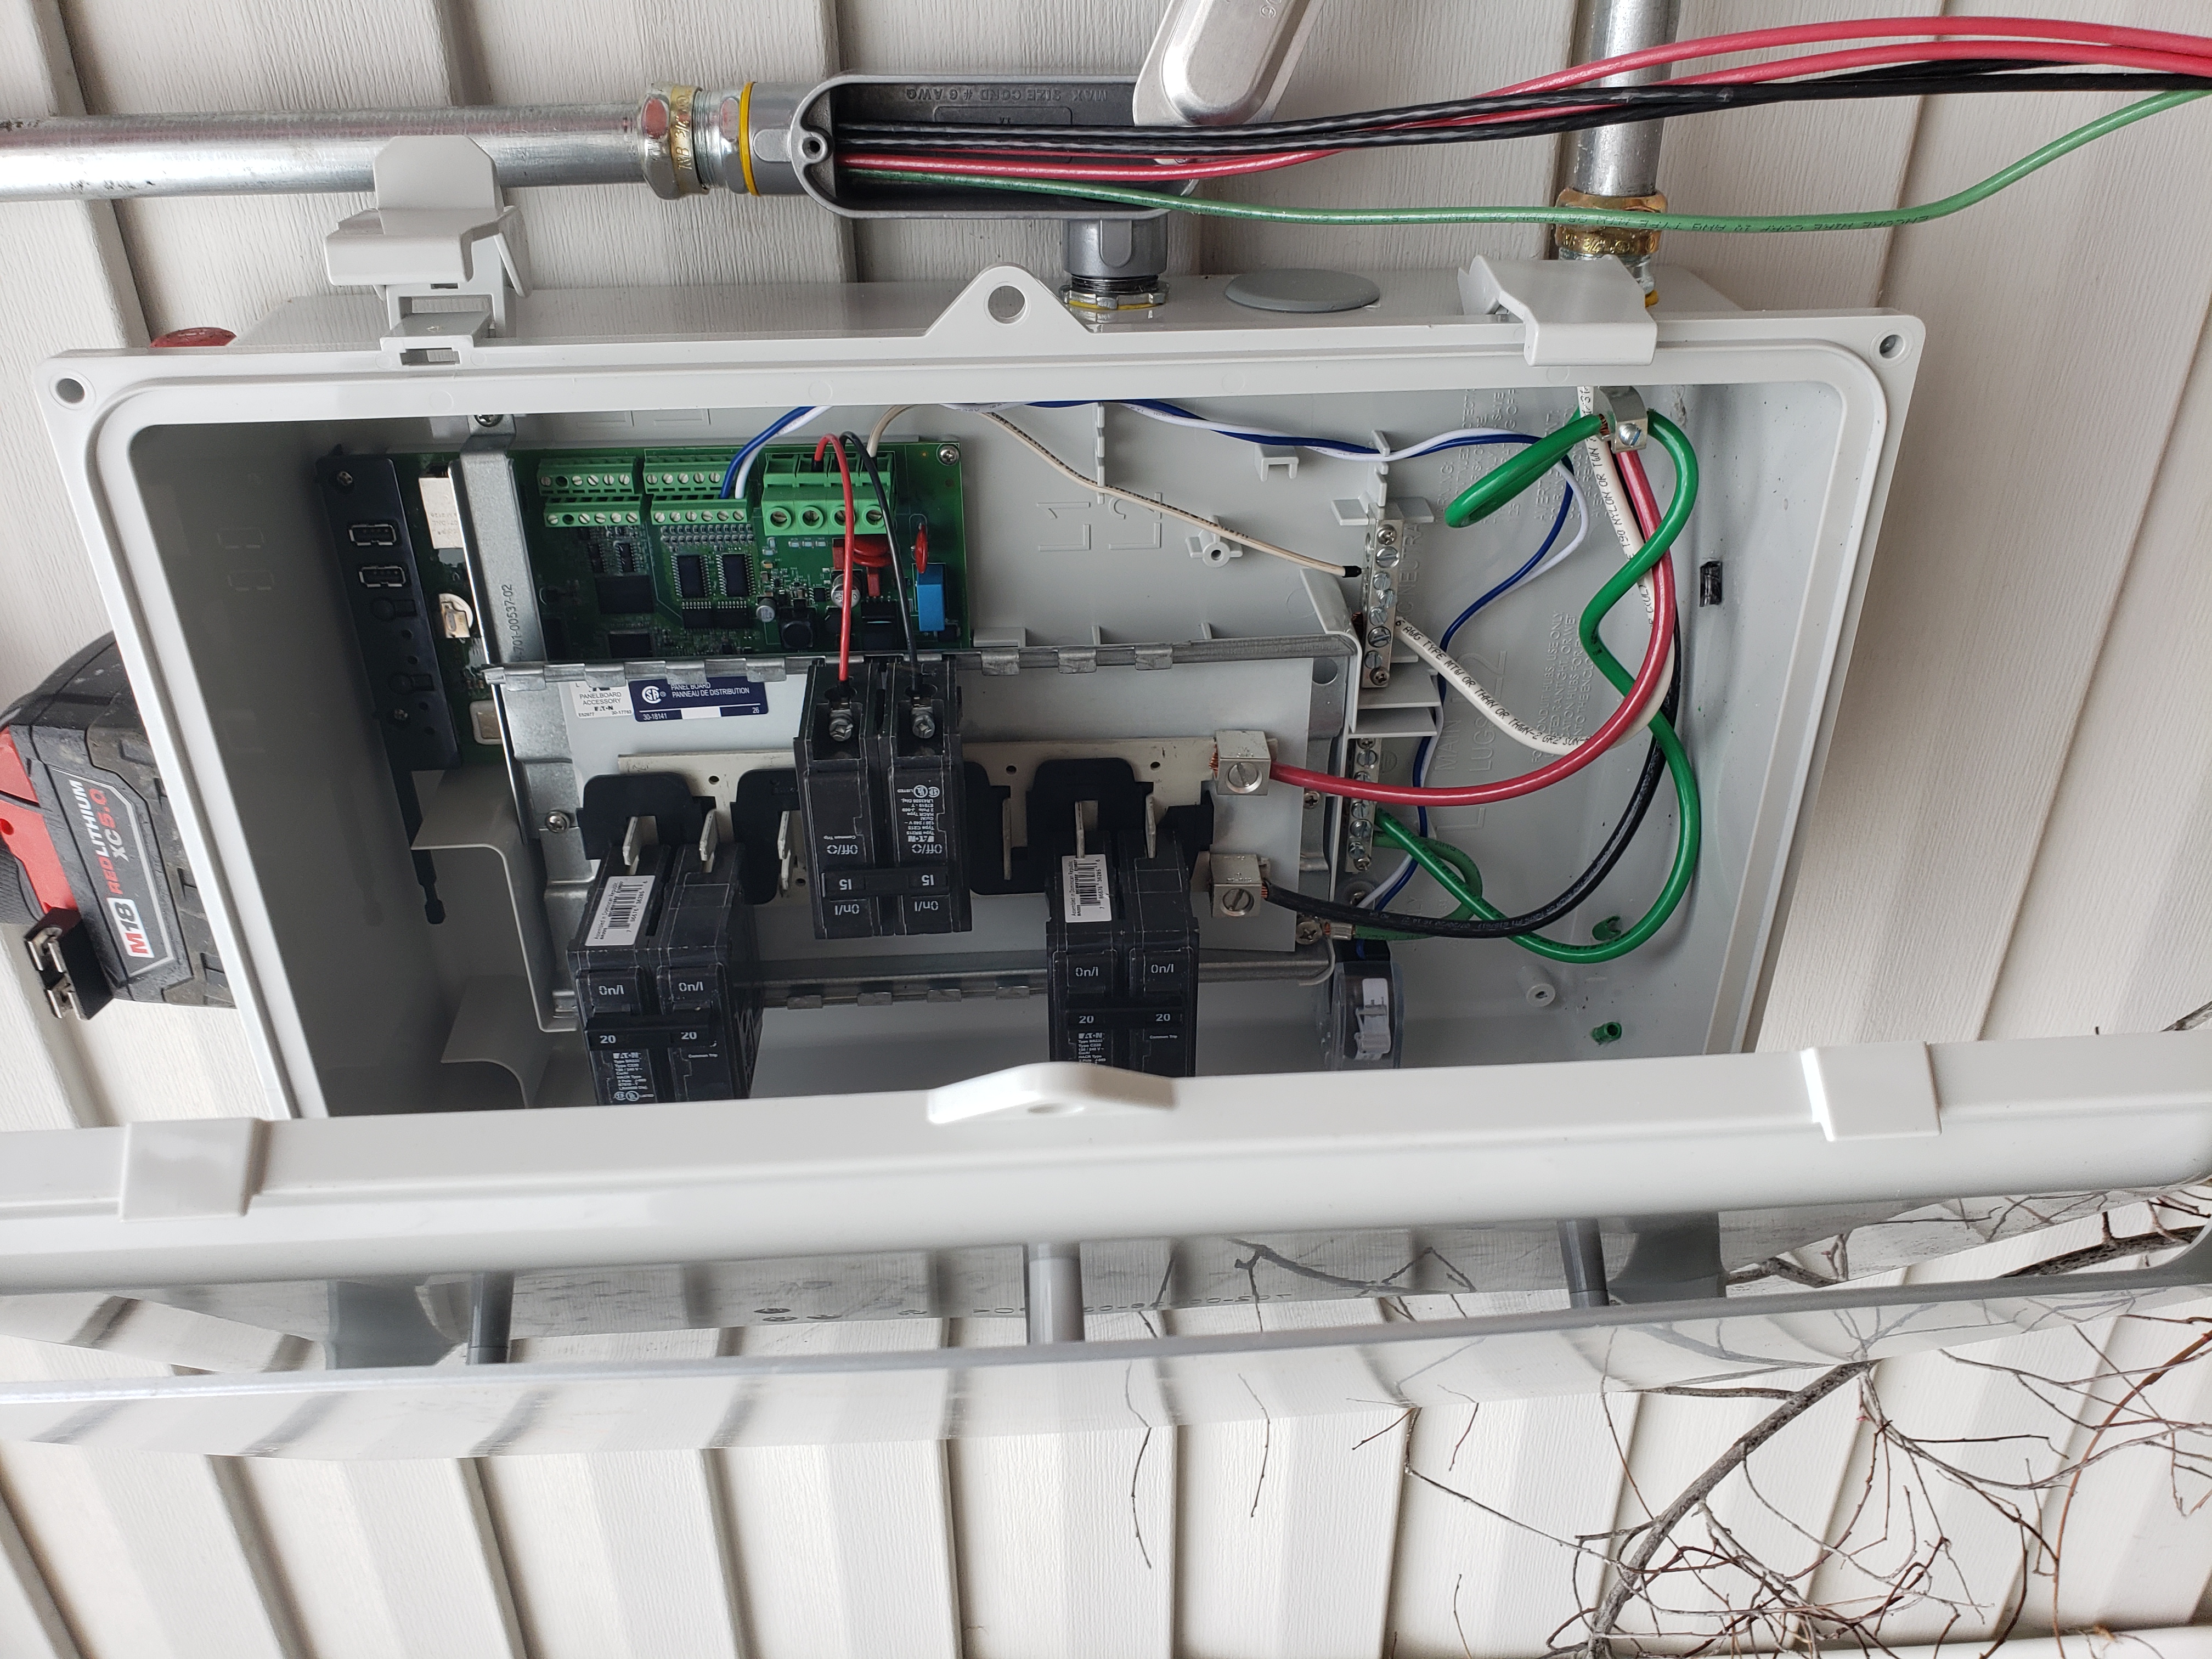
Wiring of Enphase Combiner. |
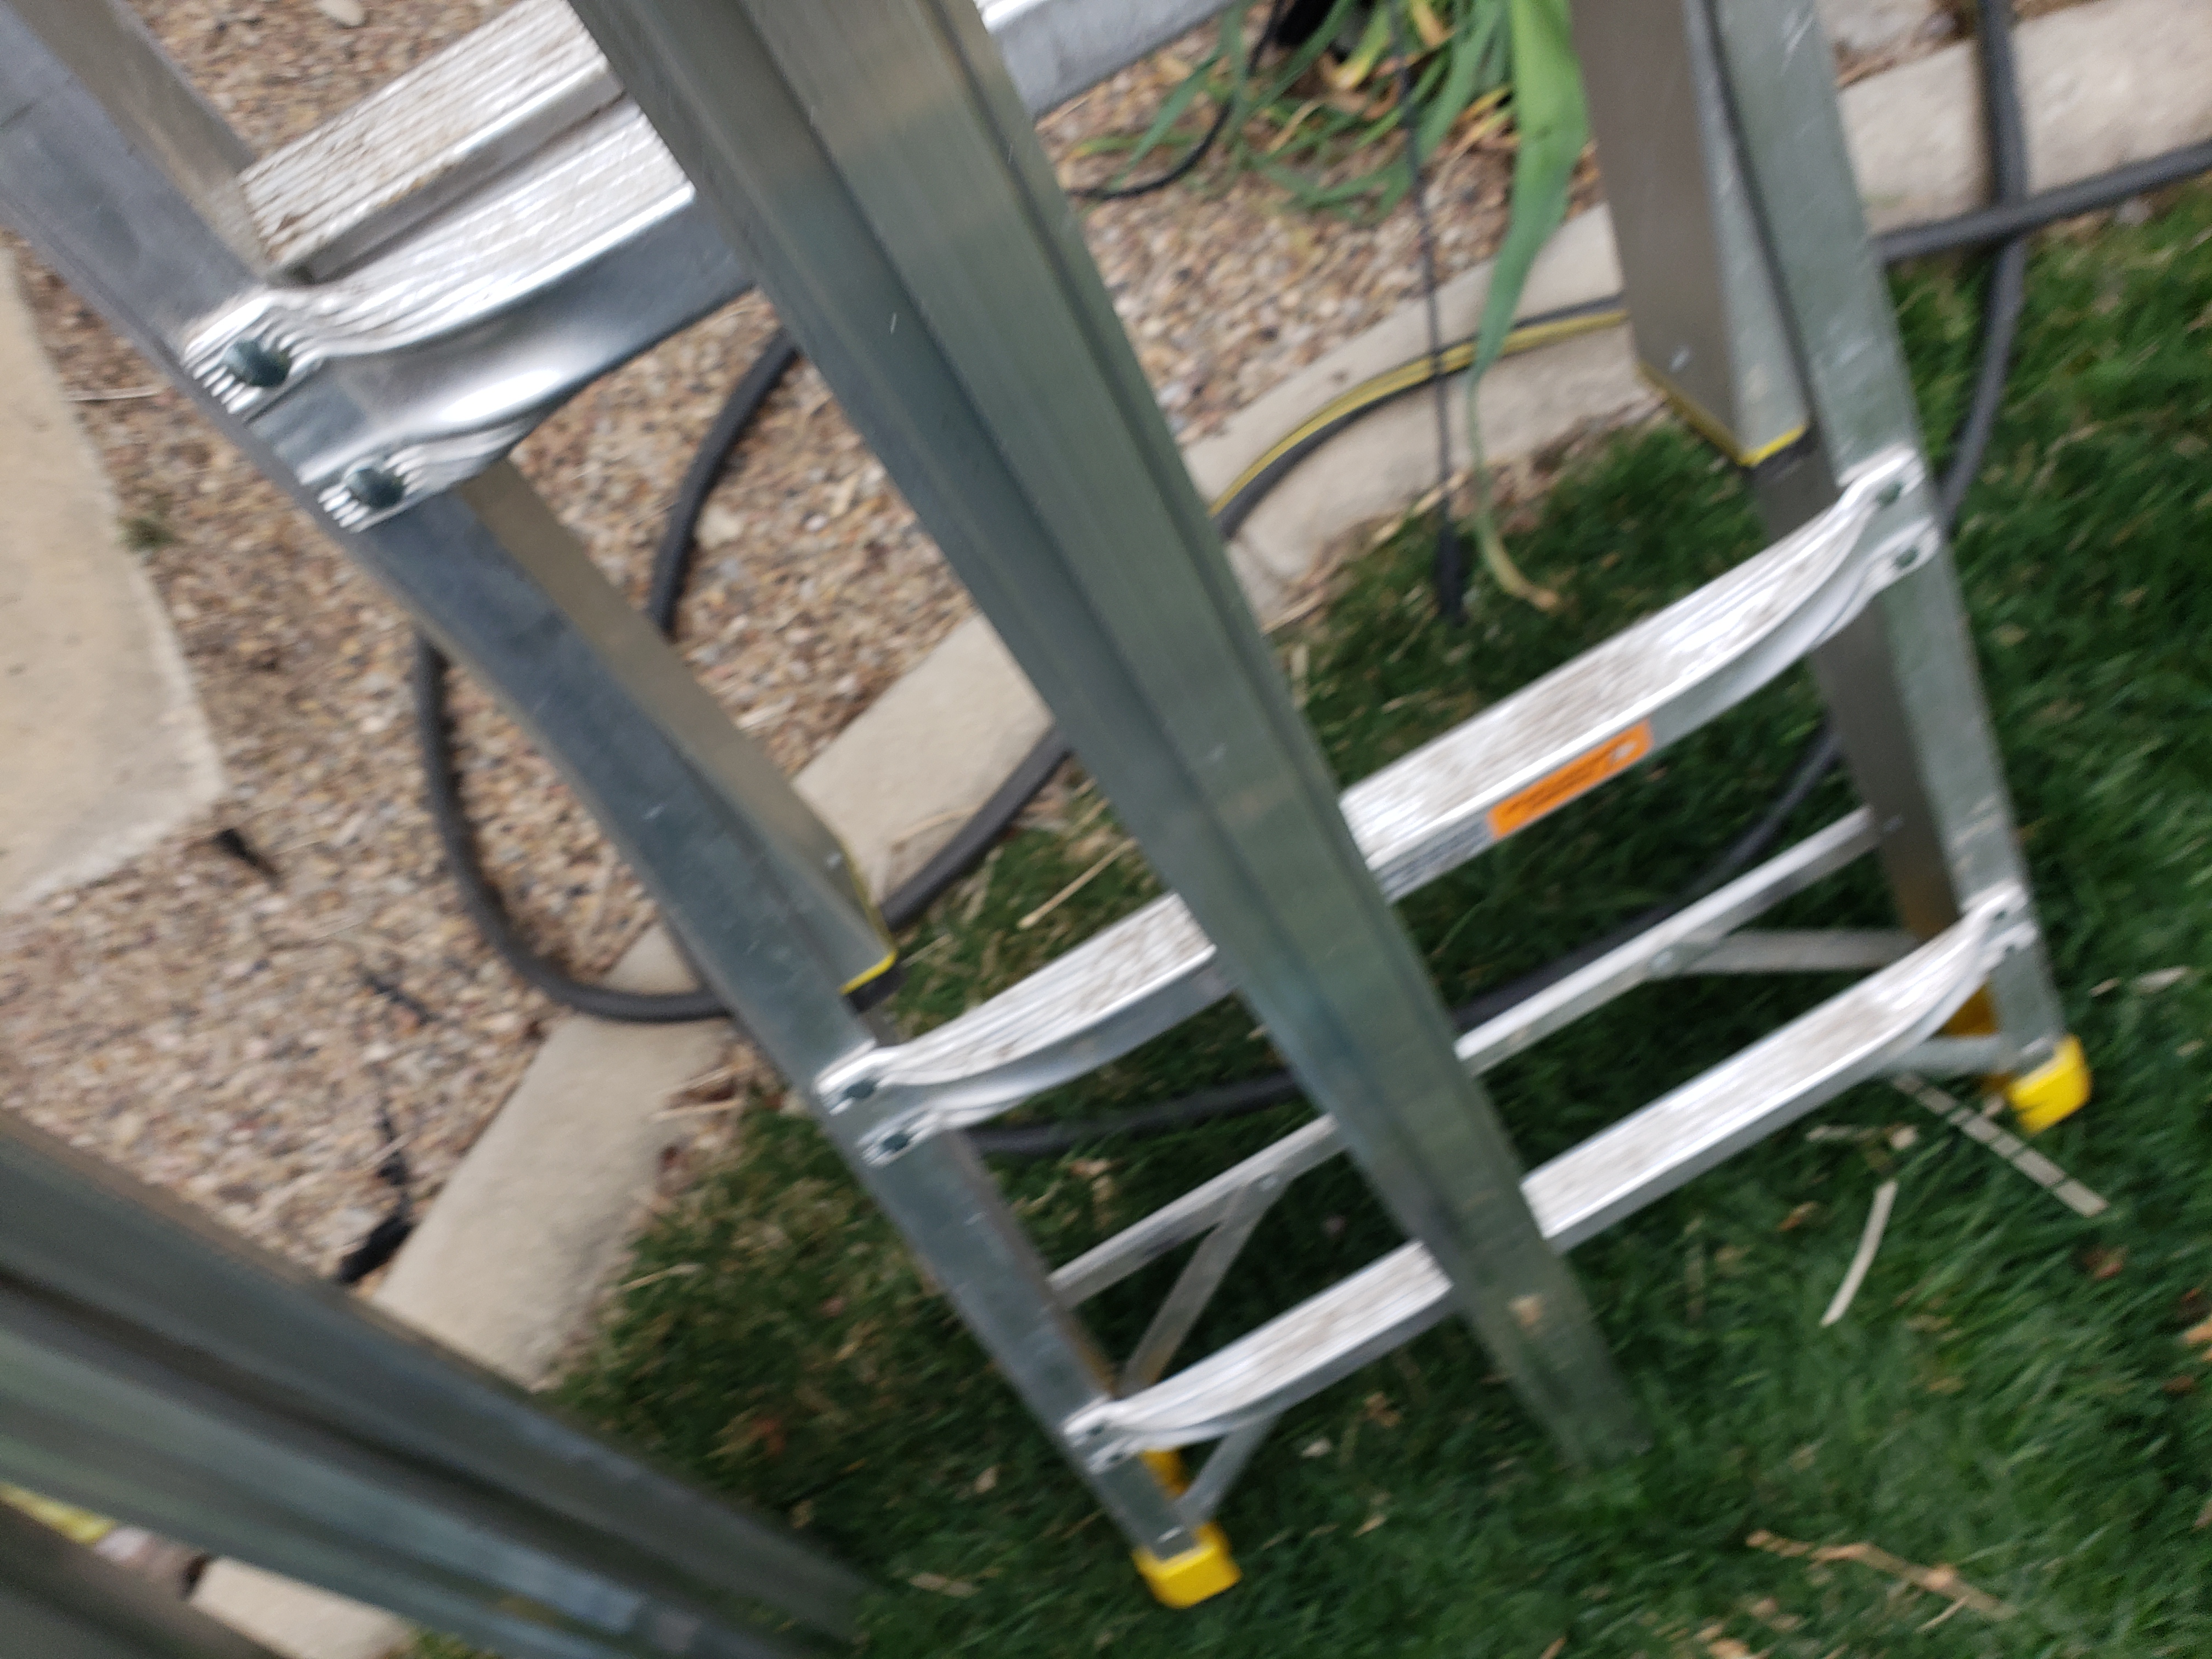
Roof mounting railing | ||
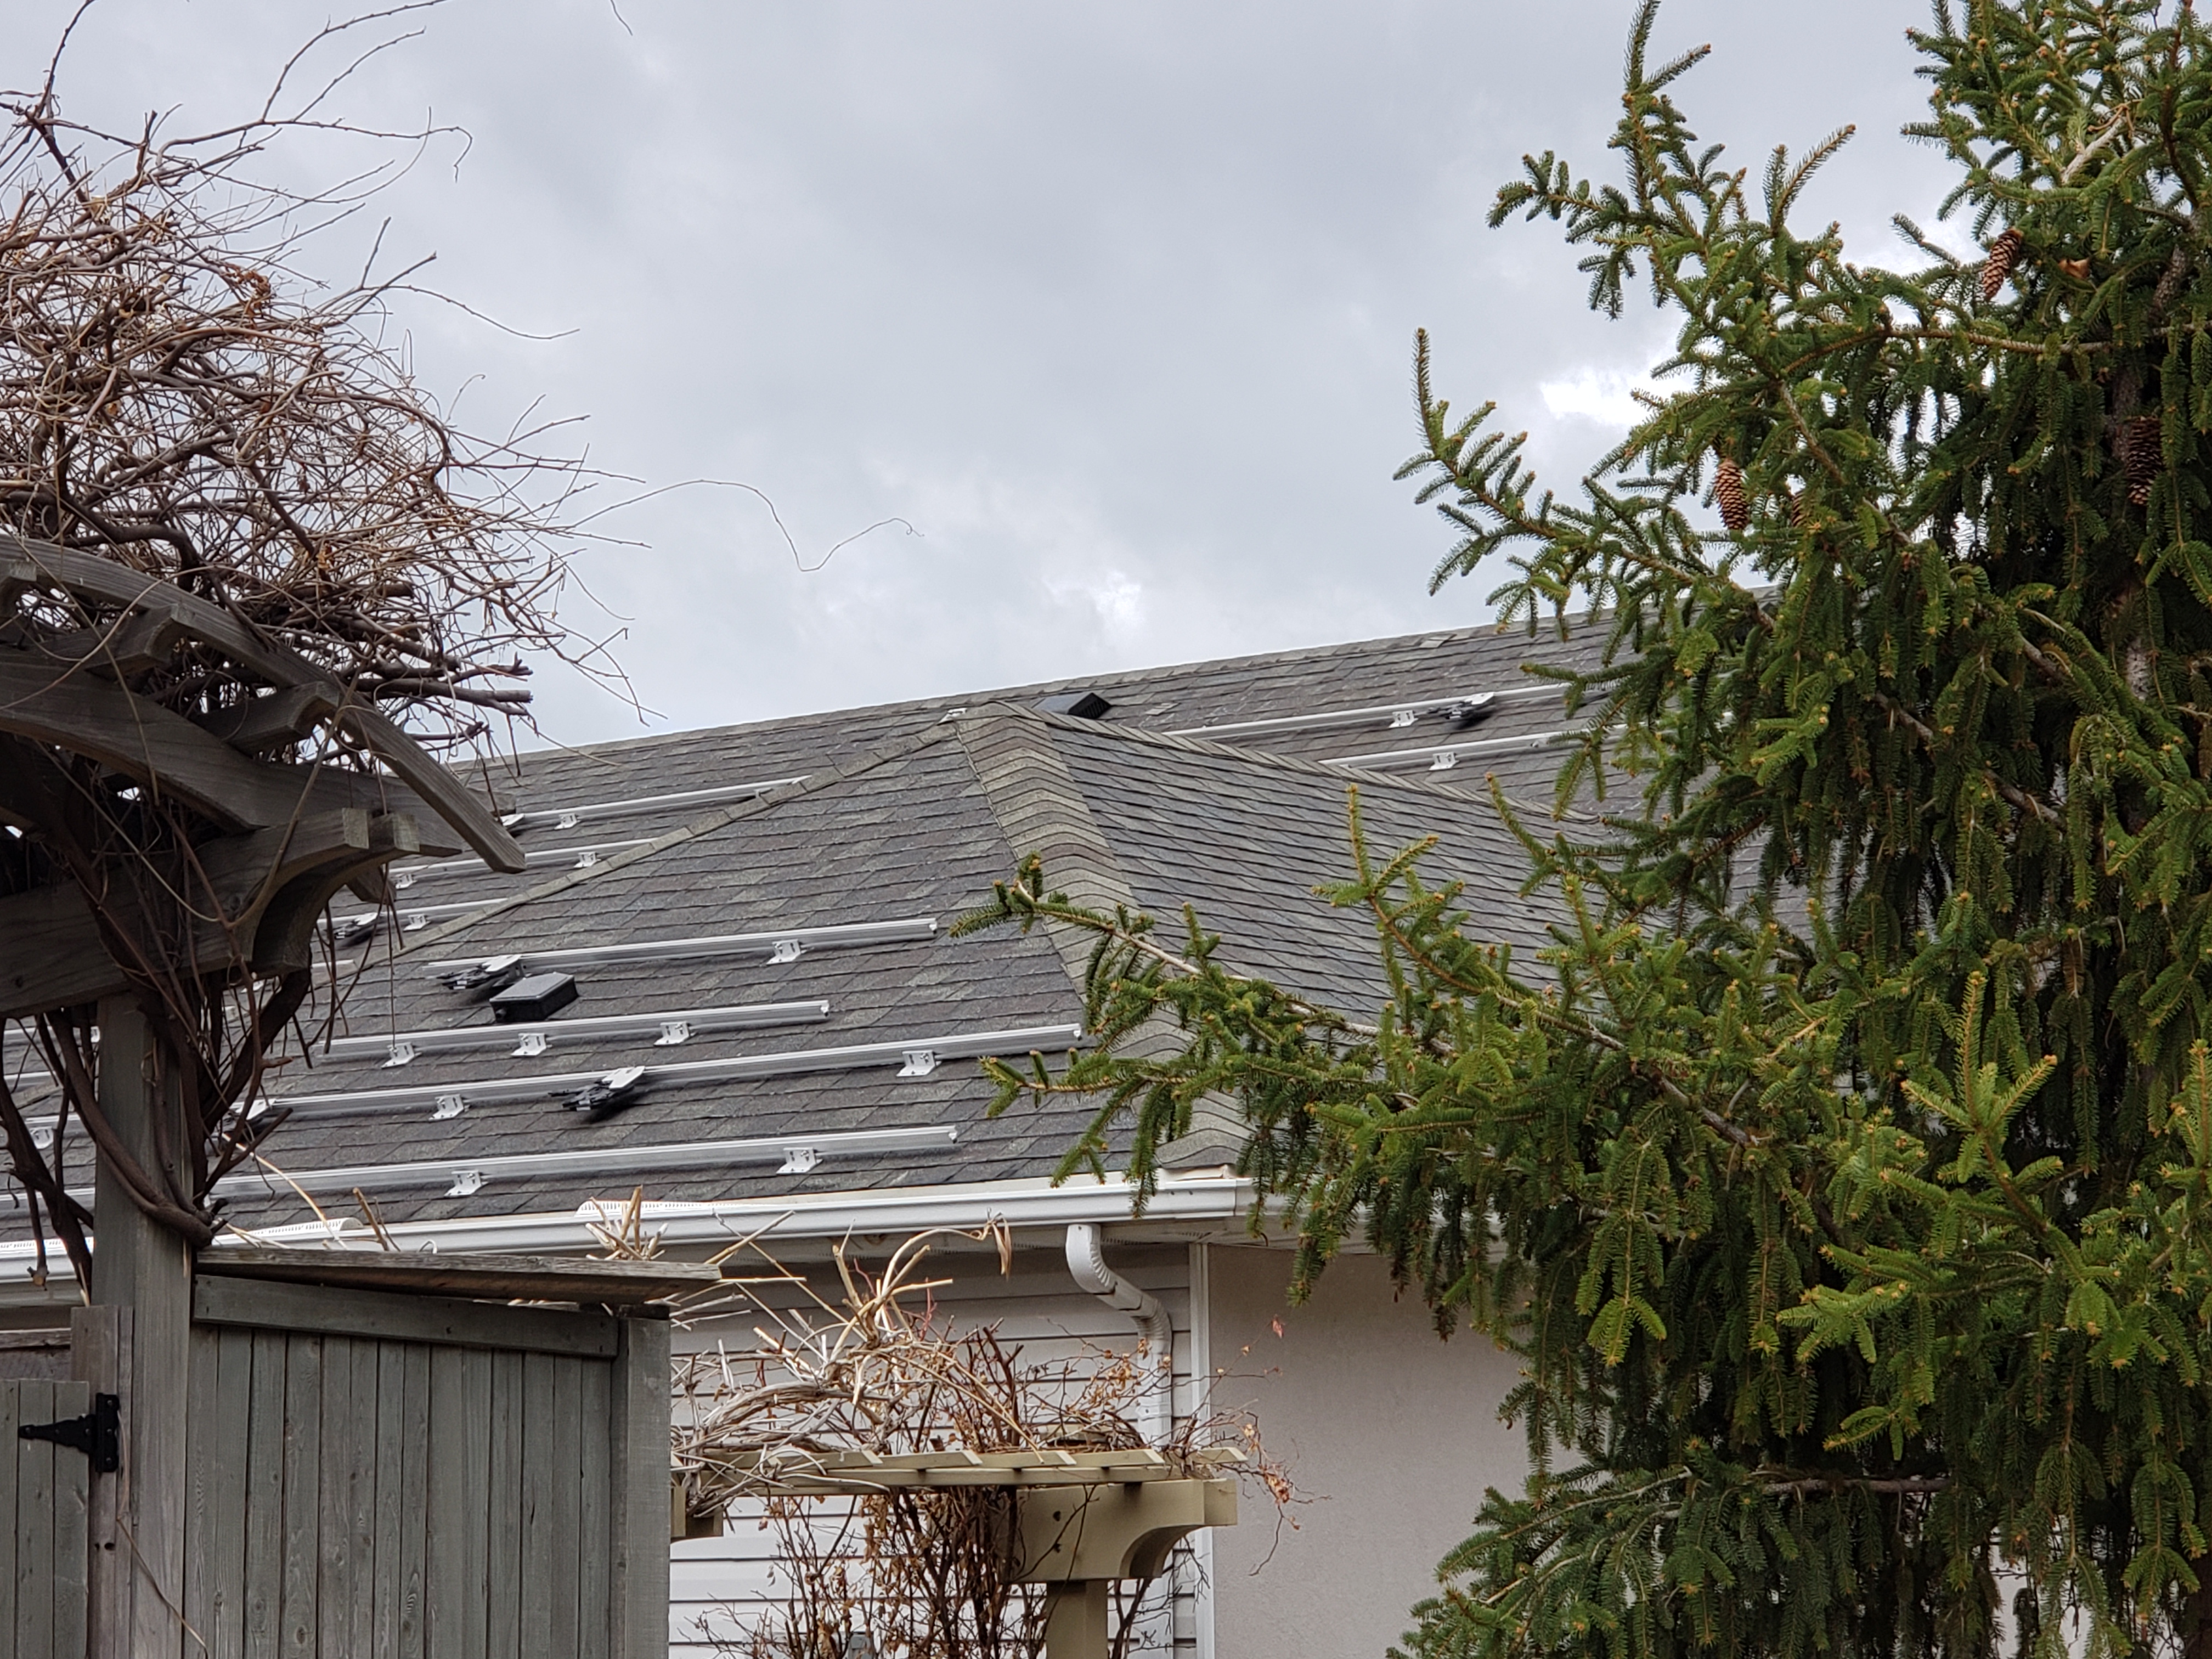
|
Note SolaDeck™—gathers |
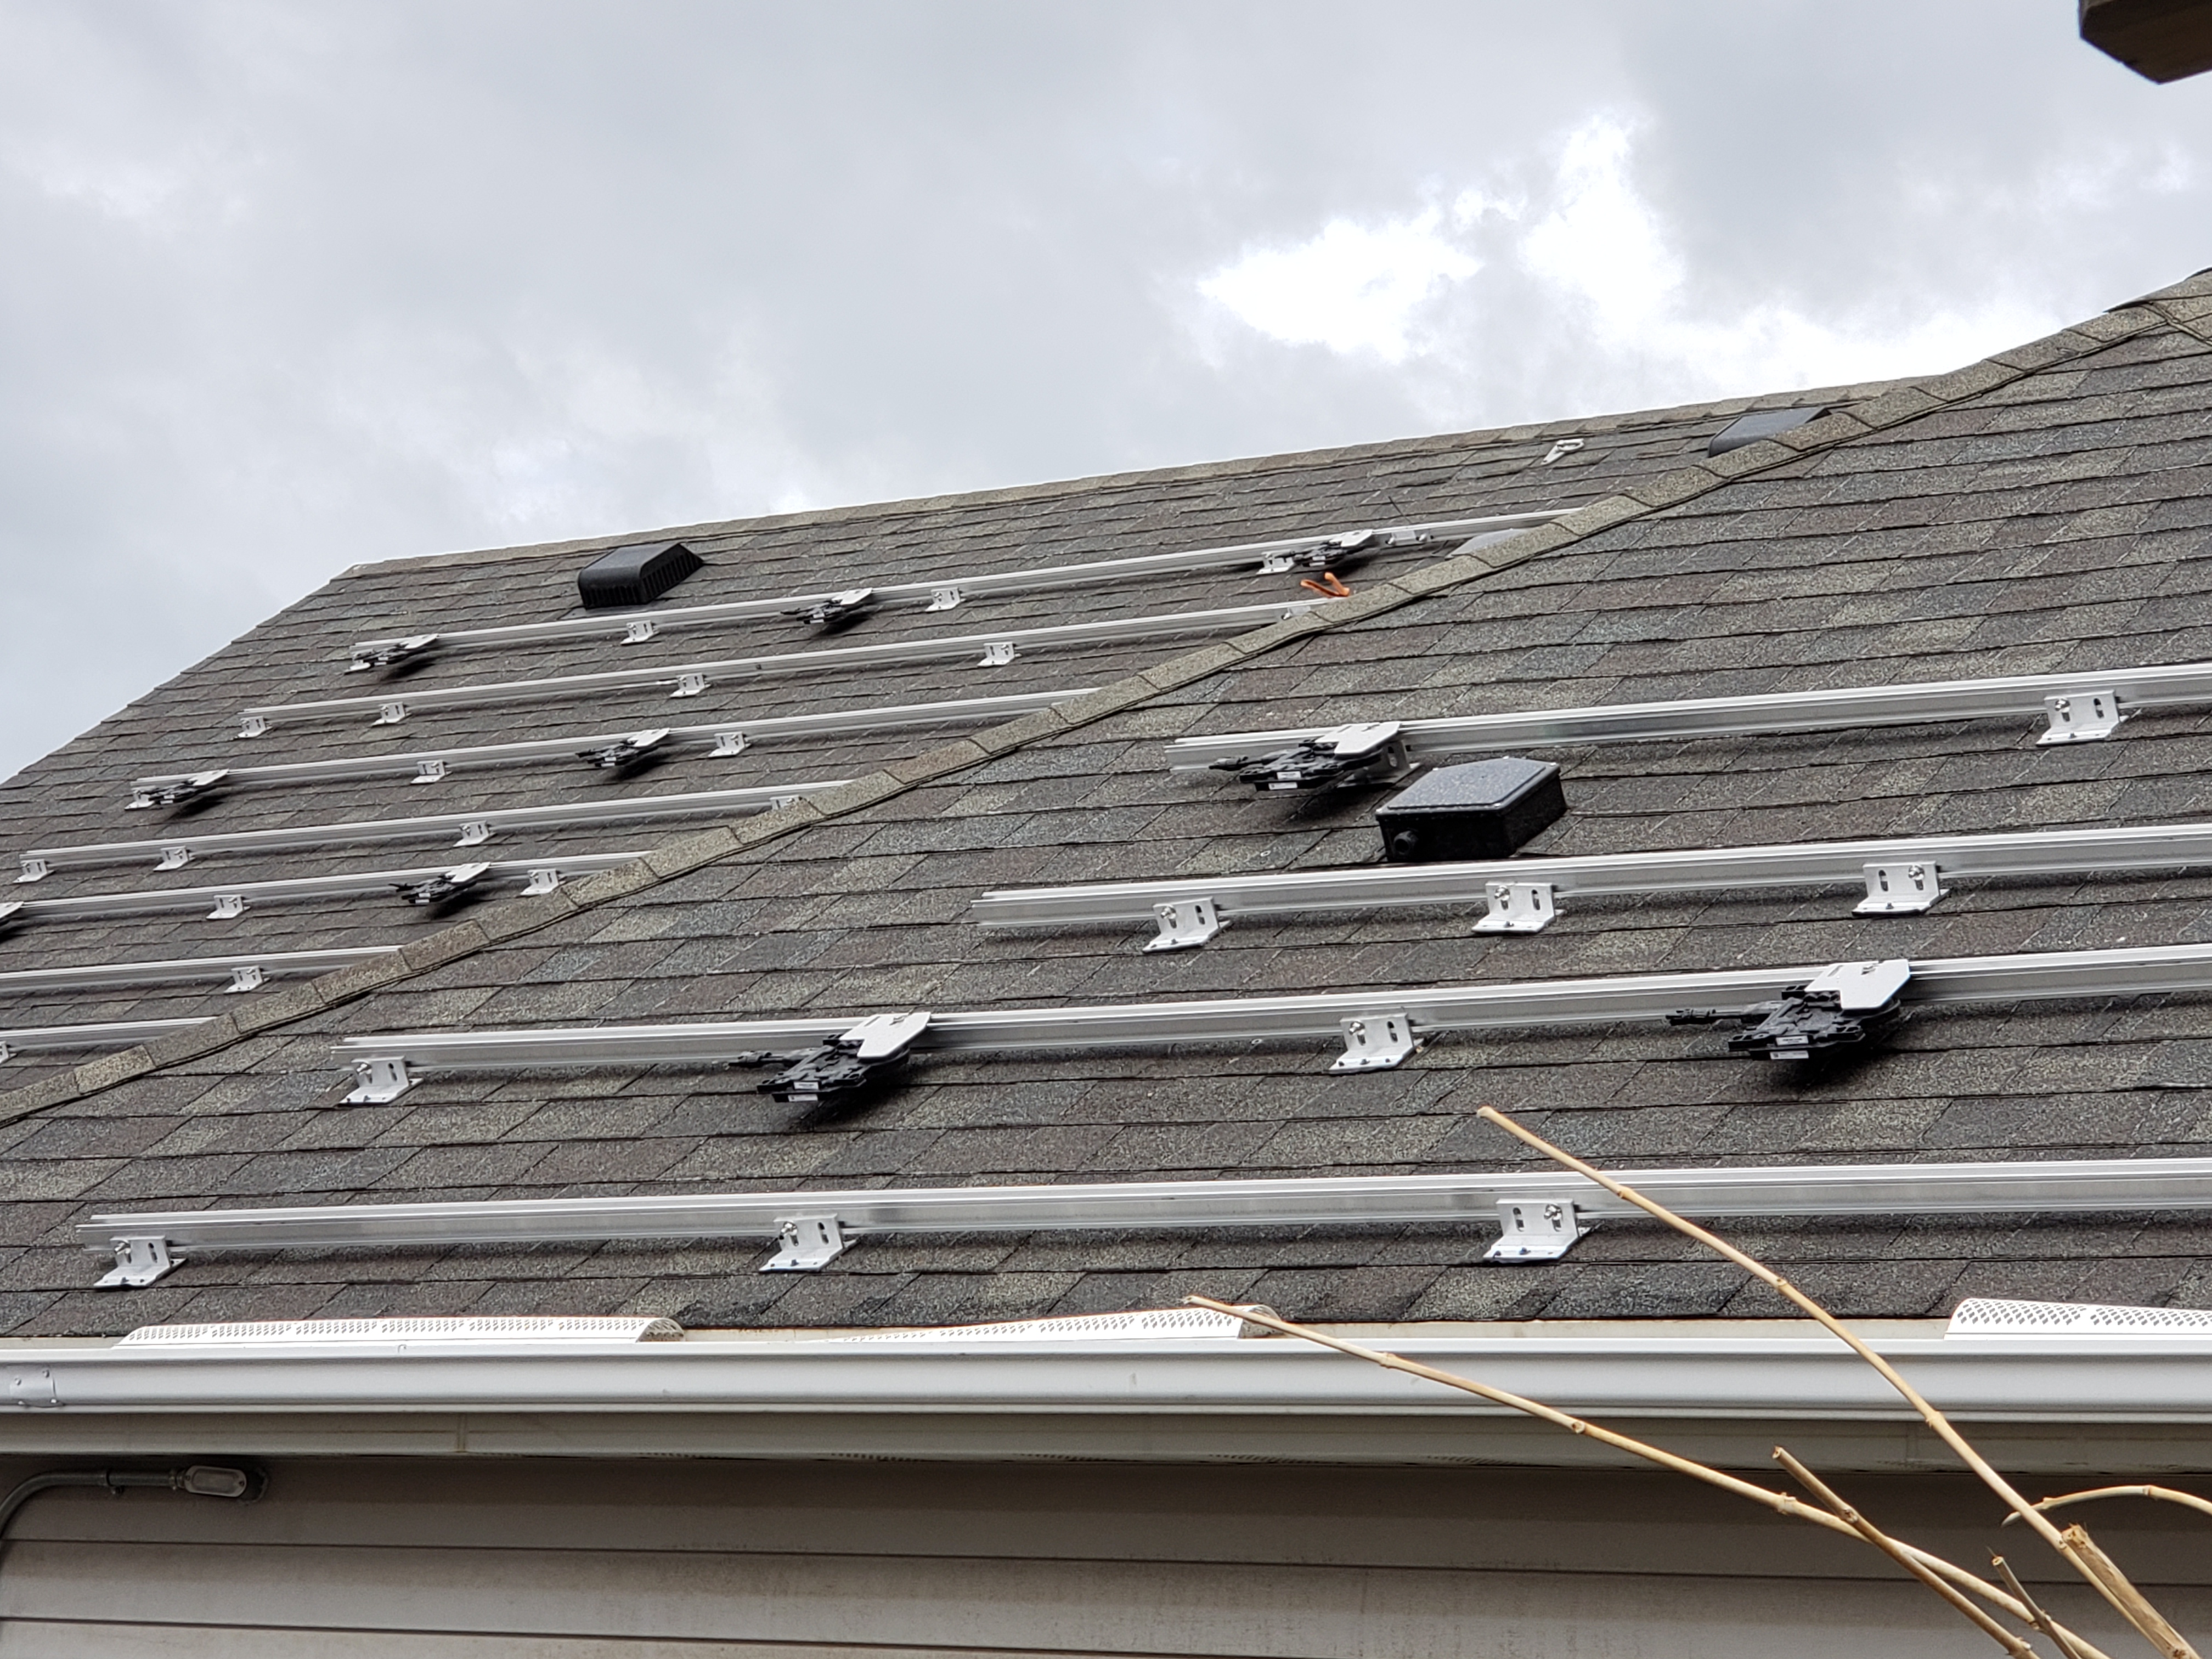
Note SolaDeck™. There is one |
|
|
|
Unorganized photos | ||
Channel/rail on way up to roof. |
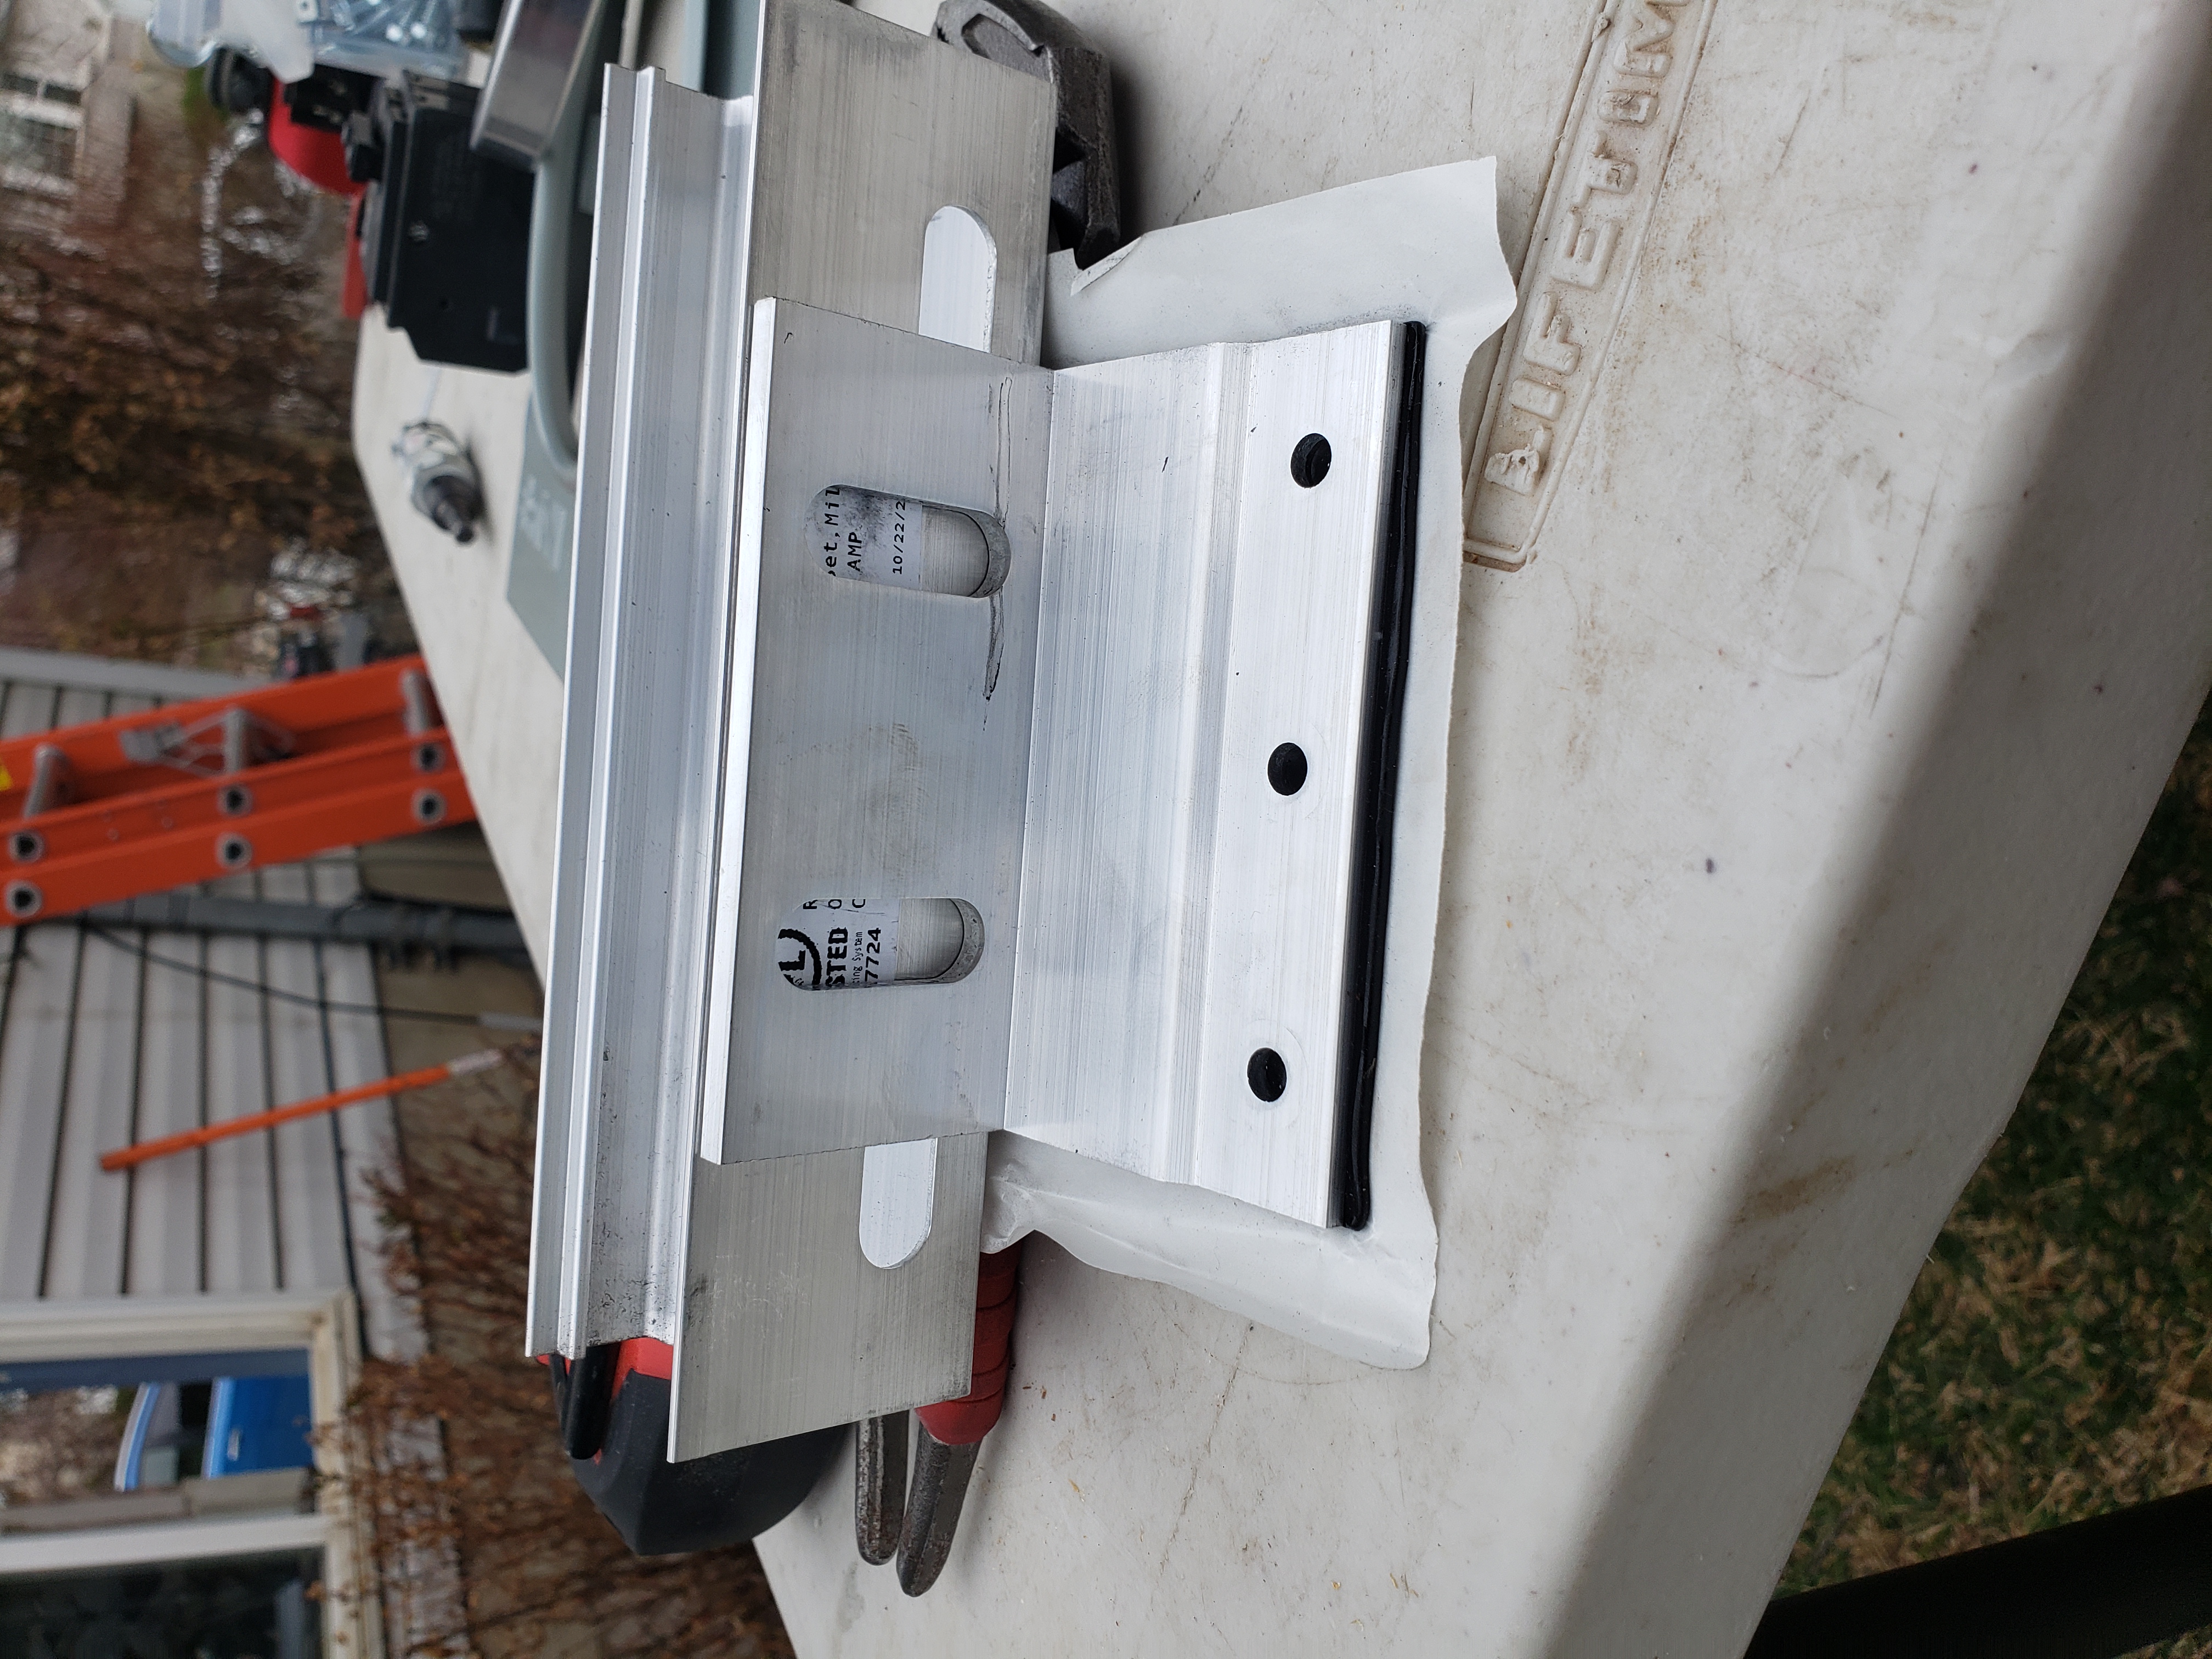
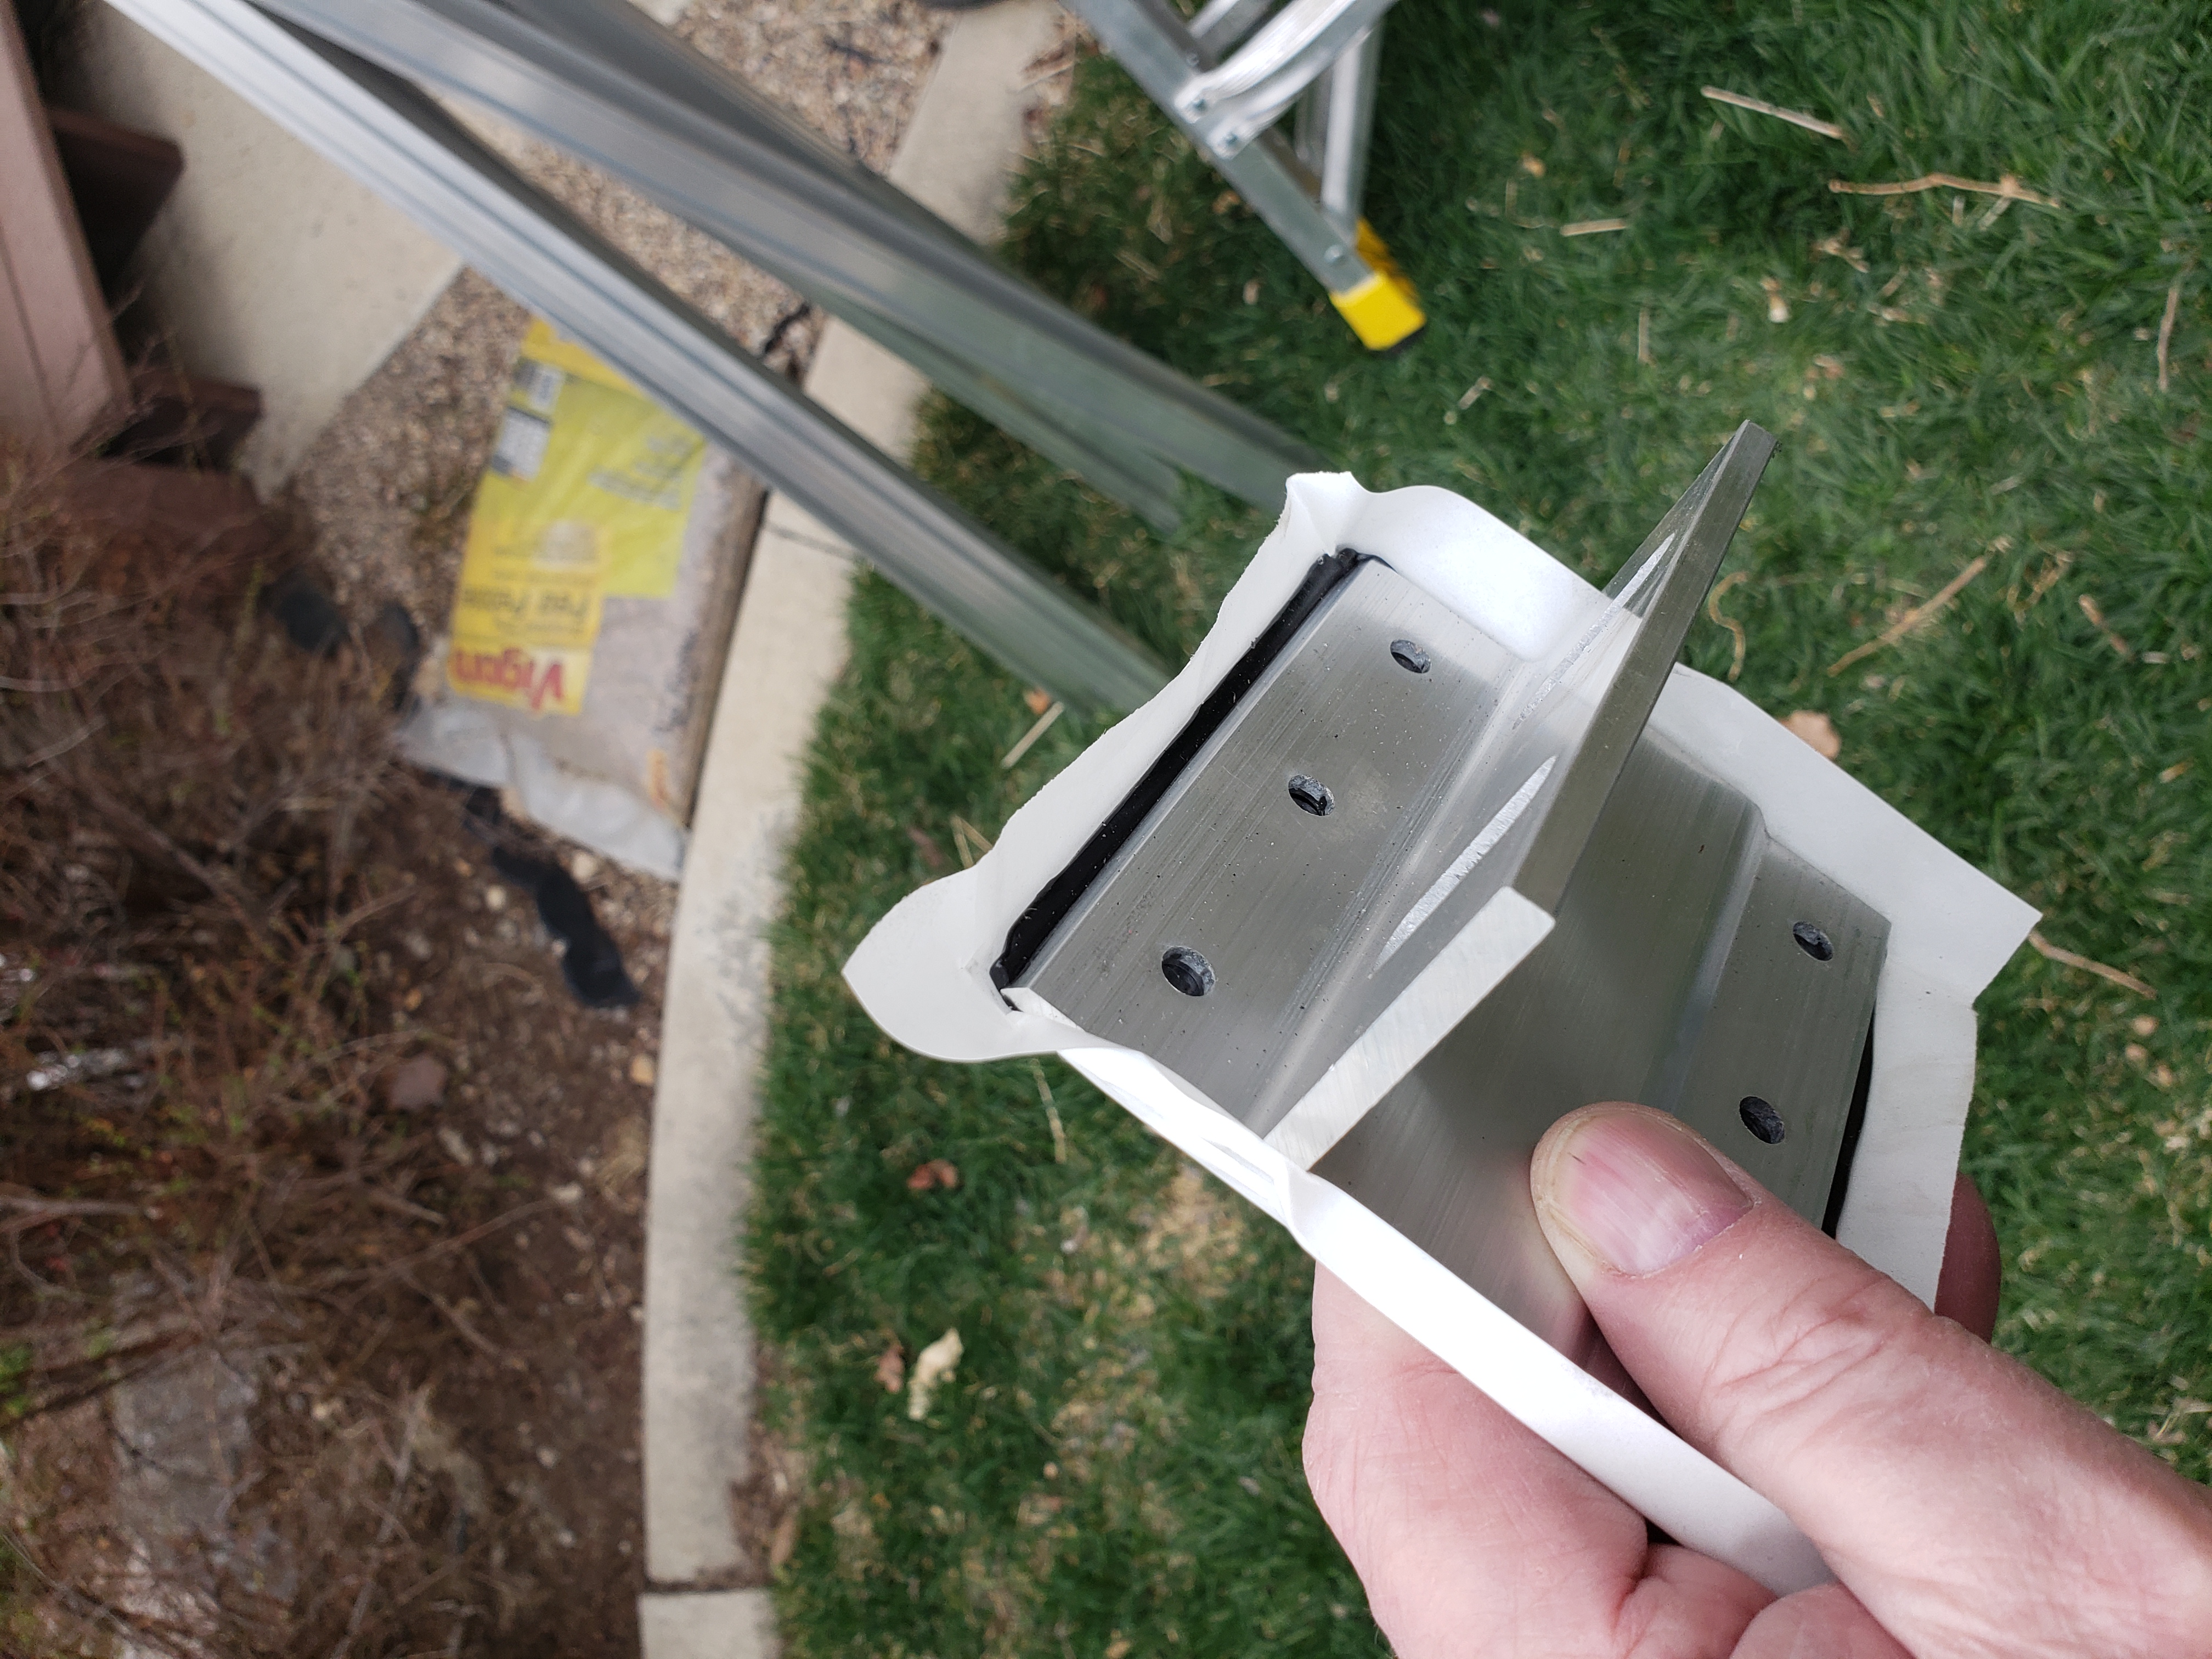
Mounting of channel/rail to |
|
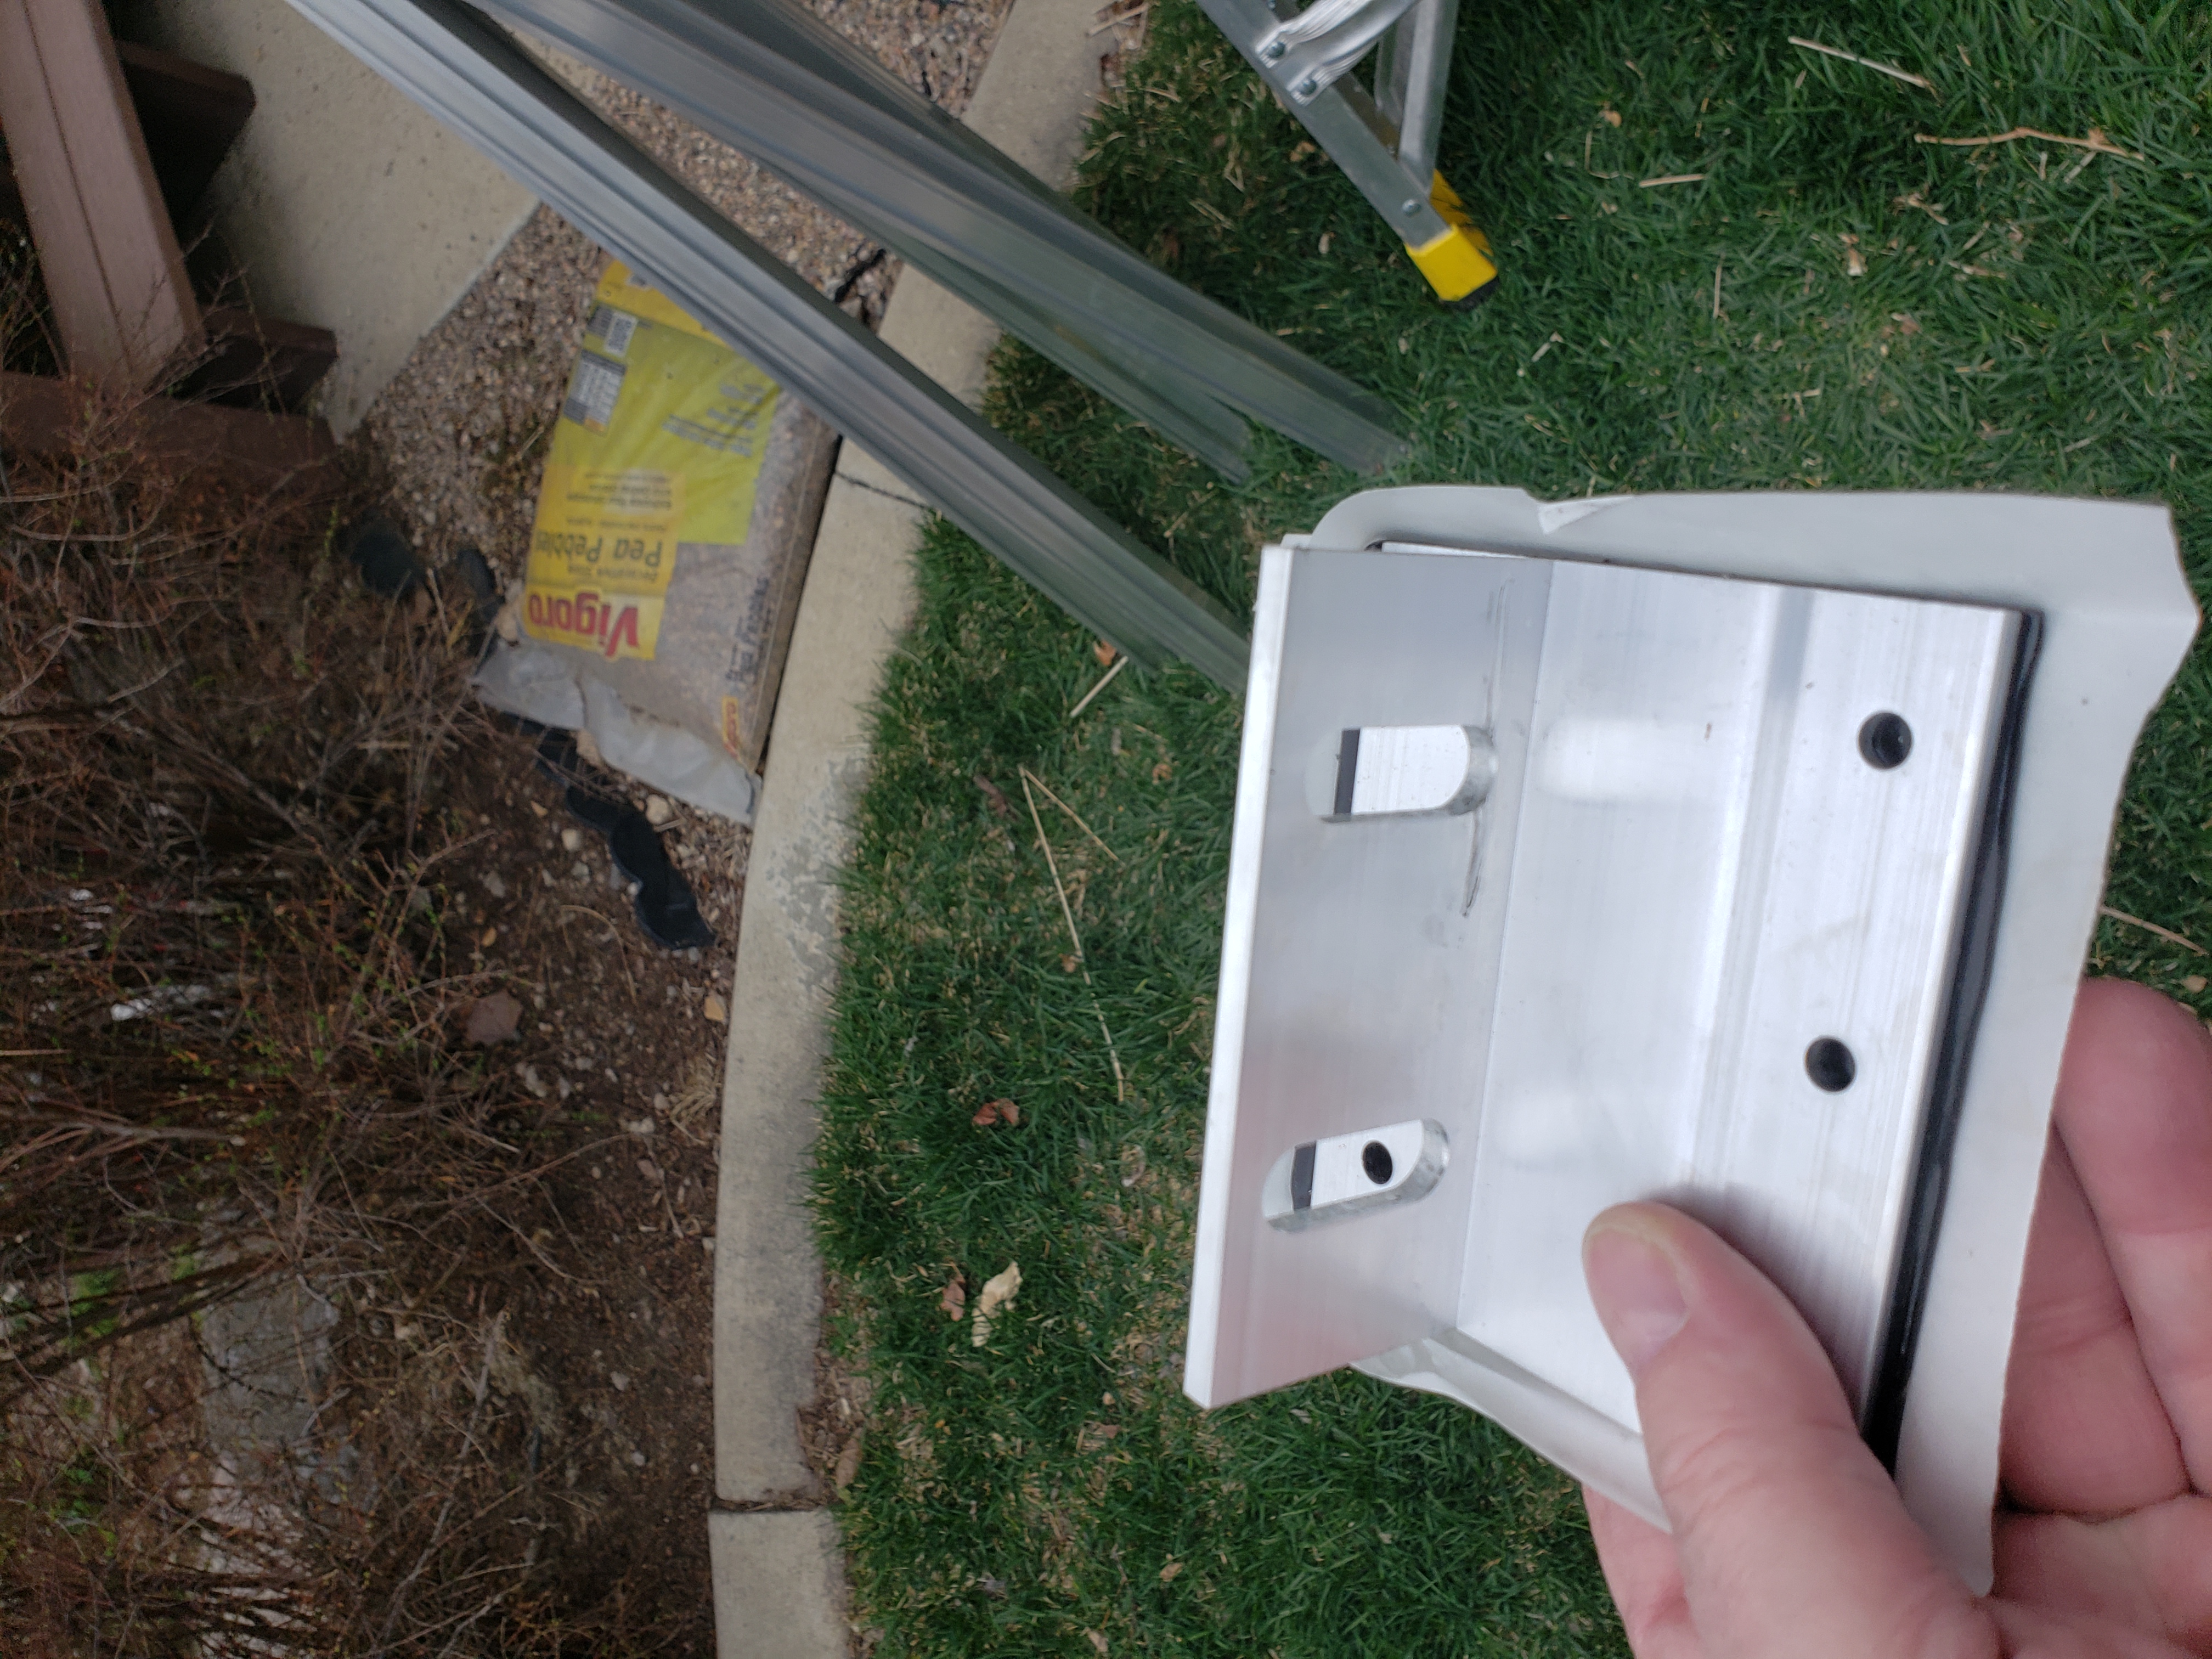
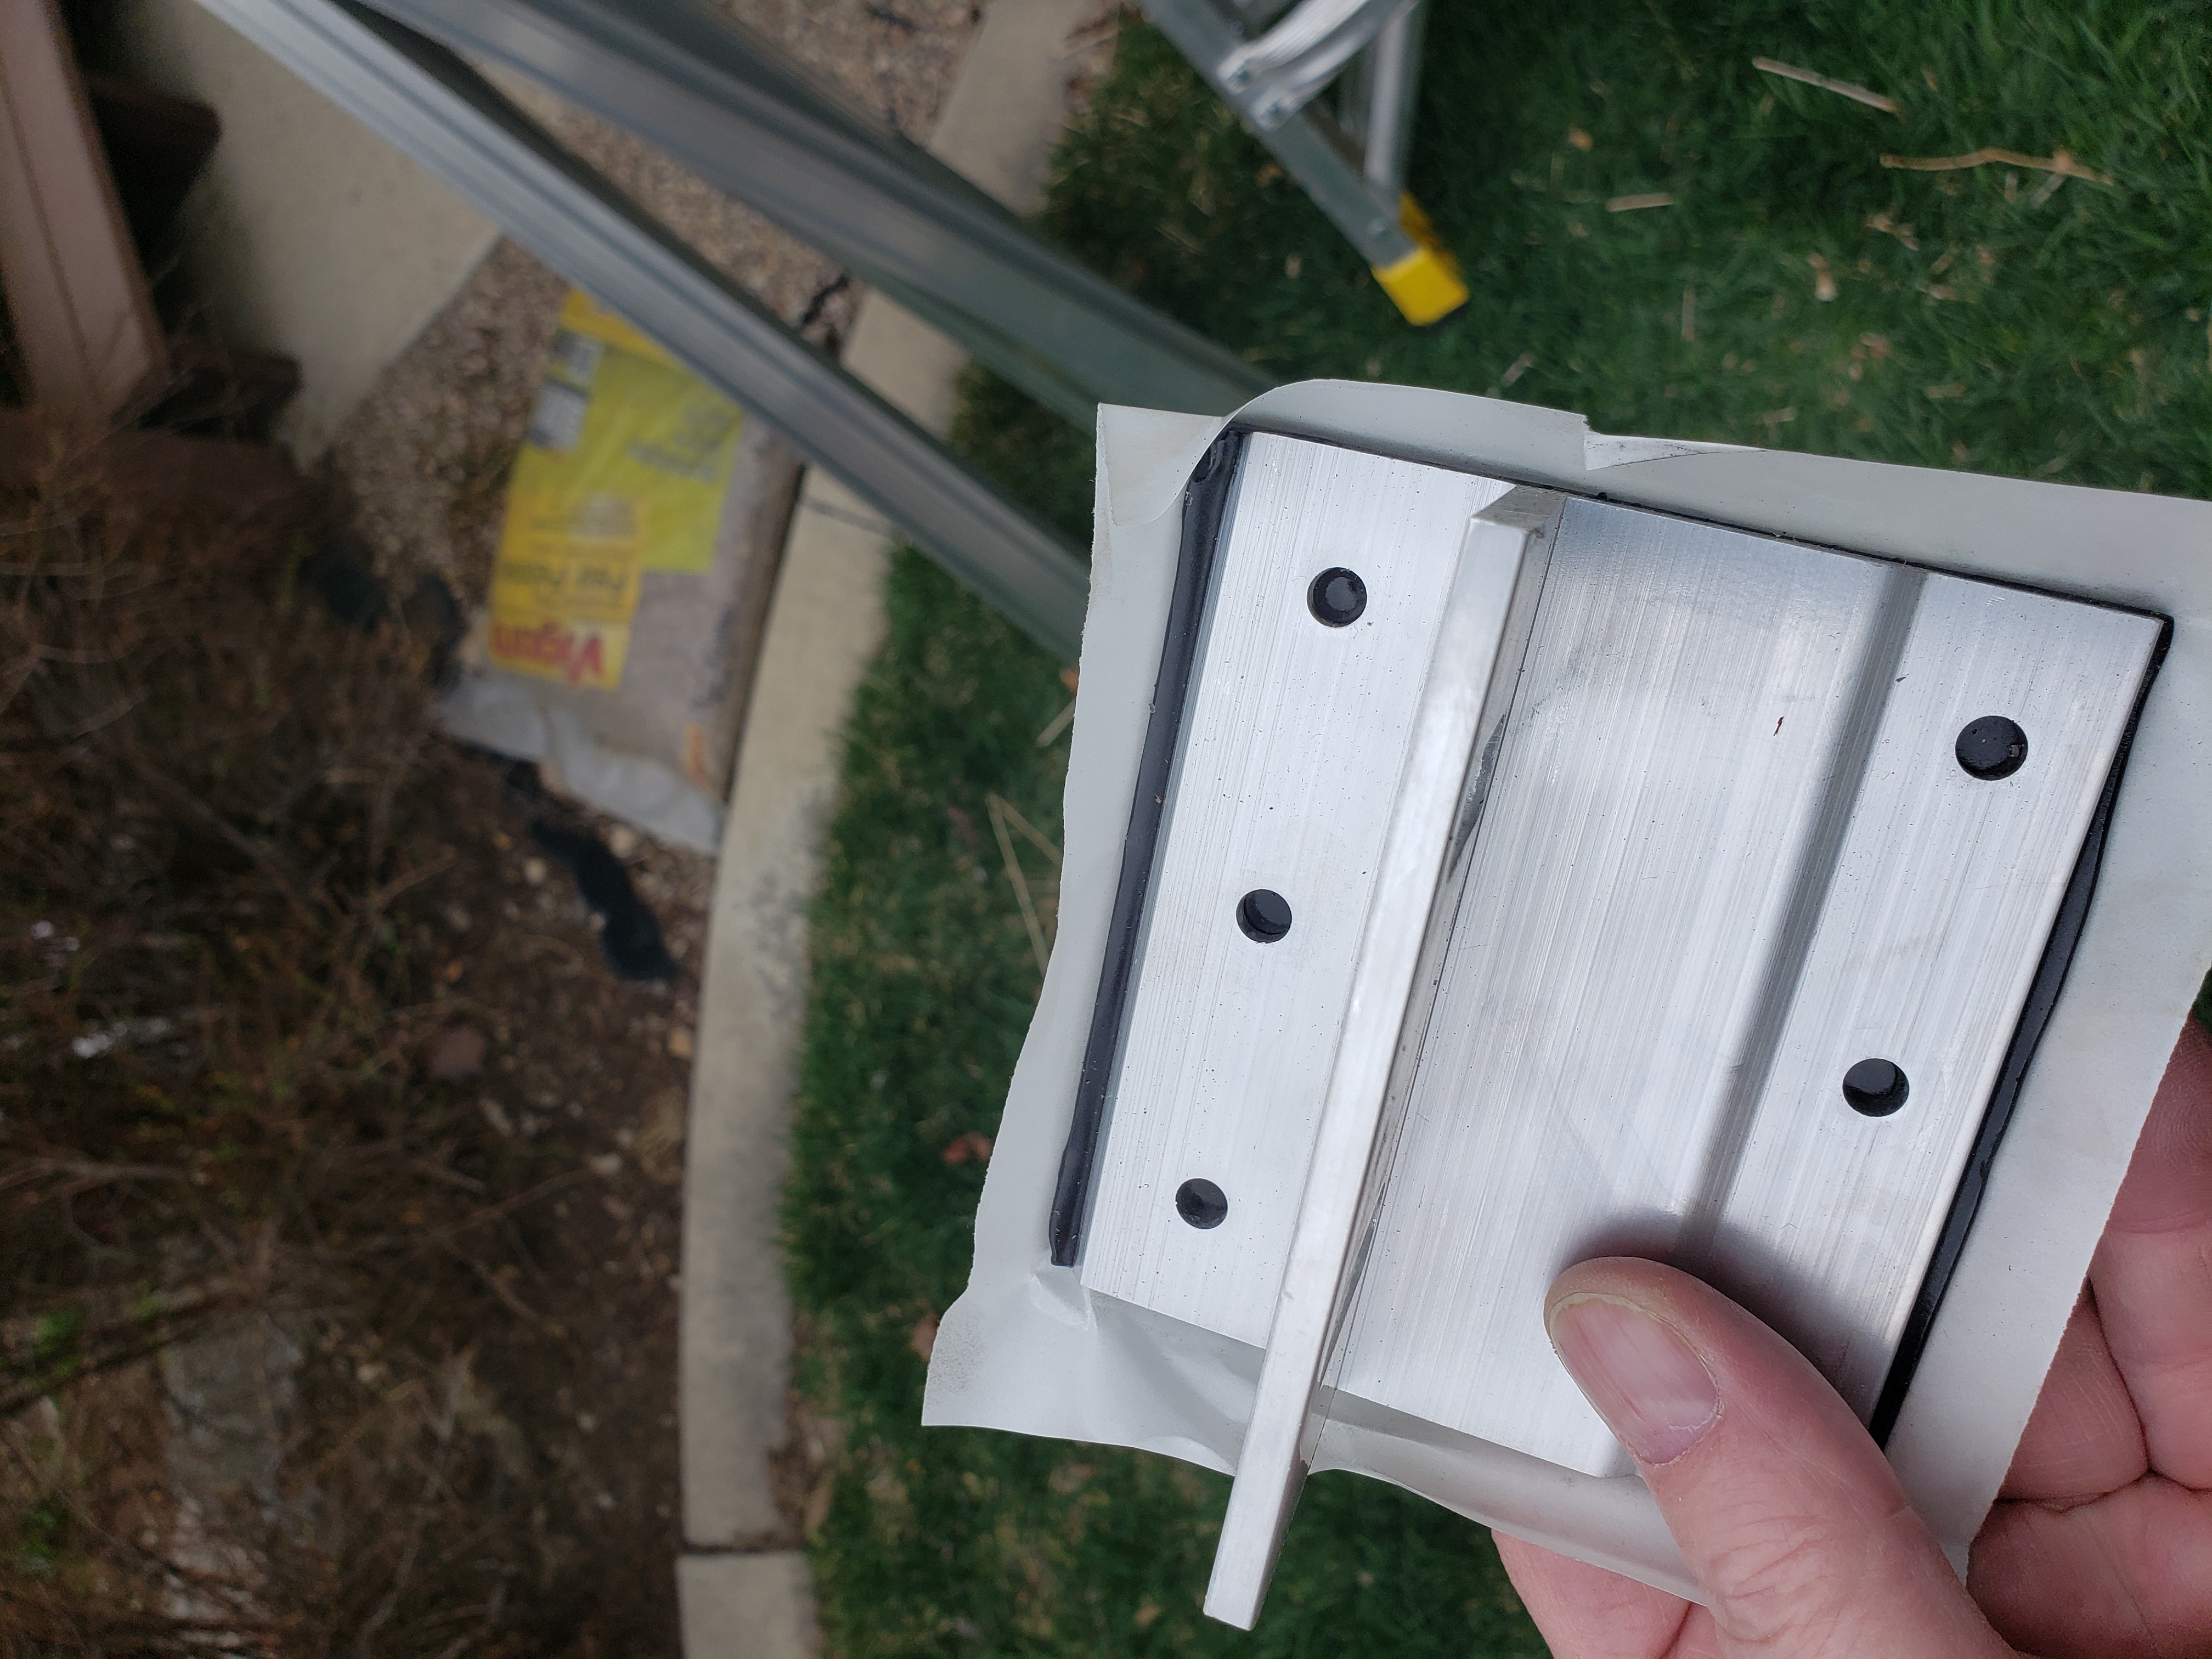
Brackets are pre-tarred and
|
|
|
West-facing installation. |
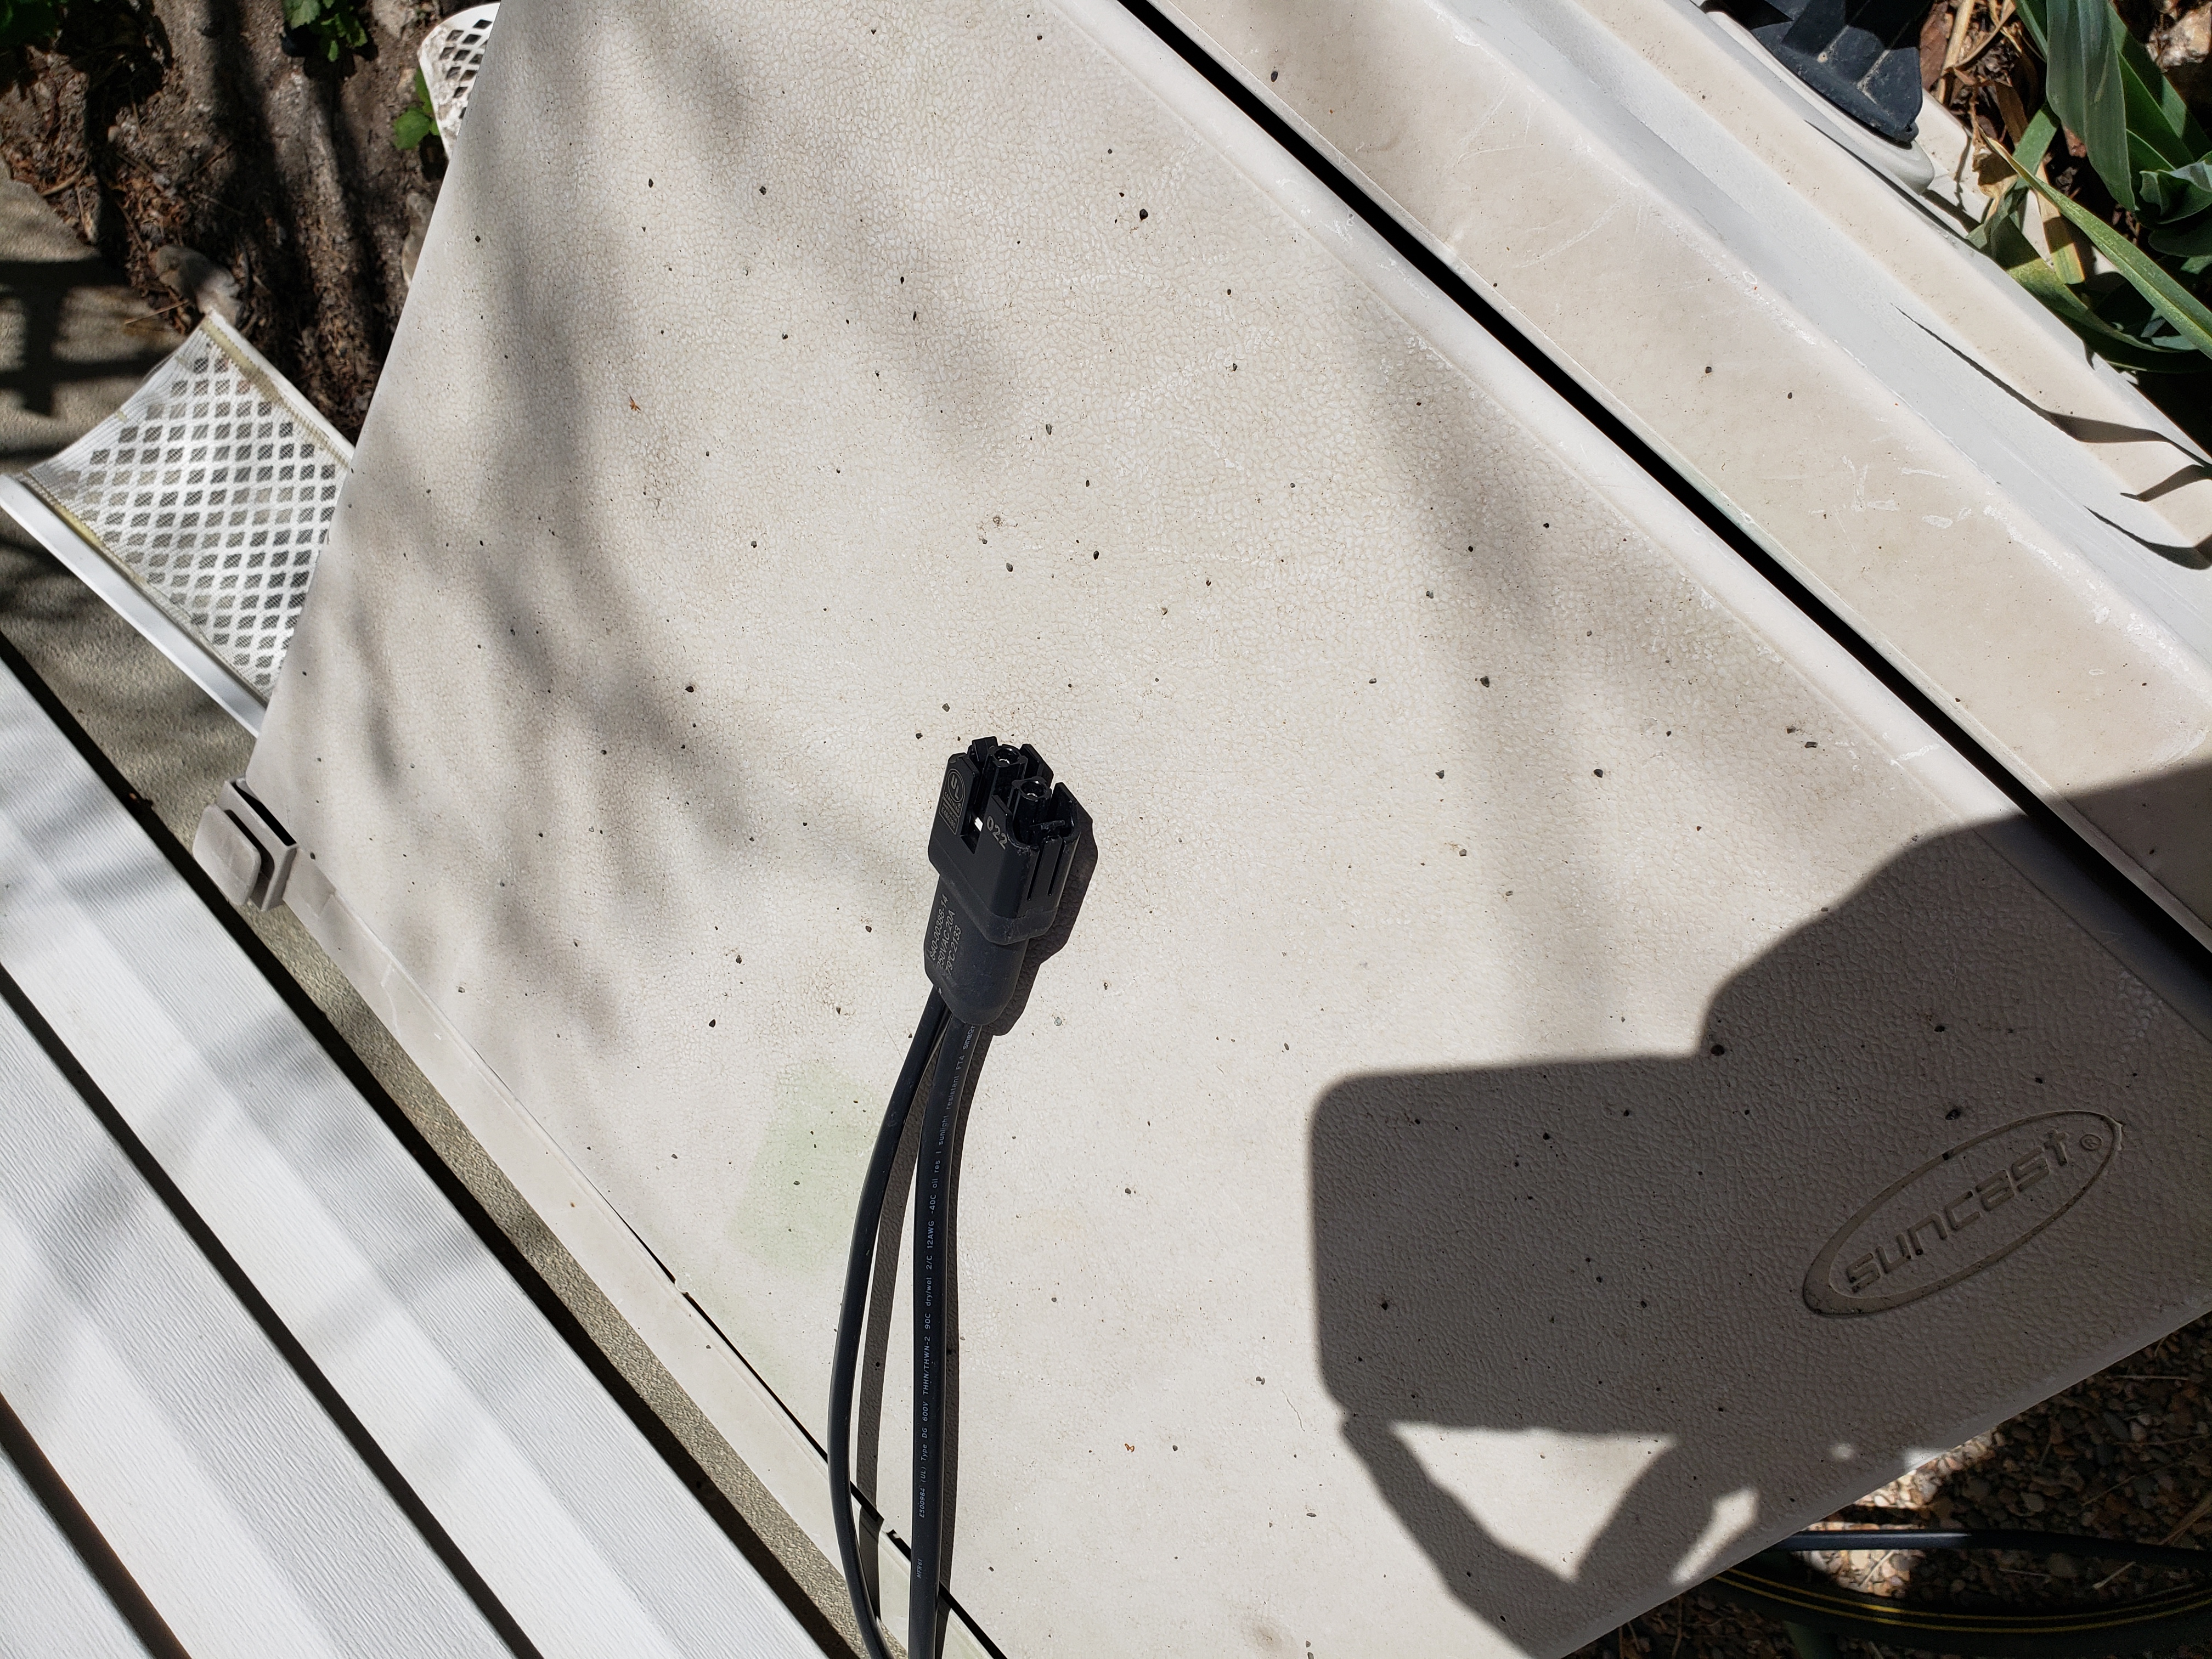
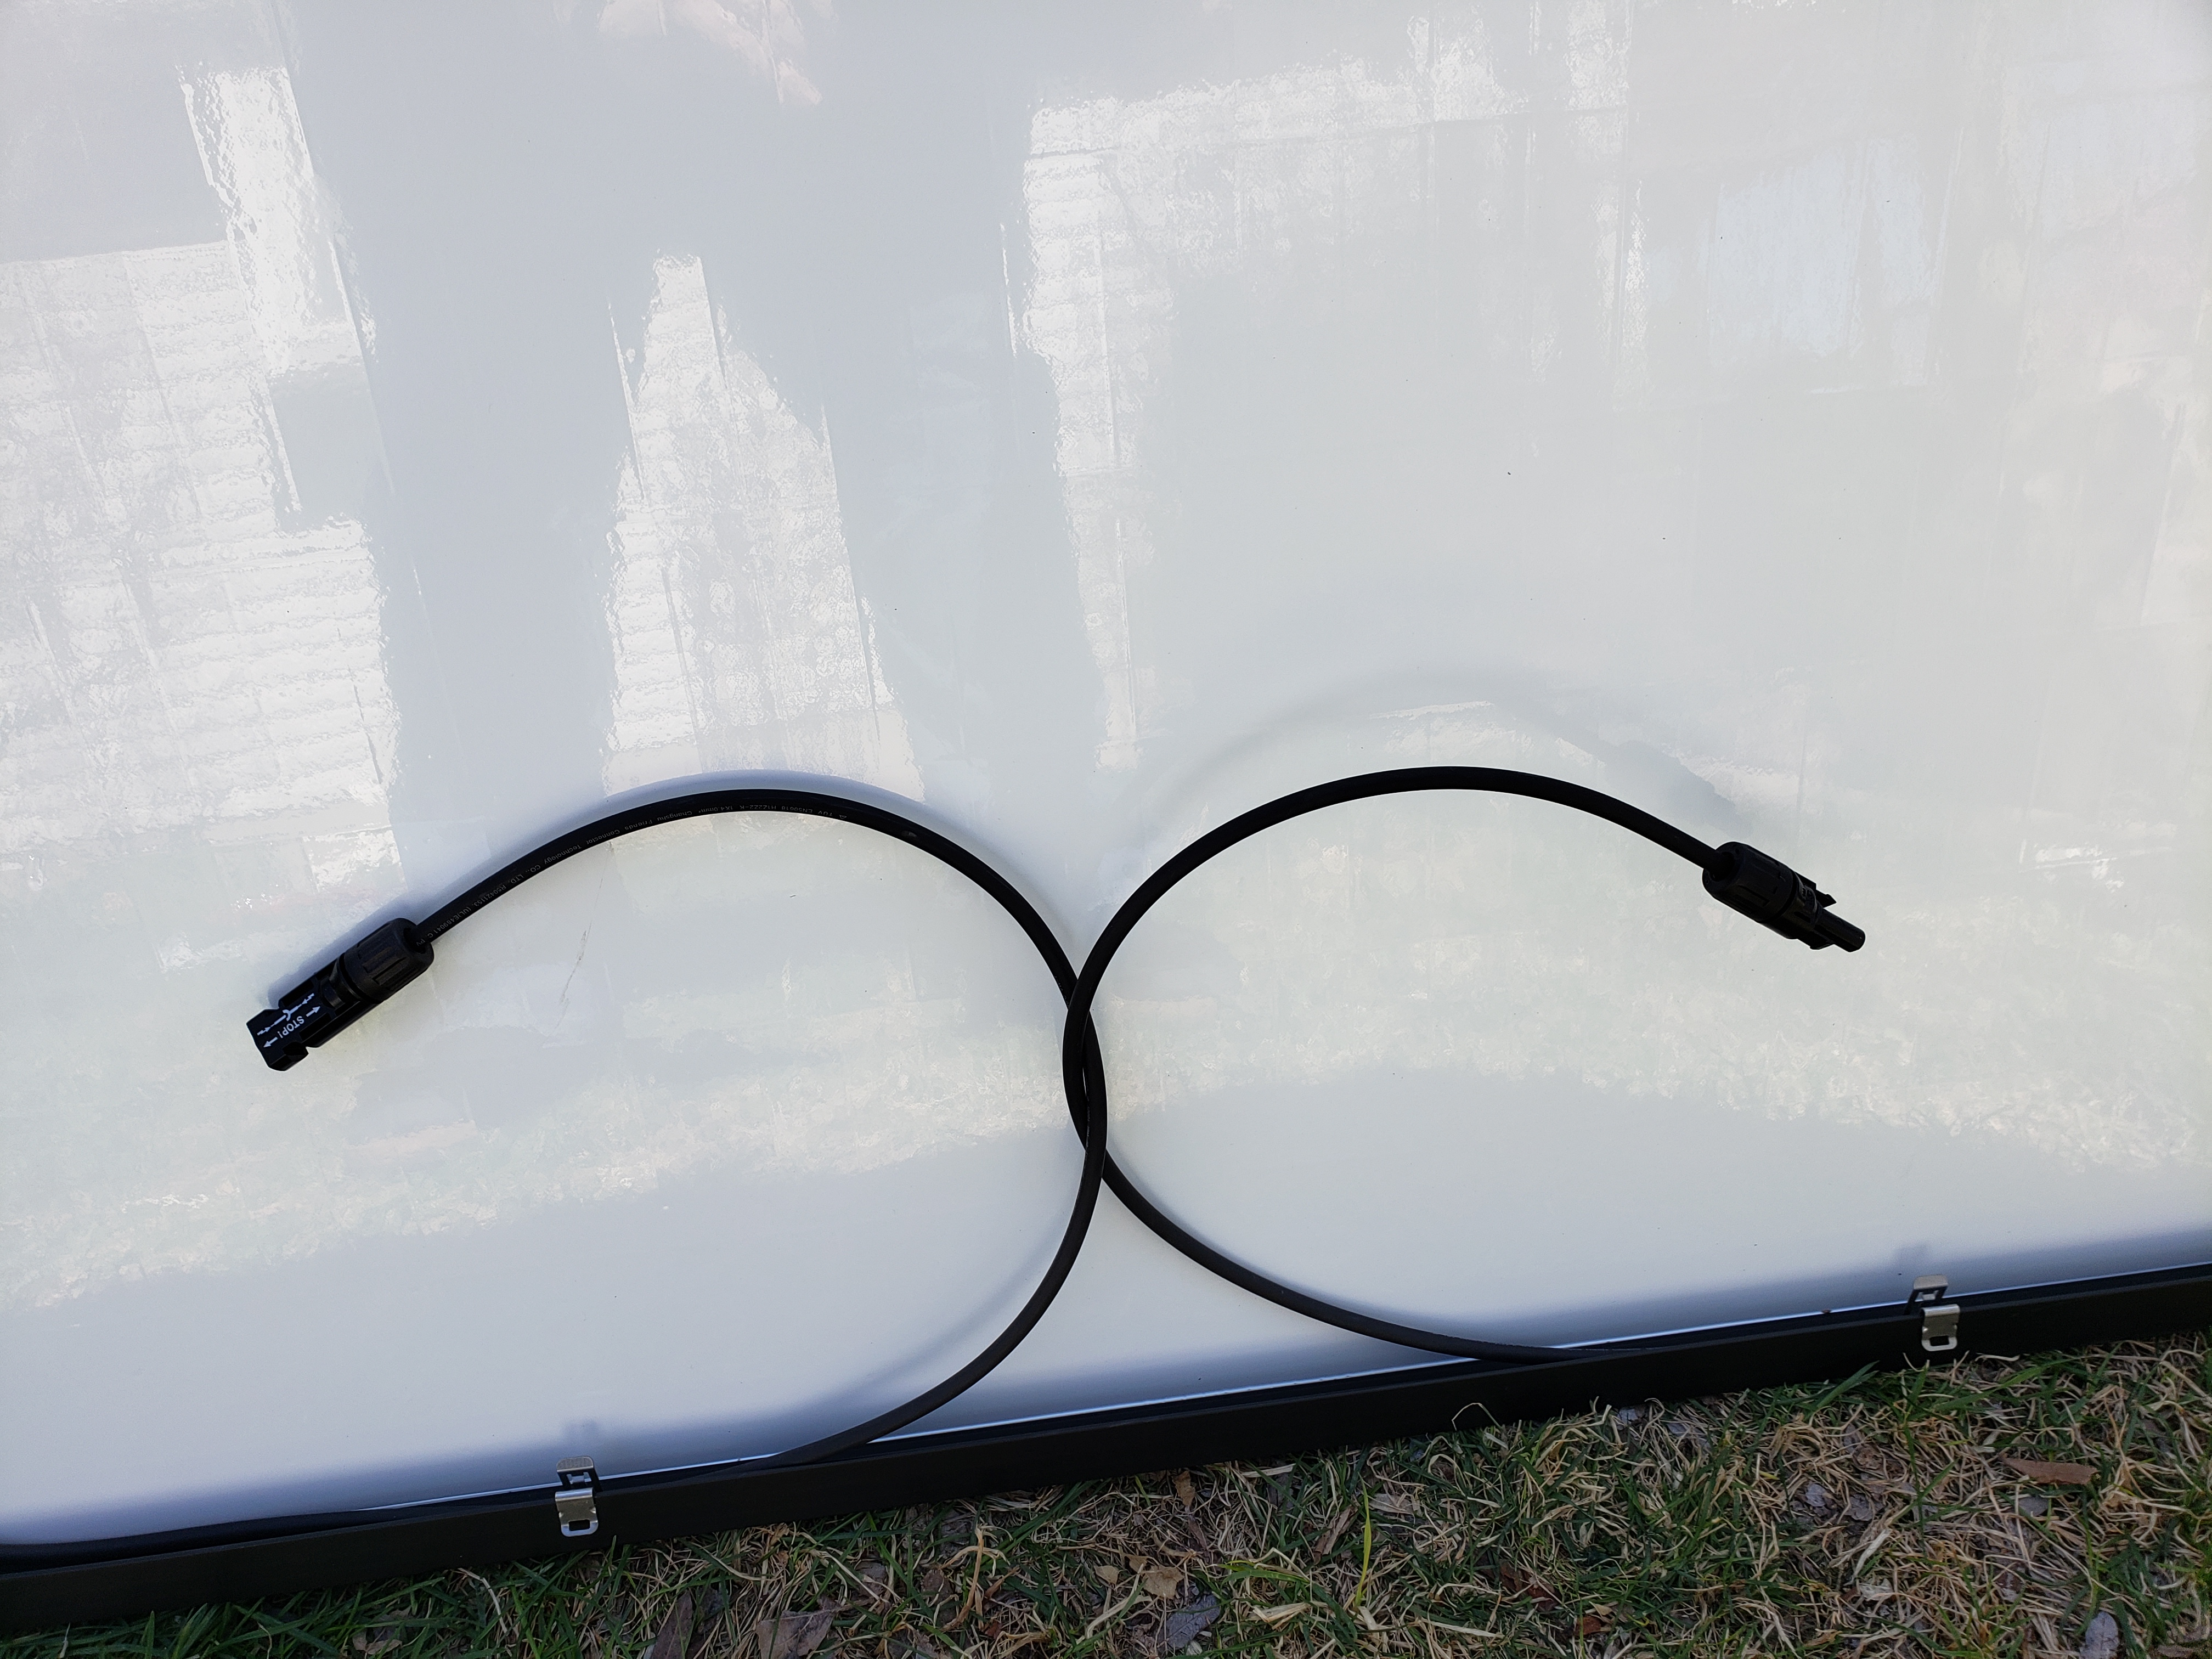
Inverter cable and connector. |
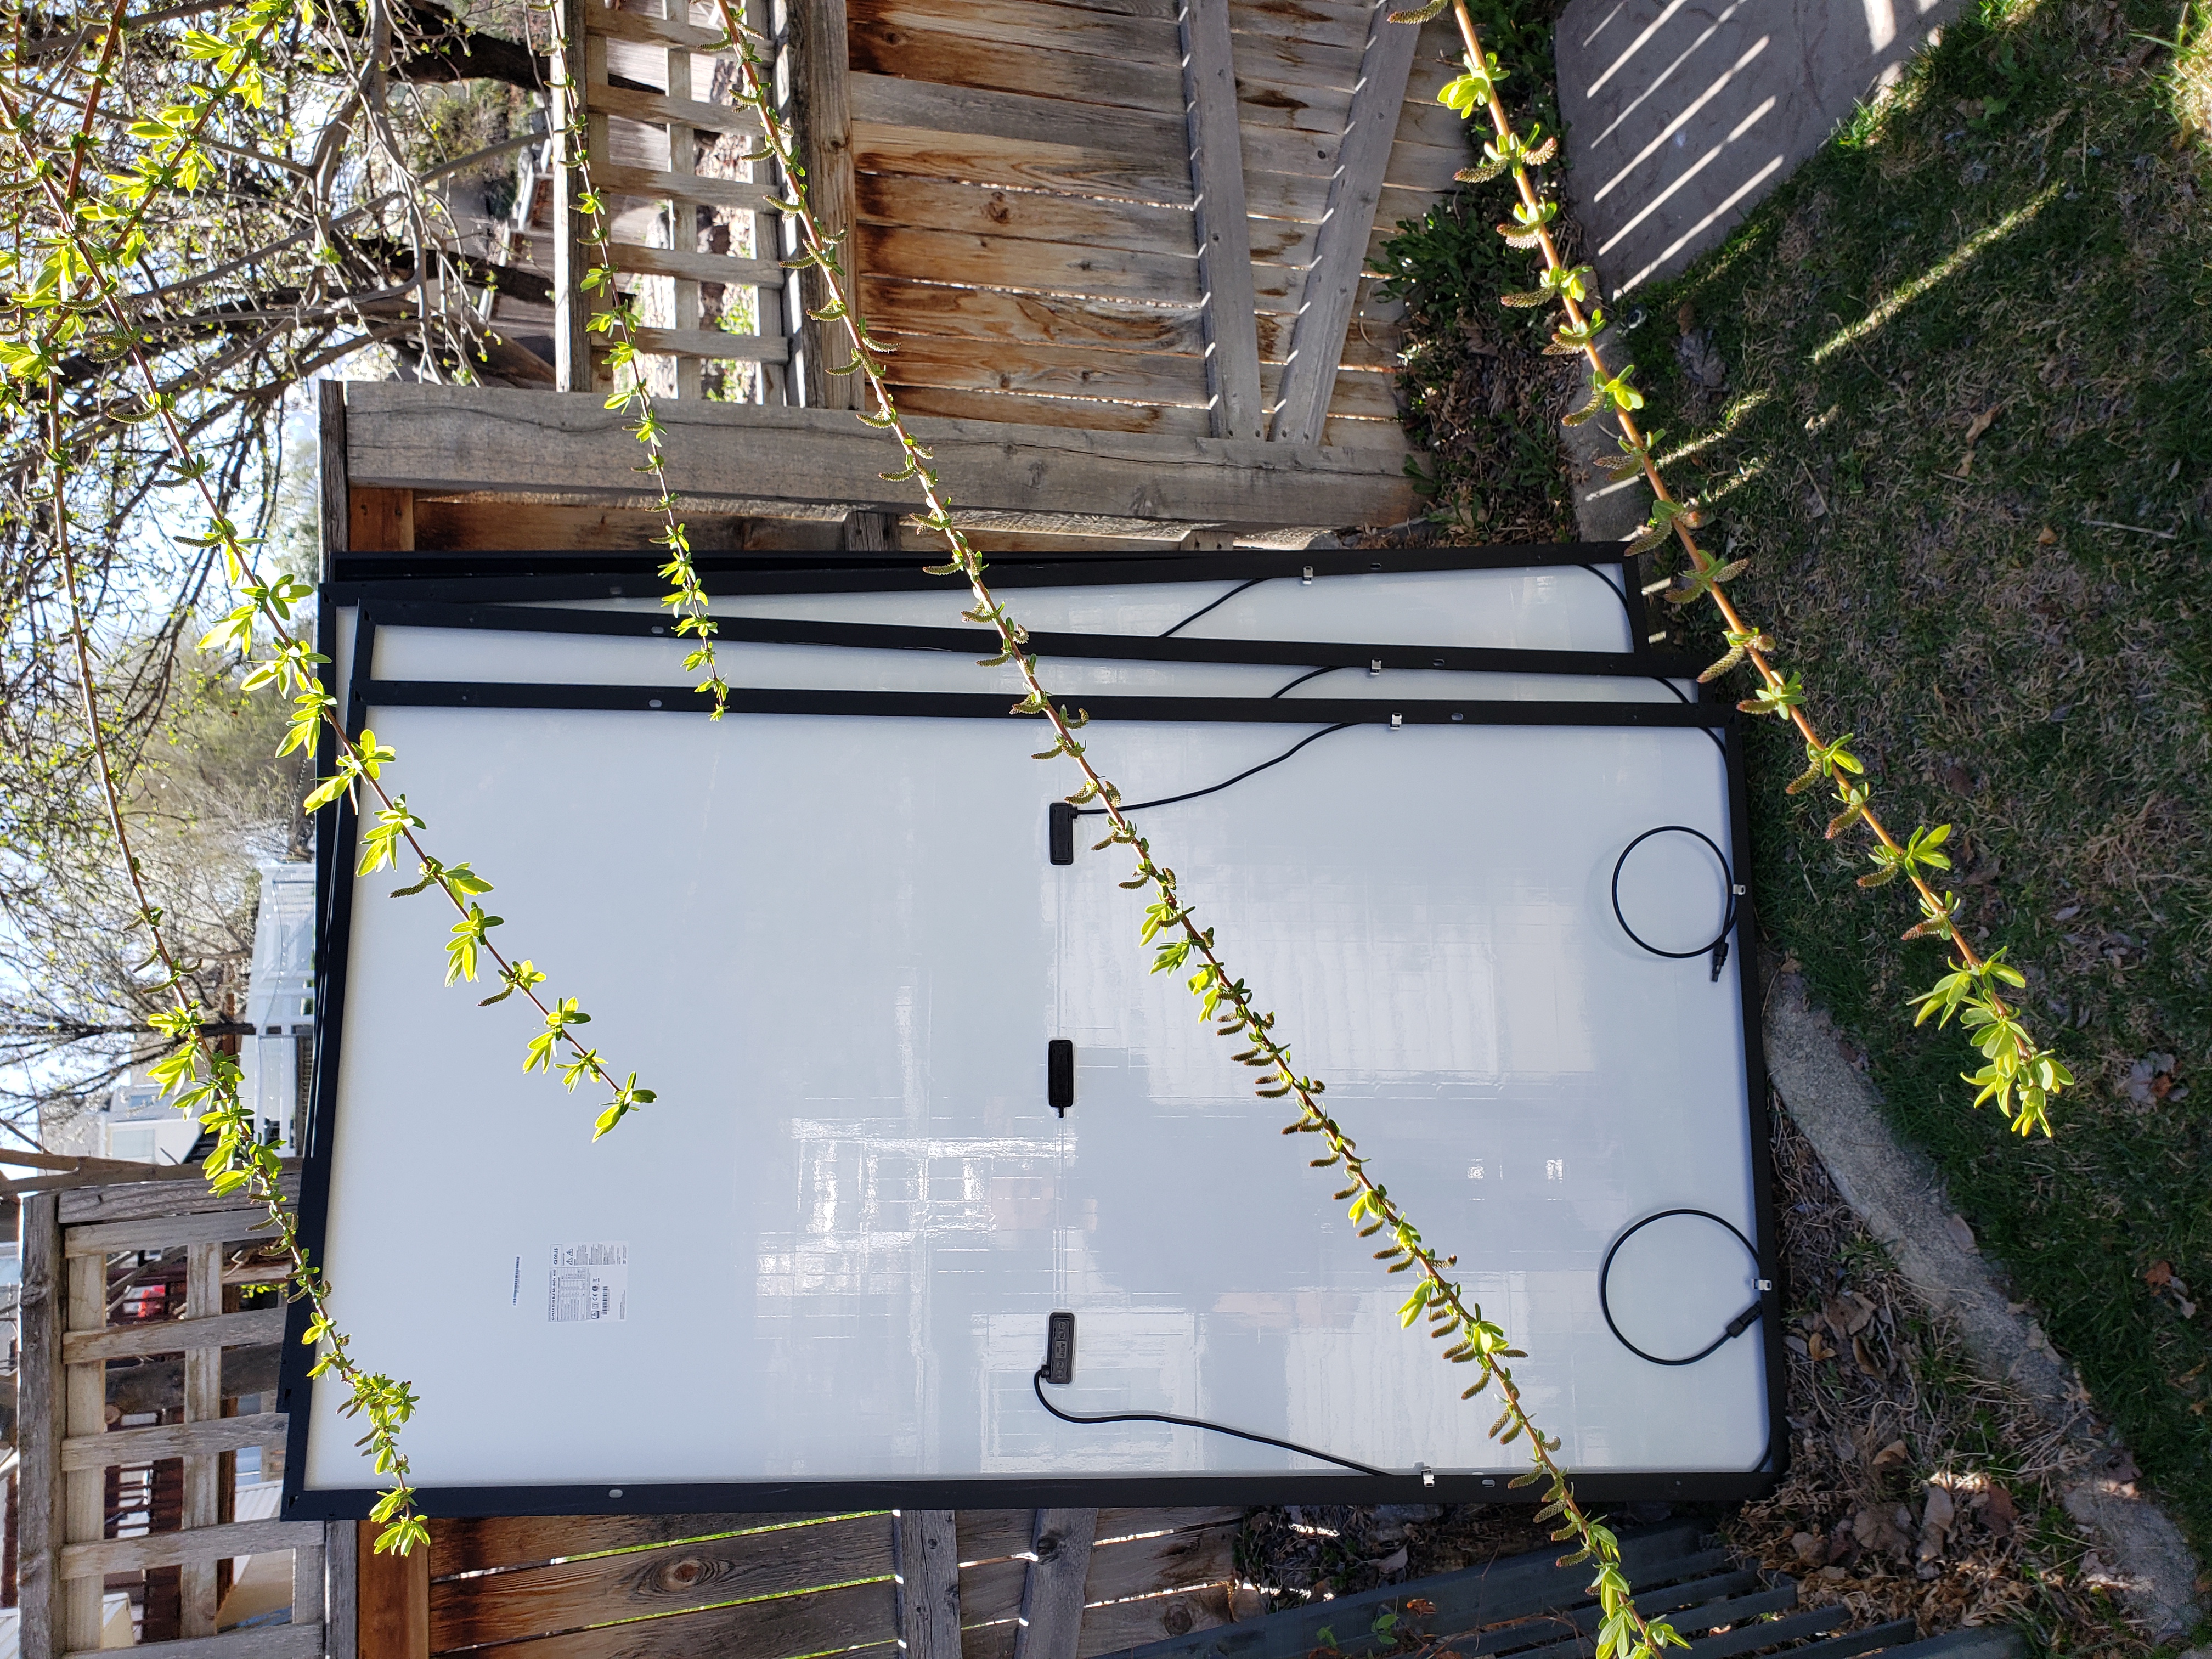
Back of panel (inverter is |
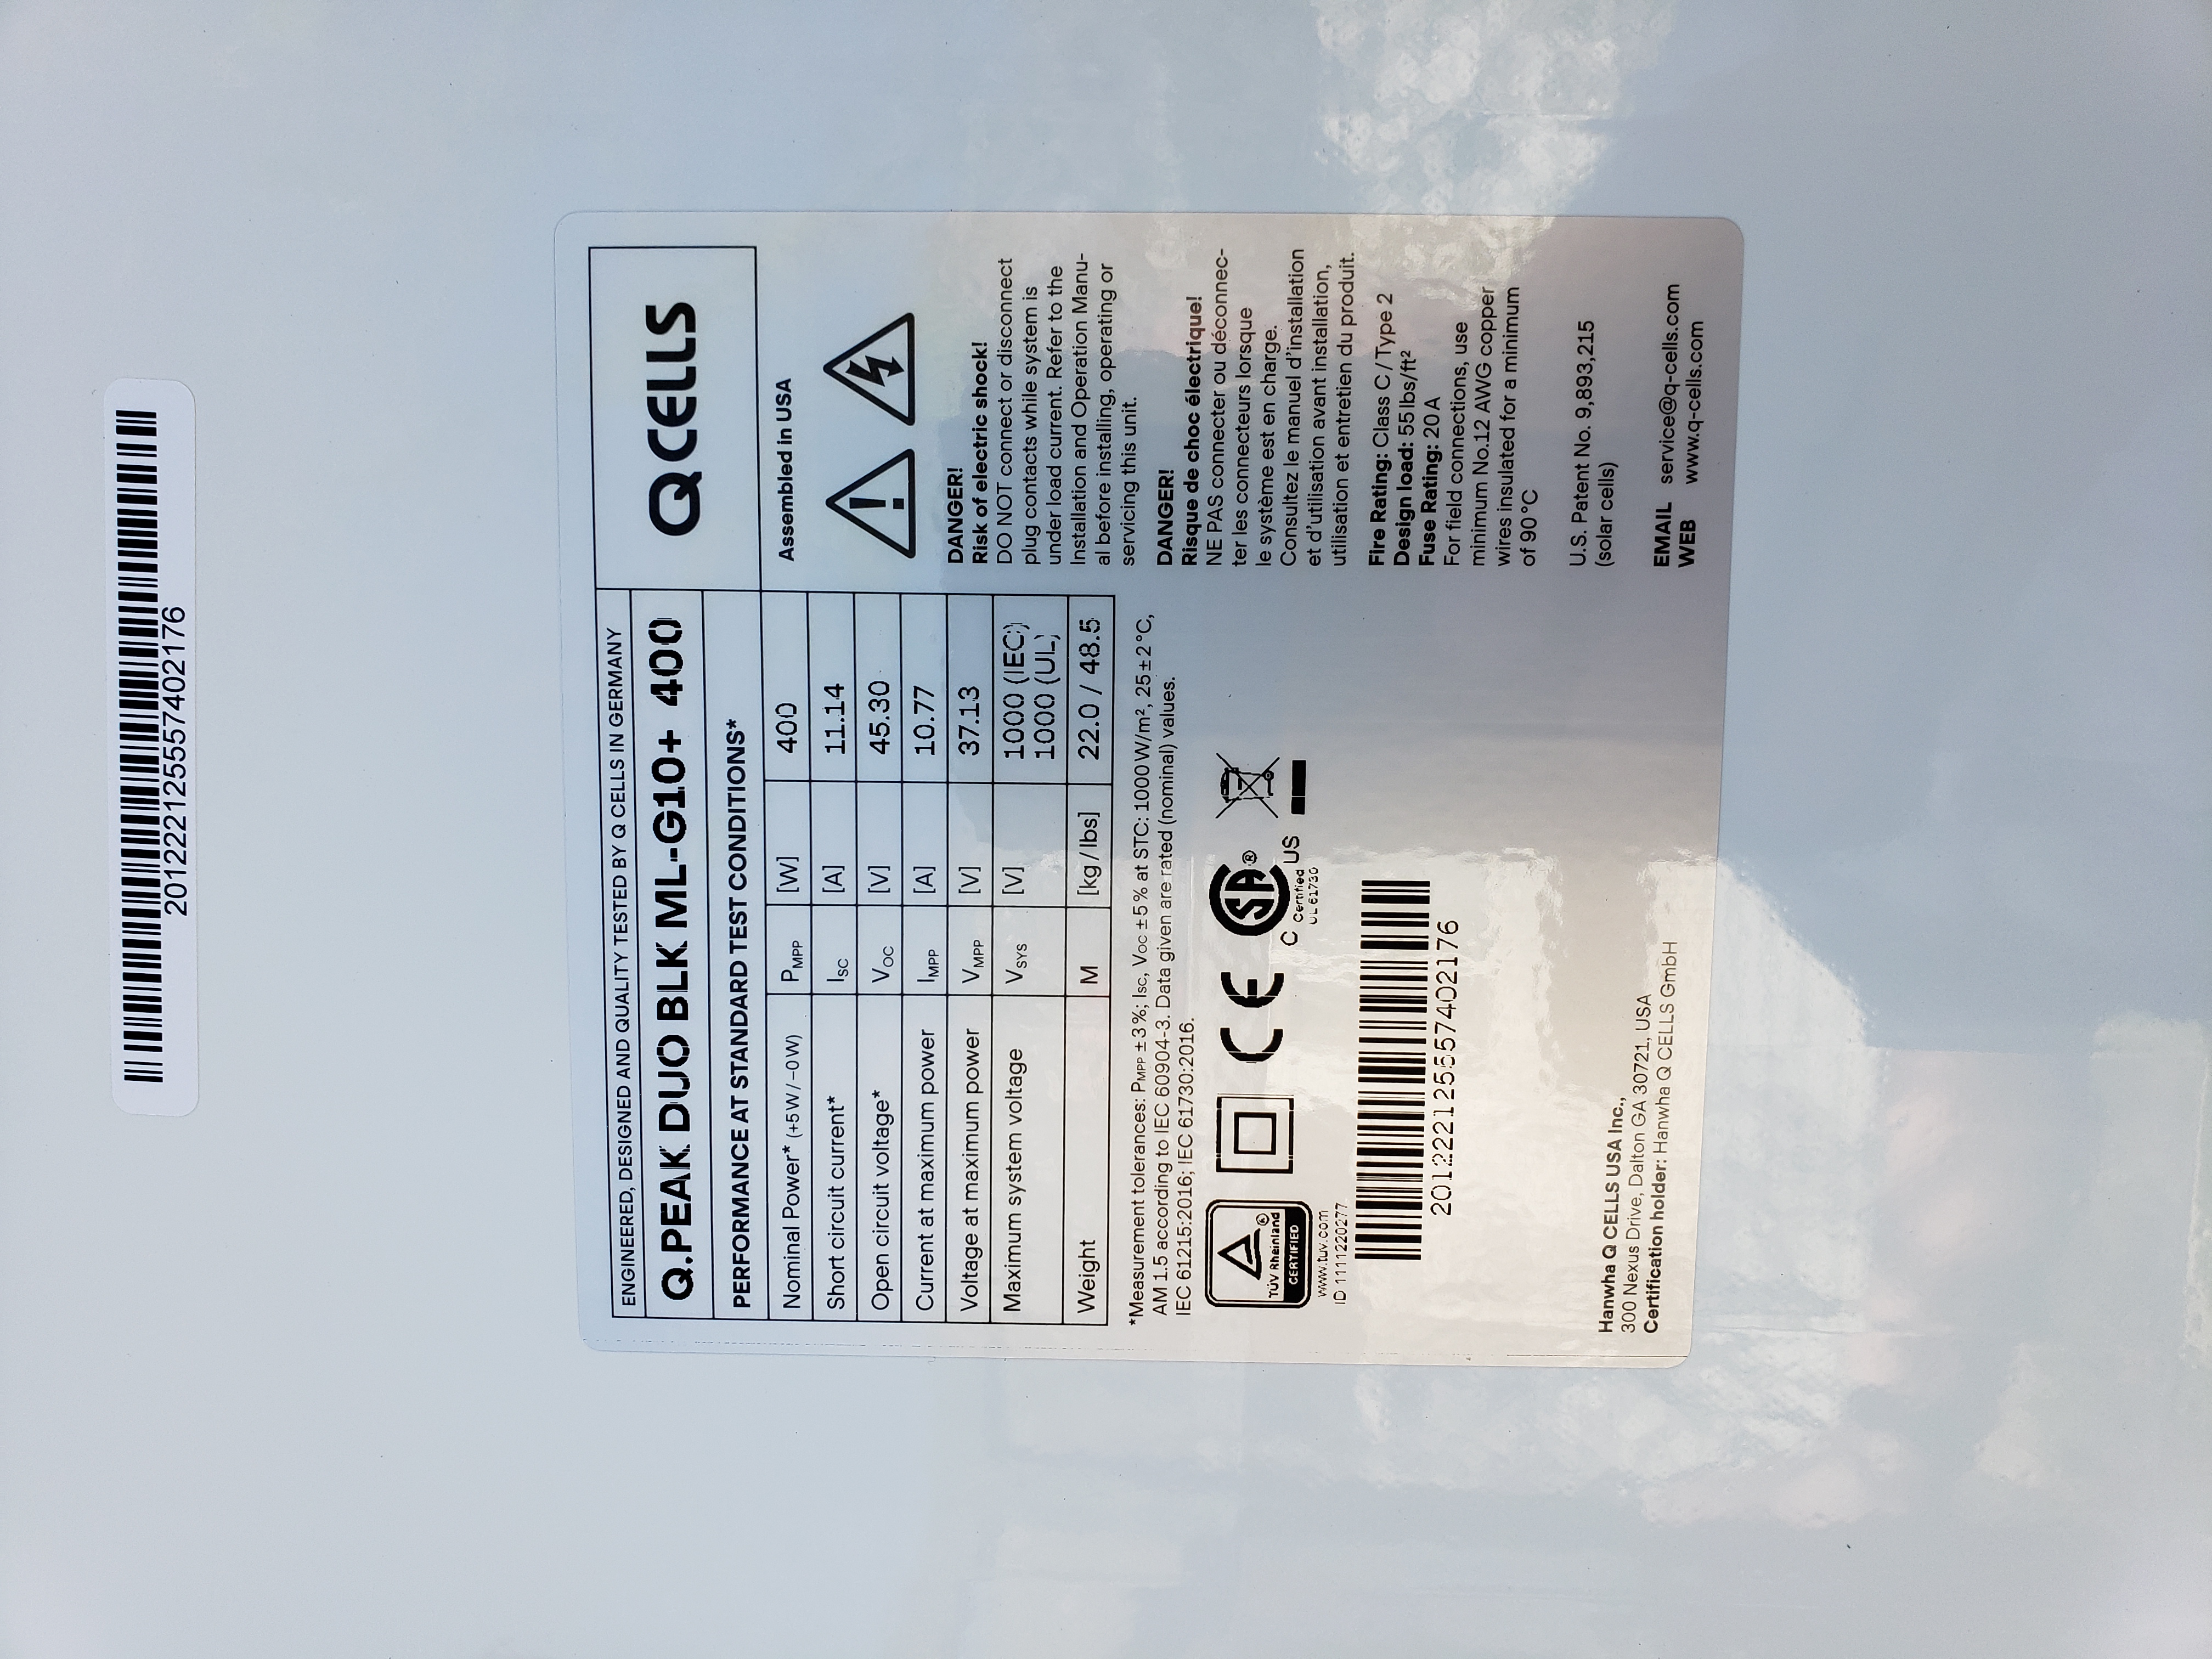
Back of Q Cell panel. |
West-facing panel mount. |
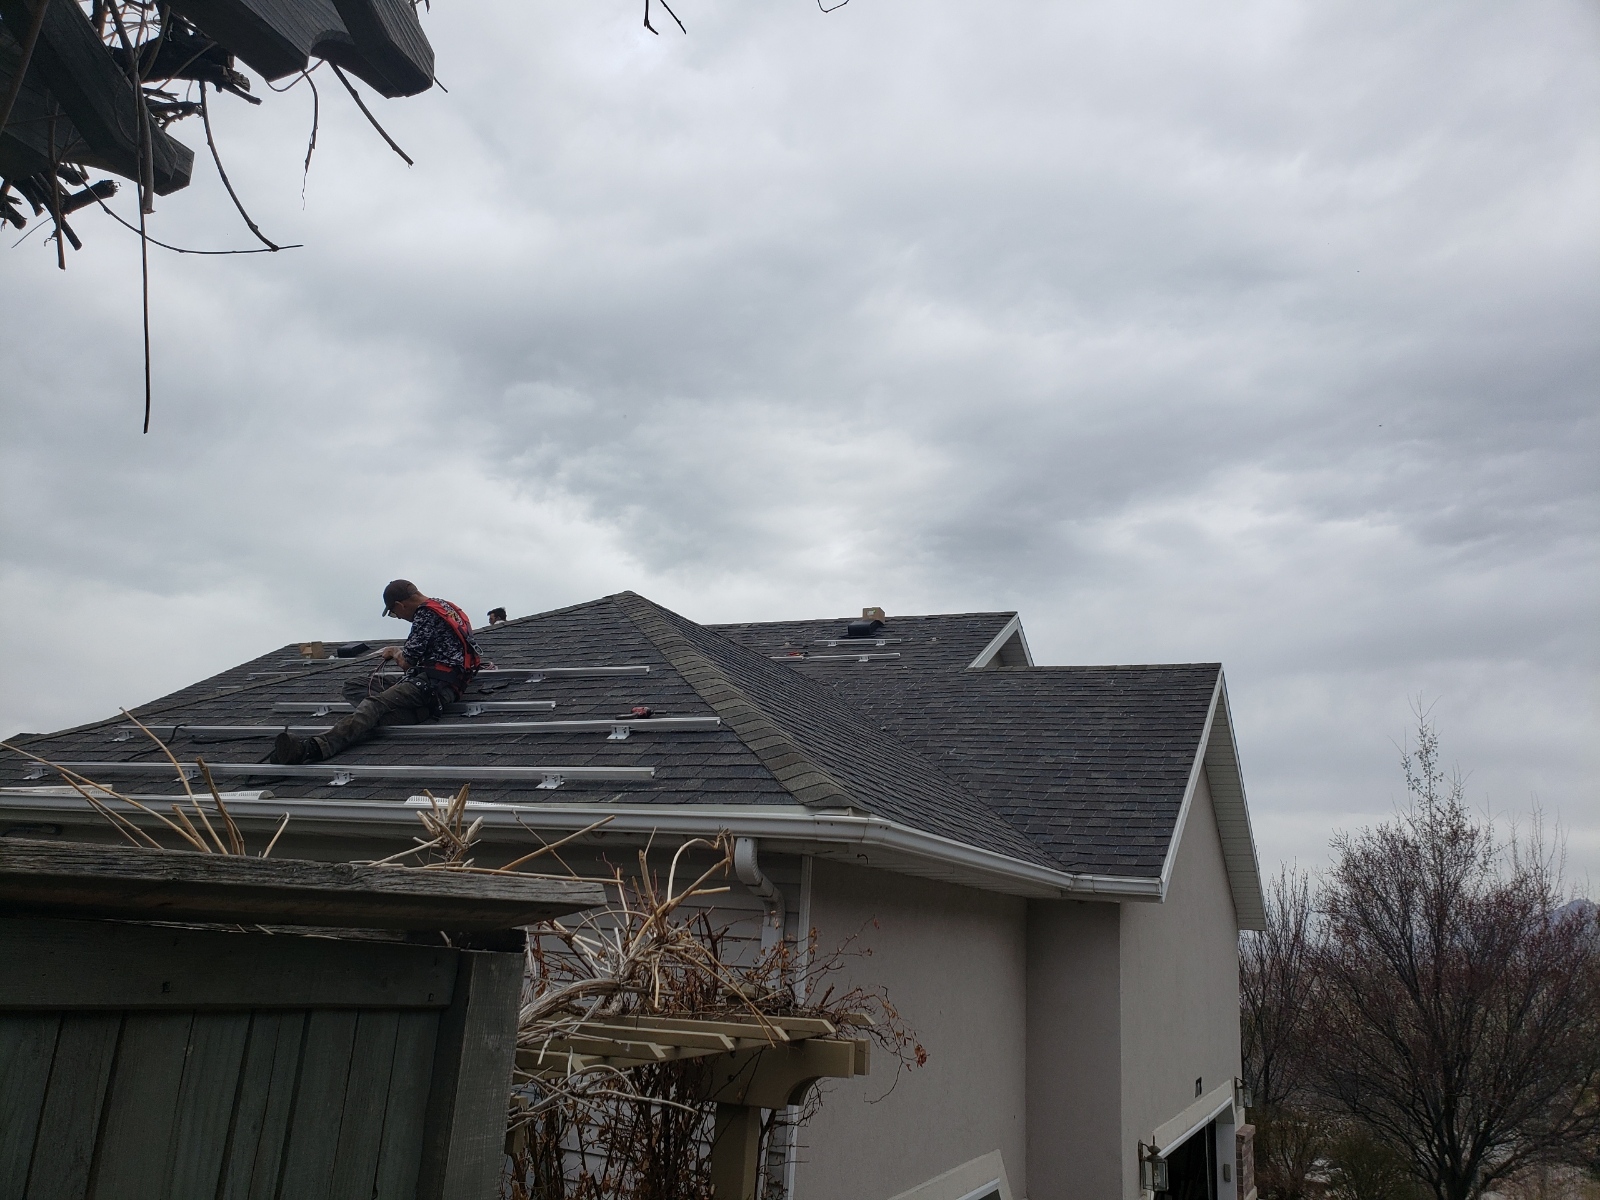
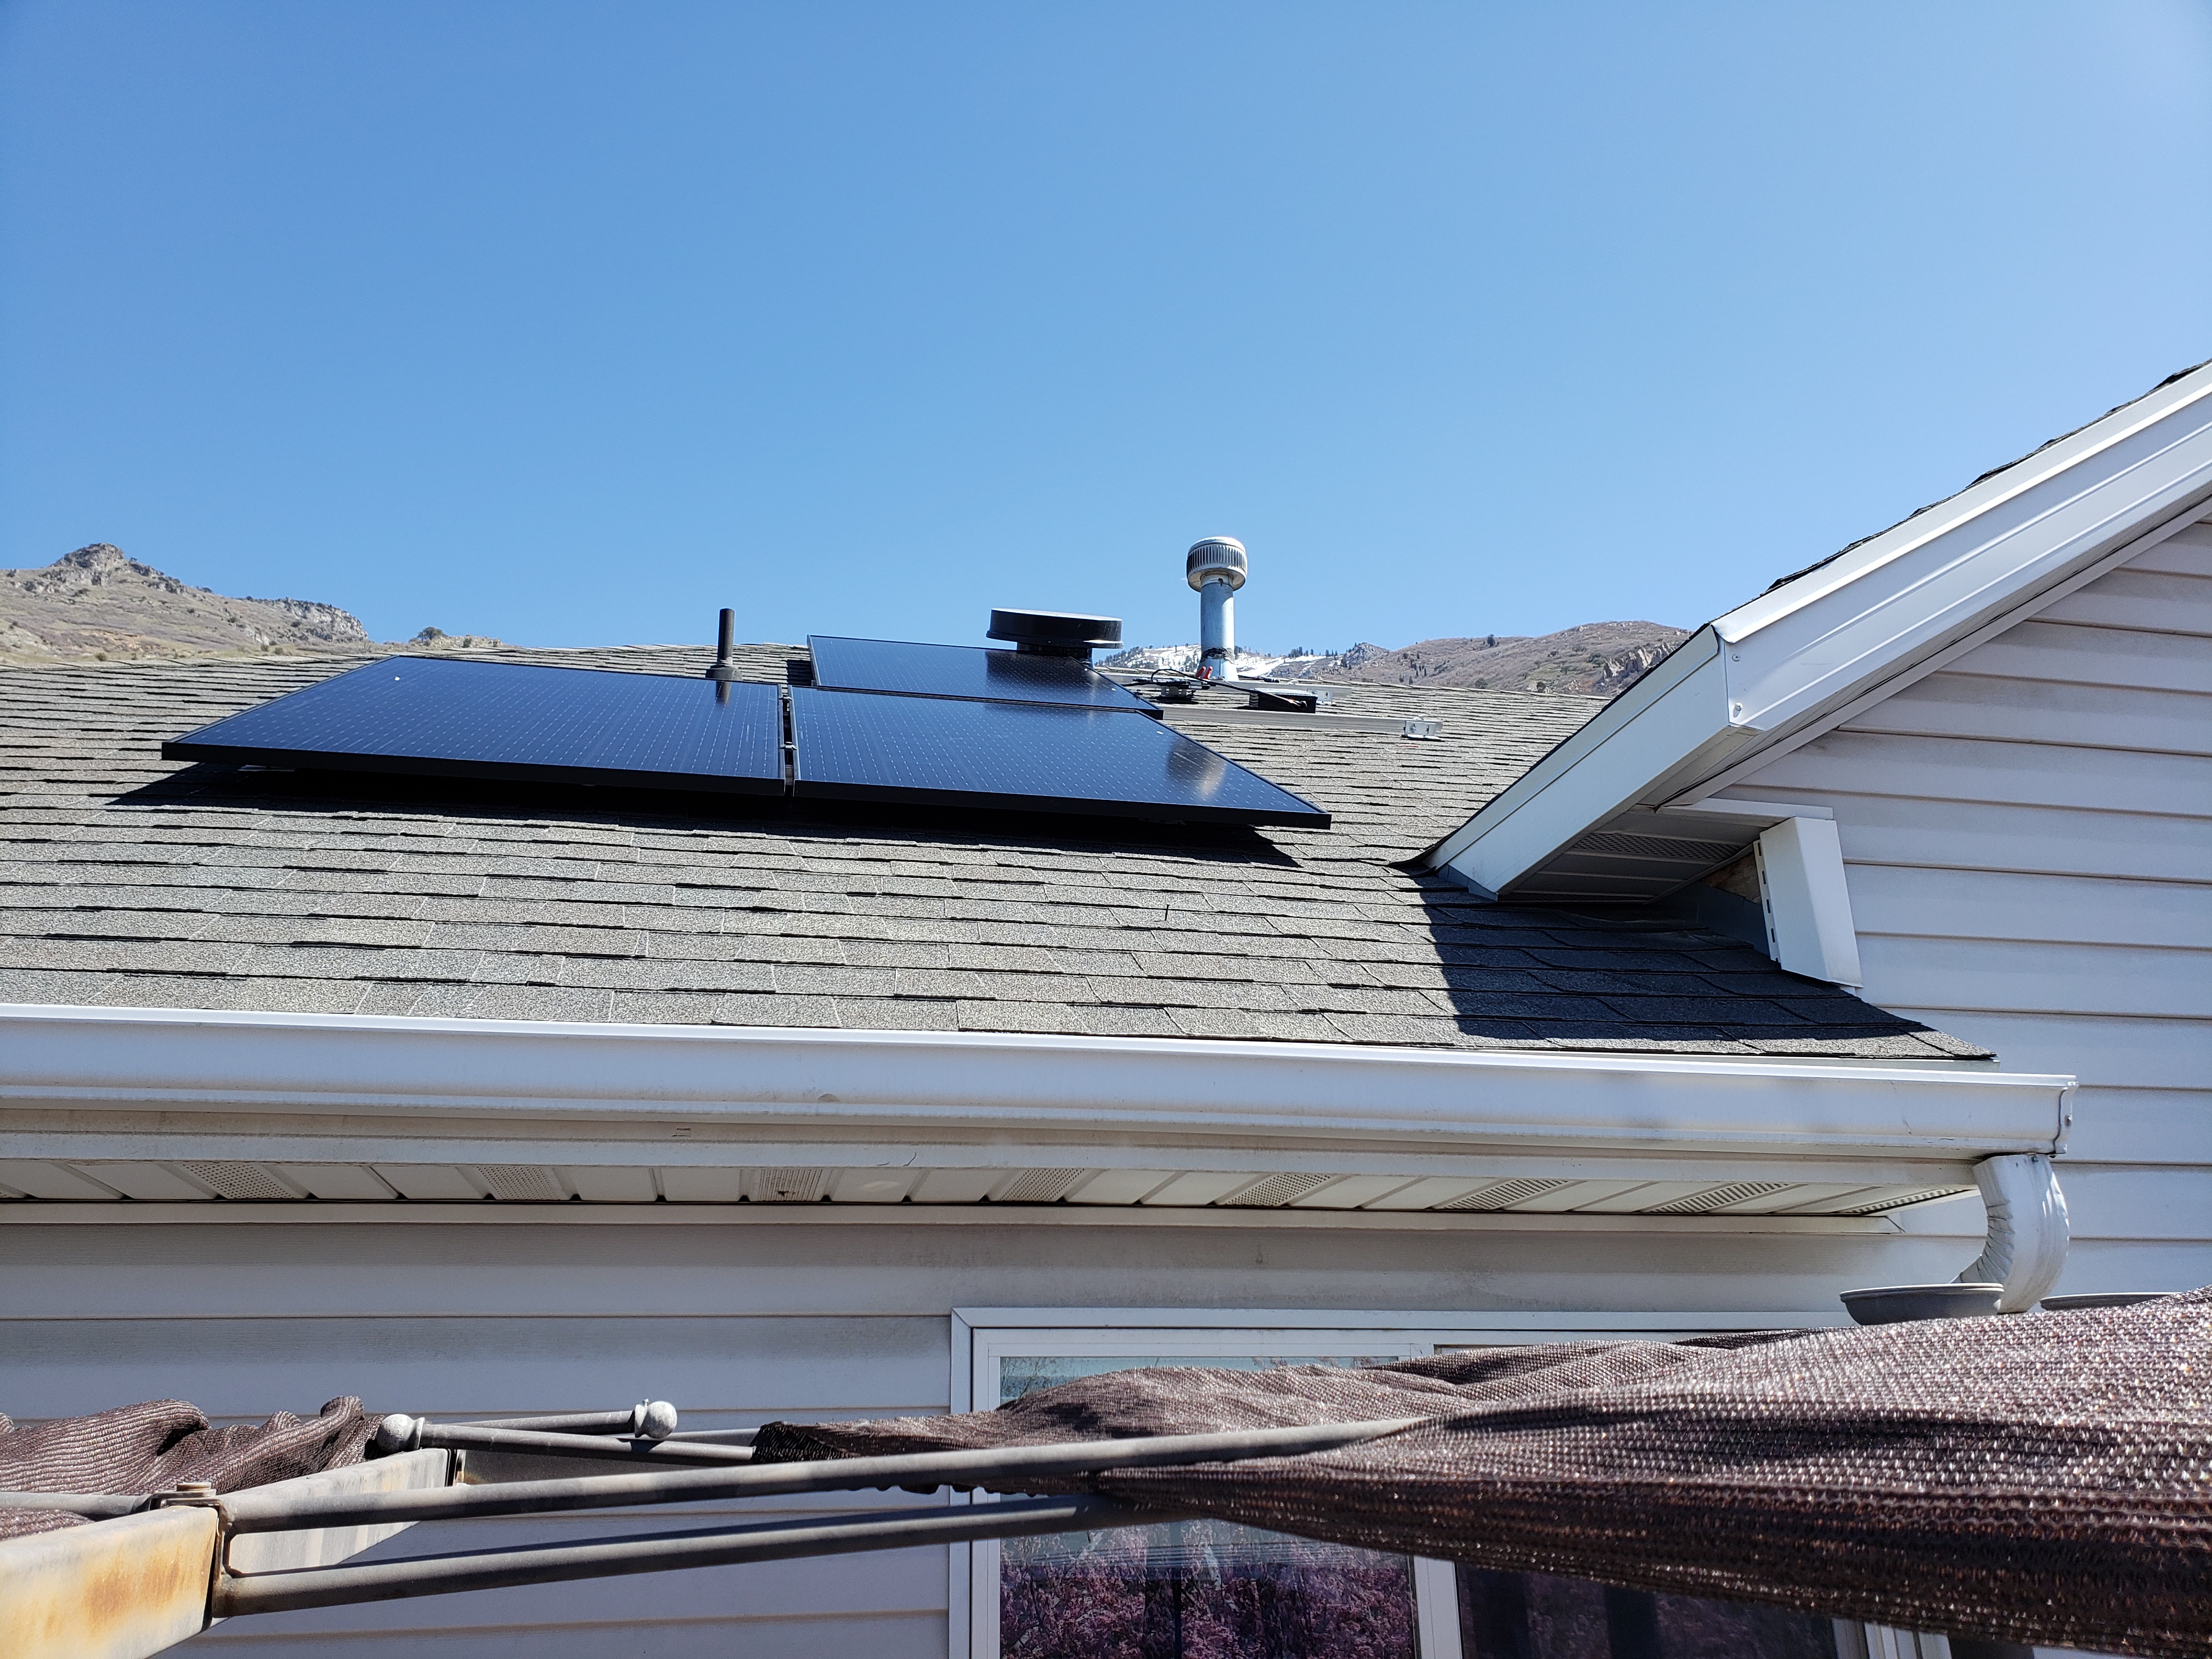
South-facing roof with |

Carrying panel from truck. |

South-facing access. |
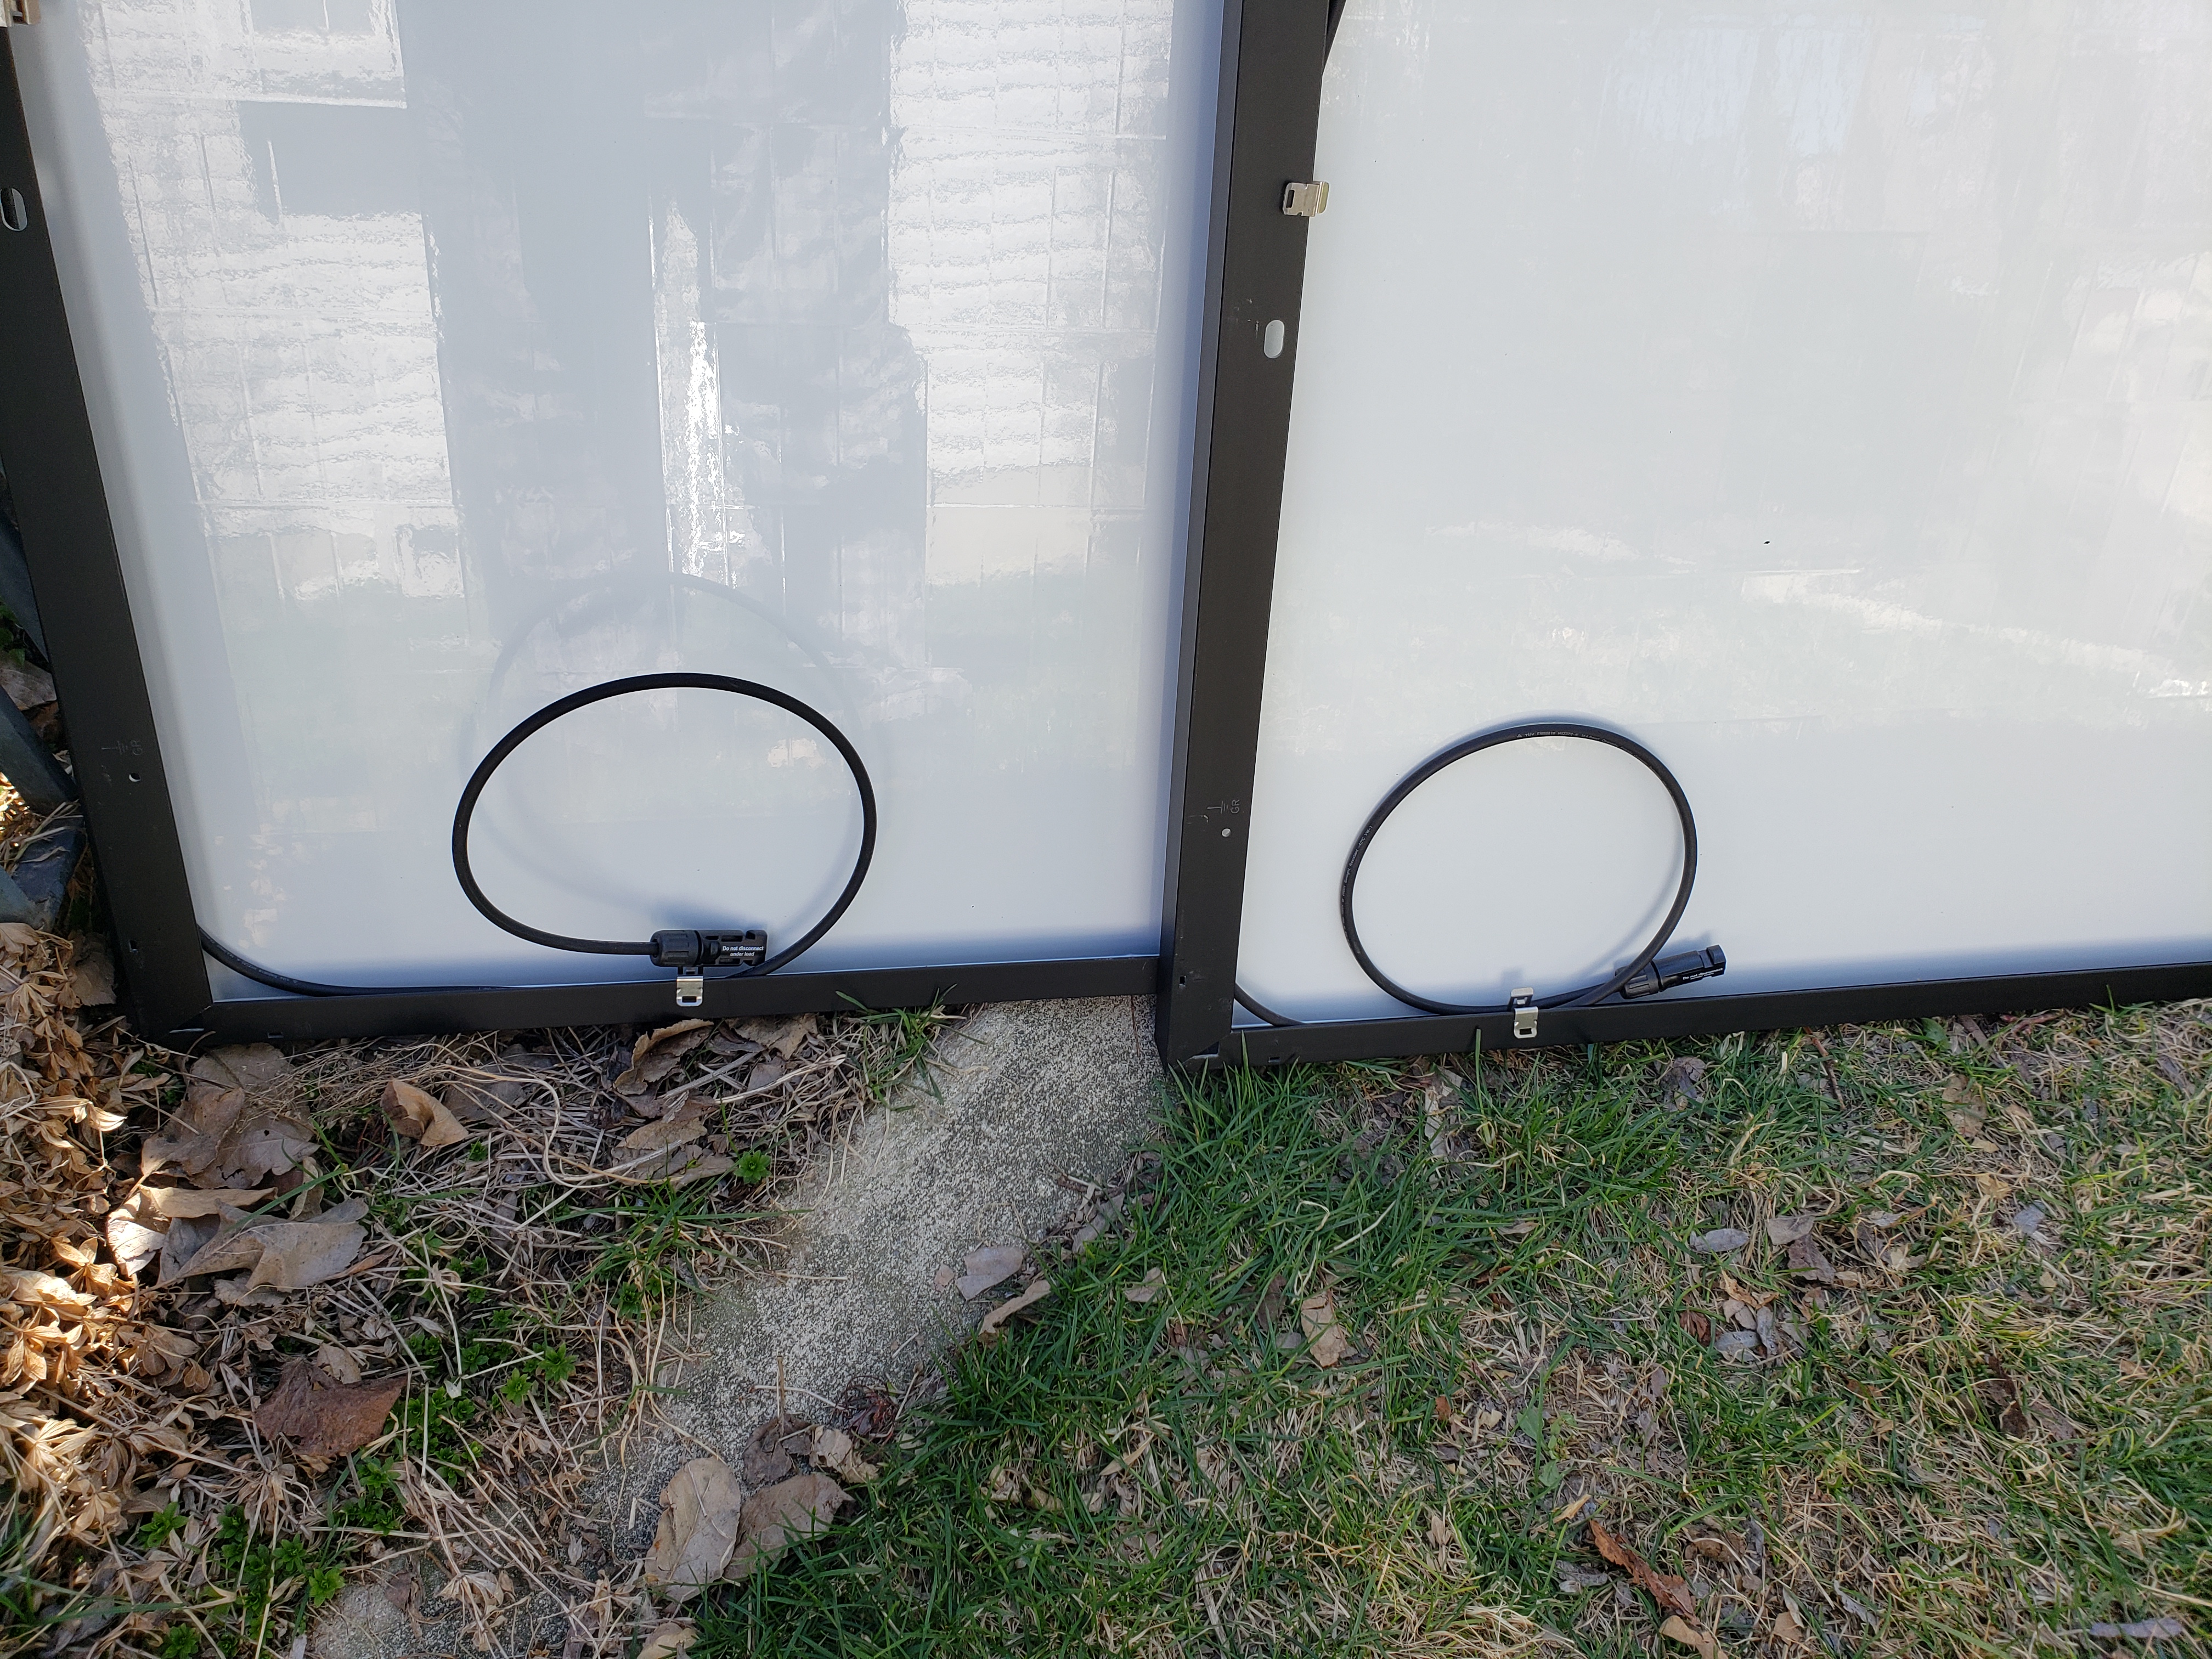
Bottom of back of Q Cell panel. |
Inverter detail before |
West-facing installation |
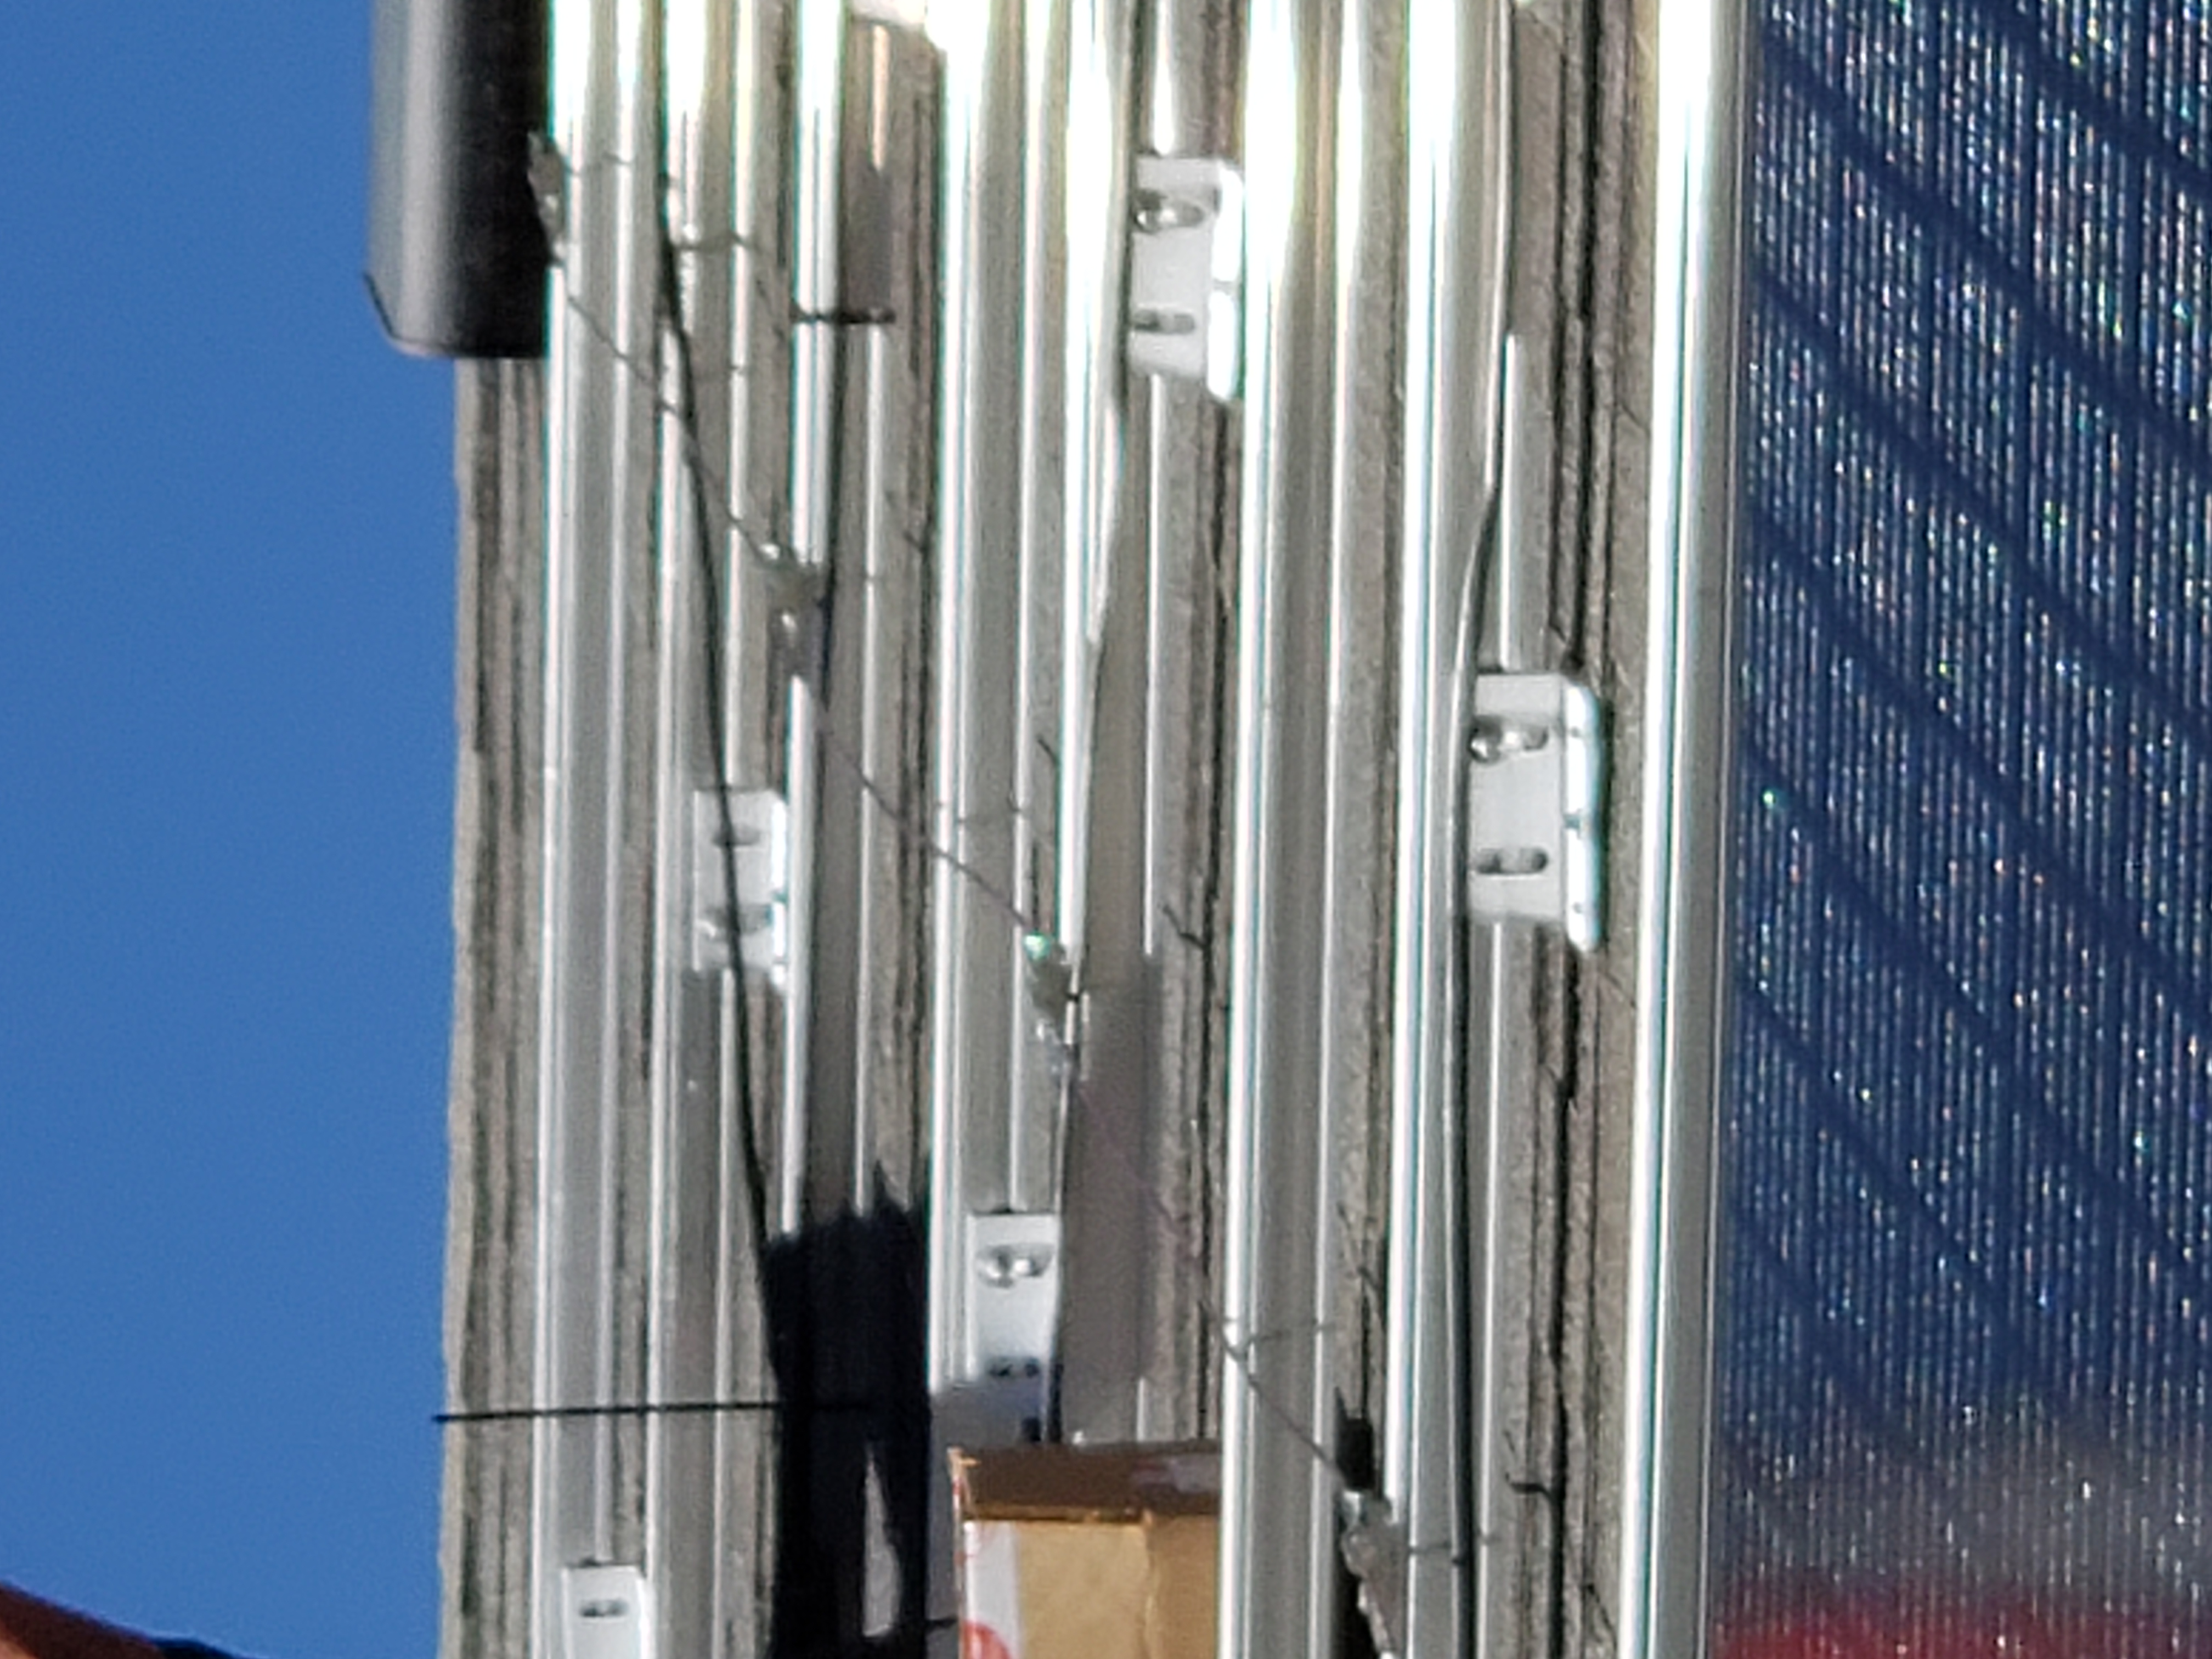
Rail and mounting bracket detail. |
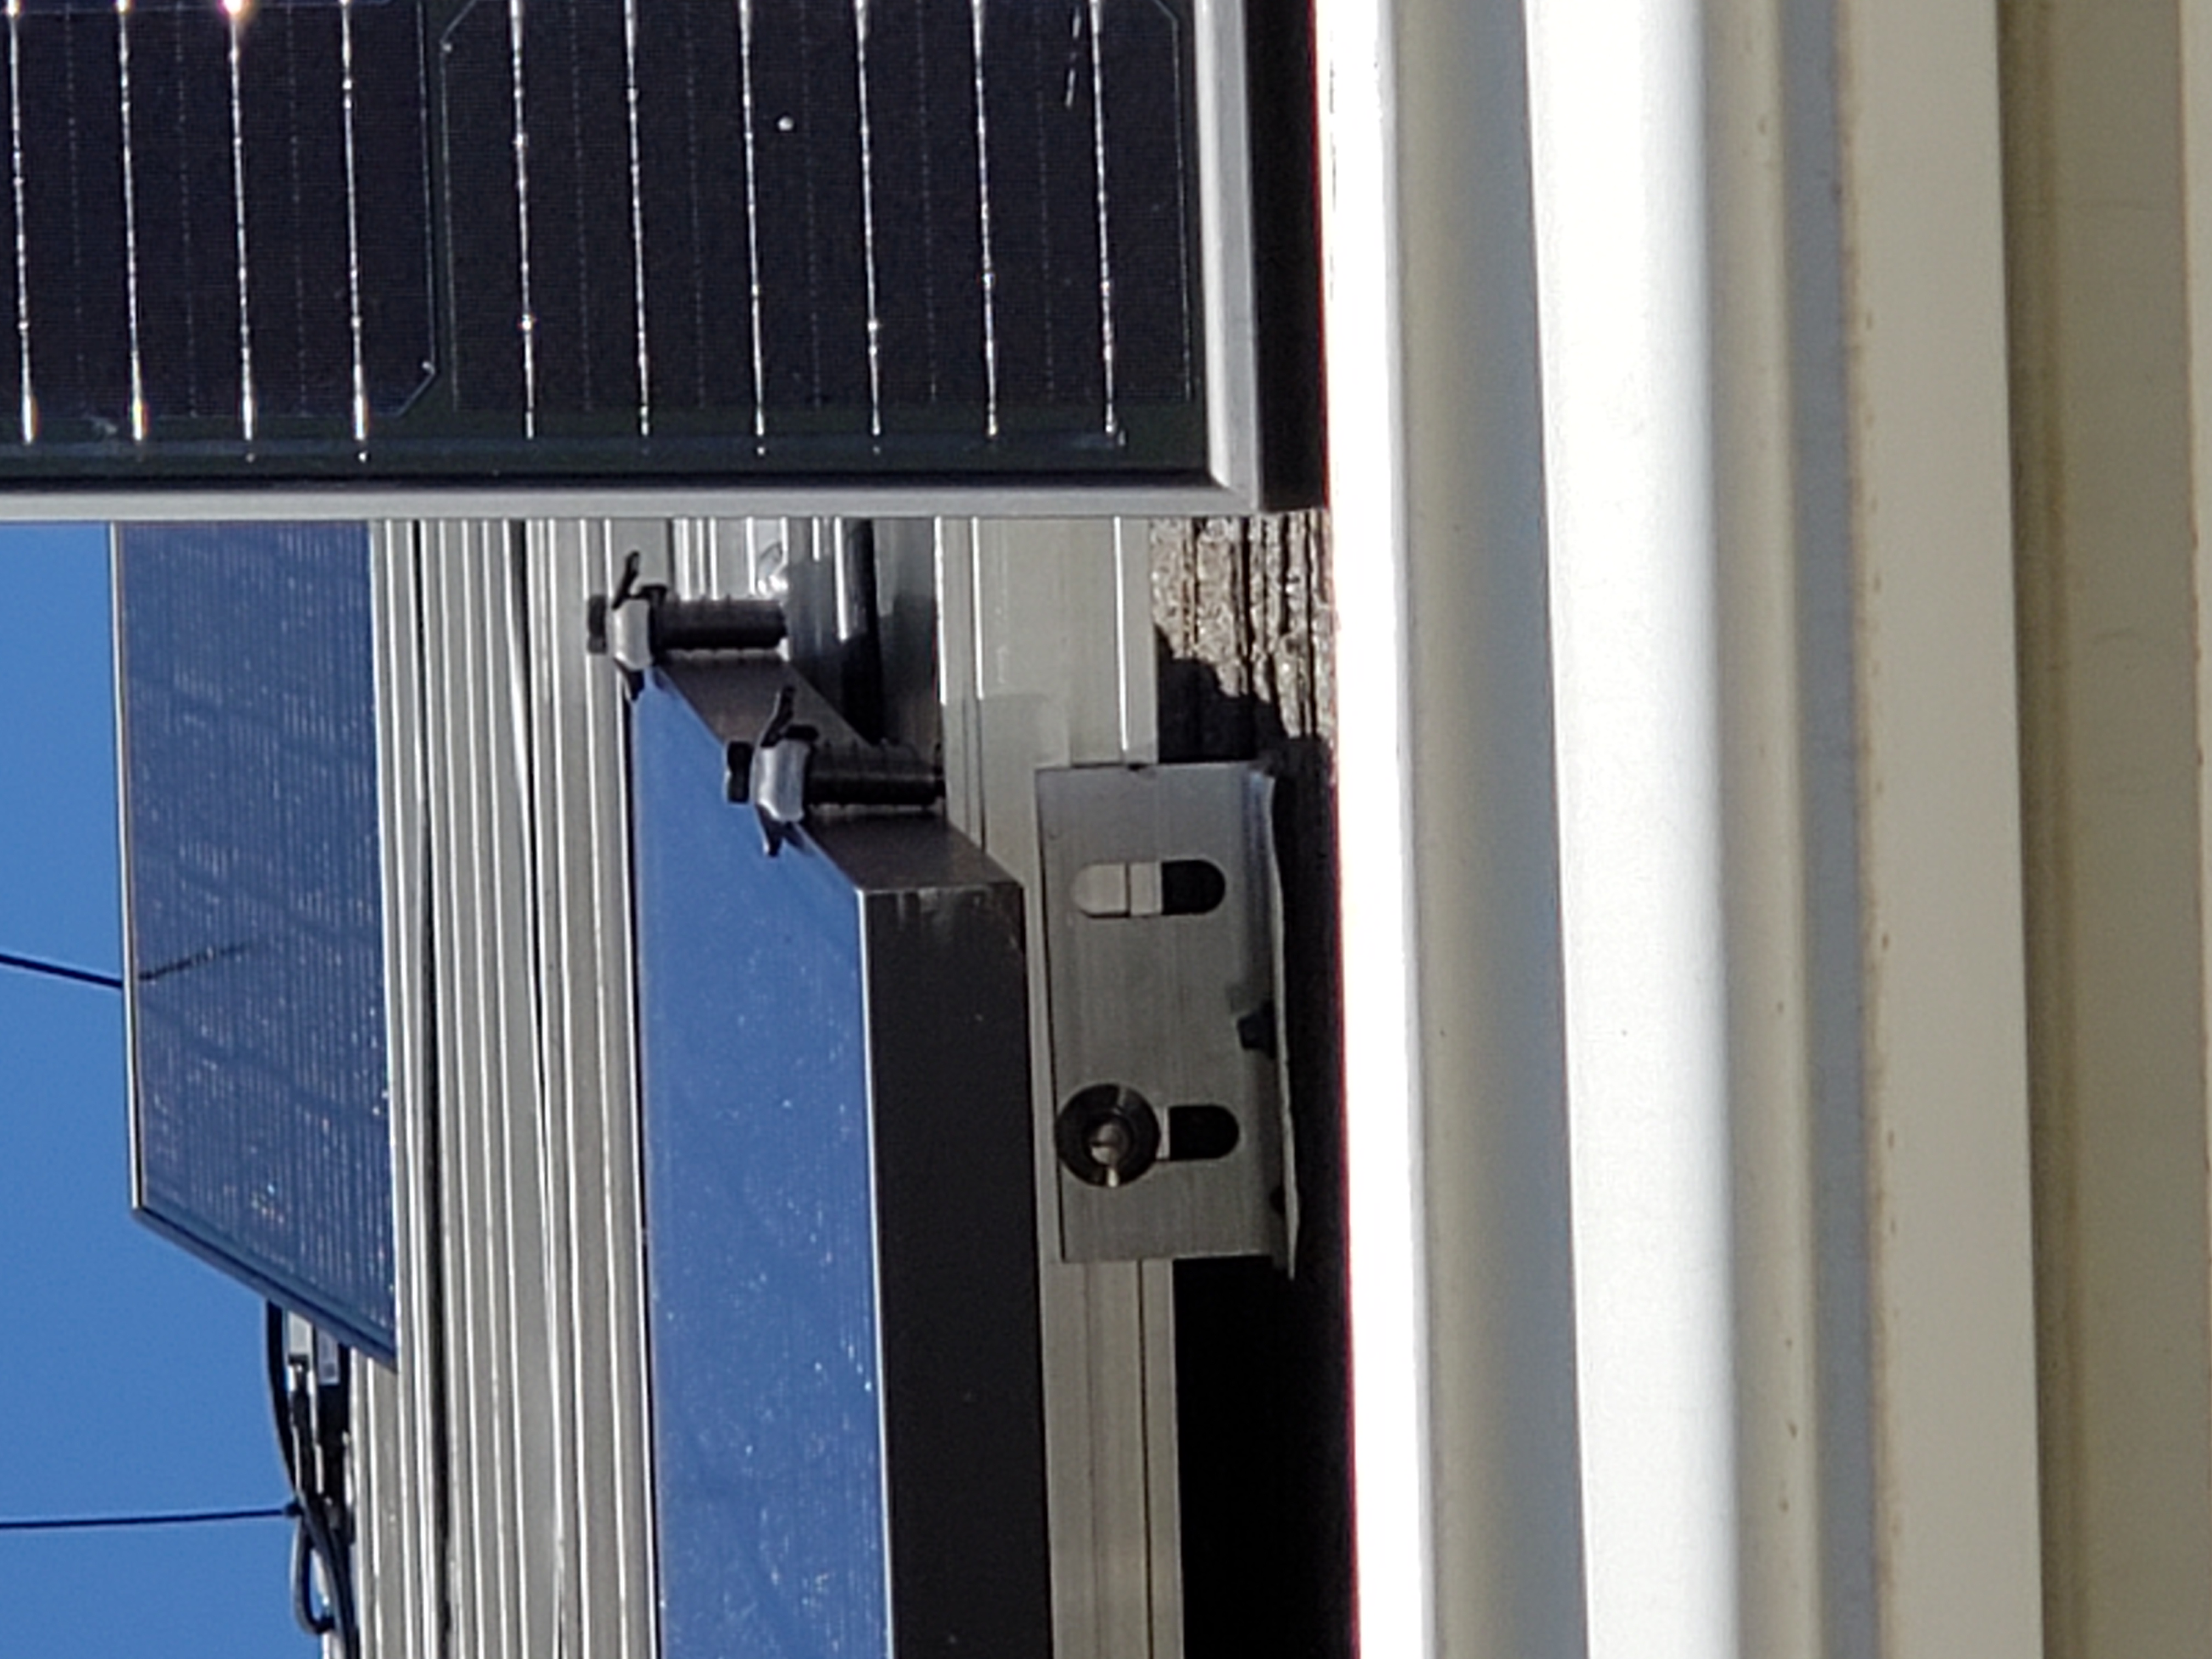
Rail and mounting bracket detail. |
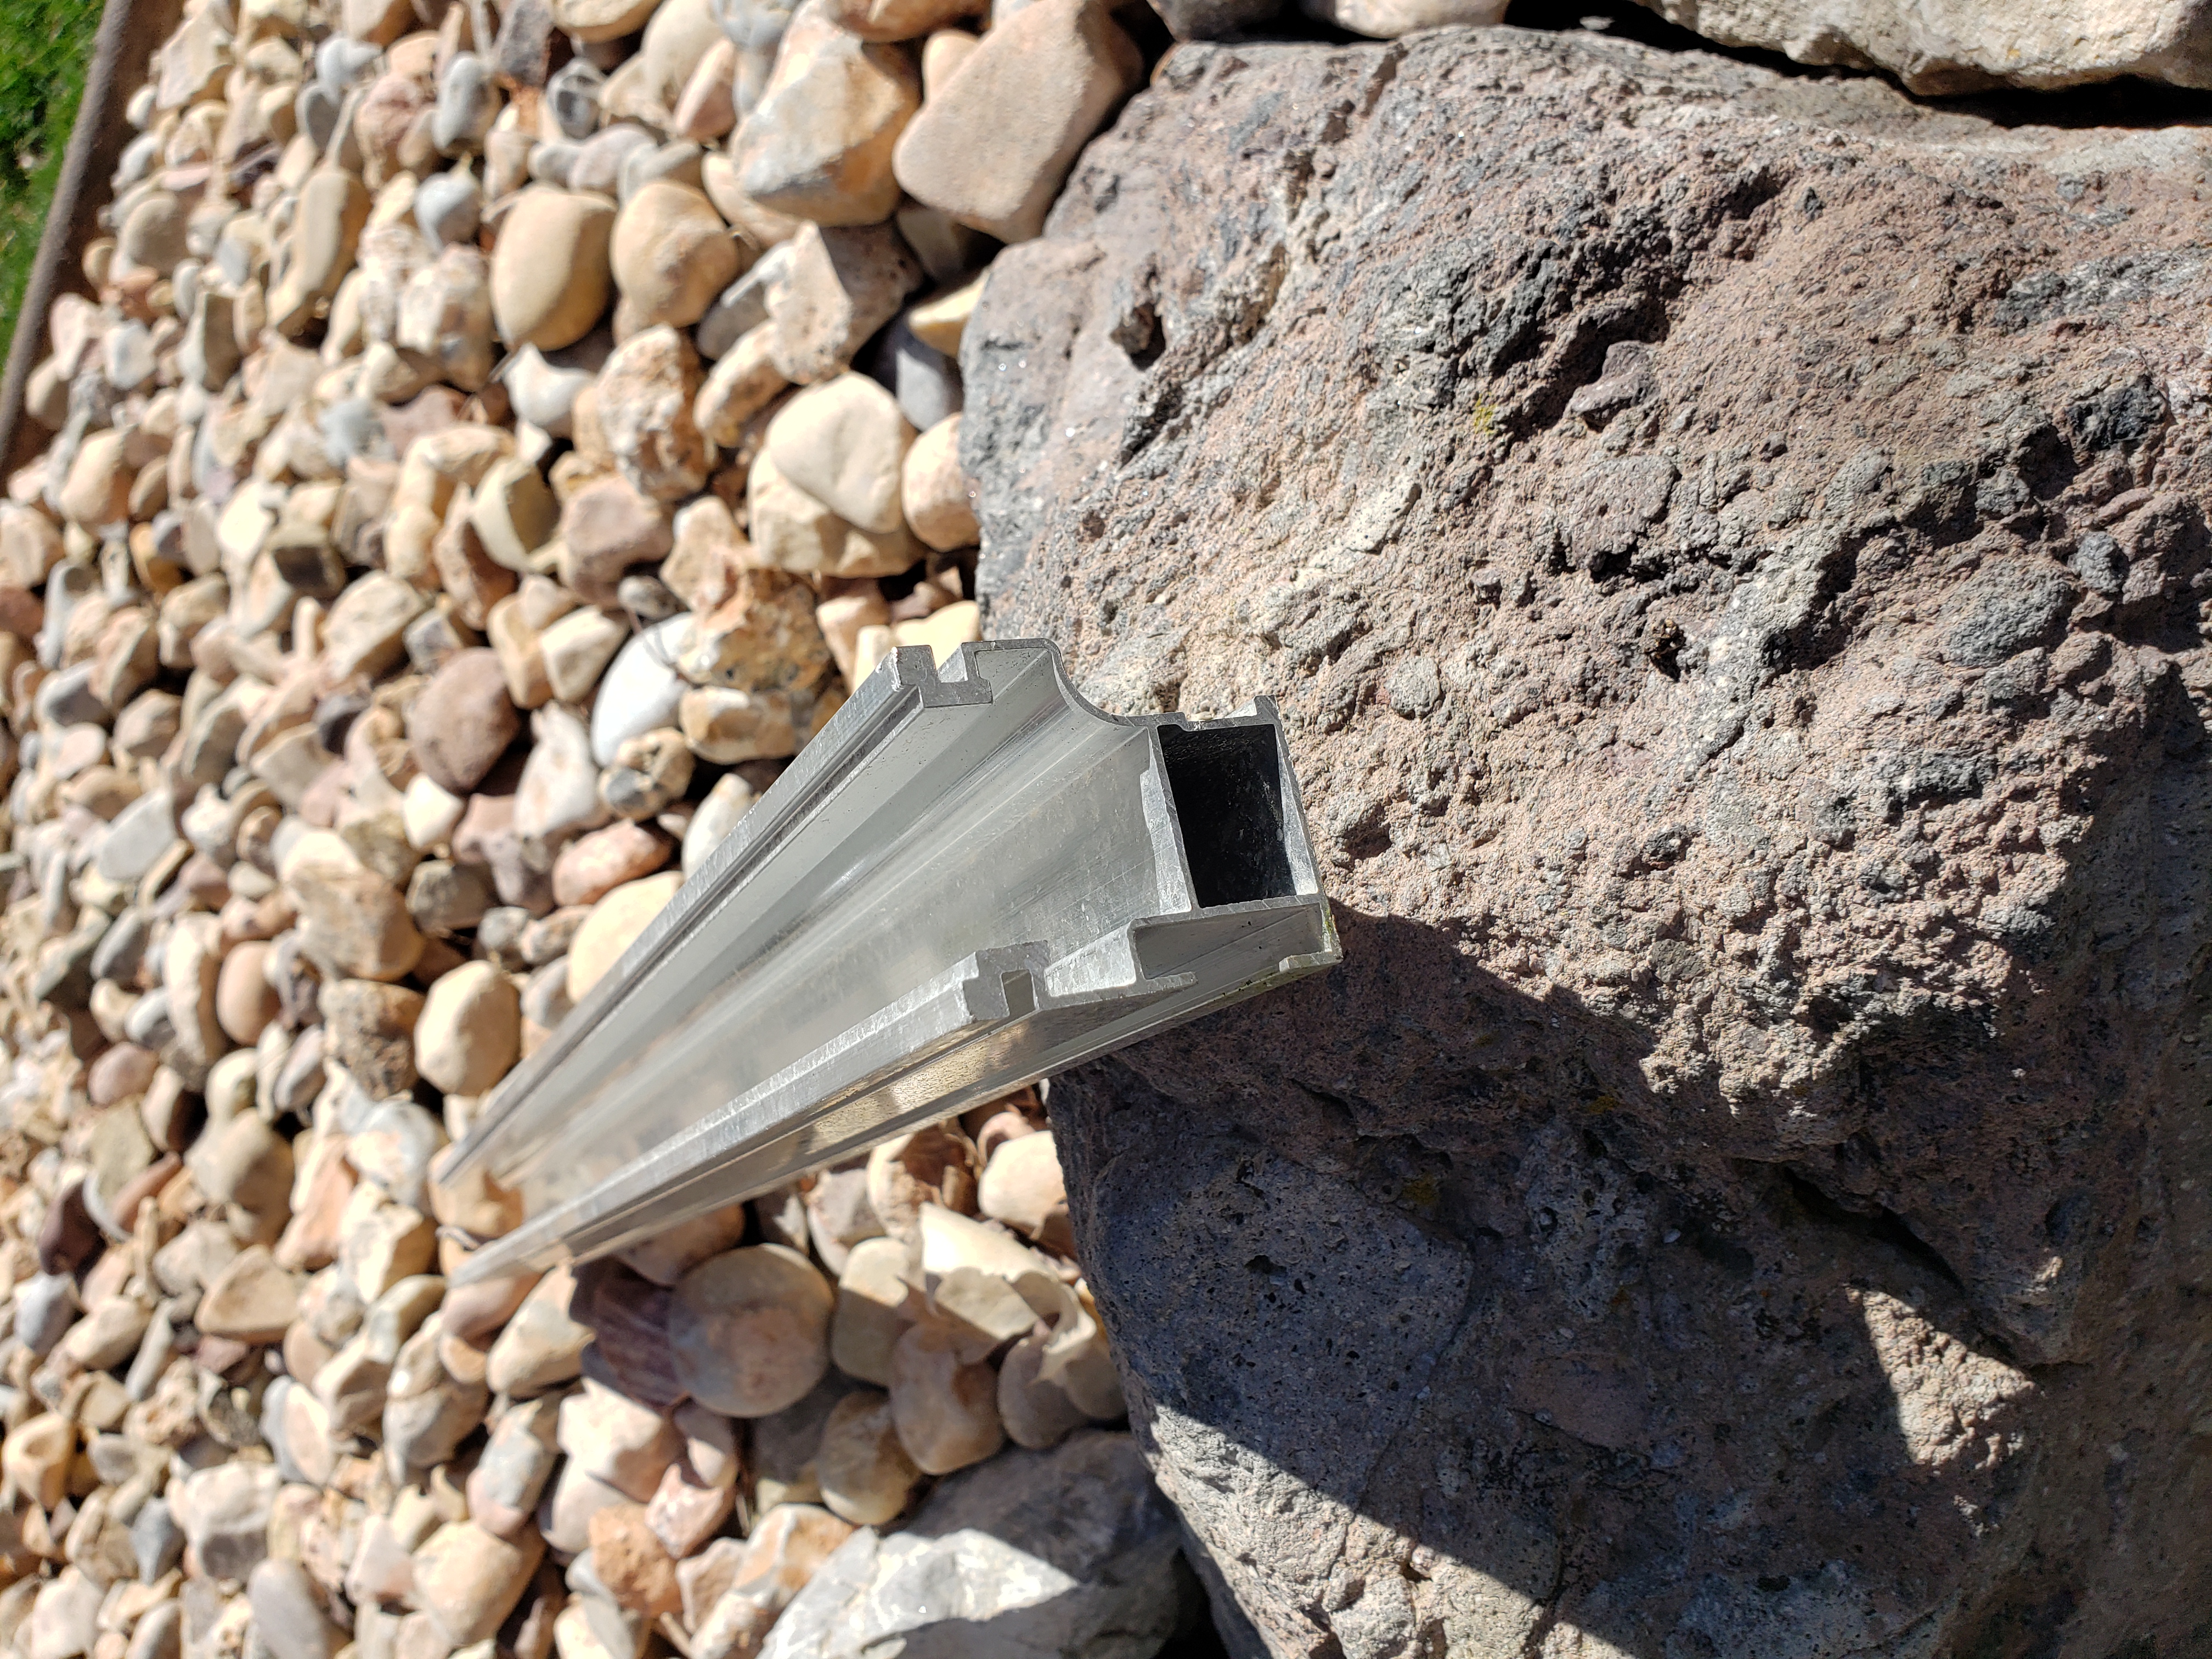
Rail cross section detail. |
Back of Q Cell panel |
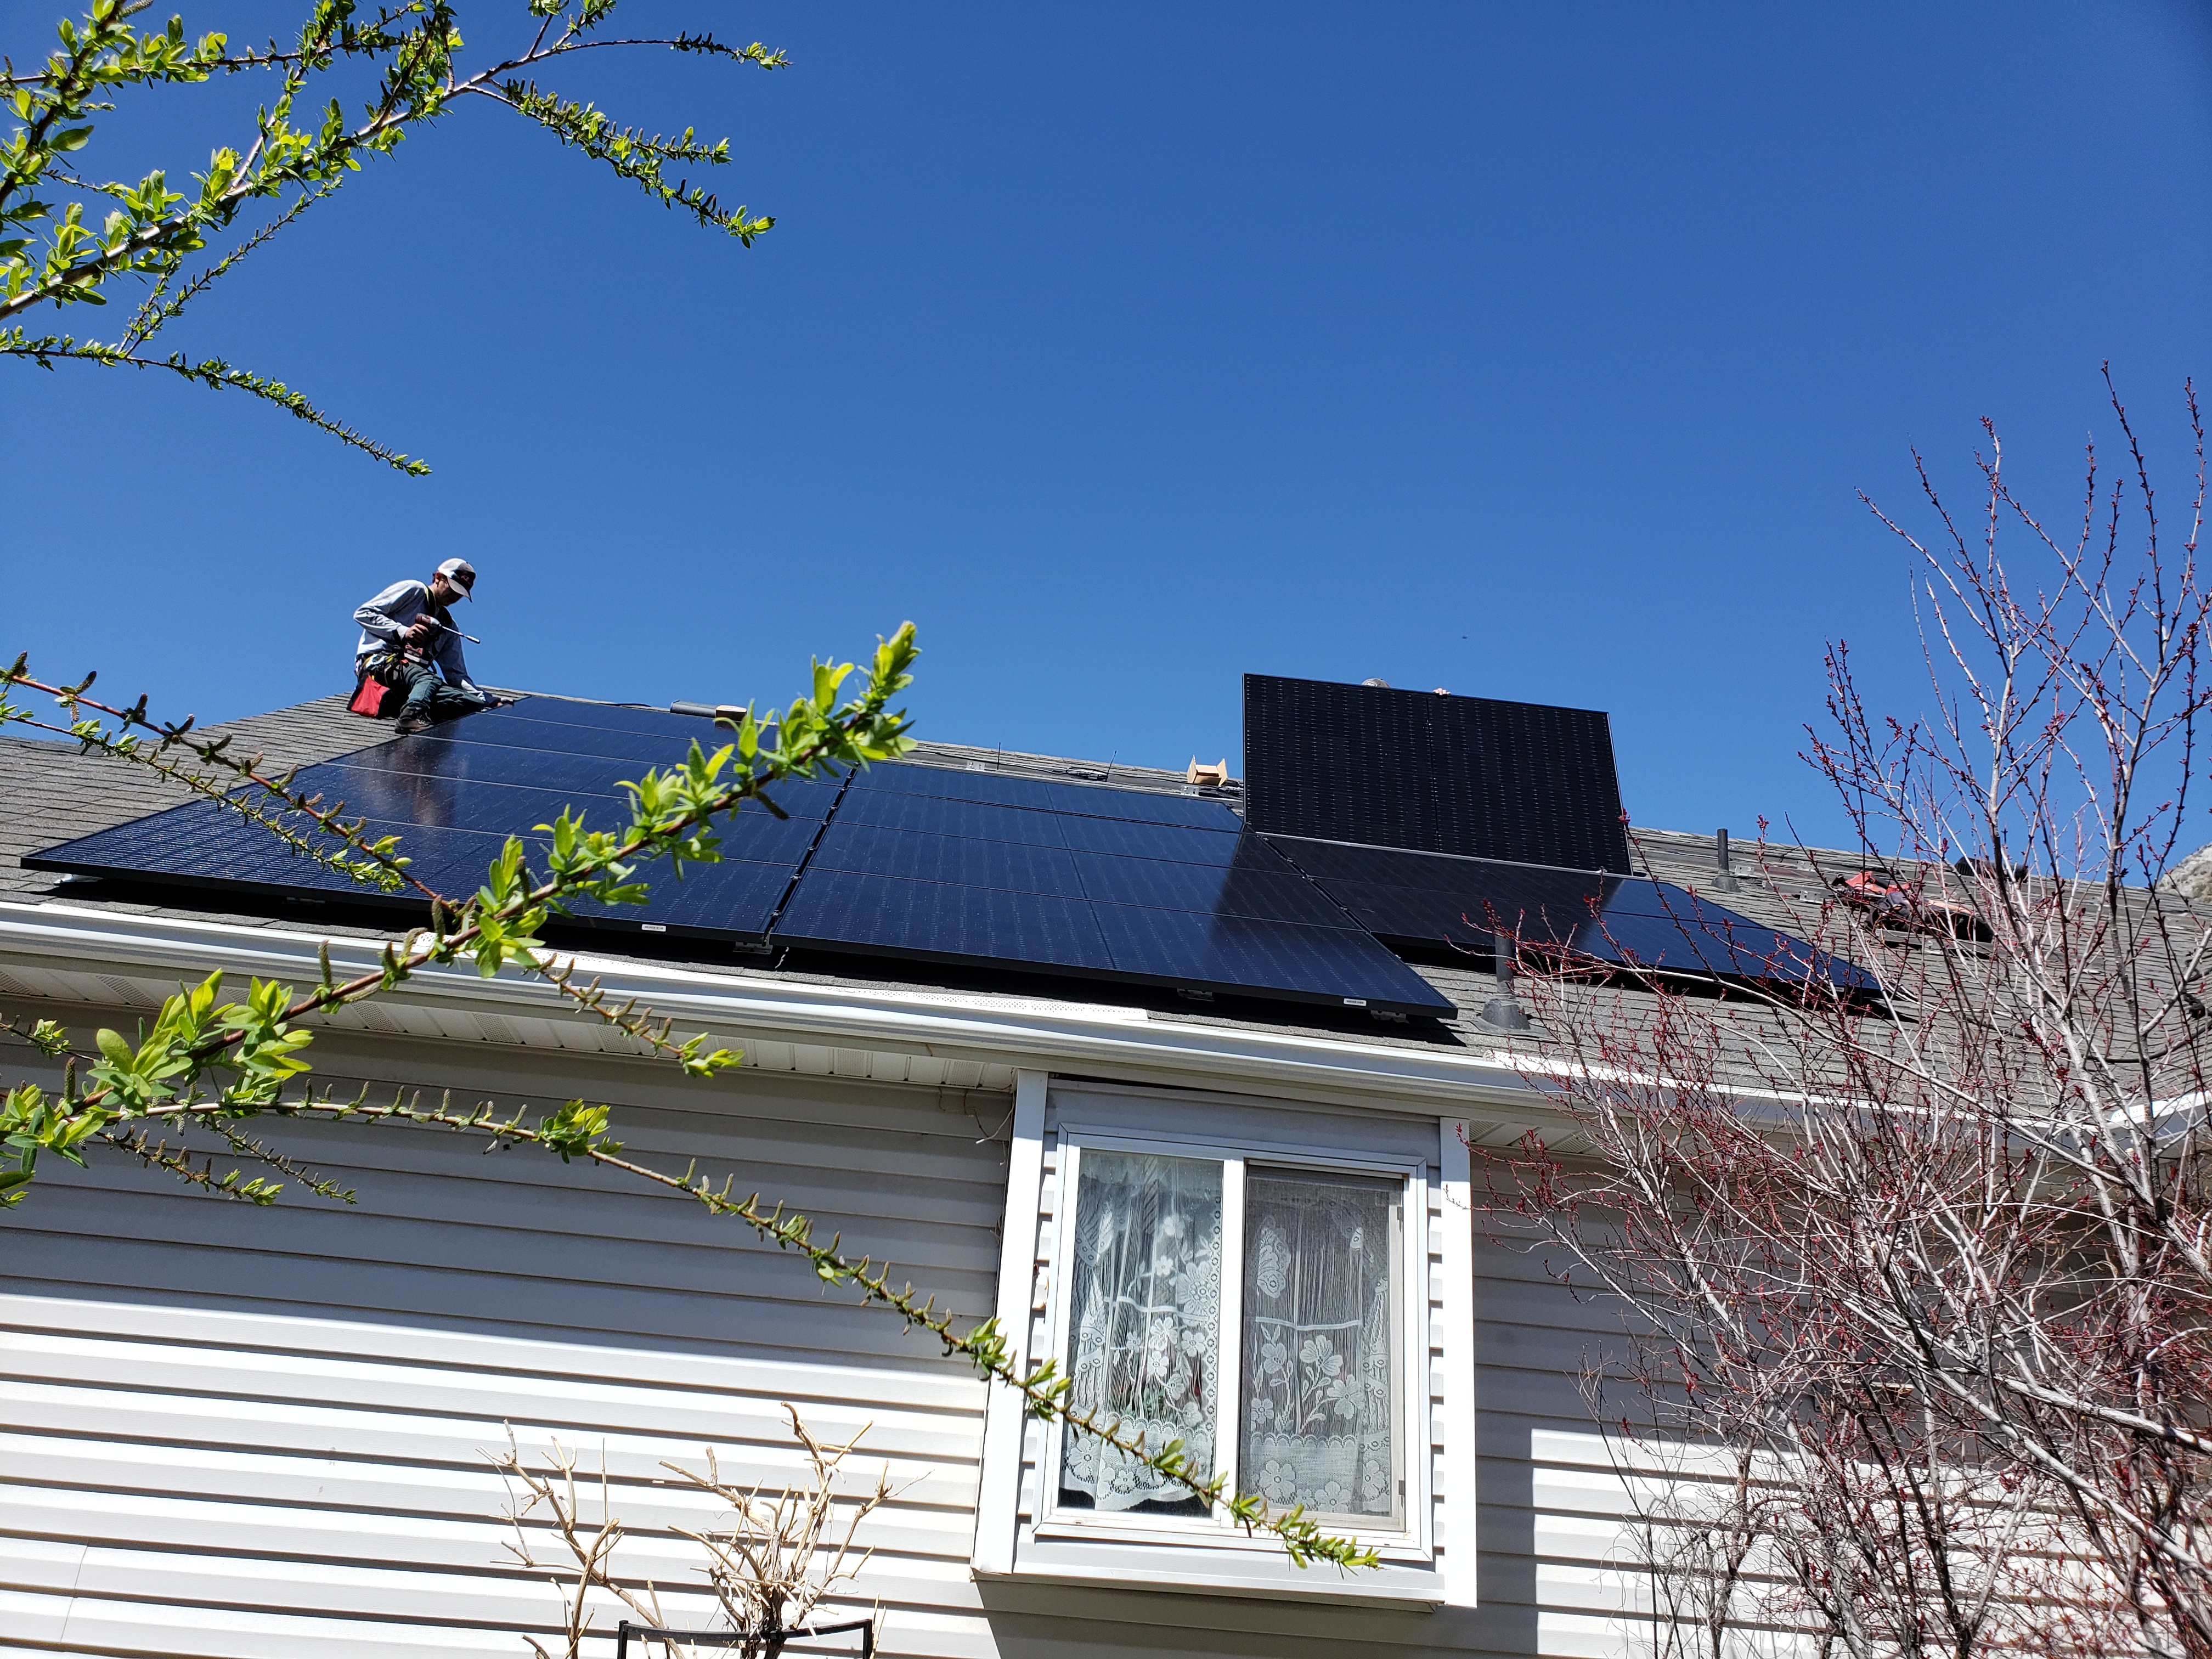
South-facing installation |
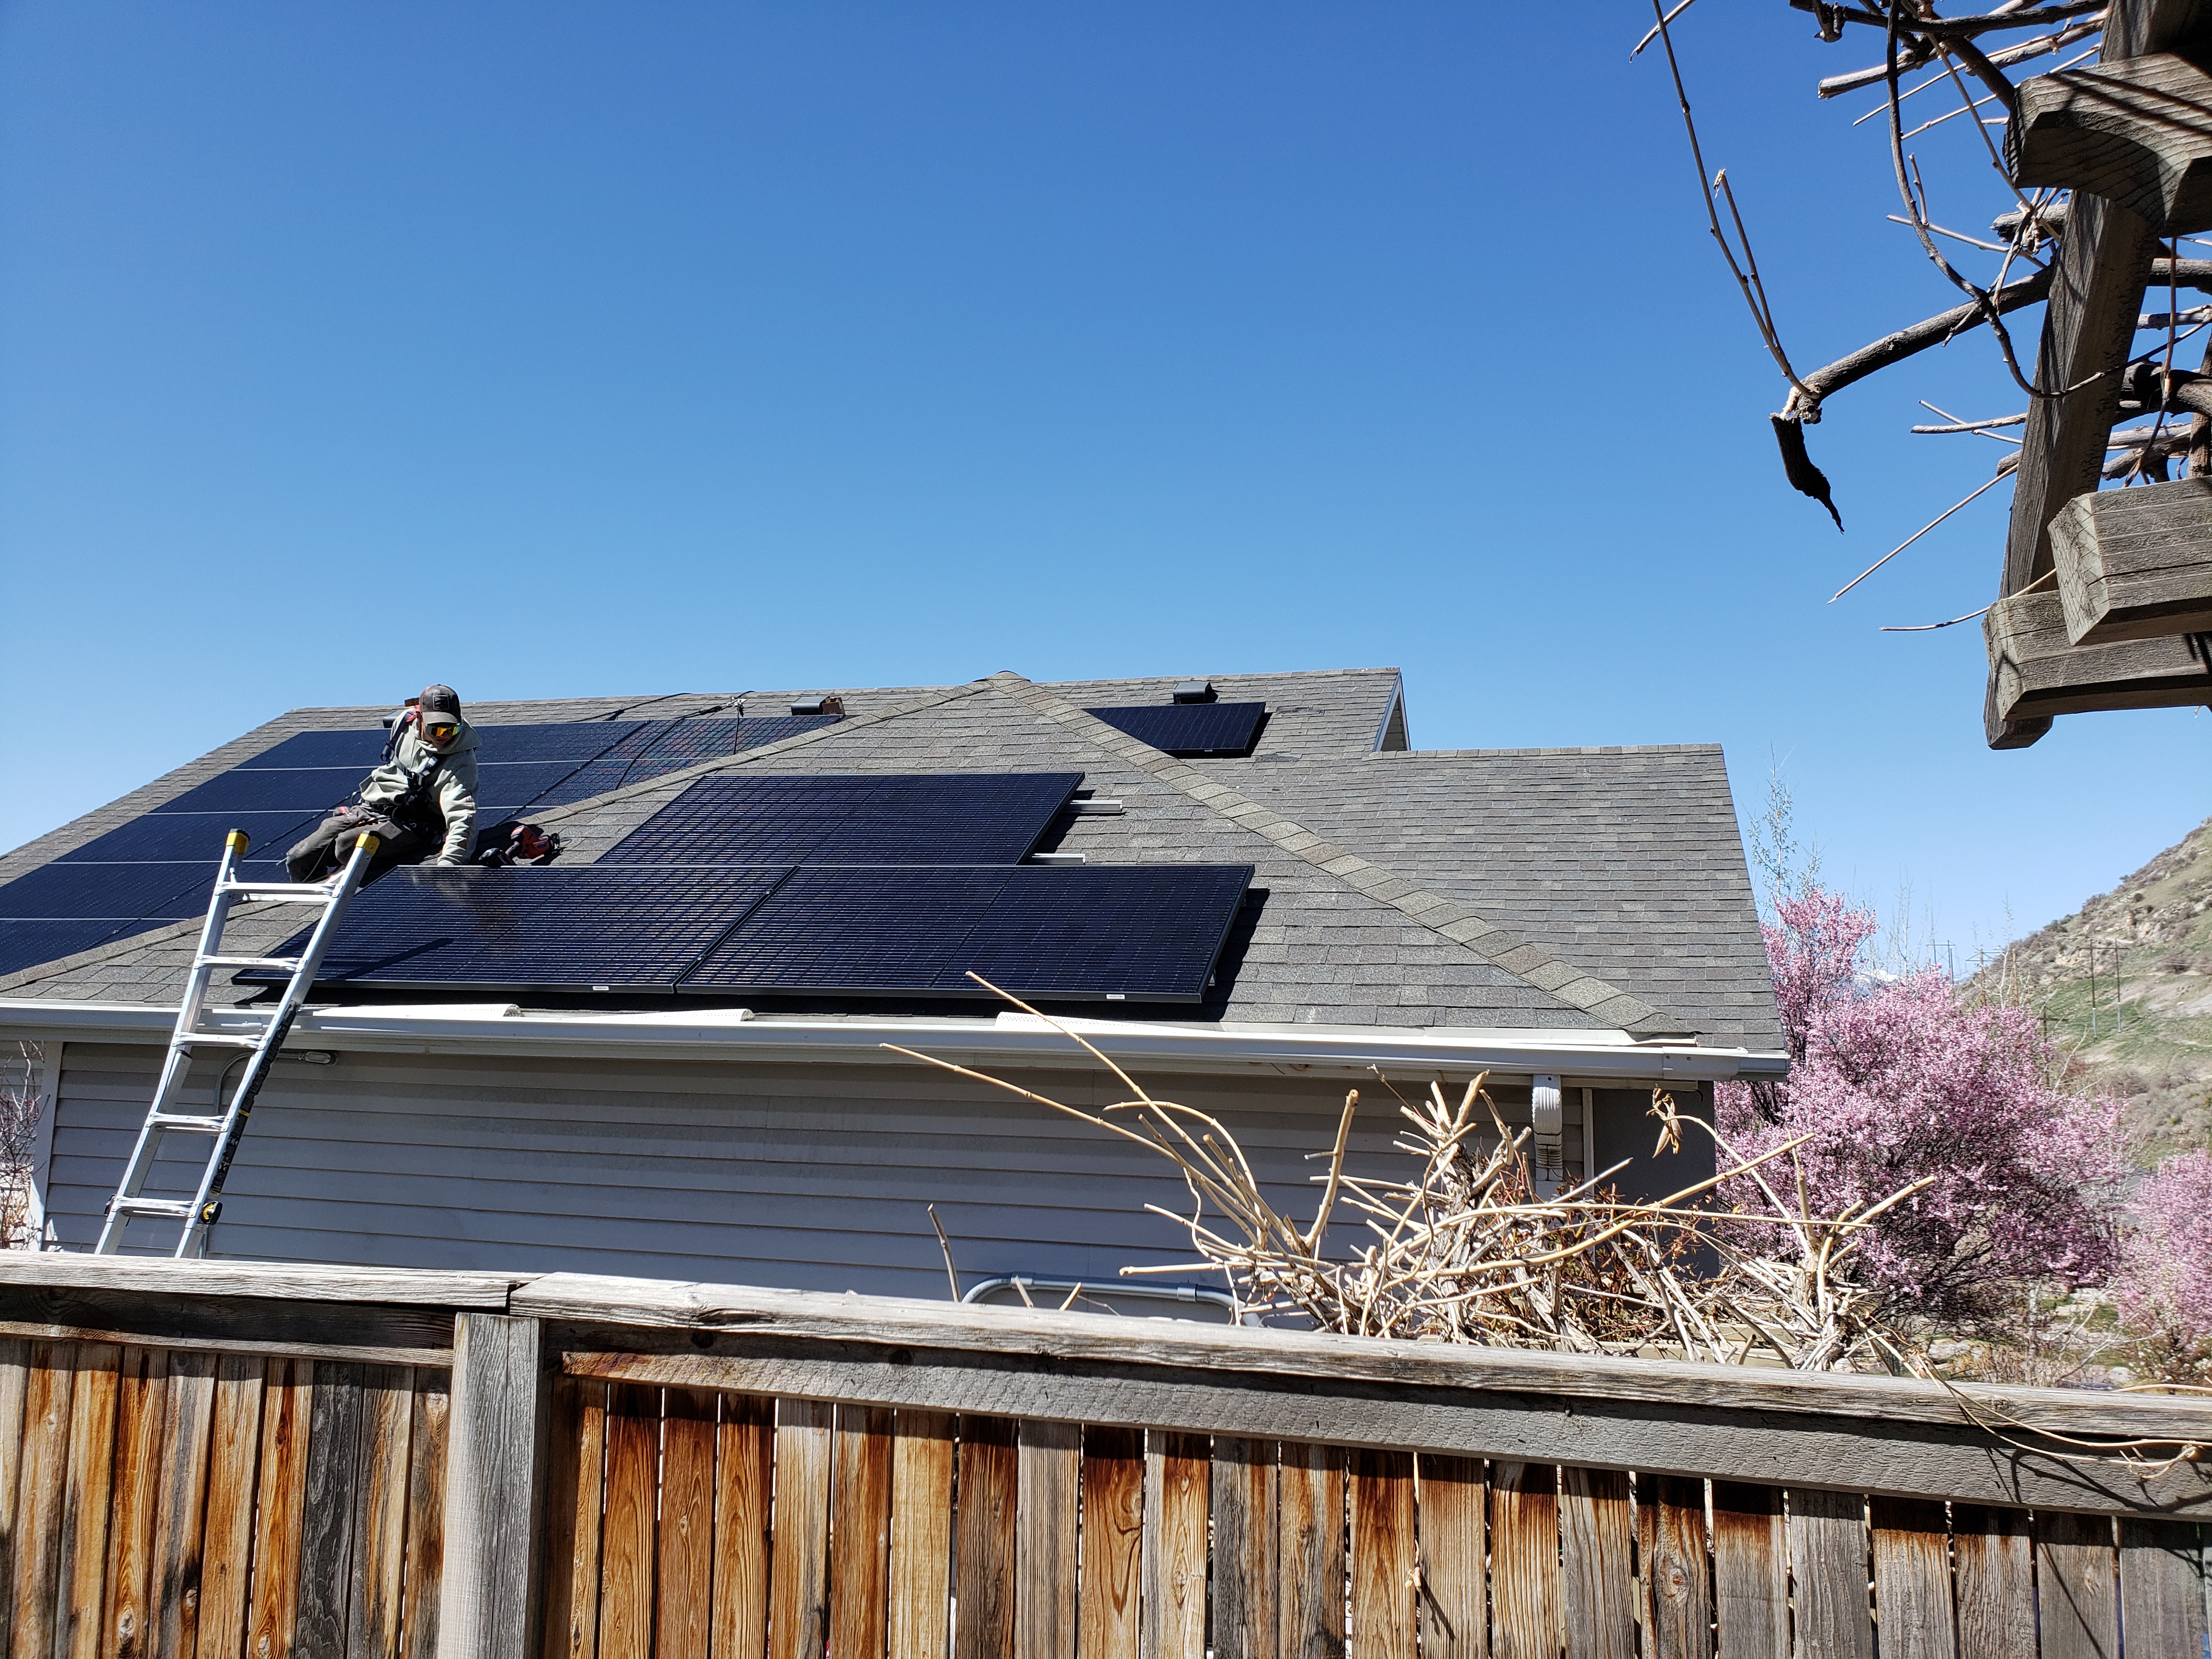
South-facing installation |
South-facing installation |
Cabling in new PV meter base. |
Loop-back cabling added to |
Loop back intercepts in-coming |
Left to right: combiner |
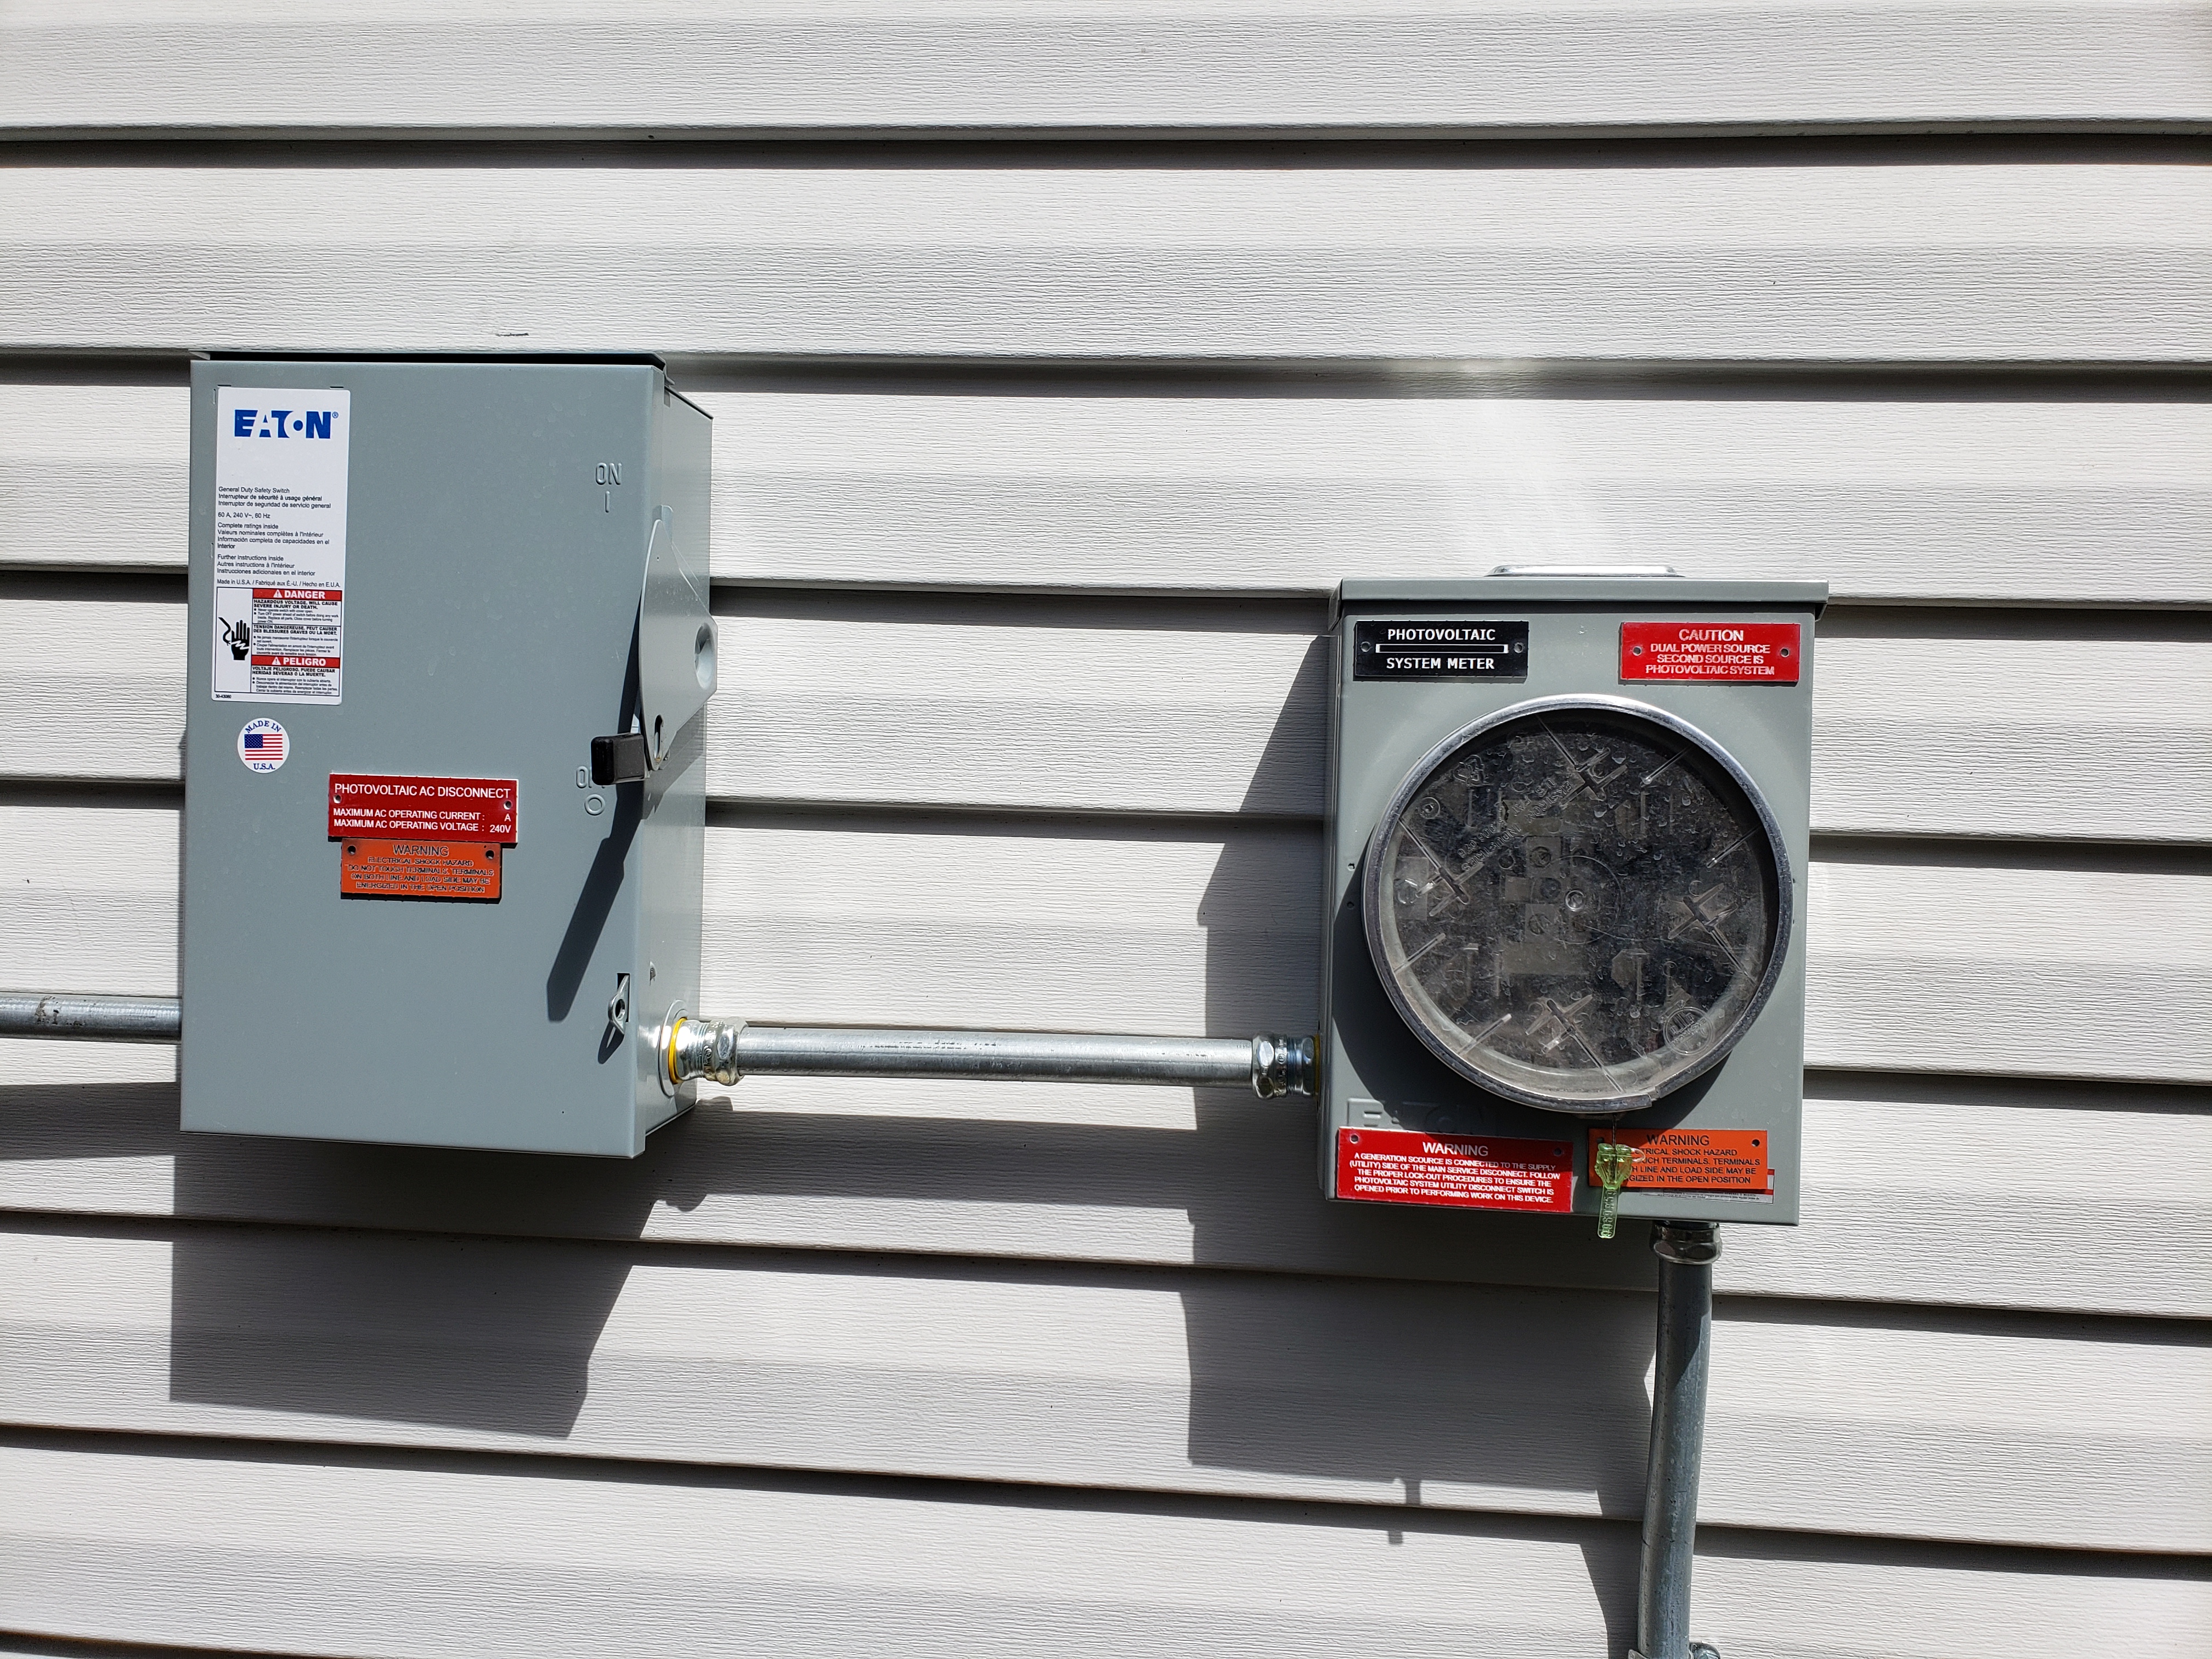
Disconnect and PV meter base |
The electrical installation. |
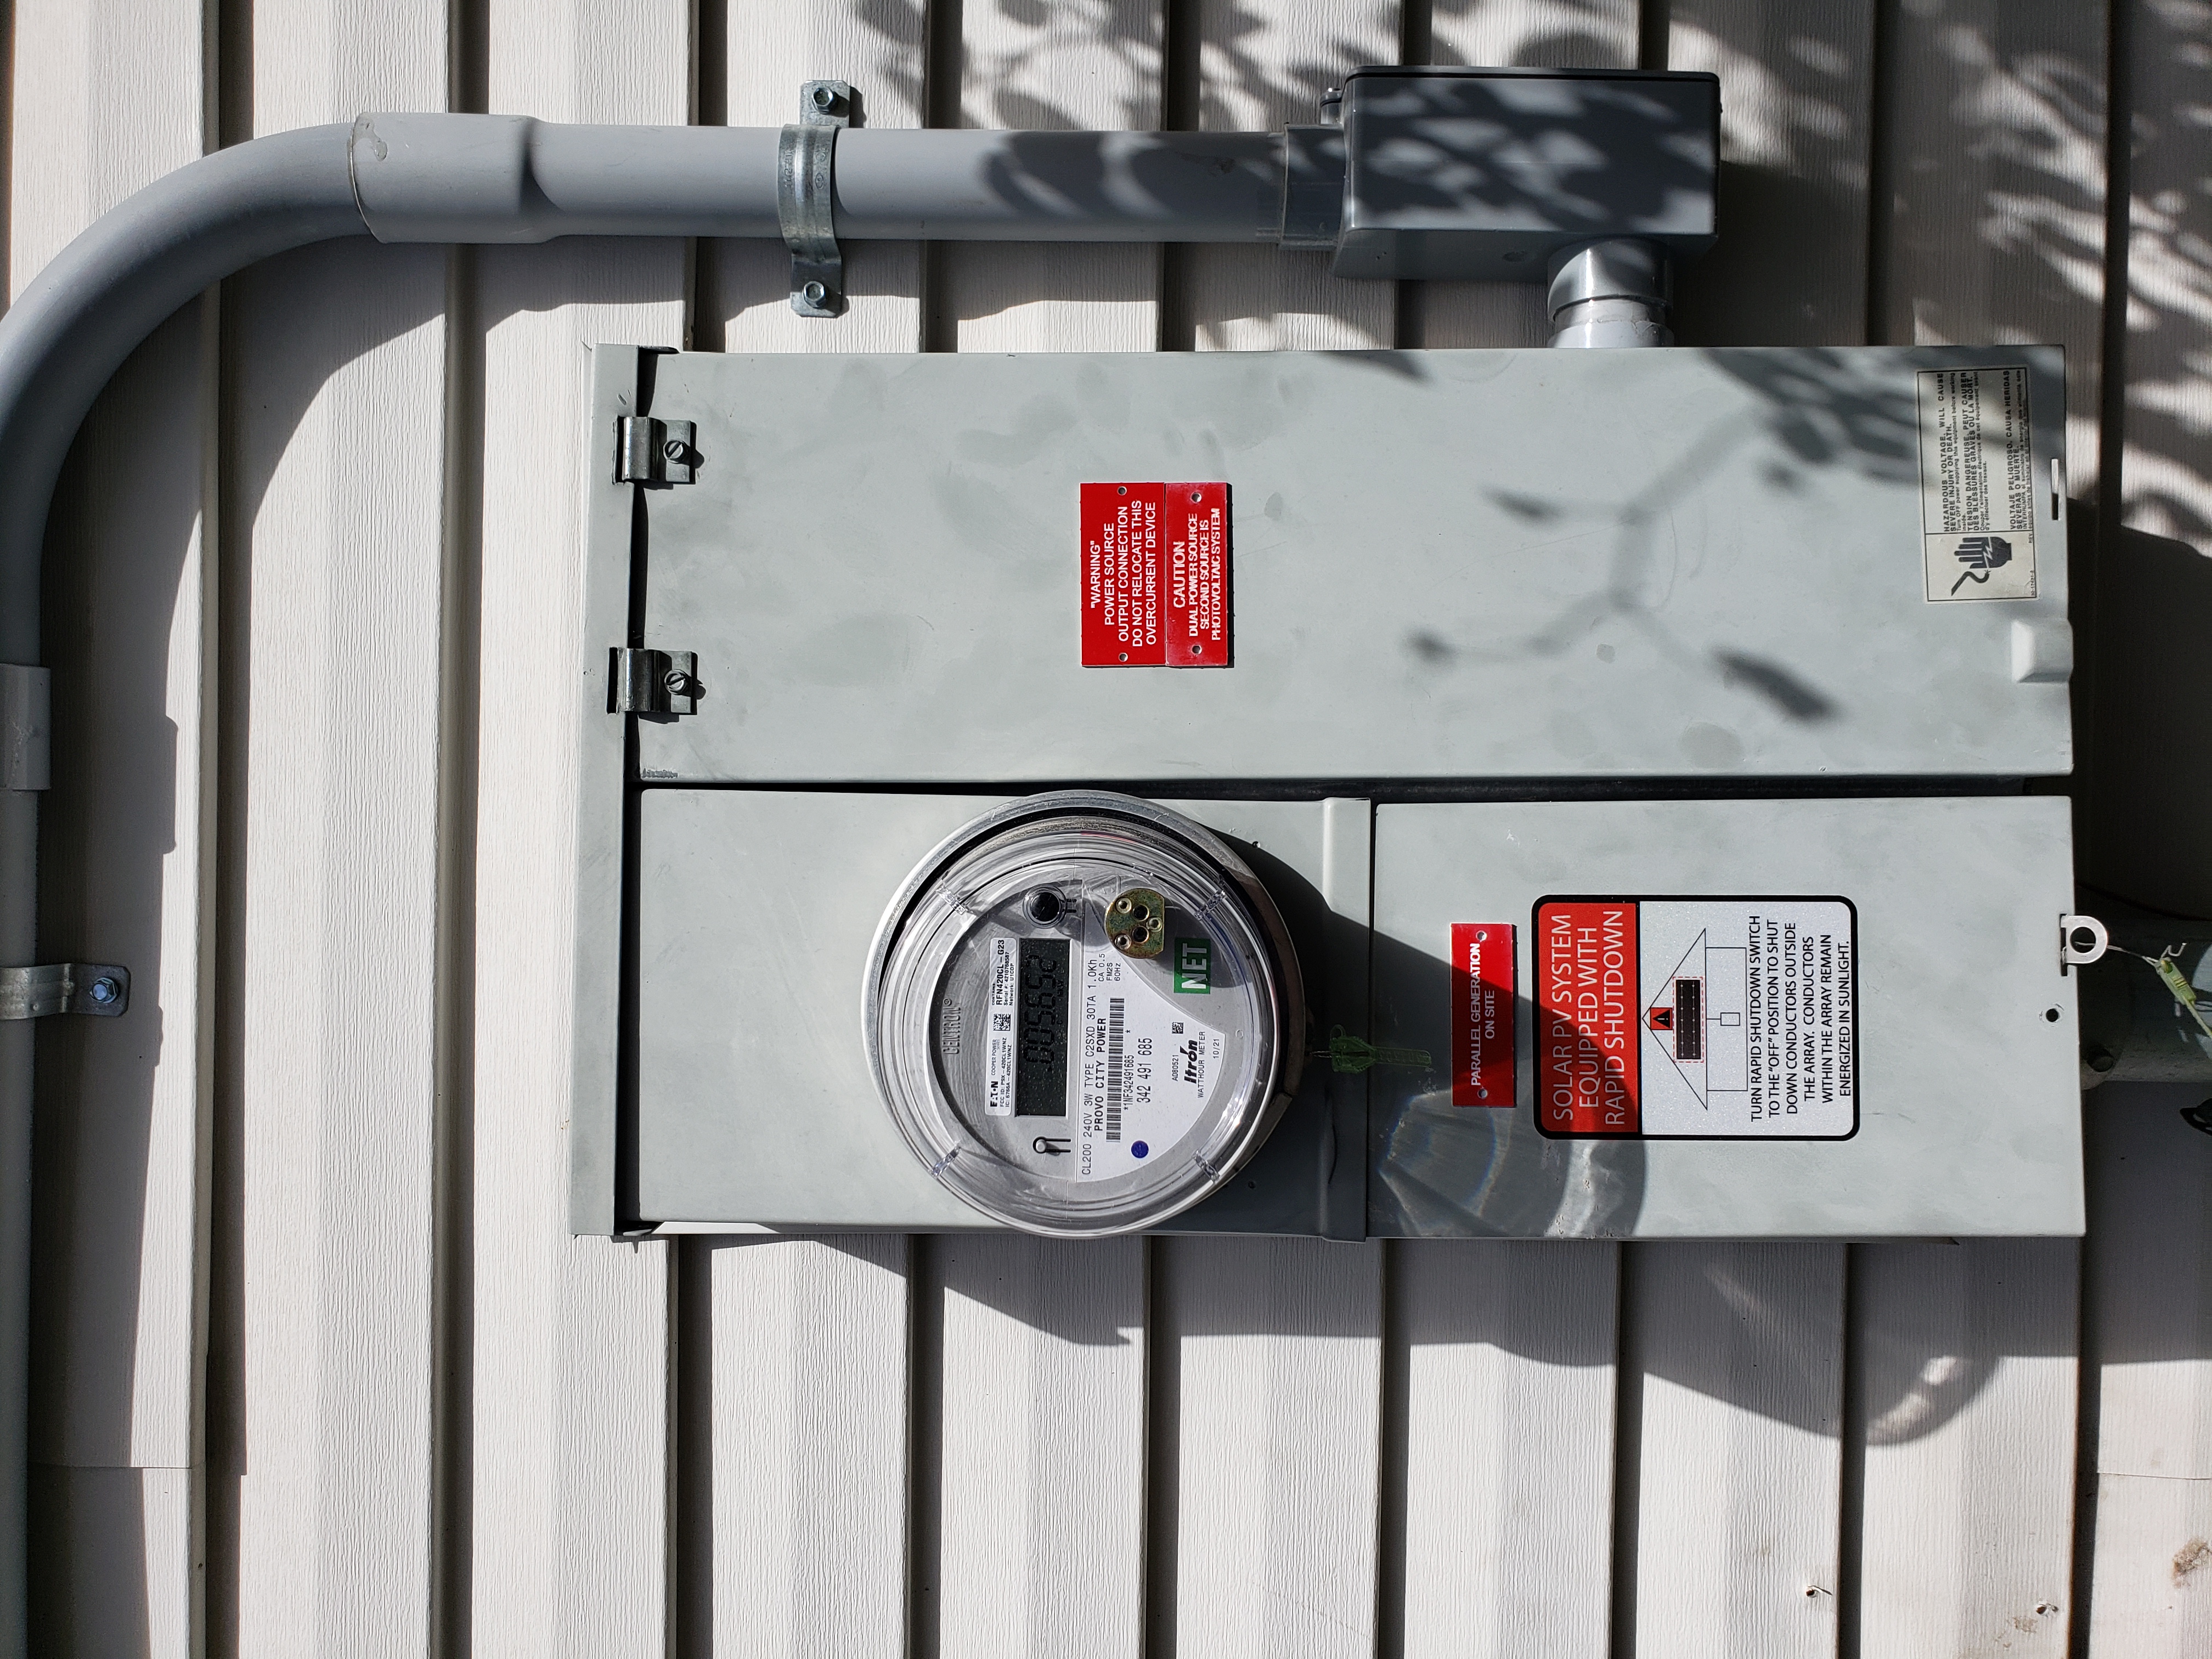
New grid power meter (net metering-ready) performs |
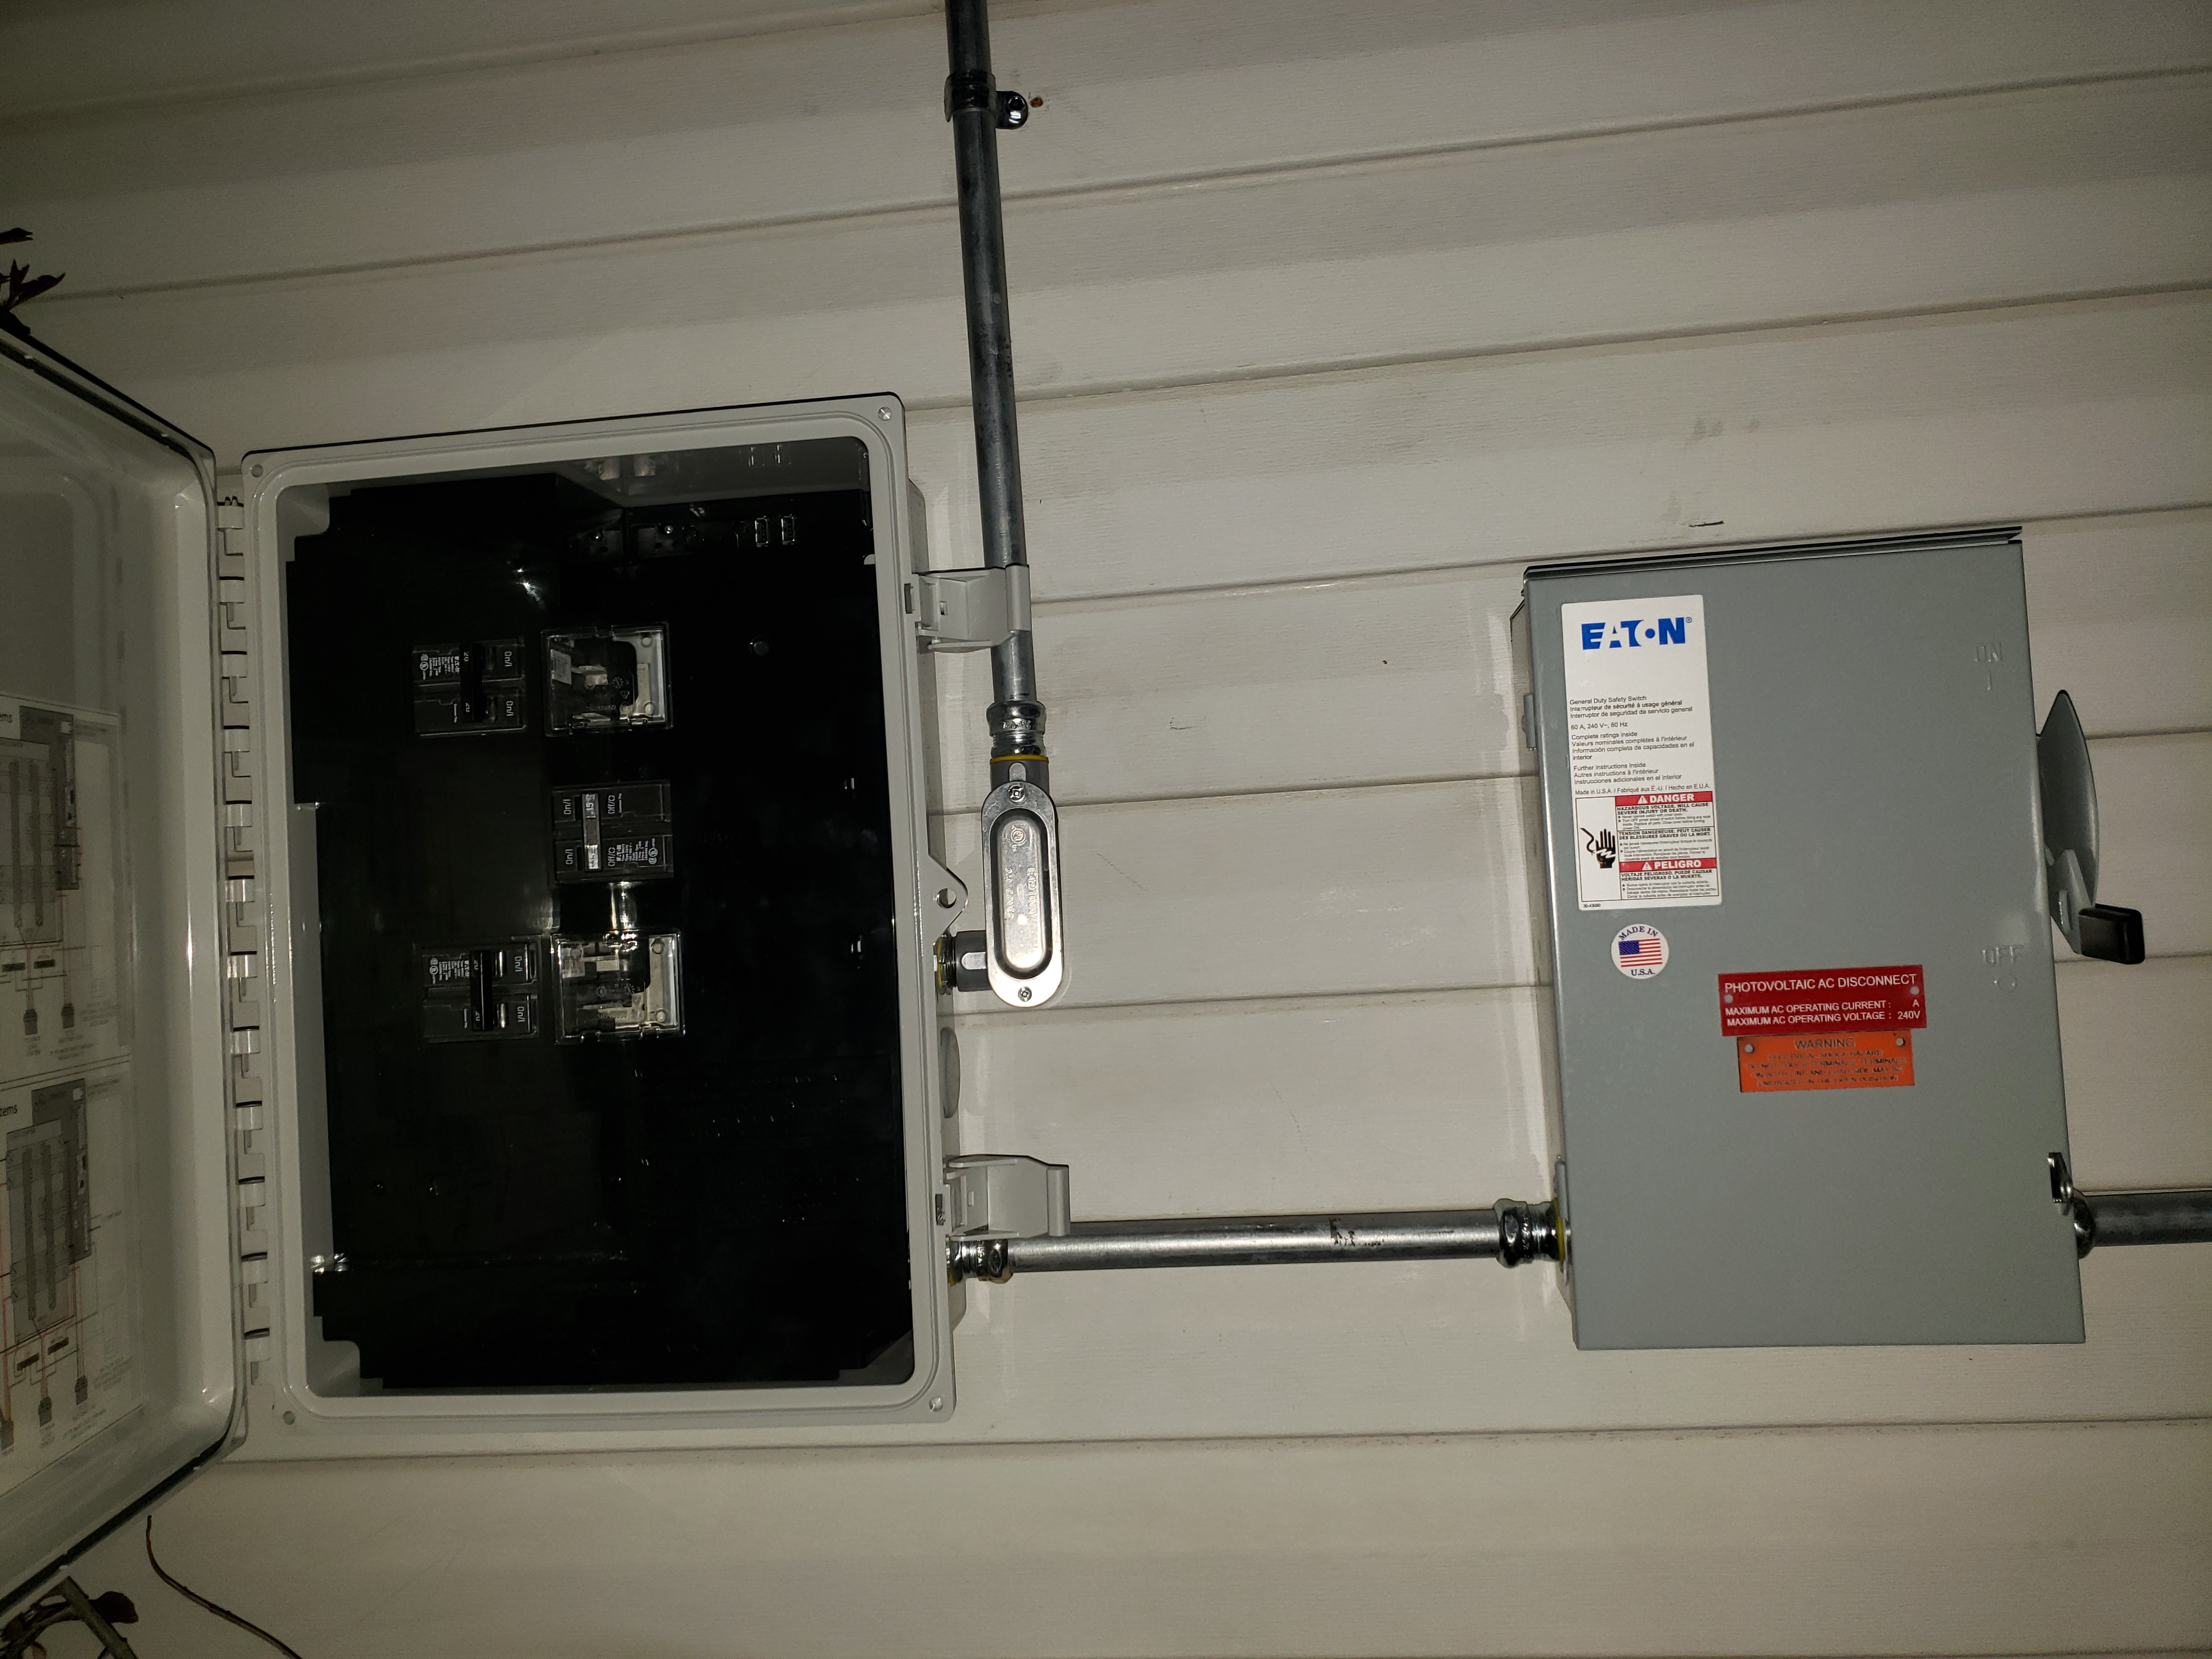
Detail inside the combiner: |
|
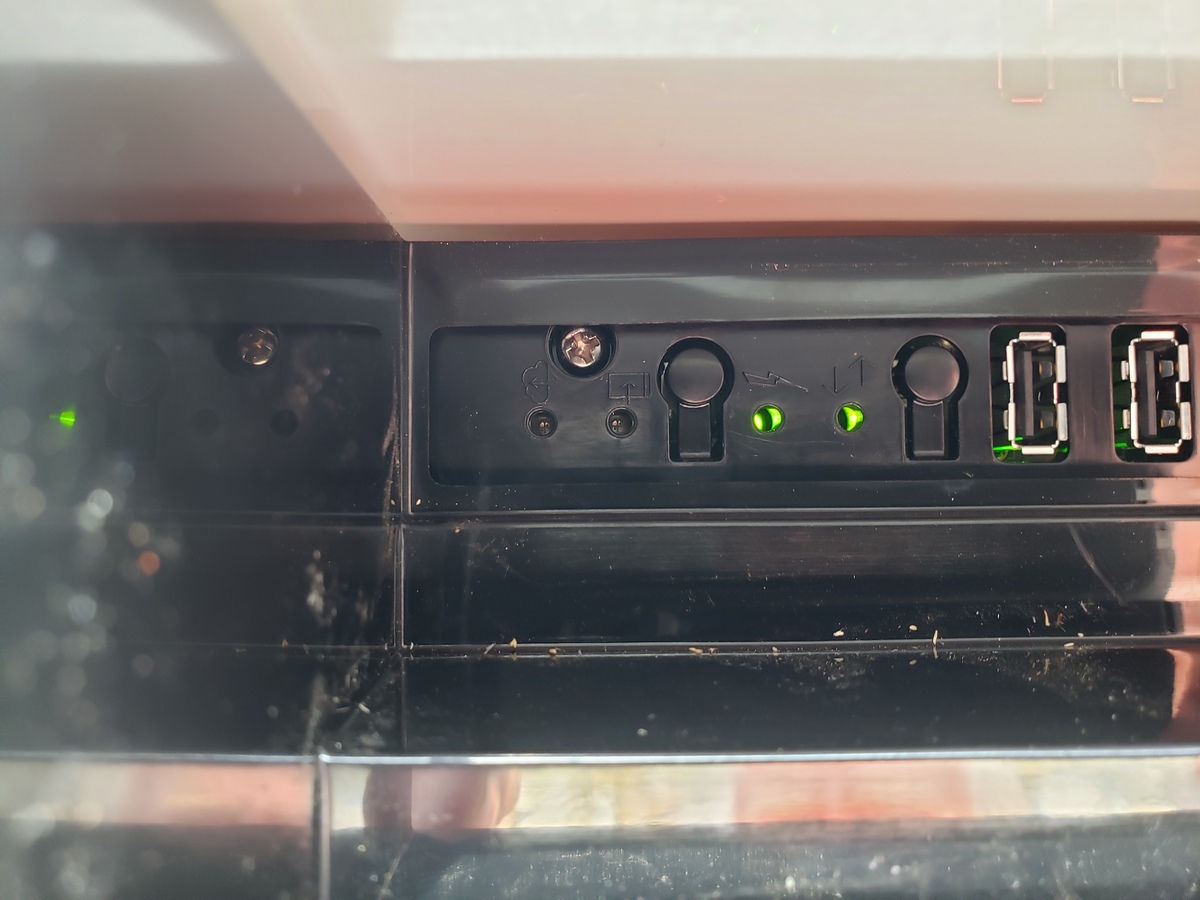
Inside the Enphase Combiner, |
Inside the Enphase Combiner, |
Instructions for system turn-on...
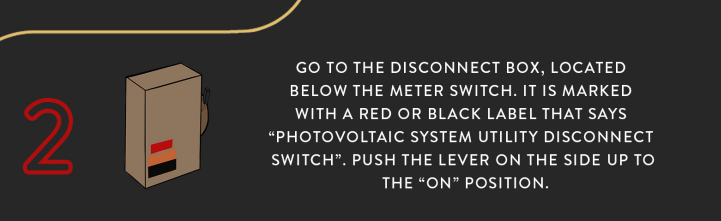
The images containing large, red-outlined numbers are from Titan Solar's instructions for the initial system turn-on. However, they're from a canonical recipe that doesn't match my own installation.
-
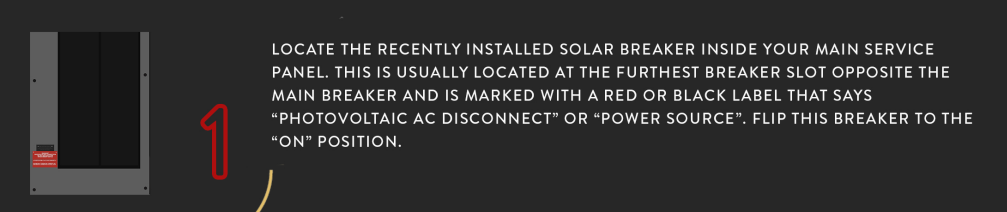
- My system's "PHOTOVOLTAIC DISCONNECT" isn't in the service entrance
(figure 1) whose cut-off breaker would bring the whole house down.
Instead, it's to be the loop-back subpanel (2, 3) bearing a red label
marked, "PHOTOVOLTAIC AC DISCONNECT" and likely the leftmost breaker.
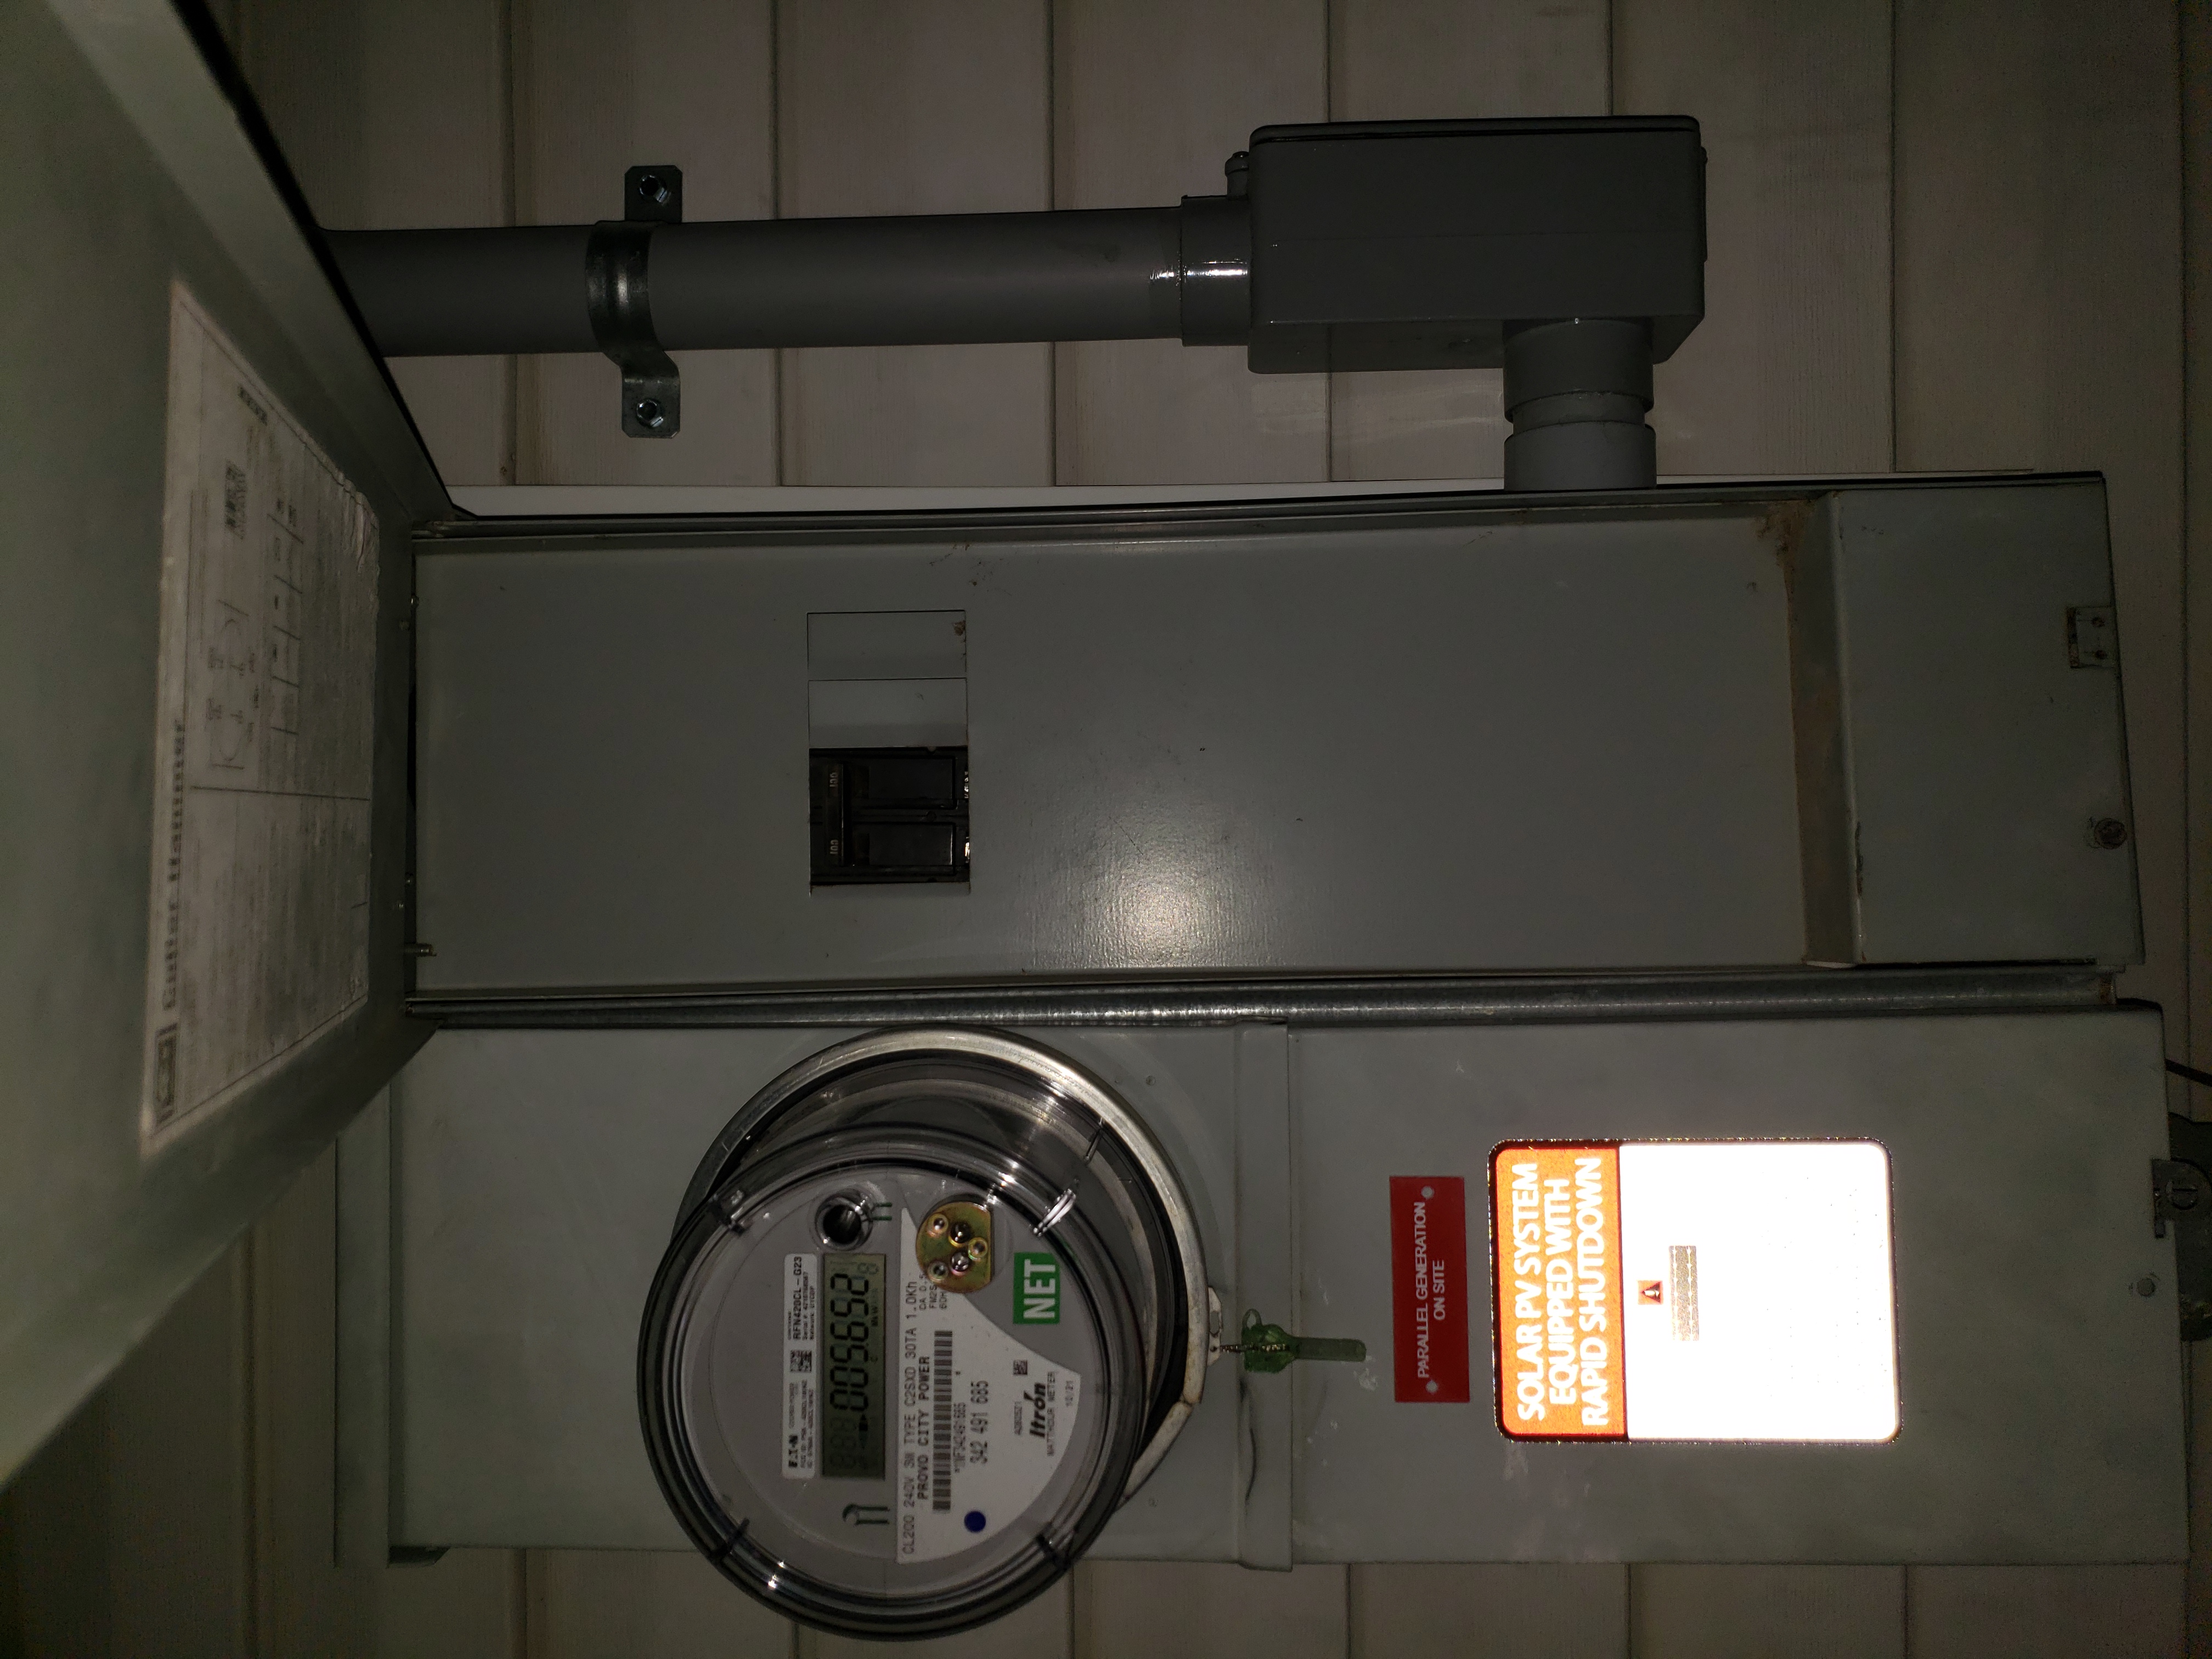
1. Provo City Power
service entrance.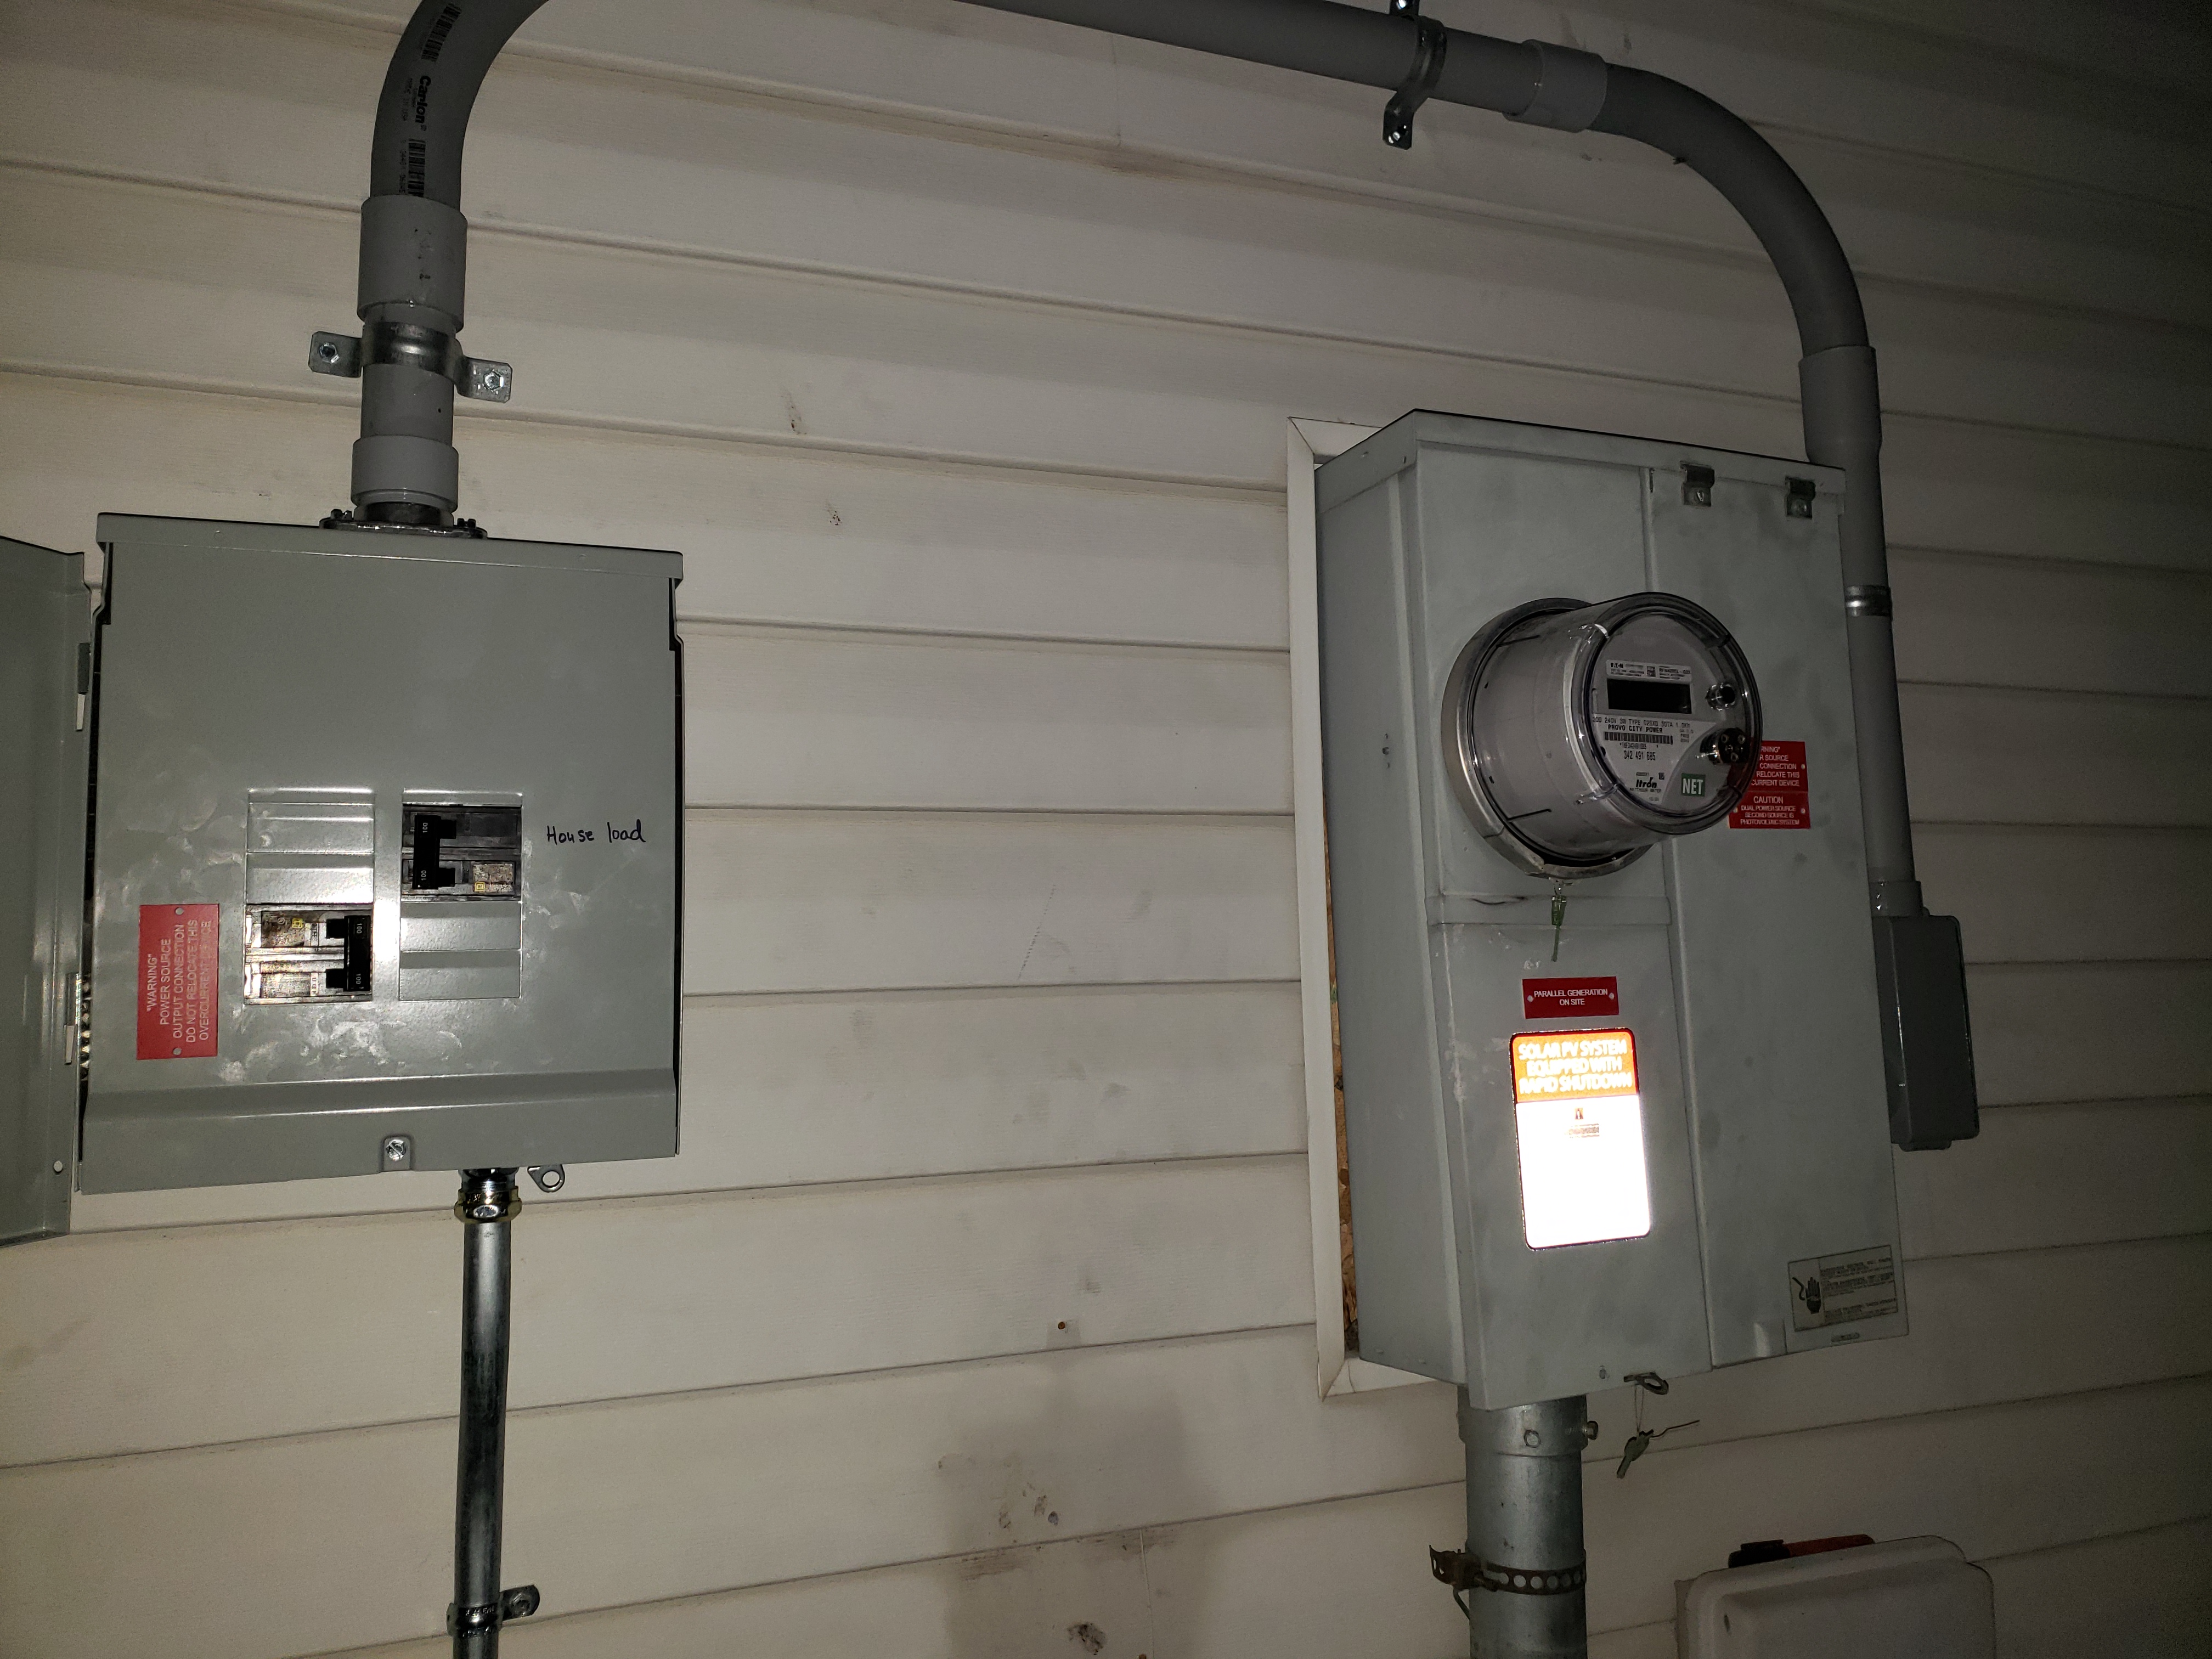
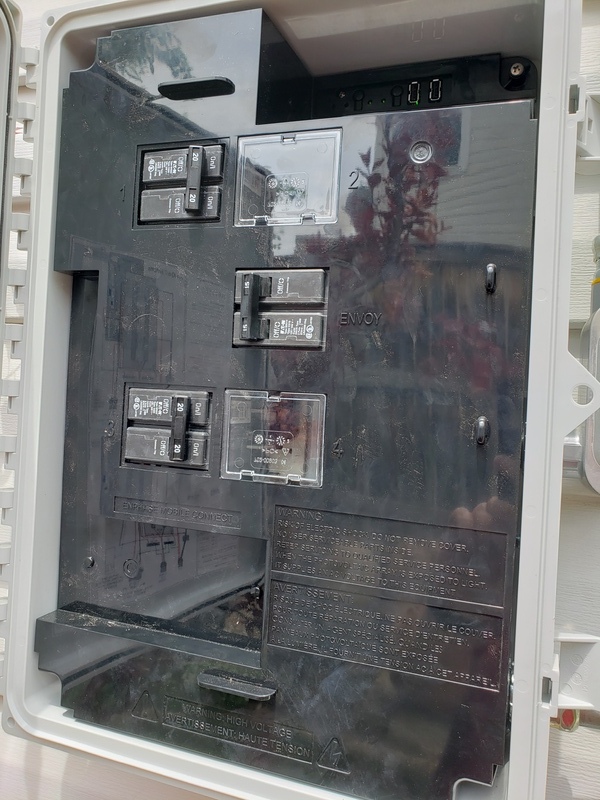
2. Loop-back subpanel (left) from
Provo City Power service entrance.
(Shown opened with two breakers
—the right one cuts house power and
the left one connects the photovoltaic system.)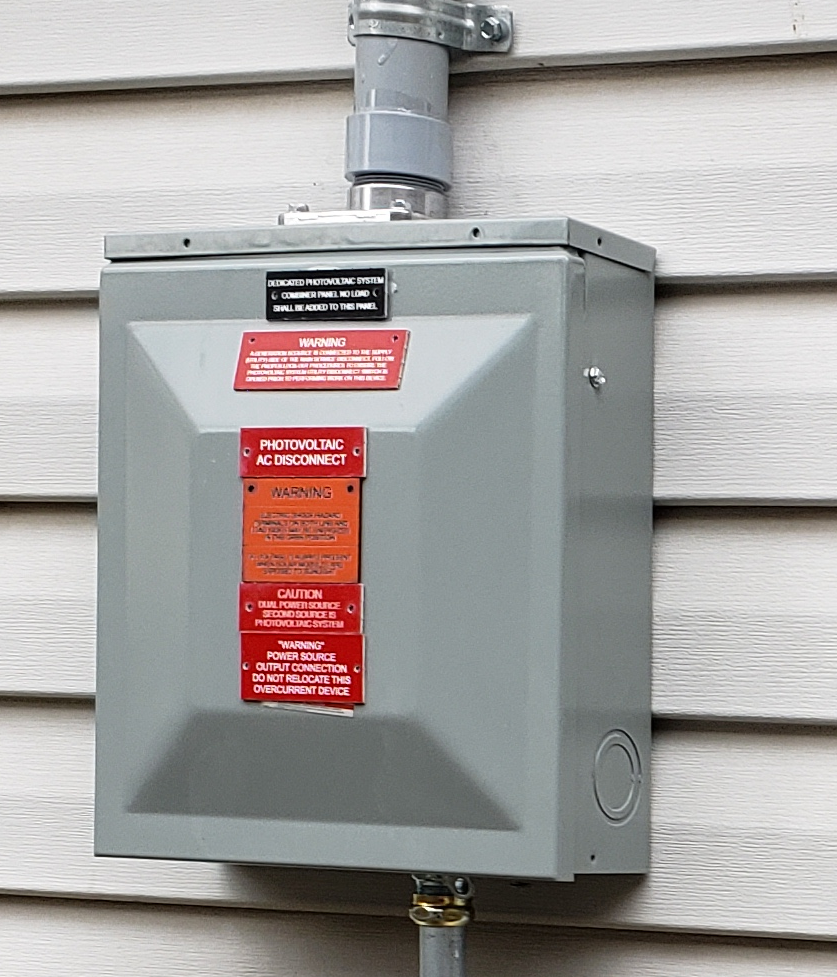
3. Loop-back subpanel.
-
- The "PHOTOVOLTAIC DISCONNECT" is this subpanel. The label in question is
red.
-

- Here's where the instructions go seriously downhill. Underneath my Q Cell panels are microinverters that transform the direct current output from the panel to alternating current. There is no "inverter" as part of the electrical panels per these instructions. Instead, what's pictured looks a little like the photovoltaic meter base.
-

- And, of course, the whole point is that, as of 11 May 2022, my system
still has no photovoltaic-system meter. However, this was later remedied.
-

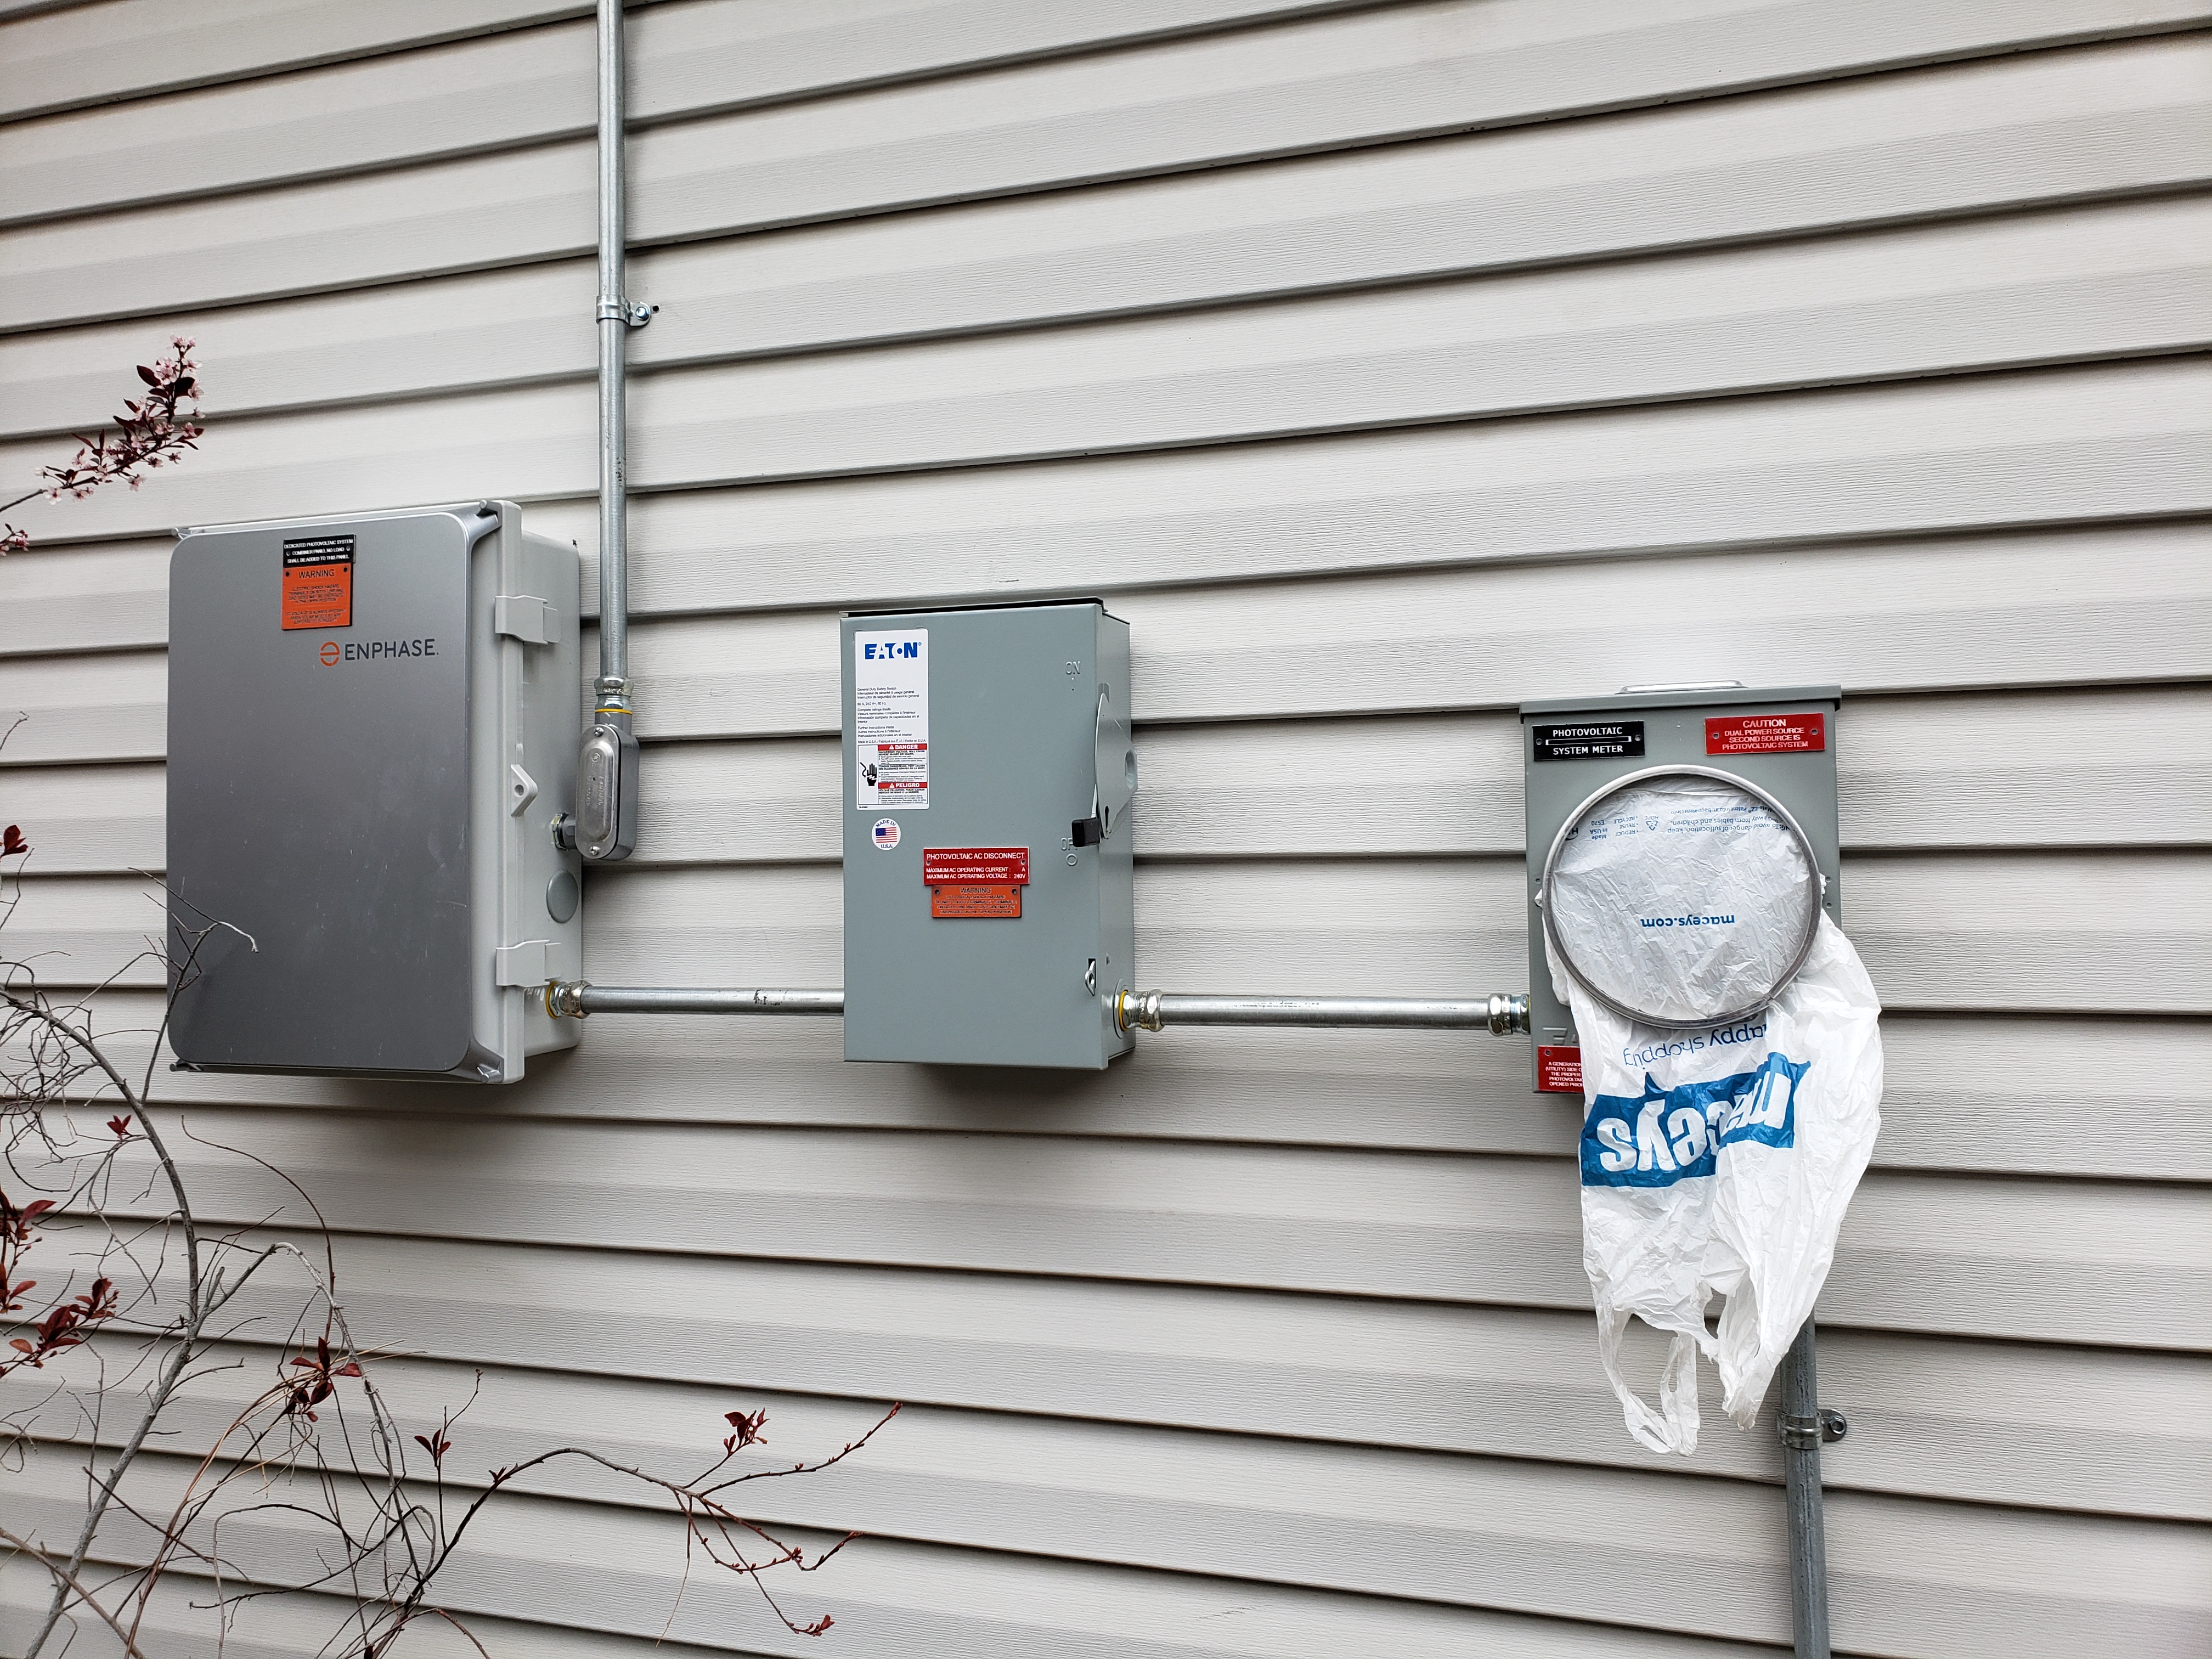
- This instruction is for naught because there is no "inverter" that's part
of the exposed electrical system. Here is the entire system spread across
the south, outside wall. Not one of these boxes or panels is labeled as
an "inverter." This was the original south wall electrical until
the installation of the Enphase battery. For the finished product
after that, see photos at the top.
From left to right:
- combiner,
- photovoltaic disconnect,
- photovoltaic-system meter base,
- loop-back subpanel and
- Provo City Power service entrance.
-

- Same puzzlement as #5 just above.