Cypress is a repeatable testing tool of Electronic Health Records (EHR) and EHR
modules in calculating eCQMs used by CMS's Quality Reporting Programs. The
Cypress validator is open source and freely available for use by software
development and IT communities including vendors and testing labs. Cypress
serves as an official testing tool for EHR Certification program. It is an
alternative to the difficult-to-obtain (and costly) validator used by the more
government-controlled National Committee for Quality Assurance (NCQA).
Resources
Installation
This can be done on Windows, Macintosh OSX and Linux. I'm only concerned with
the latter here. I'm using Linux Mint 20.1 Ulyssa, an Ubuntu (Debian)
derivative.
- The main software site is
projectcypress/cypress. From there, scroll down the bottom of
the page and begin by installing. For Cypress 7, go here:
projectcypress/cypress, Cypress 7 Install Instructions
The version you choose depends upon the rules under which you wish to
certify. For example, if you wish to use the 2015 ONC Edition with the
eCQMs updated for calendar years 2023 and 2024 reporting, use Cypress
7.
The following steps may deviate slightly as they documented Cypress 5/6
installation.
- For 2020 reporting (on events from 2019), use the Cypress 5 instructions.
However, these are a little incomplete. Read instead the instructions for
Cypress 6, but when it comes to installing the "bundle" (see later),
download instead the 2019 bundle in Cypress 5. This is what I will be
doing here.
- First, however, install Sun's VirtualBox software (now owned by Oracle on
your computer. Though a bit old, here are instructions for setting it up
in
Sun VirtualBox Notes, but for Linux Mint, I recommend using the
Software Manager, typing in "VirtualBox," and allowing it to install.
- The VM you will use in VirtualBox will not be one of your own
creation, but one you download from the
Cypress 5 instructions, then click on the VM link to
download Cypress.cypress_5.4.2_Public_VM.ova. Place this download
(2Gb) wherever convenient from VirtualBox when you run that application.
This software is a file ending in the extension, .ova, a fully
installed instance of the Cypress application that is imported into
VirtualBox.
- Launch VirtualBox and create a new VM. Once launched, click on
File → Import Appliance..., then navigate to where you saved
the recent download. Follow these instructions:
- Launch VirtualBox.
- Click Import.
- Browse to Cypress.cypress_5.4.2_Public_VM.ova, select it and
click Open.
Click Next.
- Accept everything except Networking as already configured,
click Import and wait for a minute or so. For
Networking, be certain to choose Bridged Adapter
(though, if you don't, you can change it later and bounce the VM).
- Power on (Start) the new VM.
- If you get an error to the effect that you cannot start it, it's
probably because your BIOS doesn't have VT-x enabled. Fix that.
(See
Tirion: VT-x.)
- Once your VM is installed, up and running, you can get into it via
its very console or, if more convenient, you can ssh into
it using these credentials:
- Username: ubuntu
- Password: CypressPwd
- Once in, obtain and copy the IP address (you'll need it later)
of the VM by
$ ifconfig
- vagrant is the host name, but you can make an entry such as
this in your development host's /etc/hosts/:
192.168.0.120 vagrant crypress
You can leave your new VM running. Go sign up, by following the link in
(either) the Cypress 5 or 6 instructions, with the
National Library of Medicine's Unified Medical Language System
(UMLS). (You do not need a company's help to do this.)
- Click on the Sign Up button.
- I clicked Google and used my personal, Google identity.
- Follow the instructions.
- Eventually, you will be able to Generate an API Key; at
that point you'll see a Username and an API Key.
Copy down both so that you can enter them later in a sign-in
dialog.
Now, return to the Cypress 5 Install Instructions and follow the
instruction to install the bundle and setup your application. This
reveals a long page of instructions.
- Download the bundle of your choice. Click on the link provided,
bundle-2019.zip. It's here that you'll need that
username and API key you copied in an earlier step. (Even though
you'd be tempted to use your e-mail address and a password.)
- The rest of the instructions for this step appear vague and muddled
from this point, so I'll explain differently.
- The Cypress VM installed and running is a web server. Launch it from
your browser by typing in a new tab its IP address and pressing
return. You should see a pleasant photo of cypresses and a sign-in
box.
- Create a sign-up by clicking the Sign up link, entering an
e-mail address, a password and clicking I agree to the above
Terms and Conditions. Remember the e-mail address (can be
bogus) and password.
- Now, turn to the VM console or the ssh session you still
have in progress and type:
$ sudo cypress run rake cypress:add_admin[e-mail]
[sudo] password for ubuntu: CypressPwd
where e-mail is the e-mail address you just used (might have
been bogus, that's okay). Successful completion of this step will
give that (bogus?) e-mail address/user you signed up with
administrator privileges.
- If you are using the Cypress validator as I am, for de-identified
documents in testing, you do not need TLS/SSL or need to change the
file /etc/nginx/sites-enabled/default. And, you do not need
to restart nginx.
- You have finished setting up the Cypress software.
At this point, launch and sign in to the Cypress web interface (from your
browser),
- Click Remember me, click the (gear icon) Admin tab,
then the Bundles tab, then use the + Import
Bundle tab to navigate to find the 2Gb zip file you
downloaded. This will take a few minutes to complete.
- While you're in this interface, you may as well create a vendor.
Click Dashboard, then fill out for a new vendor. This can
all be bogus. I did this (this is Munsters fodder):
Vendor Name: Mockingbird Heights Clinic
 Vendor ID : 1313
       URL : http://www.mockingbirdheightsclinic.com
   Address : 1320 Mockingbird Boulevard, Mockingbird Heights
     State : CA
       Zip : 90210
- Click Add Vendor.
This sets up your Cypress validator, ready for use.
Using the validator
In an older version of the Cypress validator, probably circa v3, it was
possible to upload a file to run, get a list of errors, get to work fixing
what's generated by MDHT, then upload the new result and try the testing again.
Here's how that was done.
- Copy the QRDA I document out of the JUnit test console and commit to a
new file extended by .xml. Alternatively, find it at
~/Documents/qrda-i-final/something.xml.
- Go to the hamburger menu (or, if displayed in banner at top)
Validation Utility.
- Update File.
- Navigate to file.
-
- Accept the PHI Confirmation (doing first reduces later scrolling).
- Click 2018 Bundle for the 2019 Reporting Period.
- Click None.
- Click Document Type.
- Click QRDA Cat I.
- Click Submit.
- See errors across top:
- QRDA Errors
- Reporting Errors
- ubmission Errors
- Warnings
Cypress 5
Today's Cypress ain't your grandfather's Cadillac...
A product be defined for a vendor. From my point of view, this is pointless.
Yet, it's necessary.
It appears that the Cypress validator is a massive framework geared toward a
somewhat different end such as a lowly software developer like myself cannot
grasp. While there are still upload semantics, even individual-file semantics
(QRDA III testing involved uploading a zip), a place to upload is very hard to
stumble upon. Also, a vendor and product must be created and there appears to
be test data already offered. Moreover, there is a finite list containing
measures supported. That's where the ability to upload a file is found.
For now, only aimless clicking around leads one to what I'm about to
demonstrate. I do not yet know how to get there deliberately.
With a product added, the upload semantic comes down in a list of all existing
measures. I chose CMS131v8, uploaded my file and the validator reported
failure. I clicked on Diabetes: Eye Exam and was taken to a page
entitled, Expected Aggregate Results. There were 60 errors and 4
warnings and a button, View Uploaded XML with Errors. See this at the
end of this next section where I try to figure out how to get there on purpose.
Let's try to find our way...
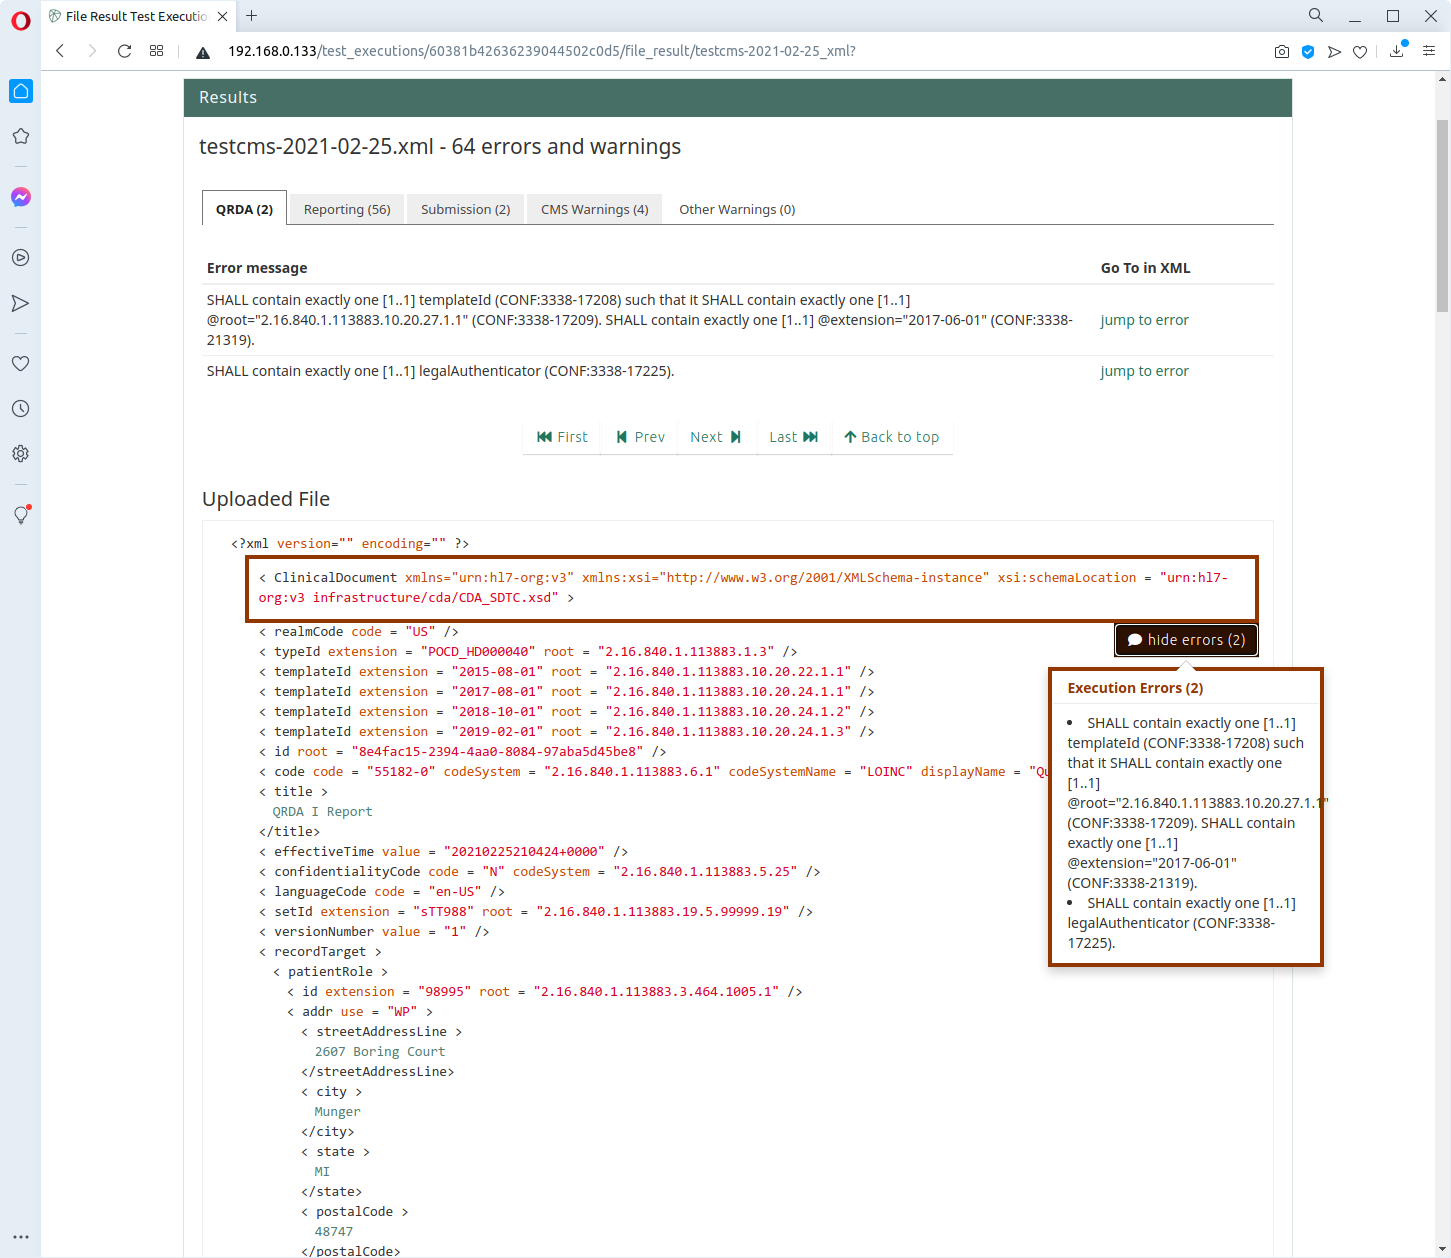
...to launching the validator on our file, testcms-2021-02-25.xml.
On the dashboard, there's a vendor listed. Click that to see this:
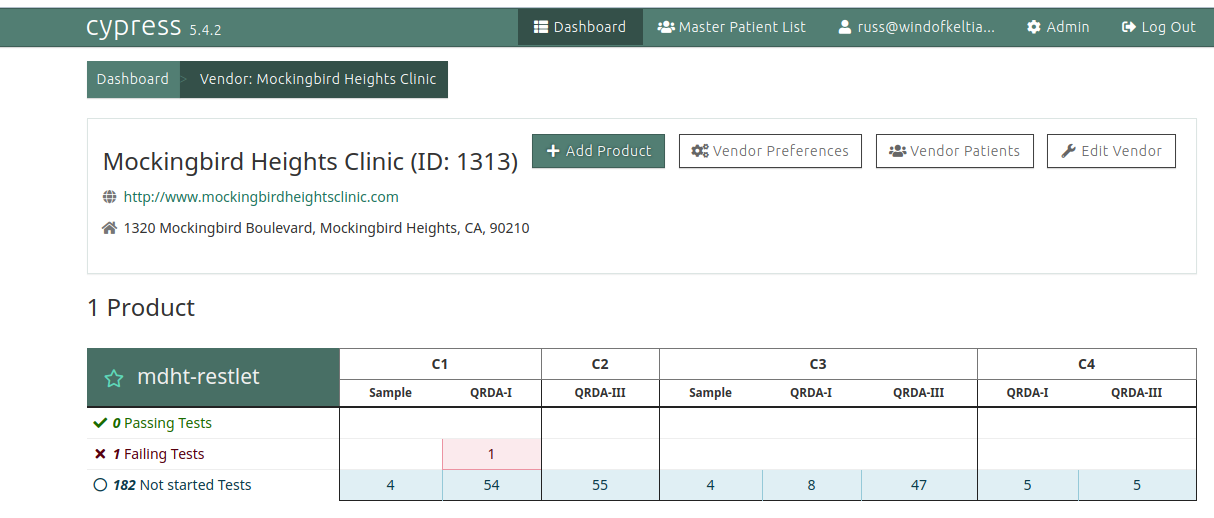
Click the lone product name (mdht-restlet, perhaps not a good name; I'm
generating these QRDA I files using a servlet based on the MDHT library) to see.
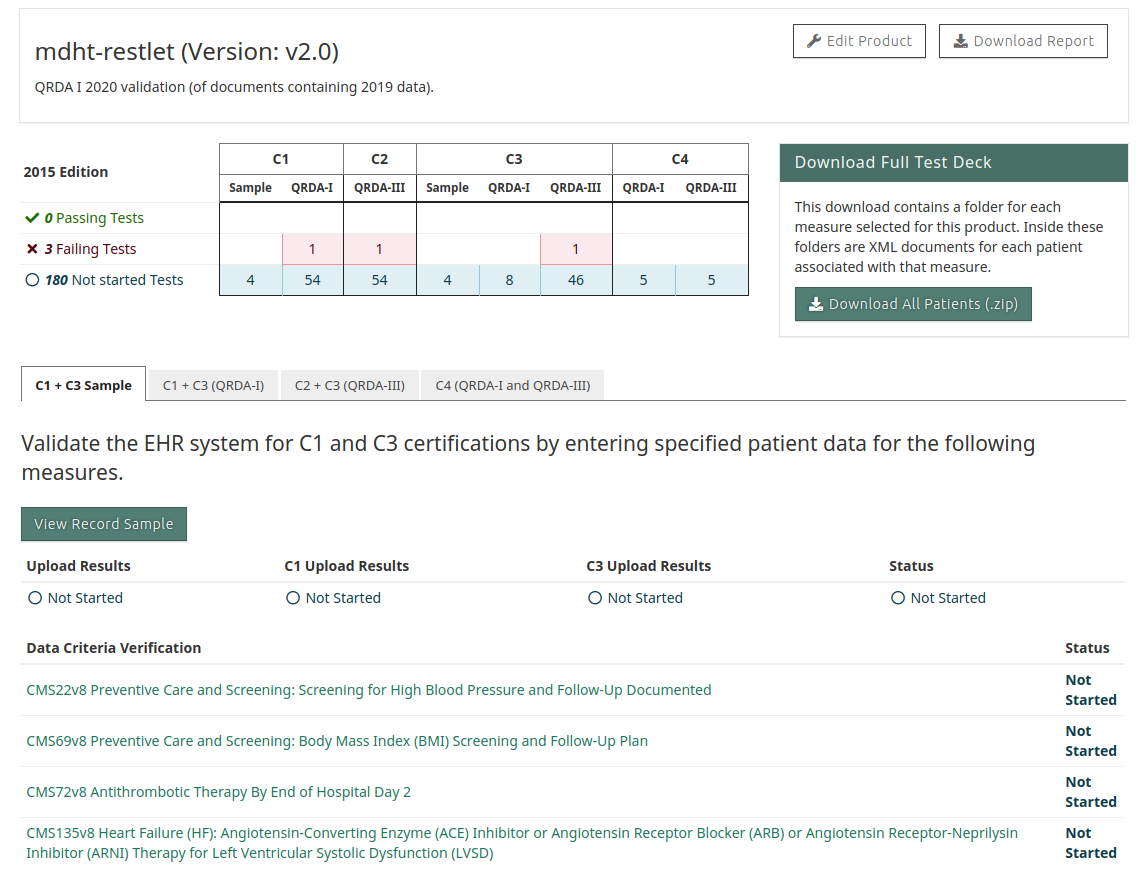
That's confusing and doesn't give me any interesting choices. Click the
C1 + C3 (QRDA-I) tab to see:
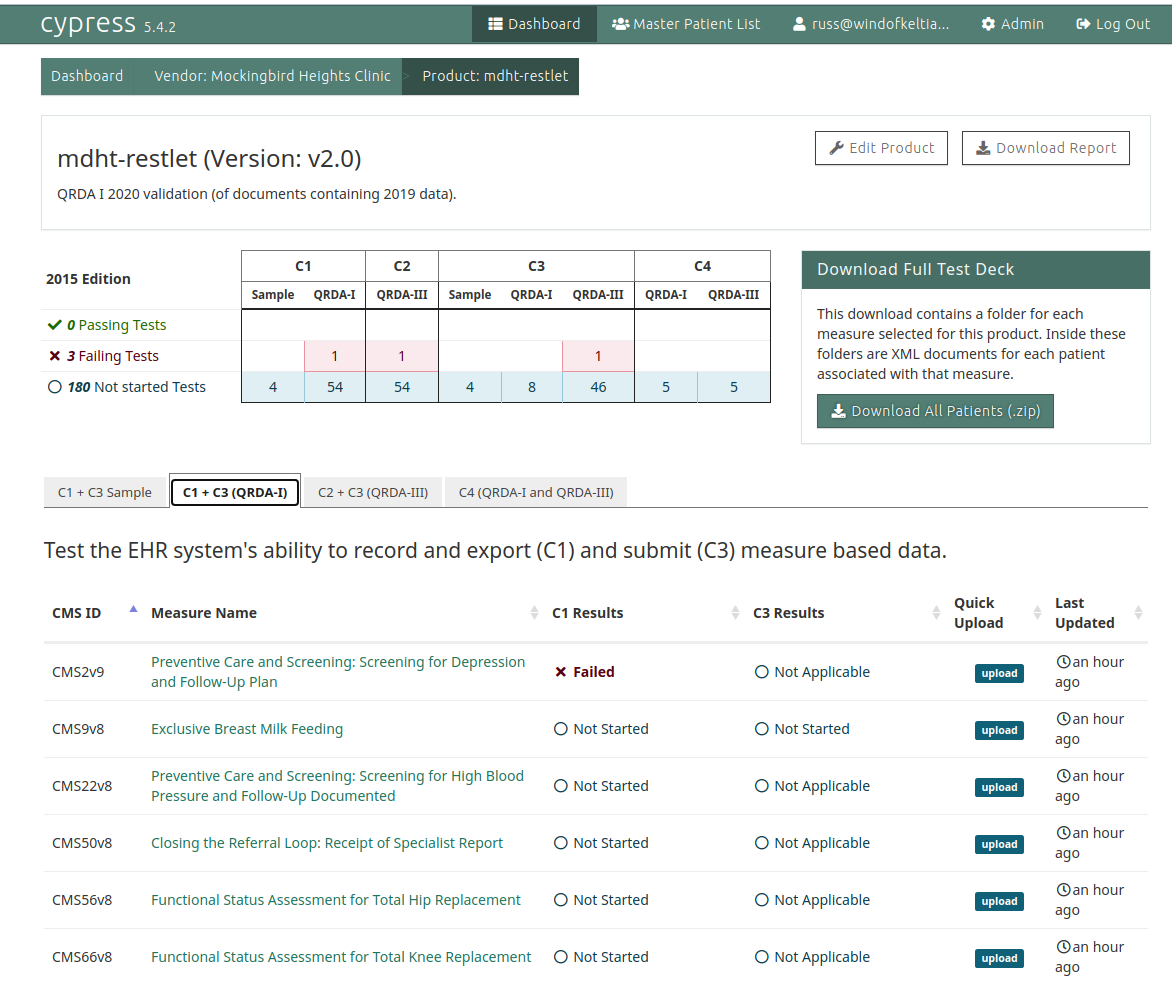
Now we see a whole list of most if not all the measures I have ever known
about. I scroll down to CMLS131v8 to see:
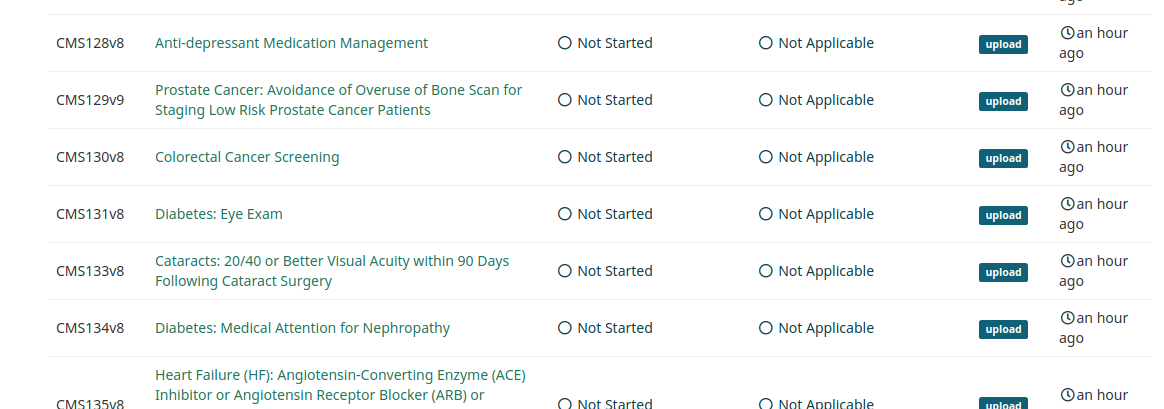
Here's where I click upload, navigate for my file (I use
Show all files), then click Open. It runs the file and
reports ✗ Failed. Then I click on the title of this measure,
Diabetes: Eye Exam.
An API?
This leaves me thirsty for an API so that I don't have to waste my time doing
all of this. I'll get back here.