
Setting up Apache Tomcat
Russell Bateman
Spring 2010
last update:
|
|
Setting up Apache TomcatRussell Bateman |
This is a very short treatment of how to set up Apache Tomcat, a web server container for use with Eclipse.
Just as I do not consume the Java runtime environment (JRE) that is set up on my computer from Eclipse, I do not use any formal Tomcat installation I may have on my box either. I install Tomcat separately (not under Program Files on Windows or outside of /home/russ on Linux).
If you like, read a few words on what Eclipse-Tomcat integration gives you here.
Download Tomcat from http://tomcat.apache.org/. There you can choose between several versions. I'm using version 6.x here.
If downloading to Linux, you need only explode the tarball and copy it to where you want it to be.
If downloading to Windows, you need only extract the contents which
produces a subdirectory you can copy to where you would like to consume
it from in Eclipse. I copy mine to the same place I put my JDK, my
downloaded third-party libraries, etc., to wit:
C:\Users\russ\dev\downloads\apache-tomcat-6.0.26
or, on Linux:
/home/russ/dev/downloads/apache-tomcat-6.0.26
While not super-relevant to this discussion, you need to be aware of another package option, "Deployer," which is not what you want now. However, it's a tiny download and, once extracted, you should read deployer-howto.html for information on what this is.
If you've accomplished this installation correctly, you're now ready to install Eclipse if you also have downloaded and installed a Sun JDK. If not, see Setting up the Sun JDK.
Note: As of January, 2011, there was still a bug in the interaction between Tomcat 7 and Eclipse. If you wish to use this version of Tomcat, you will want to peruse this discussion thread in the Eclipse web tools platform forum. However, I've never seen nor had this trouble myself.
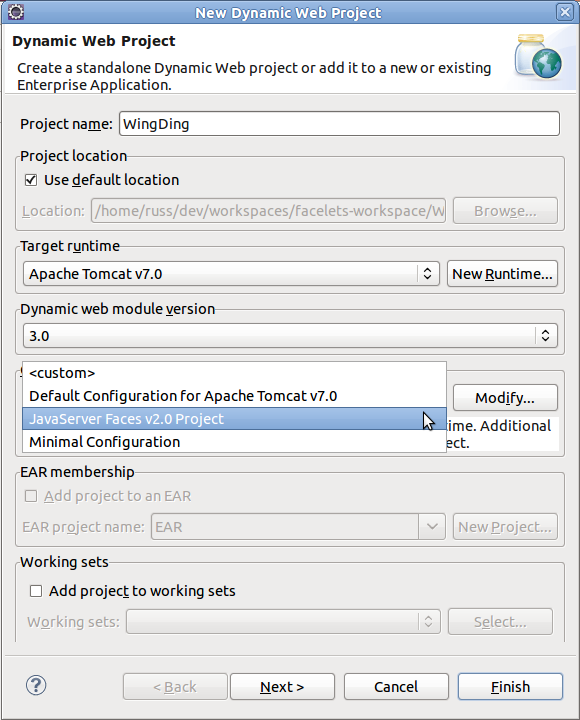
It is useful to consume Tomcat 7 for it's the only way (well, you could also use another server like GlassFish or JBoss), to gain access to Eclipse Dynamic web module version 3.0 and the JavaServer Faces v2.0 Project configuration when creating a new Dynamic Web Project. If you use Tomcat 6, you can only get 2.5/1.2.
(Note: for want of a better place to put this, I include the following:
javax.servlet.annotation.WebServlet exists only in Apache Tomcat 7.x, not in 6.x. The Seam Catch example at https://github.com/seam/catch/tree/master/examples makes use of this.)
This is only relevant if you've downloaded and installed Eclipse IDE for JEE Developers.
There is no need to install special plug-ins in Eclipse in order to run Tomcat. Once you've downloaded your chosen version of Tomcat as instructed above, and exploded it somewhere on your hard drive, do the following:
This makes Tomcat available to Eclipse. You consume it there by adding a Server "project" to your workspace. You do this because your project contains a servlet, JSP, etc. and you want to run one or more of your workspace projects as a server.
You're now ready to launch your application as a server under Tomcat and debug it. To change the port Tomcat uses (with Eclipse), go to the Servers view and double-click Tomcat. It will open a settings page in the edit view.
Eclipse does not directly deploy your application to Tomcat's webapps subdirectory. Instead, it deploys it to a path in your workspace:
.metadata/.plugins/org.eclipse.wst.server.core/tmp0/wtpwebapps