Simple JSF Facelets Project
Russell Bateman
23 February 2011
last update:
|
|
Simple JSF Facelets Project
Russell Bateman |
It's useful to understand the extent of what components are crucial to a web application that uses JSF or Facelets regardless of whether Eclipse, NetBeans or no IDE is being used. Paradigmatically, and with concrete examples in this tutorial and project, these are:
| Java web application project set up | subdirectories |
| Third-party libraries | JARs
|
| Backing bean and other Java source code | UserNumberBean.java |
| Resources (images, bundles, etc.) | java_duke.gif |
| Web descriptor | web.xml |
| Faces configuration | faces-config.xml |
| Presentation file(s) |
guessnumber.xhtml numberresponse.xhtml |
|
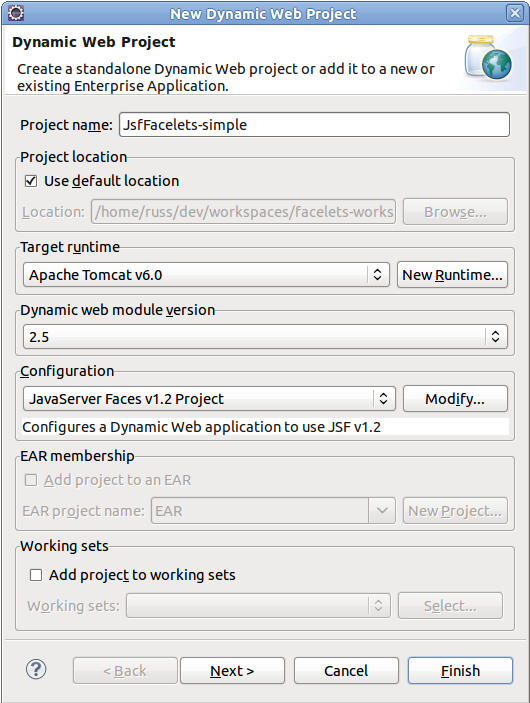
1. Use File -> New to invoke the new Dynamic Web Project wizard. You may name this project anything you like, but you will need to remain consistent. For the Configuration, choose JavaServer Faces v1.2 Project. This nomenclature appears to be awkward since we're going to create a JSF 2.0 application, but it's the only choice Eclipse gives us in Helios. (Indigo is about to come out; we'll see if WTP changes anything in that release.)
|
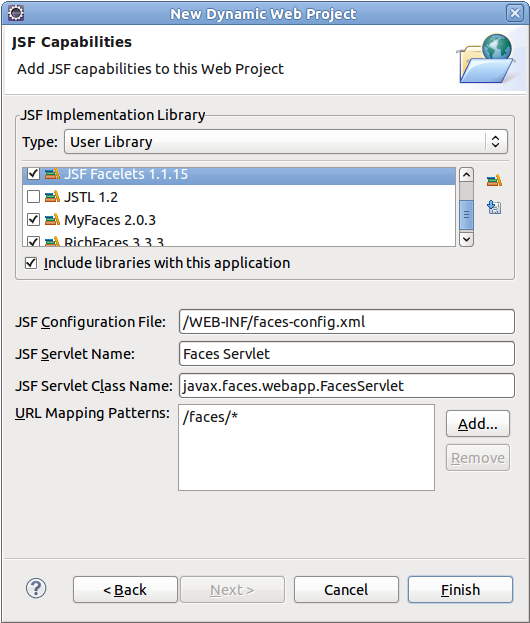
2. Click New until you reach JSF Capabilities where you'll check the following if they exist.
Don't sweat it if one or more of these is missing. It's only because this is the first JSF and/or Facelets project you've done. We'll create these libraries in the next step. Click Finish.
|
|
3. Once the project has been created, right-click its name and choose Build Path -> Configure Build Path, then click the Libraries tab. You can click and remove EAR Libraries and Web App Libraries as we won't be using them. (But, leaving them in won't hurt anything either.) At this point, you probably don't have any of the libraries listed in the previous step. Please go to Appendix: Setting up User Libraries now to set them up. When done, you should see what's below although you may have chosen to name your libraries differently—this is alright as long as the JARs inside are correct.
|
As noted, the JARs were discussed completely in Facelets Using RichFaces: The definitive JAR list. You'll find the definitive list and also links to download areas there.
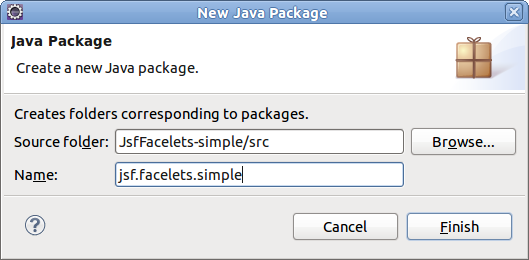
We'll need a backing bean for our JSF work; this will be written in Java. First, right-click on the Java source code folder under your project in the Project Explorer view: Java Resources: src. Click New and create the Java package we'll use, jsf.facelets.simple.
Create the backing bean. We're going to implement the very old "Guess a number" application. For this, we'll need a Java file under the new package. We'll call it UserNumberBean.java. Create this by right-clicking on the new package and choosing New -> Class.
We're going to use the latest annotations (ManagedBean and SessionScoped). We'll explain what this means later. In the meantime, be sure to include the annotations. Also, in order to do this, obviously, you'll have to have your Java compiler compliance level set at least to 1.5 in Eclipse.
package jsf.facelets.simple;
import java.util.Random;
import javax.faces.bean.ManagedBean;
import javax.faces.bean.SessionScoped;
@ManagedBean
@SessionScoped
public class UserNumberBean
{
Integer randomInt = null;
Integer userNumber = null;
String response = null;
private long maximum = 10;
private long minimum = 0;
public UserNumberBean()
{
Random r = new Random();
randomInt = new Integer( r.nextInt( 10 ) );
System.out.println( "Duke has chosen: " + randomInt );
}
public Integer getUserNumber() { return this.userNumber; }
public long getMaximum() { return this.maximum; }
public long getMinimum() { return this.minimum; }
public void setUserNumber( Integer user_number ){ this.userNumber = user_number; }
public void setMaximum( long maximum ) { this.maximum = maximum; }
public void setMinimum( long minimum ) { this.minimum = minimum; }
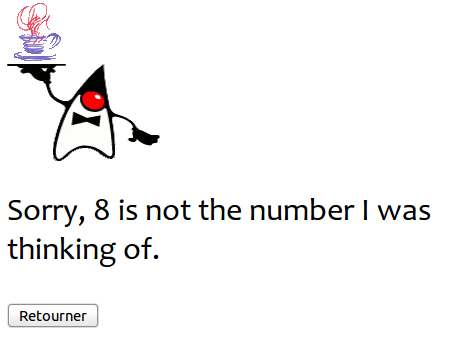
public String getResponse()
{
return( this.userNumber != null && this.userNumber.compareTo( this.randomInt ) == 0 )
? "Yes, you guessed the right number!"
: "Sorry, " + userNumber + " is not the number I was thinking of.";
}
}
Most web applications have some resources. In our case, this is only an image, but it could also be various property files or bundles that we'd use for localization. Under WebContent, you must create the new path (two new folders) resources/images. Here is the image you'll need to copy and drop on this path. Right-click here and save this image to your project.

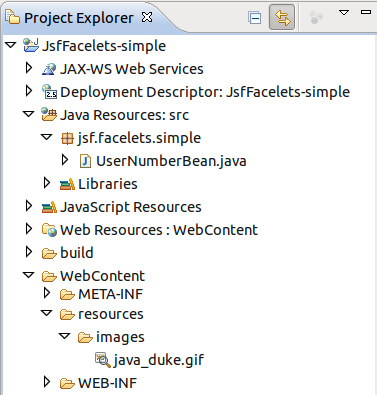
Duke is the host of our guess-a-number game. When you've set this up, you'll see the following in your project. You've already got a compiling bean and this image as a resource.
Next, we'll set up web.xml. Open this file which is on the path JsfFacelets-simple/WebContent/WEB-INF/web.xml.
Eclipse already does a good job of this and when you're doing your own applications after this, you can leave it, add to it, delete from it, etc., but here we're going to set this up for ourselves. Click here to see this file, then use your browser to view the resulting XML page's source and copy the contents of this file. Paste them into web.xml in place of what's there.
Note: to copy the contents once you're viewing the XML in the browser, simple right-click in the content region of your browser and choose either View Page Source (Firefox) or View Source (Internet Explorer).
Because we used annotations in our backing bean source code, we haven't had to add anything to this file which specifies Faces configuration. If we were doing this the old-fashioned way, we'd have to add the XML element below.
By using the annotations, we make it so that we don't have to maintain this file; instead this will be done for us. It also means we won't be able to follow best practice in bean-variable naming in the JSF files which is that the bean variable name be identical to the bean classname except for lower-casing the first letter and dropping Bean from the end. This is what is accomplished in our XML below.
<managed-bean>
  <managed-bean-name> userNumber                        </managed-bean-name>
  <managed-bean-class>jsf.facelets.simple.UserNumberBean</managed-bean-class>
  <managed-bean-scope>session                           </managed-bean-scope>
</managed-bean>
Instead, since managing our backing bean is done automatically through annotations, when it's launched, it uses reflection to walk through to find classes that contain annotations and set things up accordingly. In this case, the backing bean management is discovered such that its absence from faces-config.xml is unimportant. The annotations in the Java code cause an implicit version of this bean management that would appear as below here which you'll confirm when you see the presentation (.xhtml) files later.
<managed-bean>
  <managed-bean-name> userNumberBean                    </managed-bean-name>
  <managed-bean-class>jsf.facelets.simple.UserNumberBean</managed-bean-class>
  <managed-bean-scope>session                           </managed-bean-scope>
</managed-bean>
This type of things is big in later versions of frameworks like Spring, JPA and REST (all in my own experience; there are many more besides). Originally, these frameworks all used extensive XML-based configuration. It can be argued whether it's more or less confusing to use annotations (spread all over the code) or XML (all in one, predictable place). Obviously, it's more convenient to the Java developer who creates the code to do it inside the Java source.
But, there is something very important needed in this file. Without this statement, the application runs, but nothing renders, which is to say, what you get is a blank browser screen and doing a View Page Source (or, View Source in Internet Explorer) shows that the page contains nothing at all. So, the following is all we'll have in this file:
<?xml version="1.0" encoding="UTF-8"?>

<faces-config
    xmlns="http://java.sun.com/xml/ns/javaee"
    xmlns:xsi="http://www.w3.org/2001/XMLSchema-instance"
    xsi:schemaLocation="http://java.sun.com/xml/ns/javaee
                   http://java.sun.com/xml/ns/javaee/web-facesconfig_1_2.xsd"
    version="1.2">

<application>
	<view-handler>com.sun.facelets.FaceletViewHandler</view-handler>
</application>

</faces-config>
Oddly, Eclipse doesn't seem to support setting the version to "2.0" without changing the Project Facets to "2.0". And it's not possible to change the JavaServer Faces Preferences to 2.0. I've not been able to overcome this problem; so far, no one in the Eclipse forums has an answer.
One of the advantages of Facelets is that we can leave JSP notations behind and use HTML. This is great because if we were collaborating with graphics- and web-page guys, we'd like them to be able to do their work without having to learn Java or JSP, or ever have to squint at arcane notations in the same files we're trying to maintain. Instead, they just do their whole Dreamweaver thing and we stay out of it.
Create two xHTML files with the following names and content.
<?xml version='1.0' encoding='UTF-8' ?>
<!DOCTYPE html PUBLIC "-//W3C//DTD XHTML 1.0 Transitional//EN"
                 "http://www.w3.org/TR/xhtml1/DTD/xhtml1-transitional.dtd">
<html xmlns="http://www.w3.org/1999/xhtml"
     xmlns:ui="http://java.sun.com/jsf/facelets"
     xmlns:f="http://java.sun.com/jsf/core"
     xmlns:h="http://java.sun.com/jsf/html"
     xmlns:a4j="http://richfaces.org/a4j"
     xmlns:rich="http://richfaces.org/rich">

<head>
<title> Guess the number, a simple Facelets application</title>
<style>
	html { font-family: Candara, Trebuchet MS, Arial, sans-serif; }
	body { width: 450px; }
	p    { font-size: 2em; }
</style>
</head>
<body>
<h:form>
	<h:graphicImage value="#{resource['images:java_duke.gif']}" />
	<p>
	  Hello, my name is Duke. I am thinking of a number from
	  #{userNumberBean.minimum} to #{userNumberBean.maximum}.
	  Can you guess what it is?
	</p>

	<h:inputText id="userNo" value="#{userNumberBean.userNumber}">
		<f:validateLongRange minimum="#{userNumberBean.minimum}"
							maximum="#{userNumberBean.maximum}" />
	</h:inputText>

	<h:commandButton id="submit" value="Submit" action="numberresponse.xhtml" />
	<h:message showSummary="true"
				showDetail="false"
				style="color: red;
				font-family: Candara, 'Trebuchet MS', Arial, sans-serif;
				font-style: oblique;
				text-decoration: overline"
				id="errors1"
				for="userNo" />
</h:form>
</body>
</html>
<?xml version='1.0' encoding='UTF-8' ?>
<!DOCTYPE html PUBLIC "-//W3C//DTD XHTML 1.0 Transitional//EN"
                 "http://www.w3.org/TR/xhtml1/DTD/xhtml1-transitional.dtd">
<html xmlns="http://www.w3.org/1999/xhtml"
     xmlns:ui="http://java.sun.com/jsf/facelets"
     xmlns:f="http://java.sun.com/jsf/core"
     xmlns:h="http://java.sun.com/jsf/html"
     xmlns:a4j="http://richfaces.org/a4j"
     xmlns:rich="http://richfaces.org/rich">

<head>
<title> Guess the number, a simple Facelets application</title>
<style>
	html { font-family: Candara, Trebuchet MS, Arial, sans-serif; }
	body { width: 450px; }
	p    { font-size: 2em; }
</style>
</head>
<body>
<h:form>
	<h:graphicImage value="#{resource['images:java_duke.gif']}" />
	<p>
	<h:outputText id="result" value="#{userNumberBean.response}" />
	</p>

	<h:commandButton id="back" value="Back" action="./guessnumber.xhtml" />
</h:form>
</body>
</html>
At this point, you should have the following project:

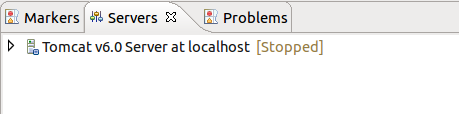
Ensure you've got an Apache Tomcat server set up. (You should already have an Apache Tomcat server associated with your workspace.)
|
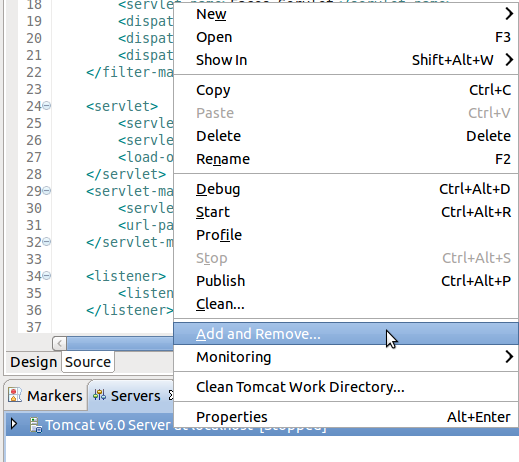
1. Ensure that it is set up to run this project. In the Servers view, right-click Tomcat v6.0 Server at localhost and choose Add and Remove....
|
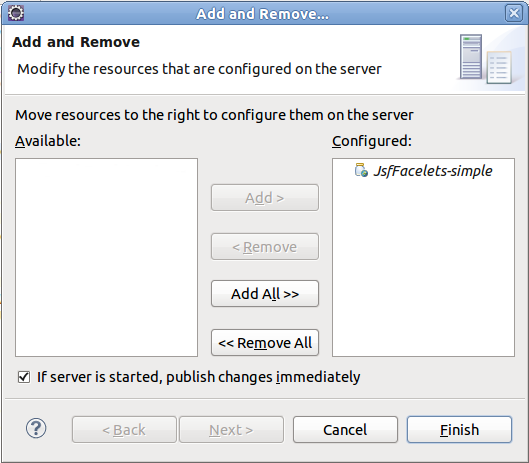
2. ...then, ensure that this application, the project by name, is configured to run.
|
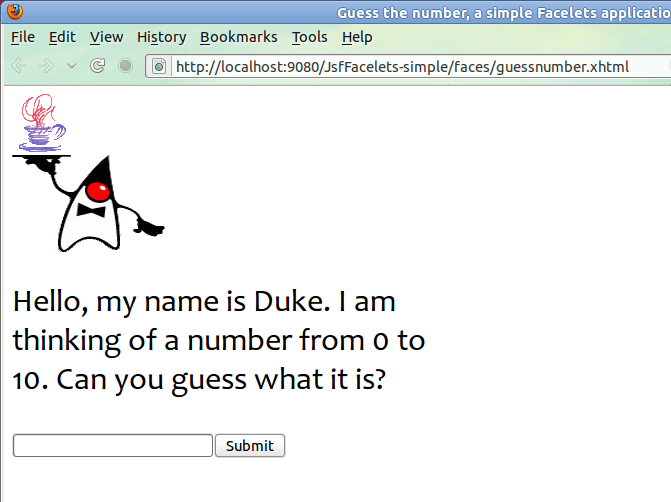
To launch the guess-a-number web application, pop open a browser and type:
http://localhost:8080/JsfFacelets-simple/faces/guessnumber.xhtml.
If your host is running something else on port 8080 (as mine is), pick a different port for Tomcat. I'm choosing 9080 instead. To do this, double-click Tomcat v6.0 Server at localhost, then change the port numbers by clicking on them...
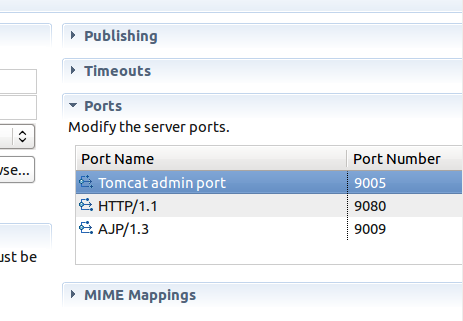
...and run again:
http://localhost:9080/JsfFacelets-simple/faces/guessnumber.xhtml.
At this point, you should see:
Internationalization is done in order for the application to be localized later. This consists of isolating every resource (mostly strings) from the presentation that must be rendered differently for a given locale, i.e.: language or culture. For this, we decide upon on a messages file, messages.properties, which we'll put in with the Java files (only so it will be available in the same package as the bean).
application.title = Guess the number, a simple Facelets application
greeting.1        = Hello, my name is Duke.
greeting.2        = I am thinking of a number from {0} to {1}.
greeting.3        = Can you guess what it is?
submit-button     = Submit
back-button       = Back
kiss-off          = Sorry, {0} is not the number I was thinking of.
In place of the following construct in guessnumber.xhtml...
<p>
  Hello, my name is Duke. I am thinking of a number from
  #{userNumberBean.minimum} to #{userNumberBean.maximum}.
  Can you guess what it is?
</p>
...we'll put:
<p>
  <h:outputText value="#{msg['greeting.1']}" />
  <h:outputText value=" " />
  <h:outputFormat value="#{msg['greeting.2']}">
    <f:param value="#{userNumberBean.minimum}" />
    <f:param value="#{userNumberBean.maximum}" />
  </h:outputFormat>
  <h:outputText value=" " />
  <h:outputText value="#{msg['greeting.3']}" />
</p>
This will force rendering to get the greeting out of messages.properties, using three key-value pairs, instead of finding it sitting literally inside the presentation file. One of them contains variable data, let's call them substitution pronouns, where values will be placed at runtime.
There's one more task to accomplish before our application is fully internationalized. This is to choose the list of locales (beside "en_US") we support. In our case, we're only supporting French. So, we'll add the following construct to our <application... \> element in faces-config.xml:
<locale-config>
  <default-locale>en_US</default-locale>
  <supported-locale>fr_FR</supported-locale>
</locale-config>
Now we're on to localization, which is the process by which we make an application work for a locale other than the one for which it was written.
A second file, messages_fr.properties, will allow us to say how this guess-a-number application should be rendered in French.
application.title = Deviner un chiffre : un logiciel Facelets
greeting.1        = Bonjour, je m'appelle Duke.
greeting.2        = Je songe à un numéro de {0} à {1}.
greeting.3        = Peux-tu deviner lequel ?
submit-button     = Soumettre
back-button       = Retourner
kiss-off          = Désolé, je ne pensais pas du tout à {0}.
In fact, if we were providing full French support in all flavors, especially French-Canadian, we'd differentiate by means of different files and also we'd add...
<supported-locale>fr_CA</supported-locale>
...to faces-config.xml (in the place you just saw higher up). The magic Eclipse faces-config.xml editor has an Other tab and, under Locale Config, you will see (go ahead and play with it) that French can come in a number of different flavors including Belgian, Swiss and Luxemburgish. In practice, after living in Paris for 6 years, I find that the only really different French occurs in Canada where accommodations are made for North American cultural differences from Continental French.
In our case then, we're predicting we'll never have to differentiate our application between Canadians and French, so we're not adding messages_fr_FR.properties and messages_fr_CA.properties files. By not doing this, no matter what the French locale, JSF will default down to the only available mapping, messages_fr.properties.
Lest you think that the next illustration is pure magic, let me point out that I've added something called Quick Local Switcher to Firefox. It let's me change locales on the fly. JSF recognizes the locale and behaves accordingly.

There's something left to do, however. Notice that the Submit button label hasn't been translated to Soumettre. This isn't done any differently than the other message. We just need to change the h:commandButton element's value attribute. The finished guessnumber.xhtml file is in an appendix below.
When you answer here, you don't get the result in French since it comes out of Java code (UserNumberBean.getResponse()). You just get the Back button localized. I don't know how to do this differently in JSF. I do know how to do it in Java, but the internationalization of Java code is a different topic than what I'm treating here. If you would like to read about this, I suggest Resource bundles.
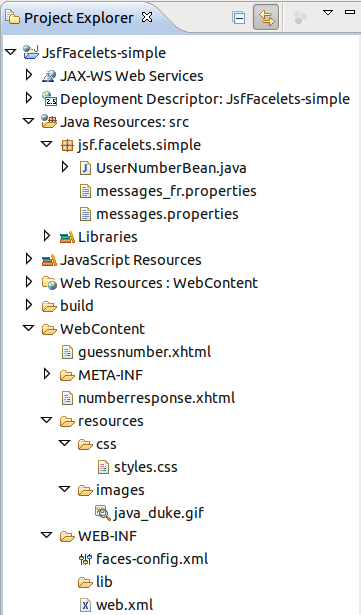
Last, let's note that the way we're handling styles in our application is primitive and we must do better. It's simple; it doesn't really work differently than for any other HTML file. We just need to put our styles into CSS and add a file to our project resources:
<link rel="stylesheet" type="text/css" href="#{resource['css:styles.css']}" />
Once we do this (and add a <link ...> element for styles to our xHTML files as shown in the "finished files" appendix), our ultimate project looks like this:
This amounts to creating a string of user libraries for Eclipse use under more or less the same names as I have them here (or ones of your own choosing). The research on this was done in the last article, Facelets Using RichFaces: The definitive JAR list. As you've seen in this tutorial, I'm using the names from that list of JARs.
Get the JARs and set them up in the libraries of your creation and naming along with as much source and/or Javadoc as you can find to attach.
This is something that must be done in Eclipse on a per-workspace basis, so it gets very old if, like me, you like lots of workspaces in place of huge workspaces with lots of projects. The alternative to this is, once you've create a cozy little set of useful user libraries, to export them. To do this, follow these steps. Once finished, you can import them at this same point into another workspace when you go to set up your first project's user libraries.
For more help in dealing with libraries and Eclipse Build Path, peruse my article, JARs and Eclipse Build Path, in particular, Appendix D: Setting up a third-party library: a practical example.
Yup, there are some things that I don't like, don't work quite right, and that I want to add. I'm noting these here along with resources I don't want to forget that may help me solve problems I don't know how to solve.
<?xml version='1.0' encoding='UTF-8' ?>
<!DOCTYPE html PUBLIC "-//W3C//DTD XHTML 1.0 Transitional//EN"
                 "http://www.w3.org/TR/xhtml1/DTD/xhtml1-transitional.dtd">
<html xmlns="http://www.w3.org/1999/xhtml"
     xmlns:ui="http://java.sun.com/jsf/facelets"
     xmlns:f="http://java.sun.com/jsf/core"
     xmlns:h="http://java.sun.com/jsf/html"
     xmlns:a4j="http://richfaces.org/a4j"
     xmlns:rich="http://richfaces.org/rich">

<f:loadBundle basename="jsf.facelets.simple.messages" var="msg" />

<head>
	<link rel="stylesheet" type="text/css" href="#{resource['css:styles.css']}" />
	<title> <h:outputText value="#{msg['application.title']}" /> </title>
<style>
	html { font-family: Candara, Trebuchet MS, Arial, sans-serif; }
	body { width: 450px; }
	p    { font-size: 2em; }
</style>
</head>
<body>
<h:form>
	<h:graphicImage value="#{resource['images:java_duke.gif']}" />
	<p>
		<h:outputText value="#{msg['greeting.1']}" />
		<h:outputText value=" " />
		<h:outputFormat value="#{msg['greeting.2']}">
			<f:param value="#{userNumberBean.minimum}" />
			<f:param value="#{userNumberBean.maximum}" />
		</h:outputFormat>
		<h:outputText value=" " />
		<h:outputText value="#{msg['greeting.3']}" />
	</p>

	<h:inputText id="userNo" value="#{userNumberBean.userNumber}">
		<f:validateLongRange minimum="#{userNumberBean.minimum}"
							maximum="#{userNumberBean.maximum}" />
	</h:inputText>

	<h:commandButton id="submit" value="#{msg['submit-button']}" action="numberresponse.xhtml" />
	<h:message showSummary="true"
				showDetail="false"
				style="color: red;
				font-family: Candara, 'Trebuchet MS', Arial, sans-serif;
				font-style: oblique;
				text-decoration: overline"
				id="errors1"
				for="userNo" />
</h:form>
</body>
</html>
<?xml version='1.0' encoding='UTF-8' ?>
<!DOCTYPE html PUBLIC "-//W3C//DTD XHTML 1.0 Transitional//EN"
                 "http://www.w3.org/TR/xhtml1/DTD/xhtml1-transitional.dtd">
<html xmlns="http://www.w3.org/1999/xhtml"
     xmlns:ui="http://java.sun.com/jsf/facelets"
     xmlns:f="http://java.sun.com/jsf/core"
     xmlns:h="http://java.sun.com/jsf/html"
     xmlns:a4j="http://richfaces.org/a4j"
     xmlns:rich="http://richfaces.org/rich">

<f:loadBundle basename="jsf.facelets.simple.messages" var="msg" />

<head>
	<link rel="stylesheet" type="text/css" href="#{resource['css:styles.css']}" />
	<title> <h:outputText value="#{msg['application.title']}" /> </title>
<style>
	html { font-family: Candara, Trebuchet MS, Arial, sans-serif; }
	body { width: 450px; }
	p    { font-size: 2em; }
</style>
</head>
<body>
<h:form>
	<h:graphicImage value="#{resource['images:java_duke.gif']}" />
	<p>
	<h:outputText id="result" value="#{userNumberBean.response}" />
	</p>

	<h:commandButton id="back" value="#{msg['submit-button']}" action="./guessnumber.xhtml" />
</h:form>
</body>
</html>
html { font-family: Candara, Trebuchet MS, Arial, sans-serif; }
body { width: 450px; }
p    { font-size: 2em; }