
Using Apache ant in Eclipse
Russell Bateman
September 2010
last update:
|
|
Using Apache ant in EclipseRussell Bateman |
Table of Contents
|
ForwardThis article will present a simple ant script to build two Eclipse projects, the first, a "library" project out of which a JAR is made that is consumed by the second, an application. There won't be any actual application code: I recommend you create your own Eclipse projects and drop the ant script code into them—and modify them as needed. I have experience writing ant scripts for a very large, multi-project service developed in Eclipse and consisting of two servers and multiple supporting projects supplying JARs as well as a client piece also consuming JARs from those supporting projects. It also handled the case that the client piece and some of the supporting projects had to be compiled with Java 1.4 while the servers and other supporting projects used Java 5. The whole enterprise had a root-level build.xml that was not run from Eclipse, but the various project-level build.xml files were routinely run from Eclipse, especially after code changes that needed to be pushed to the consuming projects. |
Please follow the set-up procedure in this appendix.
I'll explain these scripts as we go. First, you must understand that I'm not recommending anything concrete here. What I'm doing is out of my head rather than best practive when I simply don't know best practice. It works for me.
First, however, let's talk about how to get the information to create these.
You can let Eclipse create an ant buildscript for you since it knows
far better what goes into it than you do. To do this, right-click on the
project and choose Export... -> General -> Ant Buildfiles.
If you've already started your own build.xml in the project root, this
wizard will warn you about overwriting it. (Click Cancel.) Choose a
different name for the script that Eclipse will generate, for example,
build.eclipse.xml.
The real point behind doing this is that if your project is just a little complicated in that it's using libraries beside the standard JRE ones, you won't be able to guess at how to write that in ant. Eclipse Build Path knows the location of these libraries and gathers them together
Thus, if I were going to build my application using Hibernate 3.5.0 and Log4j 1.2.16, I would have to create the following structure:
<path id="Hibernate 3.5.0.userclasspath">
   <pathelement location="../../downloads/hibernate-3.5.0/hibernate3.jar"/>
   <pathelement location="../../downloads/hibernate-3.5.0/lib/required/antlr-2.7.6.jar"/>
   <pathelement location="../../downloads/hibernate-3.5.0/lib/required/commons-collections-3.1.jar"/>
   <pathelement location="../../downloads/hibernate-3.5.0/lib/required/dom4j-1.6.1.jar"/>
   <pathelement location="../../downloads/hibernate-3.5.0/lib/required/javassist-3.9.0.GA.jar"/>
   <pathelement location="../../downloads/hibernate-3.5.0/lib/required/jta-1.1.jar"/>
   <pathelement location="../../downloads/hibernate-3.5.0/lib/required/slf4j-api-1.5.8.jar"/>
</path>

<path id="Log4j (Apache 1.2.16).userclasspath">
   <pathelement location="../../downloads/apache-log4j-1.2.16/log4j-1.2.16.jar"/>
</path>

<path id="project.classpath" >
    <pathelement location="bin" />
    <path refid="Hibernate 3.5.0.userclasspath" />
    <path refid="Log4j (Apache 1.2.16).userclasspath" />
</path>
Incidentally, these peculiar names, Hibernate 3.5.0 and Log4j (Apache 1.2.16) happen to be the name of Eclipse user libraries I created when I put the project I'm using as an example together. I don't have to keep these names, but I will.
These three constructs gather all of the various libraries (we have two here) into one place. Instead of imitating Eclipse by naming this by my project name, I simply call it project.classpath. I do this because I like to create fairly generic build-commons.xml files that are common between all my projects.
Later, in the javac and javadoc targets, you must bring out these dependencies (or contributors) by referring to them:
<classpath refid="project.classpath" />
(Note importantly that whenever you stumble upon build errors that seem to have something to do with classpath issues, it's often because you don't have the <classpath ... /> expressed inside the target or task, e.g.: inside the <javac> ... </javac> element.)
You will see these constructs in my build files below (look for classpath). And now, let's look at the files...
There are two files that aren't ant script properly speaking, build.properties and build.number. The first is a plain old Java properties file that you can use to supply definitions to your script if you want to close the script to the need to be modified. This avoids having to write the definitions in ant format. It's also syntactically simpler.
# Application name. This is needed everywhere to know the name of the
# application being built (or being contributed to).
application.name    = Fun
application.title   = Fun!
application.vendor  = Etretat Logiciels, LLC.
application.package = com.etretatlogiciel.fun.model
version             = 0.9

# ${build.dir} must point at the project
build.dir = .

# Set to true or false that you want debug code.
debug = false

# Important note: In order to use the ant script to build the project, you must
# copy the JDK you hope to use to the path ${eclipse.home}/jre. Then the location
# of the parent directory of Eclipse must be specified in order for ant to be able
# to locate javac.
eclipse.home = C:/Users/russ/dev/eclipse/galileo-android
The second file is magically maintained by ant each time you build assuming you reference it from your build script thus:
<buildnumber file="./build.number" />
Especially while testing these scripts, the number is going to jump nonsensically higher. I suggest that, once your scripts are the way you want them, you edit the file to zero out the build number (start it over). Otherwise, you are not supposed to edit this file.
Also, if you manage your source code via Subversion or another source-code control system, don't commit the bumped build.number except for significant builds, such as those done by your configuration person or lead engineer. That way, the number remains trackable and meaningful.
#Build Number for ANT. Do not edit!
#Sat Aug 21 12:39:52 MDT 2010
build.number=4
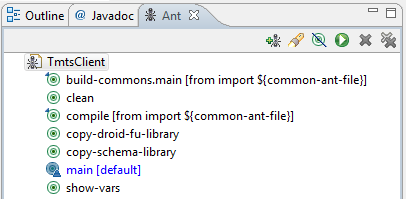
Now we get to the real meat, our first script proper. The default name for an ant script is build.xml. It's like Makefile.mak. It's the name ant expects and you can invoke ant from the command line without specifying the name of your script if it carries this name. Of course, if you're running ant from Eclipse, it hardly matters as long as every developer knows which file is the main script.
Up first in the build script is an XML element, description, which you can use to tell the user how to run it. The user types:
russ@taliesin:~/dev/workspaces/android-workspace/FunModel> ant -p
...and ant will display the description formatted more or less identically to how it is in the script:
Buildfile: C:\Users\russ\dev\workspaces\android-workspace\FunModel\build.xml

        Copyright (c) 2010 by Russell Bateman and Etretat Logiciels, LLC.
        This is the library project build on which all the other projects
        depend. It contains the entire Model for the Fun application.

    target descriptions:
        compile, jar, copy

        compile:    Compiles source files to ./bin.
        jar:        Builds library JAR of classes to FunModel.jar.
                    Also adds manifest information and uses and incremental
                    build-number. Please change manifest information in the
                    property section below.
        copy:       Copies resulting library FunModel.jar to Fun,
                    either the Android, BlackBerry or both projects.

Main targets:

Other targets:

 build-commons.main
 clean
 compile
 copy
 jar
 main
 show-vars
Default target: main
<project name="FunModel" basedir="." default="main">
	<description>
        Copyright (c) 2010 by Russell Bateman and Etretat Logiciels, LLC.
        This is the library project build on which all the other projects
        depend. It contains the entire Model for the Fun application.

    target descriptions:
        compile, jar, copy

        compile:    Compiles source files to ${classes.dir}.
        jar:        Builds library JAR of classes to ${ant.project.name}.jar.
                 Also adds manifest information and uses and incremental
                 build-number. Please change manifest information in the
                 property section below.
        copy:       Copies resulting library ${ant.project.name}.jar to Score,
                 either the Android, BlackBerry or both projects.
	</description>

	<!-- some property definitions -->
	<property file="./build.properties" />
	<property name="application.dir" value="../${application.name}" />

	<!-- our contributing libraries -->
	<path id="Hibernate 3.5.0.userclasspath">
		<pathelement location="../../downloads/hibernate-3.5.0/hibernate3.jar"/>
		<pathelement location="../../downloads/hibernate-3.5.0/lib/required/antlr-2.7.6.jar"/>
		<pathelement location="../../downloads/hibernate-3.5.0/lib/required/commons-collections-3.1.jar"/>
		<pathelement location="../../downloads/hibernate-3.5.0/lib/required/dom4j-1.6.1.jar"/>
		<pathelement location="../../downloads/hibernate-3.5.0/lib/required/javassist-3.9.0.GA.jar"/>
		<pathelement location="../../downloads/hibernate-3.5.0/lib/required/jta-1.1.jar"/>
		<pathelement location="../../downloads/hibernate-3.5.0/lib/required/slf4j-api-1.5.8.jar"/>
	</path>

	<path id="Log4j (Apache 1.2.16).userclasspath">
		<pathelement location="../../downloads/apache-log4j-1.2.16/log4j-1.2.16.jar"/>
	</path>

	<path id="project.classpath" >
		<pathelement location="bin" />
		<path refid="Hibernate 3.5.0.userclasspath" />
		<path refid="Log4j (Apache 1.2.16).userclasspath" />
	</path>

	<!-- this gets us a lot of common targets... -->
	<import file="./build-commons.xml" />
	<buildnumber file="./build.number" />

	<!-- jar up the classes as a library -->
	<target name="jar" depends="compile">
		<mkdir dir="${jar.dir}" />
		<buildnumber file="build.number" />
		<mkdir dir="${jar.dir}" />
		<jar destfile="${jar.dir}/${ant.project.name}.jar"
				basedir="${classes.dir}">
			<manifest>
				<attribute name="Specification-Title"    value="${ant.project.name}" />
				<attribute name="Specification-Version"  value="${application.version}" />
				<attribute name="Specification-Vendor"   value="${application.vendor}" />
				<attribute name="Implementation-Title"   value="${application.title}" />
				<attribute name="Implementation-Version" value="${version}-${build.number}" />
				<attribute name="Implementation-Vendor"  value="${application.vendor}" />
			</manifest>
		</jar>
	</target>

	<!-- copy the library JAR to project Fun -->
	<target name="copy" depends="clean,jar">
		<copy file="${jar.dir}/${ant.project.name}.jar"
				todir="${application.dir}/lib" />
	</target>

	<!-- main target does all -->
	<target name="main" depends="copy" />
</project>
<!-- vim: set tabstop=3 shiftwidth=3 noexpandtab: -->
I'm expecting you'll go to the trouble to learn ant. I don't have the time or space here. For example, you'll learn how to include another ant script in build.xml using the import element. That's how build-commons.xml is included. It contains the common things both the script that builds and JARs the library needs and the script that builds the application.
<project name="build-commons" basedir="." default="main">
	<!--
       This is the common ant script that defines targets that are common to
       sub-ant scripts in sub-projects. Each ant build script in the projects
       includes this file. Targets in sub scripts may be overriden to customize.
       Basically, this script knows how to clean and compile.

       This script isn't yet complete for building JUnit tests.
	-->

	<property name="classes.dir"      value="${build.dir}/bin"  />
	<property name="jar.dir"          value="${build.dir}/jar"  />
	<property name="src.dir"          value="${build.dir}/src"  />
	<property name="lib.dir"          value="${build.dir}/lib"  />
	<property name="javac.location"   value="${eclipse.home}/jre/jdk1.6.0_20/bin" />
	<property name="includeantruntime" value="false" />

	<!-- clean up -->
	<!--
		Remove the compiled classes so that we're forced to rebuild from scratch.
		These, including the top-level directory, will be restored as soon as the
		compile target runs.
	-->
	<target name="clean">
		<delete dir="${jar.dir}" />
		<delete dir="${classes.dir}" />
	</target>

	<!-- compile -->
	<target name="compile" depends="clean">
		<mkdir dir="${classes.dir}" />
		<javac executable="${javac.location}/javac.exe"
				srcdir="${src.dir}"
				destdir="${classes.dir}"
				debug="${debug}"
				source="1.6"
				target="1.6"
				includeantruntime="false">
			<classpath>
				<fileset dir="${lib.dir}">
					<!-- include all the JARs under this directory -->
					<include name="**/*.jar" />
				</fileset>
				<classpath refid="project.classpath" />
			</classpath>
		</javac>
	</target>

	<!-- generate Javadoc from the Java source code -->
	<target name="javadoc" description="Builds the javadocs for the project">
		<mkdir dir="${doc.dir}" />
		<javadoc destdir="${doc.dir}" author="true" version="true">
			<fileset dir="${src.dir}" />
            <classpath refid="project.classpath" />
		</javadoc>
	</target>

	<!-- show-vars target: this is a diagnostic (for debugging these scripts) -->
	<target name="show-vars">
		<echo>  From build.properties:                          </echo>
		<echo>               debug = ${debug}                   </echo>
		<echo>           build.dir = ${build.dir}               </echo>
		<echo>        eclipse.home = ${eclipse.home}            </echo>
		<echo>                                                  </echo>
		<echo>  From build-commons.xml:                         </echo>
		<echo>         classes.dir = ${classes.dir}             </echo>
		<echo>             jar.dir = ${jar.dir}                 </echo>
		<echo>             src.dir = ${src.dir}                 </echo>
		<echo>             lib.dir = ${lib.dir}                 </echo>
		<echo>      javac.location = ${javac.location}          </echo>
		<echo>                                                  </echo>
		<echo>    ant.project.name = ${ant.project.name}        </echo>
		<echo>             version = ${version}                 </echo>
		<echo>    application.name = ${application.name}        </echo>
		<echo>   application.title = ${application.title}       </echo>
		<echo>  application.vendor = ${application.vendor}      </echo>
		<echo> application.package = ${application.package}     </echo>
		<echo> version-buildnumber = ${version}-${build.number} </echo>
		<echo>                                                  </echo>
		<echo> This stops a spurious ant 1.8.x warning:         </echo>
		<echo>   includeantruntime = ${includeantruntime}       </echo>
	</target>

	<target name="main">
		<echo> This file contributes to build.xml. Do not invoke this file
		directly. </echo>
	</target>
</project>
<!-- vim: set tabstop=3 shiftwidth=3 noexpandtab: -->
On occasion, you might get a warning from Eclipse in your build.xml file:
No grammar constraints (DTD or XML schema) detected for the document
This may be a bug in Eclipse. Just make your build.xml like this (it's the second line that contains the solution):
<?xml version="1.0" ?>
<!DOCTYPE project>
<project name="sample-rest-project" default="deploy">
...
(See http://stackoverflow.com/questions/363768/disable-dtd-warning-for-ant-scripts-in-eclipse.)
Collection of great links to ant tutorials, docs, types, etc.
The set-up is generally identical between platforms, however, it's easier perhaps to separate the two so that the commands and other particulars do not confuse.
russ@taliesin:~/tools> gunzip -d apache-ant-1.8.1-bin.tar.gz
russ@taliesin:~/tools> tar -xf apache-ant-1.8.1-bin.tar
russ@taliesin:~/tools> export set ANT_HOME=$HOME/tools/apache-ant-1.8.1
must list something.russ@taliesin:~/dev/workspaces/android-workspace/Fun> ll $JAVA_HOME/bin/java
russ@taliesin:~/dev/workspaces/android-workspace/Fun> set $PATH="$PATH:$ANT_HOME/bin"
russ@taliesin:~/dev/workspaces/android-workspace/Fun> ant -version
Apache Ant version 1.8.1 compiled on April 30 2010
The Windows set-up isn't any more difficult. If you change something in your system's user variables, be sure to bounce your command prompt window.
must work.C:\Users\russ\dev\workspaces\android-workspace\Fun>dir %JAVA_HOME%\bin\java.exe
On Windows, you'll be executing ant.bat on that path.C:\Users\russ\dev\workspaces\android-workspace\Fun>PATH=%PATH%:%ANT_HOME%\bin"
C:\Users\russ\dev\workspaces\android-workspace\Fun>ant -version
Apache Ant version 1.8.1 compiled on April 30 2010
These are hard to find for some reason. So I've reproduced them here. I'm not certain of all of them.
| basedir | the absolute path of the project's basedir (as set with the basedir attribute of | |
| ant.file | the absolute path of the buildfile. | |
| ant.version | the version of ant | |
| ant.project.name | the name of the project that is currently executing; it is set in the name attribute of | |
| ant.java.version | the JVM version ant detected; currently it can hold the values "1.2", "1.3", "1.4" and "1.5". | |
| ant.home | home directory of ant | |
| java.version | JRE version | |
| java.vendor | JRE vendor | |
| java.vendor.url | Java vendor URL | |
| java.home | Java installation directory | |
| java.vm.specification.version | JVM specification version | |
| java.vm.specification.vendor | JVM specification vendor | |
| java.vm.specification.name | JVM specification name | |
| java.vm.version | JVM implementation version | |
| java.vm.vendor | JVM implementation vendor | |
| java.vm.name | JVM implementation name | |
| java.specification.version | JRE specification version | |
| java.specification.vendor | JRE specification vendor | |
| java.specification.name | JRE specification name | |
| java.class.version | Java class format version number | |
| java.class.path | Java class path | |
| java.ext.dirs | Path of extension directory(ies) | |
| os.name | Operating system name | |
| os.arch | Operating system architecture | |
| os.version | Operating system version | |
| file.separator | File separator ("/" on UNIX, "\" on Windows) | |
| path.separator | Path separator (":" on UNIX, ";" on Windows) | |
| line.separator | Line separator ("\n" on UNIX, "\r\n" on Windows) | |
| user.name | User's account name | |
| user.home | User's home directory |
eclipse.home should exist (in ant on Eclipse), but it has never worked for me. And I've read everything about fixing that to no avail.
Here's how to get at your own system's environment from ant. Imagine you have the following in your environment:
<property environment="env" />

<echo> Hostname: ${env.COMPUTERNAME} </echo>
<echo> Path: ${env.Path}             </echo>
To run an ant script from Eclipse, follow these steps:
ant is written in Java. A custom ant task is a program written in Java that does something special beyond the myriad ant tasks (like javac and mkdir), a task for which no one else has already written and distributed a solution.
I've written an SQL preprocessor to transform MySQL scripts that use the source directive to include one script in another so that my initialization scripts for projects don't have to be so monolithic.
Writing a custom ant task is very easy; getting it to work is a little harder. It's fairly well covered in Tutorial: Writing Tasks in the Apache ant on-line documentation. I've committed all but the testing and debugging parts at the end of that tutorial to a series of seven tiny projects that illustrate custom tasks. In addition, I've also included the source code to my SqlScriptPreprocessor. Download a tarball from this link. (< 13Mb; right-click and download this link).
Here's how to do some conditional stuff in ant using ant-contrib:
<!-- Consume ant-contrib, which gives us if, then and else, from its
library -->
<taskdef resource="net/sf/antcontrib/antcontrib.properties">
    <classpath>
        <pathelement location="${basedir}/lib/ant-contrib/ant-contrib-1.0b3.jar" />
    </classpath>
</taskdef>

...

<if><!-- Calculated properties for MySQL... -->
    <equals arg1="${database}" arg2="mysql" />
    <then>
        <property name="mysql_connector_version"    value="5.1.16"/>
        <property name="mysql_driver_classname"     value="com.mysql.jdbc.Driver"/>
        <property name="mysql_jdbc_driver"
                  value="${lib}/${database}/mysql-connector-java-${mysql_connector_version}-bin.jar" />
        <property name="jdbc_driver"      value="${mysql_jdbc_driver}" />
        <property name="driver_classname" value="${mysql_driver_classname}" />
        <echo message="mysql_connector_version = ${mysql_connector_version}" />
        <echo message="      mysql_jdbc_driver = ${mysql_jdbc_driver}" />
    </then>
</if>
<if><!-- Calculated properties for PostgreSQL... -->
    <equals arg1="${database}" arg2="postgres" />
    <then>
        <property name="postgres_connector_version" value="9.1-901" />
        <property name="postgres_driver_classname"  value="org.postgresql.Driver" />
        <property name="postgres_jdbc_driver"
                  value="${lib}/${database}/postgresql-${postgres_connector_version}.jdbc4.jar" />

        <property name="jdbc_driver"      value="${postgres_jdbc_driver}" />
        <property name="driver_classname" value="${postgres_driver_classname}" />
        <echo message="postgres_connector_version = ${postgres_connector_version}" />
        <echo message="      postgres_jdbc_driver = ${postgres_jdbc_driver}" />
    </then>
</if>

...
This is for an Eclipse, Dynamic Web Project containing code for a Jersey ReST server with an underlying database, either MySQL or PostgreSQL. It contains a reference to a curious custom ant task that concatenates a bunch of individual SQL scripts together into one before running them to load up a new database. It performs therefore the following targets (by alphabetic order):
<?xml version="1.0" ?>
<project name="rest-server" default="deploy">
<!-- ==========================================================================
  - This is the ant build file for the Acme rest-server project.
  -
  - This is the file used by Jenkins for continuous builds on the development
  - server. Because of this, anything you change may break continuous builds.
  -
  - Typically, you would not need to run this in order to build for your local,
  - unit (JUnit) testing, however, if you need to refresh database schema in
  - your local MySQL/PostgreSQL installation, this is the best way to get that.
  -
  - For local use, you will need to clone and modify your own copy of
  -
  -     extras/build.properties
  -     extras/db.properties
  -
  - You can keep these in a subdirectory, extras/<your-name>, that's committed
  - in Git. Deploy a copy of them to your local host's /etc/acme where
  - this build file will get them.
  -
  - If you're having trouble diagnosing problems when this script runs, run it
  - with "ant -v". To do this from Eclipse, open the Ant view, right-click
  - Acme, choose Run As... -> External Tools Configuration -> Main (tab)
  - and add "-v" to the Arguments edit field. This will give you extra spewage
  - and Java stack traces when trouble arises.
  -
  - Russ Bateman, October 2011
  ========================================================================== -->

    <property name="eclipse_bug" value="make Eclipse not complain about pulling in ant-contrib" />

    <!-- Consume ant-contrib, which gives us if, then and else, from its library -->
    <taskdef resource="net/sf/antcontrib/antcontrib.properties">
        <classpath>
            <pathelement location="${basedir}/lib/ant-contrib/ant-contrib-1.0b3.jar" />
        </classpath>
    </taskdef>

    <!-- ${src}, ${test}, ${build}, ${lib}, ${web}, ${dist} and ${deploy} come from
       build.properties. ${database}, ${db_url}, ${db_username} and ${db_password} come
       from db.properties.
       -->
    <property file="/etc/acme/build.properties" />
    <property file="/etc/acme/db.properties" />

    <!-- Add more calculated subdirectory names... -->
    <property name="classes.dir"       value="${build.dir}/classes" />
    <property name="junit.classes.dir" value="${build.dir}/test-classes" />
    <property name="junit.output.dir"  value="junit"/>
    <property name="extras.dir"        value="${base.dir}/extras" />
    <property name="flat_libs.dir"     value="deployed-libraries" />

    <property name="mysql_connector_version" value="5.1.16"/>
    <property name="mysql_driver_classname"  value="com.mysql.jdbc.Driver"/>
    <property name="mysql_jdbc_driver"
              value="${lib.dir}/${database}/mysql-connector-java-${mysql_connector_version}-bin.jar" />
    <property name="postgres_connector_version" value="9.1-901" />
    <property name="postgres_driver_classname"  value="org.postgresql.Driver" />
    <property name="postgres_jdbc_driver"
              value="${lib.dir}/${database}/postgresql-${postgres_connector_version}.jdbc4.jar" />

    <if><!-- Calculated properties for MySQL... -->
        <equals arg1="${database}" arg2="mysql" />
        <then>
            <property name="jdbc_driver"      value="${mysql_jdbc_driver}" />
            <property name="driver_classname" value="${mysql_driver_classname}" />
        </then>
    </if>
    <if><!-- Calculated properties for PostgreSQL... -->
        <equals arg1="${database}" arg2="postgres" />
        <then>
            <property name="jdbc_driver"      value="${postgres_jdbc_driver}" />
            <property name="driver_classname" value="${postgres_driver_classname}" />
        </then>
    </if>

    <!-- C L A S S P A T H S ===============================================
        Include all the JARs at the root of subdirectory lib only: we find that the
        Java class loader will not ferret out JARs from under "appropriately named"
        subdirectories, which is sort of too bad for knowing which JAR belongs to
        which framework (Hibernate, Jersey, etc.).

        Javadoc must also have this classpath or it will error out looking for
        consumed classes even though it won't try to generate doc for them.

        Hanging a property off the classpath ensures it will print out via the
        <echoproperties /> task (for debugging).
      -->
    <path id="classpath">
        <fileset dir="${lib.dir}">
            <include name="*/*.jar" />
        </fileset>
    </path>
    <property name="project_classpath" refid="classpath" />

    <path id="junit.classpath">
        <fileset dir="${lib.dir}">              <!-- get all the third-party JARs... -->
            <include name="**/*.jar" />
        </fileset>
        <fileset dir="${classes.dir}">          <!-- get all our application class files -->
            <include name="**/*.class" />
        </fileset>
    </path>

    <!-- T A R G E T S ===================================================== -->
    <target name="clean">
        <echo message="==== Cleaning up old targets... ====" />
        <delete dir="${build.dir}" />                     <!-- Remove build subdirectory -->
        <delete dir="${junit.output.dir}" />              <!-- Remove JUnit report subdirectory -->
        <delete dir="${dist.dir}" />                      <!-- Remove dist subdirectory -->
        <delete dir="${flat_libs.dir}" />                 <!-- Remove deployed libraries subdirectory -->
        <delete file="${extras.dir}/acmedb.sql" />        <!-- Remove compiled DB script -->
        <echo message="==== Cleaning complete ====" />
    </target>

    <target name="init" depends="clean">
        <echo message="==== Initializing... ====" />
        <tstamp />                                        <!-- Create the time stamp -->
        <echoproperties />
        <mkdir dir="${classes.dir}" />                    <!-- Create build/classes subdirectory -->
        <mkdir dir="${junit.classes.dir}" />              <!-- Create build/test/classes subdirectory -->
        <mkdir dir="${junit.output.dir}" />               <!-- Create JUnit report subdirectory -->
        <mkdir dir="${dist.dir}" />                       <!-- Create dist subdirectory -->
        <mkdir dir="${flat_libs.dir}" />                  <!-- Create deployed libraries subdirectory -->
        <echo message="==== Initialization complete ====" />
    </target>

    <target name="compile" depends="init">
        <echo message="==== Compiling Java sources including JUnit tests... ====" />

        <javac srcdir="${src.dir}"
               destdir="${classes.dir}"
               classpathref="classpath"
               includeantruntime="false" />

        <echo message="JUnit classpath = ${toString:junit.classpath}" />

        <javac srcdir="${test.dir}"
               destdir="build/classes"
               classpathref="junit.classpath"
               includeantruntime="false" />

        <echo message="==== Compiling complete ====" />
    </target>

    <target name="doc" depends="init" >
        <echo message="==== Generating javadoc... ====" />
        <javadoc packagenames="*"
                 sourcepath="${src.dir}"
                 classpathref="classpath"
                 destdir="${build.dir}/classes" />
        <echo message="==== Documentation complete ===="/>
    </target>

    <target name="updatedb" depends="database-preprocess">
        <echo message="==== Updating database... ====" />
        <sql driver="${driver_classname}"
             url="${db_url}"
             userid="${db_username}"
             password="${db_password}">
            <classpath>
                <pathelement location="${jdbc_driver}" />
            </classpath>
            <transaction src="${extras.dir}/acmedb.sql" />
        </sql>
        <echo message="==== Database update complete ====" />
    </target>

    <target name="database-preprocess">
        <echo message="==== Preprocess database scripts into one file... ====" />
        <taskdef name="sqlscriptpreprocessor"
                 classname="com.etretatlogiciels.ant.task.SqlScriptPreprocessor"
                 classpath="${lib.dir}/ant-tasks/sqlscriptpreprocessor.jar" />

        <echo message="currentworkingdirectory: ${extras.dir}/schema/${database}" />
        <echo message="          inputfilepath: ${extras.dir}/acmedb.sql.in" />
        <echo message="         outputfilepath: ${extras.dir}/acmedb.sql" />

        <sqlscriptpreprocessor currentworkingdirectory="${extras.dir}/schema/${database}"
                               inputfilepath="${extras.dir}/acmedb.sql.in"
                               outputfilepath="${extras.dir}/acmedb.sql" />
        <echo message="==== SQL script preprocessing complete ====" />
    </target>

    <target name="deploy" depends="compile,updatedb">
        <echo message="==== Creating WAR file and deploying... ====" />
        <!-- Copy all the files needed to build WAR: -->
        <copy todir="${classes.dir}/resources">
            <fileset dir="${src.dir}/resources">
                <include name="**/*" />
            </fileset>
        </copy>
        <copy file="${src.dir}/log4j.properties" todir="${classes.dir}" />
        <copy file="webplatform-servicelocator.log" todir="${classes.dir}" />
        <copy todir="${flat_libs.dir}" flatten="true">
            <fileset dir="${lib.dir}">
                <include name="**/*.jar" />
                <exclude name="**/*ant-contrib*" />    <!-- only used by build.xml -->
                <exclude name="**/*sqlscript*" />      <!-- only used by build.xml -->
                <exclude name="**/*mockito*" />        <!-- only used in testing -->
            </fileset>
        </copy>

        <war destfile="${dist.dir}/acme.war" webxml="${web.dir}/WEB-INF/web.xml">
            <fileset dir="${web.dir}" />
            <lib dir="${flat_libs.dir}" />
            <classes dir="${classes.dir}" />
            <manifest>
                 <attribute name="Built-By"               value="Snapfish Web Platform Team" />
                 <attribute name="Implementation-Title"   value="User Account Service" />
                 <attribute name="Implementation-Version" value="0.9" />
                 <attribute name="Implementation-Vendor"  value="Hewlett-Packard Development Company, LP." />
             </manifest>
        </war>

        <copy file="${dist.dir}/acme.war" todir="${deploy.dir}" />
        <echo message="==== Deploy complete ====" />
    </target>

    <!-- ========================================================================================= -->
    <!-- =================== Here's where we're building and running JUnit tests ================= -->
    <!-- =================== Mucho trabajo needed here! ========================================== -->
    <!-- ========================================================================================= -->
    <target name="AccountManagerTest" depends="init,compile">
        <echo message="==== Running AccountManagerTest... ====" />
        <mkdir dir="${junit.output.dir}" />
        <junit fork="yes" printsummary="withOutAndErr">
            <formatter type="xml" />
            <test name="com.hp.web.user.manager.AccountManagerTest" todir="${junit.output.dir}" />
            <classpath refid="junit.classpath" />
        </junit>
        <echo message="==== Completed AccountManagerTest ====" />
    </target>

    <target name="junit-execute" depends="AccountManagerTest">
        <echo message="==== Execute JUnit tests... ====" />
    </target>

    <target name="junit-report" depends="init,compile,junit-execute">
        <junitreport todir="${junit.output.dir}">
            <fileset dir="${junit.output.dir}">
                <include name="TEST-*.xml" />
            </fileset>
            <report format="frames" todir="${junit.output.dir}" />
        </junitreport>
    </target>

    <target name="make-tarball" depends="clean">
    <echo message="==== Make a tarball of this project for distribution... ====" />
    <!-- we use the clean target to reduce the number of exclused we have to juggle -->
        <mkdir dir="${dist.dir}" />
        <tar destfile="${dist.dir}/${ant.project.name}.tar"
             basedir="${base.dir}"
             excludes="dist/**,
                       extras/private/levi/**,
                       extras/private/russ/**,
                       .settings/**,
                       .classpath,
                       .project*" />
        <gzip destfile="${dist.dir}/${ant.project.name}.tar.gz" src="${dist.dir}/${ant.project.name}.tar" />
        <delete file="${dist.dir}/${ant.project.name}.tar" />
        <echo message="==== Completed project tarball ====" />
    </target>
</project>
# Properties for per-machine configuration
# This file is placed in /etc/acme/ with values changed appropriately, for example:
#       base.dir=/usr/share/tomcat6/.jenkins/jobs/acme/workspace
#        src.dir=/usr/share/tomcat6/.jenkins/jobs/acme/workspace/src
#       test.dir=/usr/share/tomcat6/.jenkins/jobs/acme/workspace/test
#      build.dir=/usr/share/tomcat6/.jenkins/jobs/acme/workspace/build
#        lib.dir=/usr/share/tomcat6/.jenkins/jobs/acme/workspace/lib
#        web.dir=/usr/share/tomcat6/.jenkins/jobs/acme/workspace/WebContent
#       dist.dir=/usr/share/tomcat6/.jenkins/jobs/acme/workspace/dist
#     deploy.dir=/var/lib/tomcat6/webapps
# ---------------------------------------------------------------------------------------
  base.dir=/home/russ/acme/rest-server
   src.dir=/home/russ/acme/rest-server/src
  test.dir=/home/russ/acme/rest-server/test
 build.dir=/home/russ/acme/rest-server/build
   lib.dir=/home/russ/acme/rest-server/lib
   web.dir=/home/russ/acme/rest-server/WebContent
  dist.dir=/home/russ/acme/rest-server/dist
deploy.dir=/tmp
# Database properties for per-machine configuration
# --------------------------------------------------------------------
# This file is placed in /etc/acme/ with values changed appropriately,
# for example:
#
#     db_url=jdbc:mysql://192.168.1.110:3306/acme
#     db_username=jenkins
#     db_password=jenkins
# --------------------------------------------------------------------
  #database=mysql
   database=postgres
    #db_url=jdbc:mysql://localhost:3306/acme
     db_url=jdbc:postgresql://localhost/acme
db_username=russ
db_password=test123