Notes on using the Java Flight Recorder (JFR)
Russell Bateman
February 2017
last update:
I'm showing this to profile Apache NiFi remotely, which is fairly complicated,
but should provide a more than thorough exposition of Java Mission Control
(JMC) and the Java Flight Recorder (JFR). I decided on this sloppy,
step-by-step format with comments as I see fit.
Disclaimer: JMC and JFR are not exactly free software. You cannot use them
without a contract with Oracle in a commercial, production environment.
However, you are free to use them episodically for debugging purposes. (I am
not a lawyer and take no responsibility for this interpretation. You cannot
hold me responsible for how you use these tools.)
Here are the steps I followed with comments:
- Install Java Mission Control and the Java Flight Recorder. This is easy:
just download any version of Sun (Oracle) Java beginning sometime shortly
after Java 1.7 was released. I'm using Java 1.8.0-112. I have it
installed on my local, development host and on my test server (in
production, we usually run OpenJDK).
- JMC is a GUI console, written in Java (obviously), by which you can view
the results of running the JFR. JMC is available on the path
${JAVA_HOME}/bin/jmc.
- "Installing" the JFR is merely a matter of launching the Java application
you wish to profile using some options.
-XX:+UnlockCommercialFeatures
-XX:+FlightRecorder
-XX:StartFlightRecording=duration=120m,filename=recording.jfr
One of the options is duration of profiling and another a filename. I
supply these options, but I don't make use of them since I control the
JFR from JMC and don't care about them. I've left them in by
superstition only and have never experimented with taking them out.
- The JFR options are order-depdendent, so if you get them out of
order on the java command line, which is a problem when running
NiFi (until this bug was fixed).
- NiFi start-up note: For a while, I got mileage out of changing the value
of the third component of java.arg.N in
${NIFI_ROOT_}/conf/bootstrap.conf where these options
must be supplied. However, this ultimately bit me and I had to modify
nifi-bootstrap/src/main/java/org/apache/nifi/bootstrap/RunNiFi.java:start()
to make any numeric option order respected. This bug was fixed in NiFi
1.1.2 and 0.7.2, I think.
- Because we're going to run remotely, there are additional options for the
JVM command line, some order-dependent again, that must be added (to
NiFi's bootstrap.conf), to get off-box communication. Note that
10.10.10.92 is my remote server's IP address, 9098 is a
port number I chose arbitrarily that does not conflict with anything else
going on on my server and that I will need to know in JMC.
    -Djava.rmi.server.hostname=10.10.10.92
    -Dcom.sun.management.jmxremote=true
    -Dcom.sun.management.jmxremote.port=9098
    -Dcom.sun.management.jmxremote.rmi.port=9098
    -Dcom.sun.management.jmxremote.authenticate=false
    -Dcom.sun.management.jmxremote.ssl=false
    -Dcom.sun.management.jmxremote.local.only=false
- Next, I launched NiFi on my remote server and engaged the flow I wanted to
profile.
- Then, I turned to my local, development host where I launched
jmc.
~ $ ${JAVA_HOME}/bin/jmc &
~ $ ^Z
~ $ bg
~ $ disown
~ $ ^D
Note that when JMC launches, it's already configured all the running JVM
instances on your local host. For our exercise here, we're ignoring those
since we're only interested in the remote, NiFi server.
- Configure a new entry under the JVM Browser tab by right-clicking
in a clear area and choosing New Connection. Fill out the
dialog:
- Host: 10.10.10.92
- Port: 9098
- (I never found that it made any difference whether I filled in
User: or Password:.)
- Click the Test connection button (and pray). If this fails,
you need to keep reviewing the details here ensuring that your
java command-line options are correct. Usually Java won't
start if you've misspelled anything, but if port numbers, IP
addresses, etc. are wrong, the JVM probably won't say anything.
- Once connected in JMC, expand the black triangle next to your new
connection to see something like:
▼service:jmx:emi:///jndi/rmi://10.10.10.92:9098
      MBean Server
    ▶ Flight Recorder
- Expand the black triangle next to Flight Recorder. You should see
"No Recordings". Right-click this and choose Start Flight
Recording.
- Fill out the dialog with a Name: and a Recording time:
(1 min is the default). You can also add a
Description:. There are more options by clicking Next a
couple of times. Finally, click Finish to launch the recording.
Note: here's where your own mojo comes into play. I am not going to
discuss the brains of profiling—only how to set up, launch and use the
profiler.
- Once the profile recording time has expired, you should see something
brilliant and beautiful like:
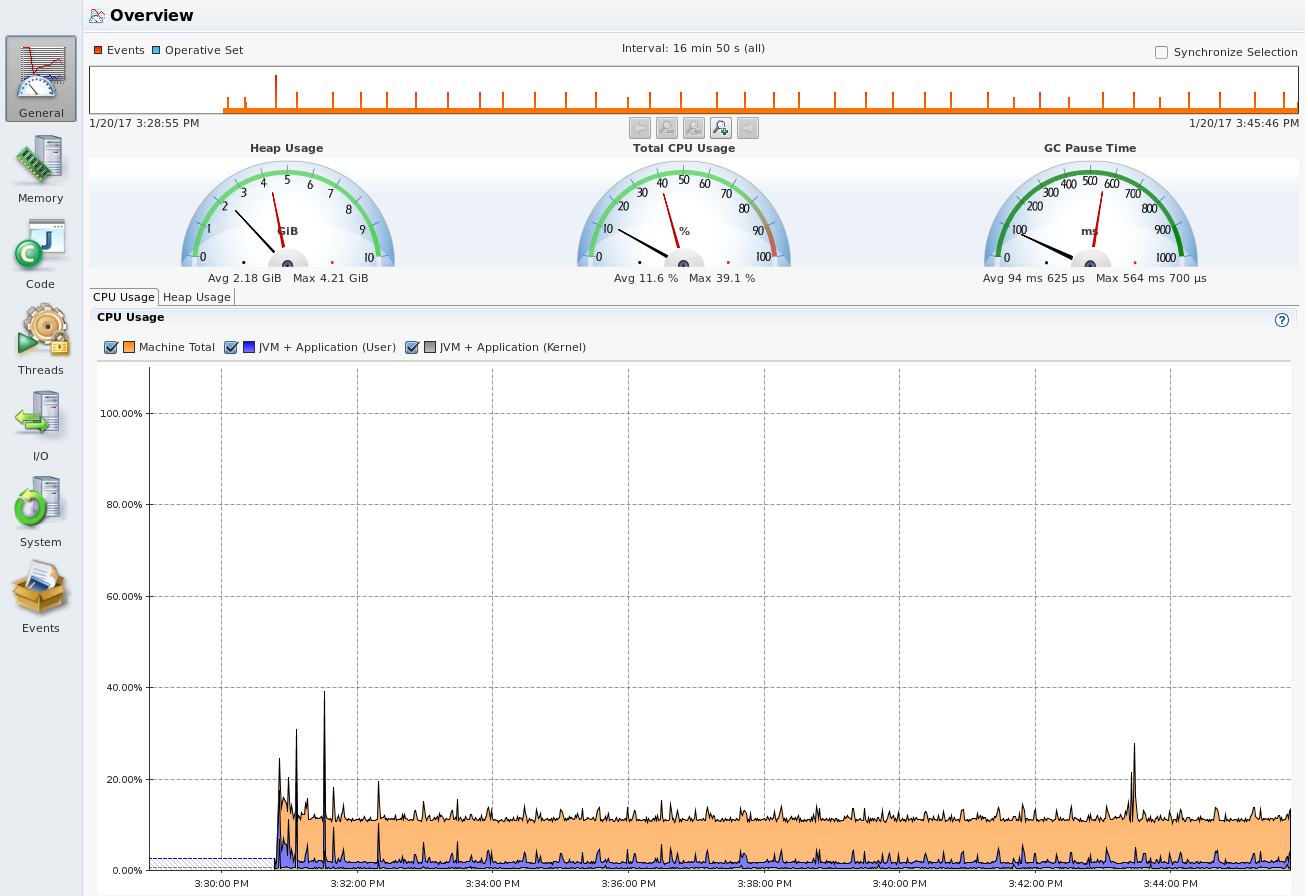
- Down the left margin are icons that lead you to various close-ups. (Click
the image above to get it full size.) There are also tabs across the
bottom on each information page that this illustration has cut off.
I hope this is helpful. I find Java Mission Control and the Java Flight
Recorder to be nicely executed and very useful. Its authors are to be
congratulated. The price, for developer use, is just right too.