Objective: Objective: Use Ant and Maven to build an application.
Ant is a powerful build tool. It is the Java world’s equivalent to make and Makefiles. With Ant a project can easily be built and packaged. In this example we will demonstrate how Ant can be used in our HelloWorld program. But as easy and powerful as Ant may be, complex Ant files demand a lot of attention and knowledge of developers. Maven was created to abstract a lot of this build knowledge to free the developer to concentrate on the larger project issues. We will demonstrate how Maven can be used to create our HelloWorld project to compare the differences between it and Ant. Understand, though, the power of Maven is more fully expressed in larger projects.
Ant can be downloaded from http://ant.apache.org/bindownload.cgi
Go the Apache Ant website, look for the link to the main distribution directory, and choose the latest (current) edition. Click and open (or download) the zipfile. Follow the advice in the INSTALL about going to http://ant.apache.org/manual/index.html to learn the installation steps. Specifically, they include creating a short-name installation directory at c:\ant.
The package is easily extracted into the directory of your choice. To configure Ant one merely has to set the ANT_HOME environment variable to the installation directory and modify the PATH variable to include $ANT_HOME/bin.
As make has a default file it uses to build (makefile), Ant uses build.xml. The basic structure of a build.xml file is:
   <project>
      <property1 />
      <property2 />

      <target1>
         <task1.1 />
         <task1.2 />
      </target1>

      <target2>
         <task2.1 />
         <task2.2 />
      </target2>
   </project>
As you can see, all of the build details are enclosed between project tags. Property tags are used to set property values that can be used throughout the file. Target tags define separate build targets that contain the steps (task tags) to successfully build the target. Each of these tags have attributes to modify the tags. For example, target tags can specify dependencies on other targets using the “depends” attribute.
Here is an Ant file I used to package my HelloWorld program. It is located at the root of my project.
<project name="HelloWorld" basedir="." default="jar">

     <property name="src.dir" value="src/main/java" />
     <property name="build.dir" value="target" />
     <property name="classes.dir" value="${build.dir}/classes" />
     <property name="jar.dir" value="${build.dir}" />
     <property name="main-class" value="HelloWorld" />

     <target name="clean">
          <delete dir="${build.dir}" />
     </target>

     <target name="compile">
          <mkdir dir="${classes.dir}" />
          <javac srcdir="${src.dir}" destdir="${classes.dir}" />
     </target>

     <target name="jar" depends="compile">
          <mkdir dir="${java.dir}" />
          <jar destfile="${jar.dir}/${ant.project.name}.jar" basedir="${classes.dir}">
               <manifest>
                    <attribute name="Main-Class" value="${main-class}" />
               </manifest>
          </jar>
     </target>

     <target name="run" depends="jar">
          <java jar="${jar.dir}/${ant.project.name}.jar" fork="true" />
     </target>

</project>
Here you can see I have three attributes to my project: it’s name; the base directory for the build; and the default target to use if one is not specified on the command line. I have specified the jar target to be the default. I also defined five properties with their names and values. These properties are used throughout the file.
I have also defined four targets: clean, compile, jar, and run. These targets can be defined in any order. You can also see how that jar target is set to depend on the compile target because of the use of the depends attribute.
If you examine the targets, you can see several different tasks used: delete,
mkdir, javac, jar, and java. Let us examine the largest task, jar. The jar
task uses attributes to define the name of the JAR file to create via the
destfile attribute; it uses basedir attribute to point to the root of the
class files to put in the JAR file. The jar task also uses a manifest tag
to create a manifest file which contains the attribute
Main-Class=HelloWorld to define the application entry point
for the JAR file.
To build my project I merely had to issue the following command:
ant
Because the jar target was set to the default, the output directories were created, the source compiled and the jar file created all with that command. Since I also wrote a target to run my application, I can issue the following to do it:
ant run
Simple enough. But one can also see that for complex projects, the developer will have to know a lot more about Ant, the tasks available and their required attributes. He will also have to maintain such complex build files.
Maven was created as a project management tool. It automates much of the build activity that must be explicitly defined in an Ant file. The knowledge of how to compile files, build jar files, etc. have been codified into a set of plugins that Maven uses to do those things for you. Basically, you tell it the location of your source files and tell it to make a JAR file for you, and presto!, you have a JAR file.
Maven does other things as well. Many projects have dependencies on other libraries and projects that are hard to maintain using Ant files. Maven creates repositories to store libraries, with their several versions, which it will update if a dependency is missing. For example, when you first run Maven, it will connect to the net to download the common libraries itself is dependent on and store them in a local repository on your machine. If one of your projects specifies a dependency on one of those libraries, Maven knows where it is and will use it for your project. If a different dependency is specified on a library that is part of the larger net repository, Maven will automatically synchronize your local repository and make it available to your project.

If you have not already installed Maven you can download it with the following link. Like Ant, you extract the archive into a directory of your choice; set the MAVEN_HOME environment variable; and set your system path to include $MAVEN_HOME/bin.
Be sure to use the “Latest Stable Release”, the .zip archive is the best.
http://maven.apache.org/start/download.html
Maven’s default file is the project.xml file. All of the information pertinent to a project is contained in this file. The name of the organization that built the project, its website, its CVS server, even the names and e-mail addresses of the developers can all be specified in the project.xml file. Here is a minimal project file to build the HelloWorld example application.
<project>
     <pomVersion>3</pomVersion>
     <id>hello</id>
     <currentVersion>0.0.1</currentVersion>
     <name>Maven Hello World</name>

     <organization>
          <name>Satori Development</name>
     </organization>

     <build>
          <sourceDirectory>src\main\java</sourceDirectory>
     </build>
</project>
Maven uses goals in the same way that Ant uses targets. You will note that
there are no goals in this project file. That is because when I ran Maven, I
used a built-in goal to build a JAR file: maven jar. Goals are
structured just as targets are, named the same way, and use other goals to
accomplish some task.
To build a JAR file, we need to specify the main class that is used as the application entry point. To do this, we need to create a file named project.properties and add the following property to it:
maven.jar.mainclass=HelloWorld
Let’s go through the project file. Besides the project tags, there are only a few things required in a project file: the pomVersion (the Project Object Model version); the ID, which is used in the naming of our output file (the artifact in Maven terms); and the organization name. The other tags used are to give the project a name; specify the version (which is also used to name the artifact); and specifying the source directory for my project.
There are other tags that developers use, though not required by this application. The more important ones are dependencies, reports, resources, etc. Refer to the Maven tutorials and documentation for a description of these tags.
A Maven project only produces one artifact; though multiple Maven projects can produce a more complex application.
There are a number of plugins and built-in goals that can be used on this project file:
clean: to clean the project of generated filesjava:compile: to compile Java filesjar: to create a JAR file
To create my JAR file I merely had to enter the command
maven clean jar.
The JAR plugin knows enough to have a dependency on
java:compile.
Even if you’re planning on consuming Maven from Eclipse, you should run Maven from the command line. Merely type maven. If Maven isn't found, you will need to put the path to it in the PATH environment variable. There are some other benefits to launching at least once from the command line. Once you have done this, you may not care to use Maven outside Eclipse. If this becomes the case, you won't need the PATH variable addition.
To install the Maven plugin to Eclipse, we’ll use the update feature. From Eclipse, select Help | Software Updates | Find and Install. When it asks if you want to search for updates or for new features, select the new features option and click Next. In the Update sites to visit page, select New Remote Site and enter the following URL for the Mevenide (yes, it is spelled correctly):
http://mevenide.codehaus.org/release/eclipse/update
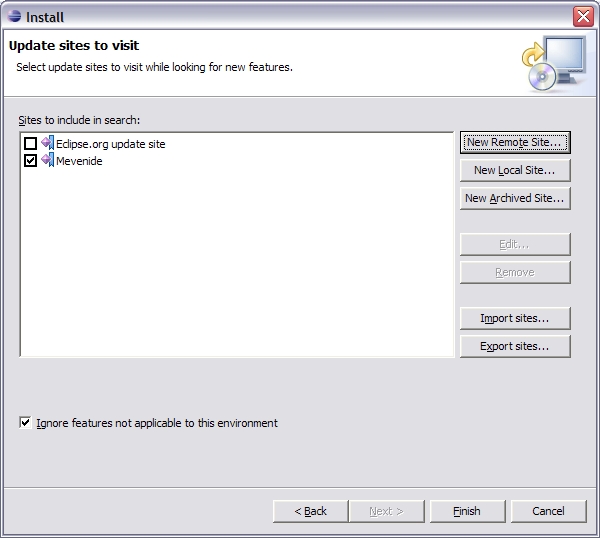
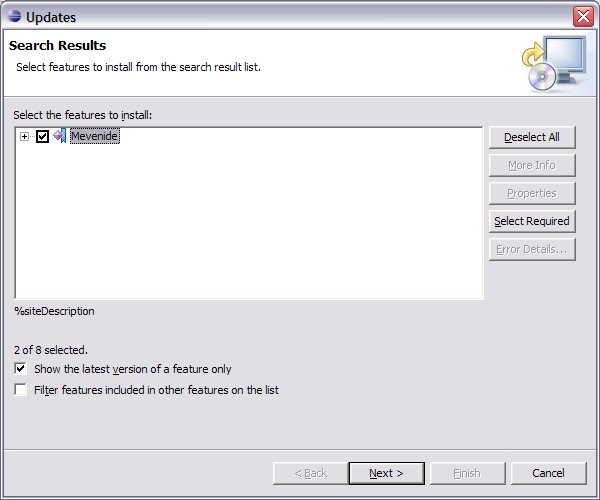
Click Finish. Eclipse will now search the site for features to install. The Search Results page will be displayed. Select the Mevenide feature and click Next.
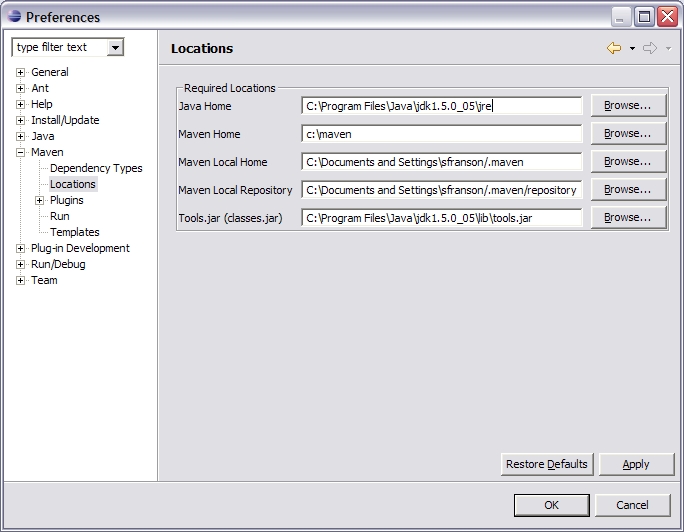
Accept the license agreement and continue the installation. Once the installation is complete it will ask to restart Eclipse. Once Eclipse is back up, verify the Maven plugin paths: select Window | Preferences | Maven | Locations.
Verify that the paths are correct. If the Java Home path points to the JDK directory, add \jre to the end of the path to point the plugin to the JRE directory of the JDK.
We are now ready to use Maven with Eclipse.
Create a new project, but this time as a Maven Project. The Project Object Model Settings page will ask for information relevant to our project. The only items necessary are the Organization Name (make one up) and Inception Year. We will modify the rest ourselves after the project is created. Once it is created, expand the project in Navigator and see that the Mevenide plugin uses a directory structure, main/src/java, rather than the one we want to use, so delete the main directory and create our source directory structure, src/main/java. Remember to add this path to the Java Build Path via the project’s property page (right-click on the project, select Properties | Java Build Path). Remove any paths that referenced the old main.... structure.
You will note that the plugin created two files at the root of the project: project.properties and project.xml. The project.properties file contains properties that Maven will use during the build. To edit it, double click and it will come up in the editor. Add the following to the project.properties file:
maven.jar.mainclass=<classname>
where classname is the name of your JDBC class with the main() method. (You should bring in your JDBC application code at this point.)
To edit project.xml you could use the standard editor, or use the POM Editor: right-click on project.xml and select Open With | Project Object Model Editor. These are the fields we need to edit or modify:
Once the modifications are complete, save the file.
Our project is now setup and ready for sources. Add class files to the src/main/java directory and write our JDBC application.
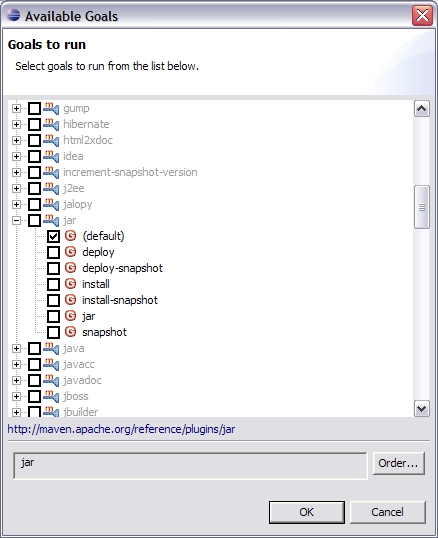
To run Maven for the first time, right-click on the project.xml file and select Maven | Run Maven. This will bring up a page to specify settings for running an external tool from Eclipse. For our project, replace test in the name with jar. And for arguments, select Choose. This displays a dialog box with all of the goals Maven plugins make available. For our project, we want to select the default JAR goal.
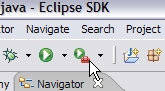
Click OK to dismiss the dialog and Run to run Maven. You will see Maven run in the Console view. If this is the first time Maven is run on your machine, it will attempt to connect to the web to synchronize the repository. To run Maven again, simply click on the External Tool icon next to the run icon.
(assignment)